Natalie's Health

  • Recipes
    • Breakfast
    • Desserts
    • Drinks
    • Smoothies
    • Snacks
    • Salads
    • Recipe Roundups
  • Seasonal Foods
  • Healthy Living
  • About me
menu icon
go to homepage
  • Recipes
    • Breakfast
    • Desserts
    • Drinks
    • Smoothies
    • Snacks
    • Salads
    • Recipe Roundups
  • Seasonal Foods
  • Healthy Living
  • About me
    • Facebook
    • Pinterest
  • search icon
    Homepage link
    • Recipes
      • Breakfast
      • Desserts
      • Drinks
      • Smoothies
      • Snacks
      • Salads
      • Recipe Roundups
    • Seasonal Foods
    • Healthy Living
    • About me
    • Facebook
    • Pinterest
  • ×
    Home » You searched for peanut butter

    Search Results for: peanut butter

    What's in Season: April

    March 31, 2022 by Natalie 19 Comments

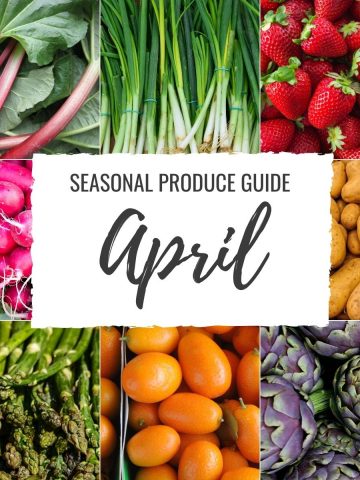
    Seasonal Produce Guide What’s in Season April featured image

    From sweet strawberries to beautiful asparagus, in this illustrated produce guide, you will find a list of fruit and vegetables in season in April. Also included are more than 50+ seasonal recipes that will inspire you to eat fresh and seasonal throughout the whole month.

    [feast_advanced_jump_to]
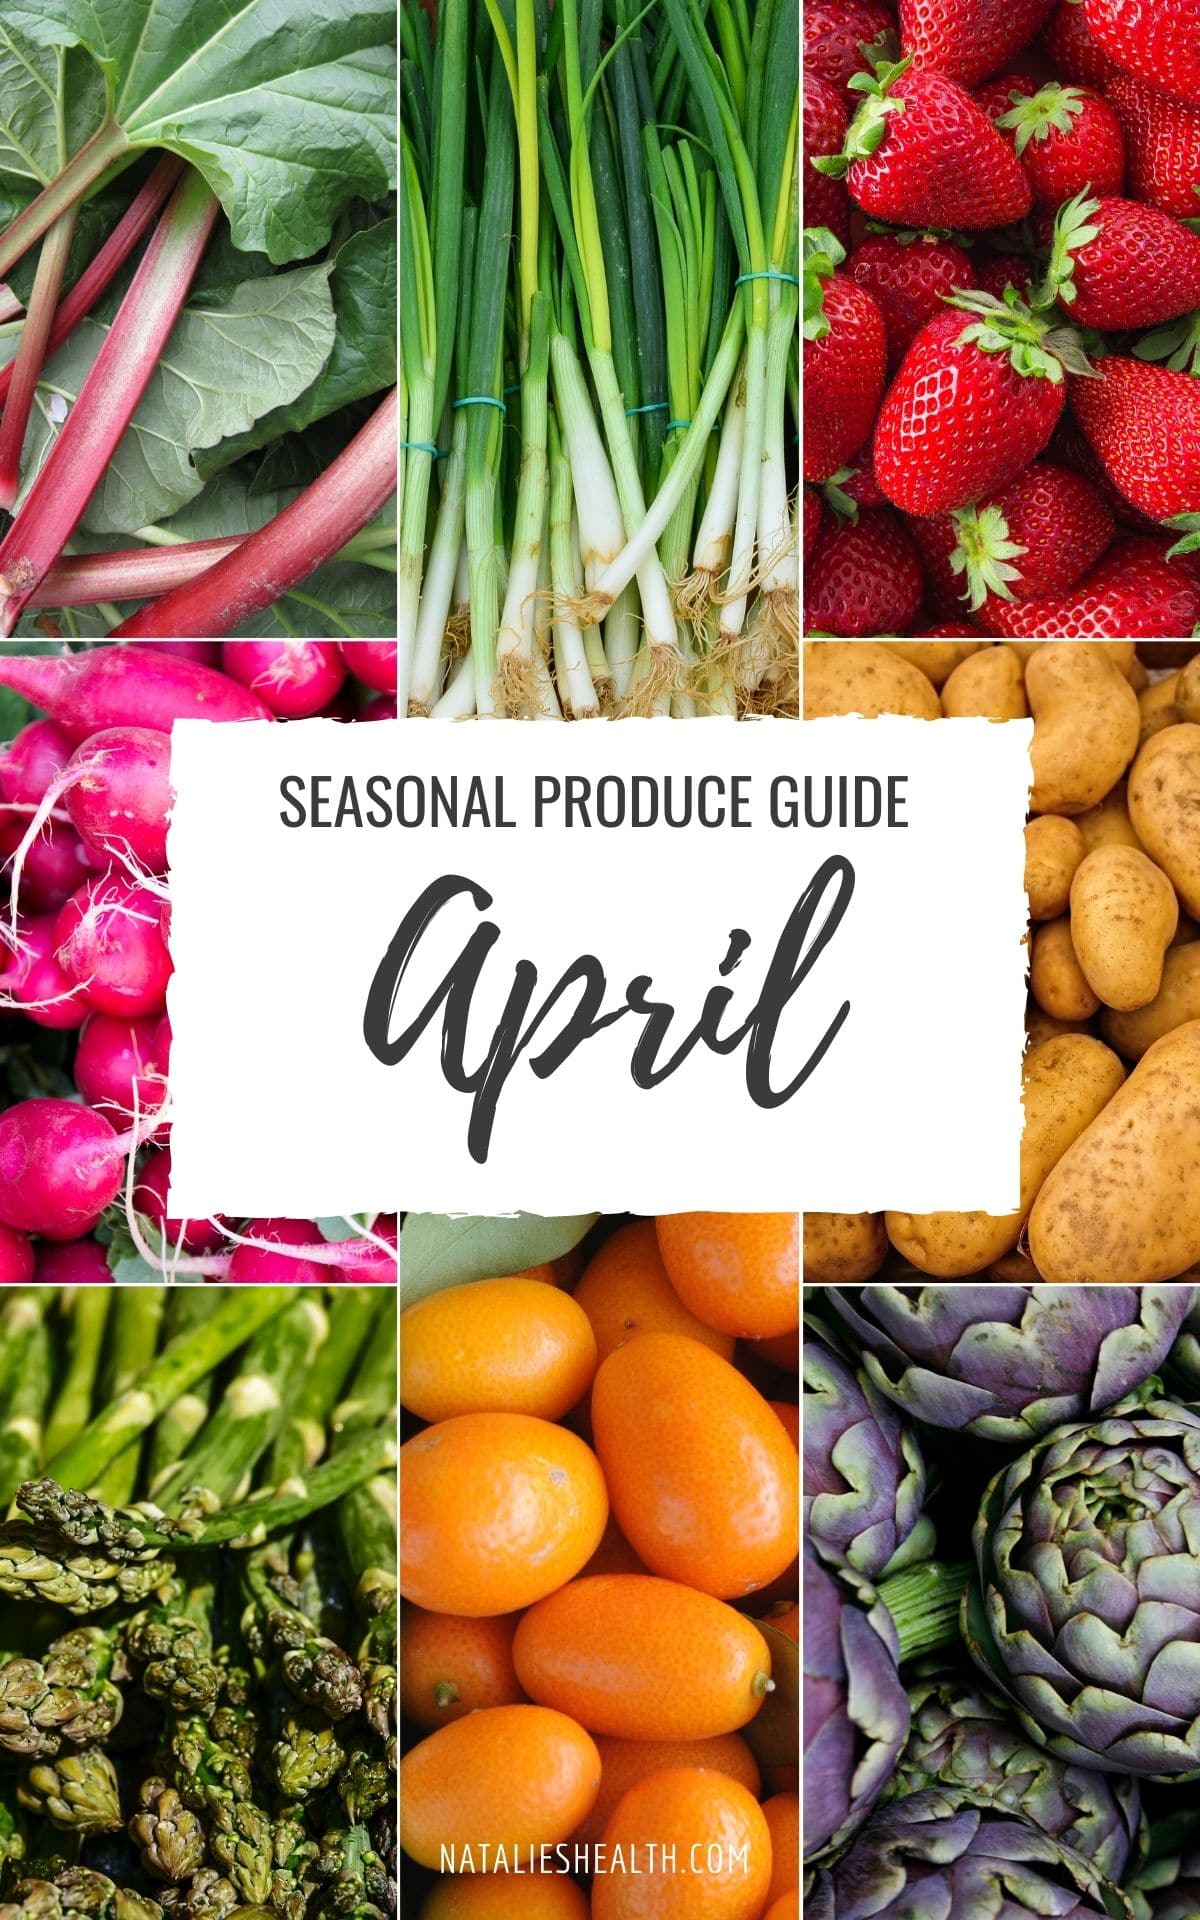
    Seasonal Produce Guide What’s in Season April

    Welcome to month 4 of my Monthly Seasonal Produce Guides!

    With the coming of Spring, colors returned to the market. You've probably noticed how oranges and lemons painted everything in bright colors while kale and young spinach gave a market more calming green tones. Beautiful sweet strawberries and juicy radishes are popping on tables. The market is bursting with freshness and flavors.

    If you're wondering what fruit and vegetables are in season in April, here is a full list of all the produce now in season in many parts of the US. However, availability may still vary depending on your specific location and local growing conditions.

    Looking for recipe ideas? Just click on the links below and grab all the inspiration you need to cook healthy throughout the month.

    Vegetables in season April

    Arugula, artichokes, asparagus, avocados, beets, broccoli, cabbage, carrots, cauliflower, celery, celery root, chicory, cucumbers, endive, fava beans, fennel, horseradish, kale, leeks, lettuce, new potatoes, parsnips, purple sprouting broccoli, radicchio, radishes, rhubarb, shallots, spinach, spring onions, sunchokes, turnips, watercress.

    Fruits in season April

    Apple, cherries, grapefruit, kiwi, kumquats, limes, mangos, oranges, papayas, pineapple, strawberries.

    ∗ Download this printable seasonal food chart! Or PIN for later! ∗
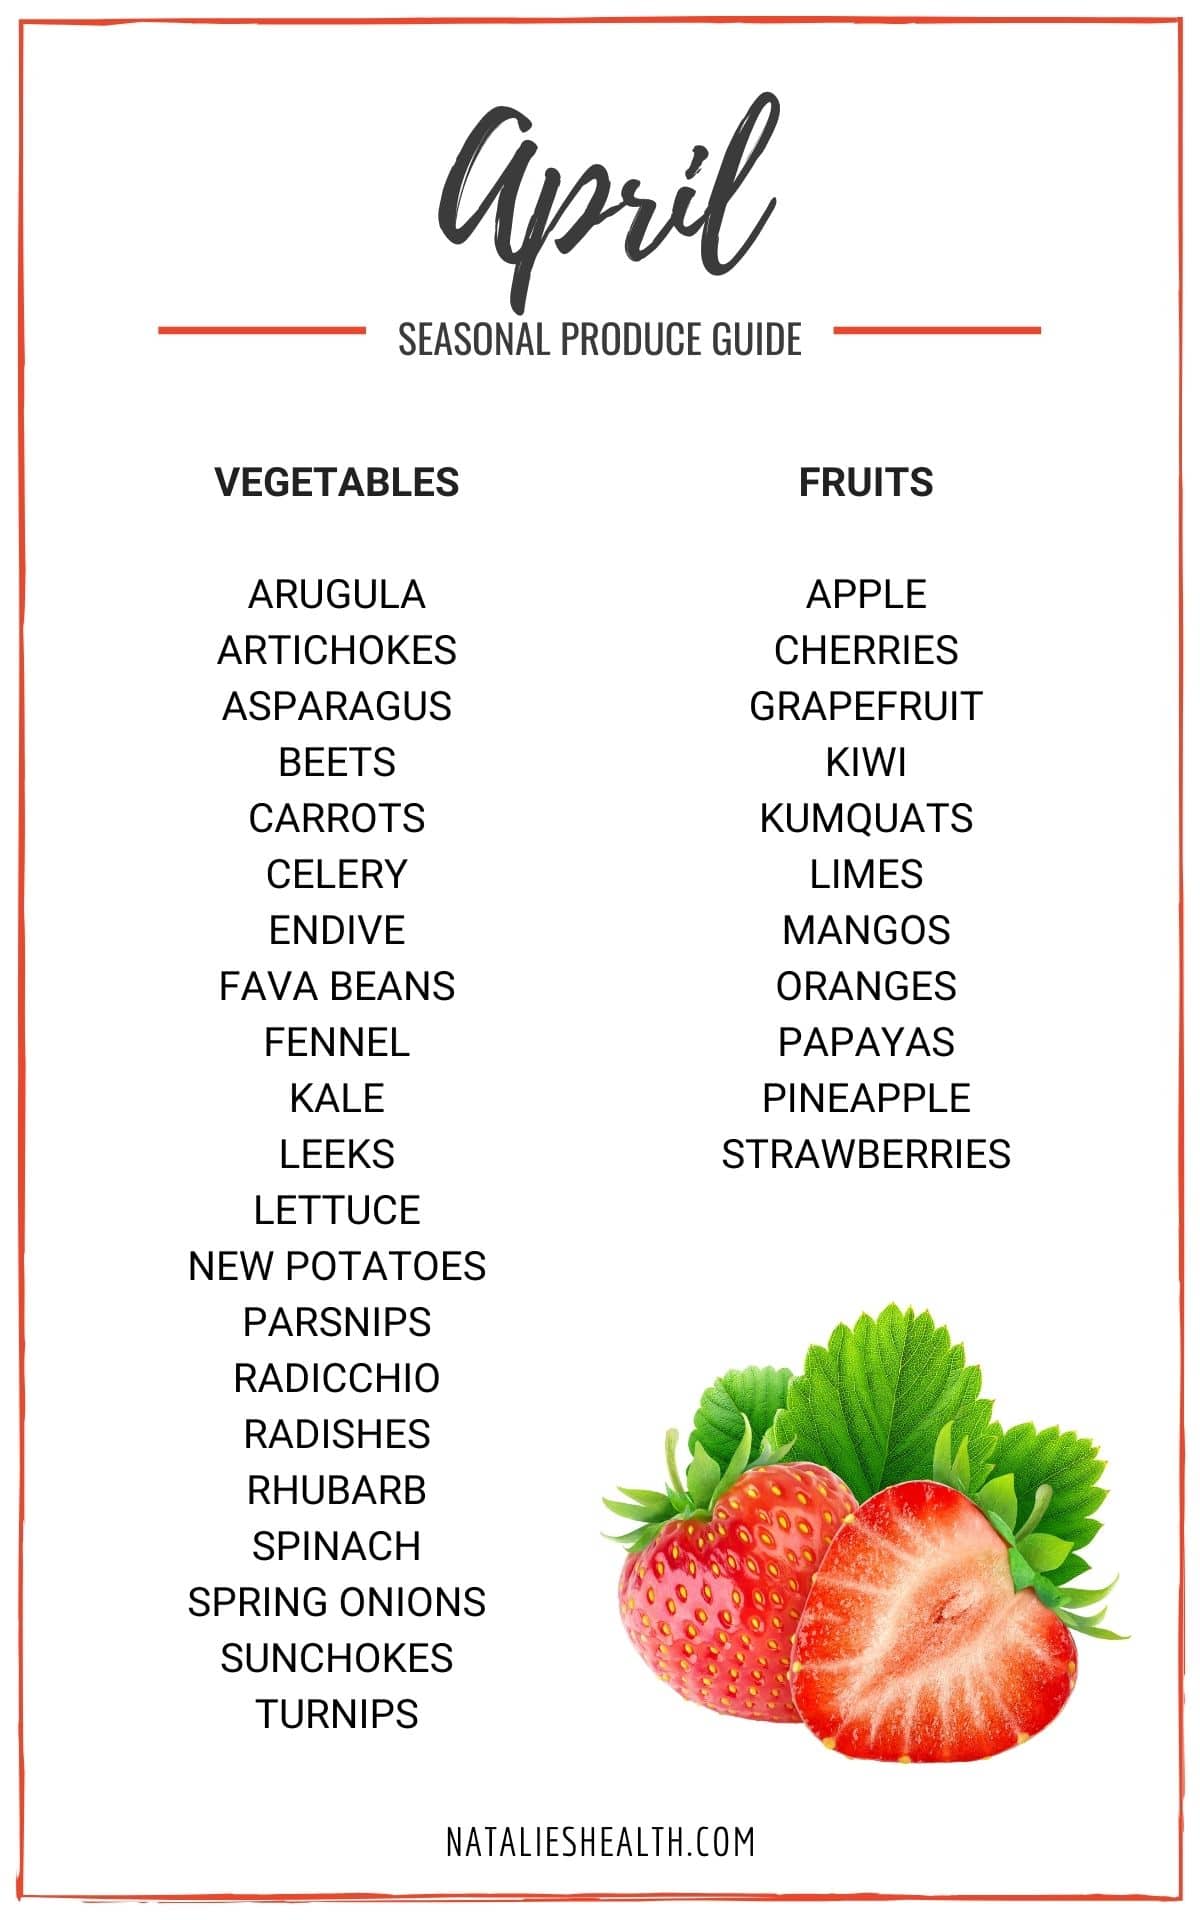
    Seasonal Produce Guide What’s in Season April PIN

    April seasonal recipes to try

    Breakfast recipes

    • Strawberry Overnight Oats
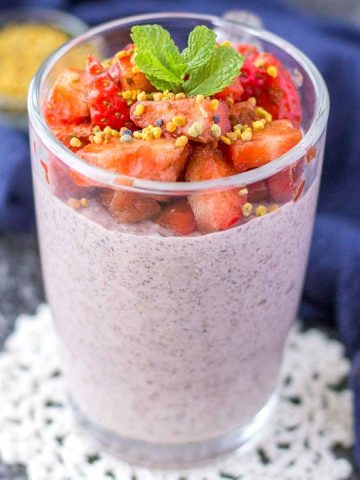
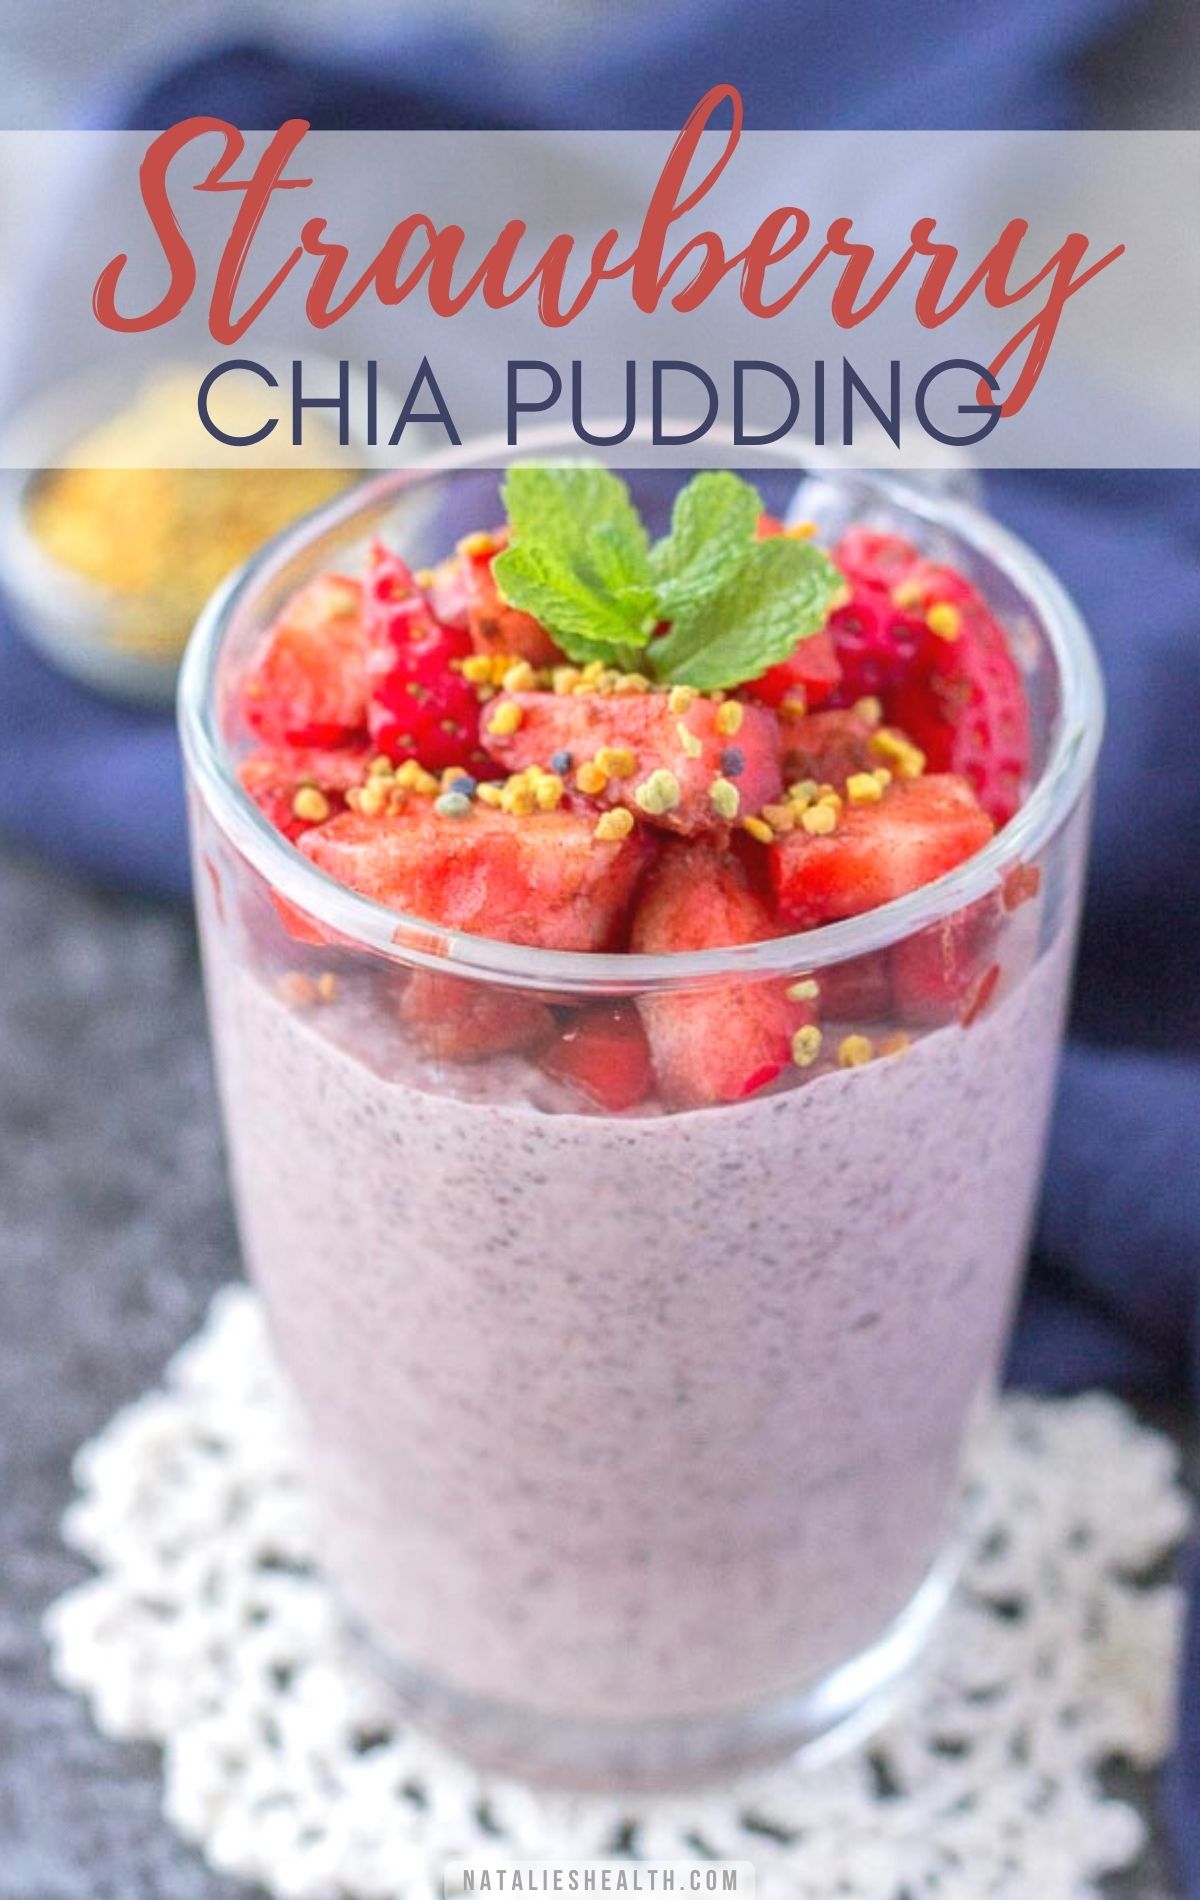
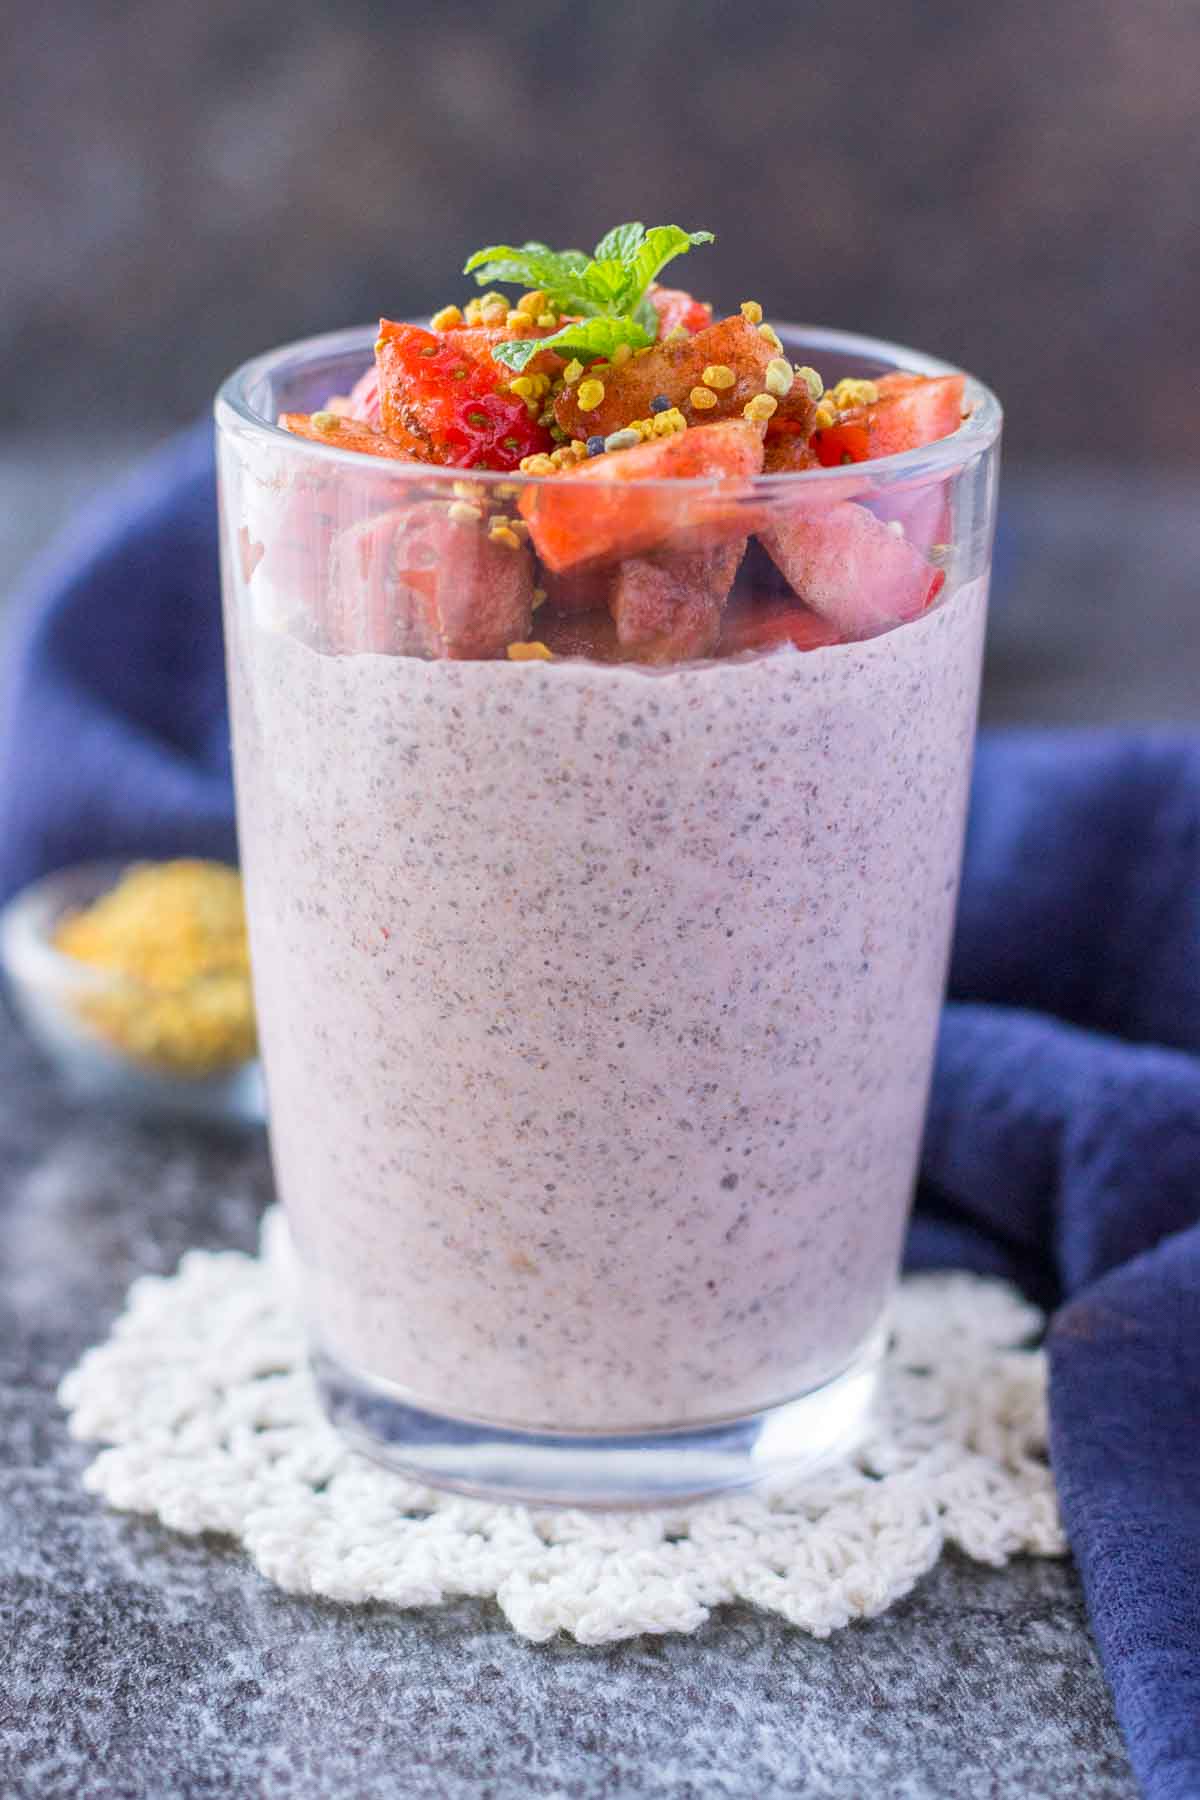
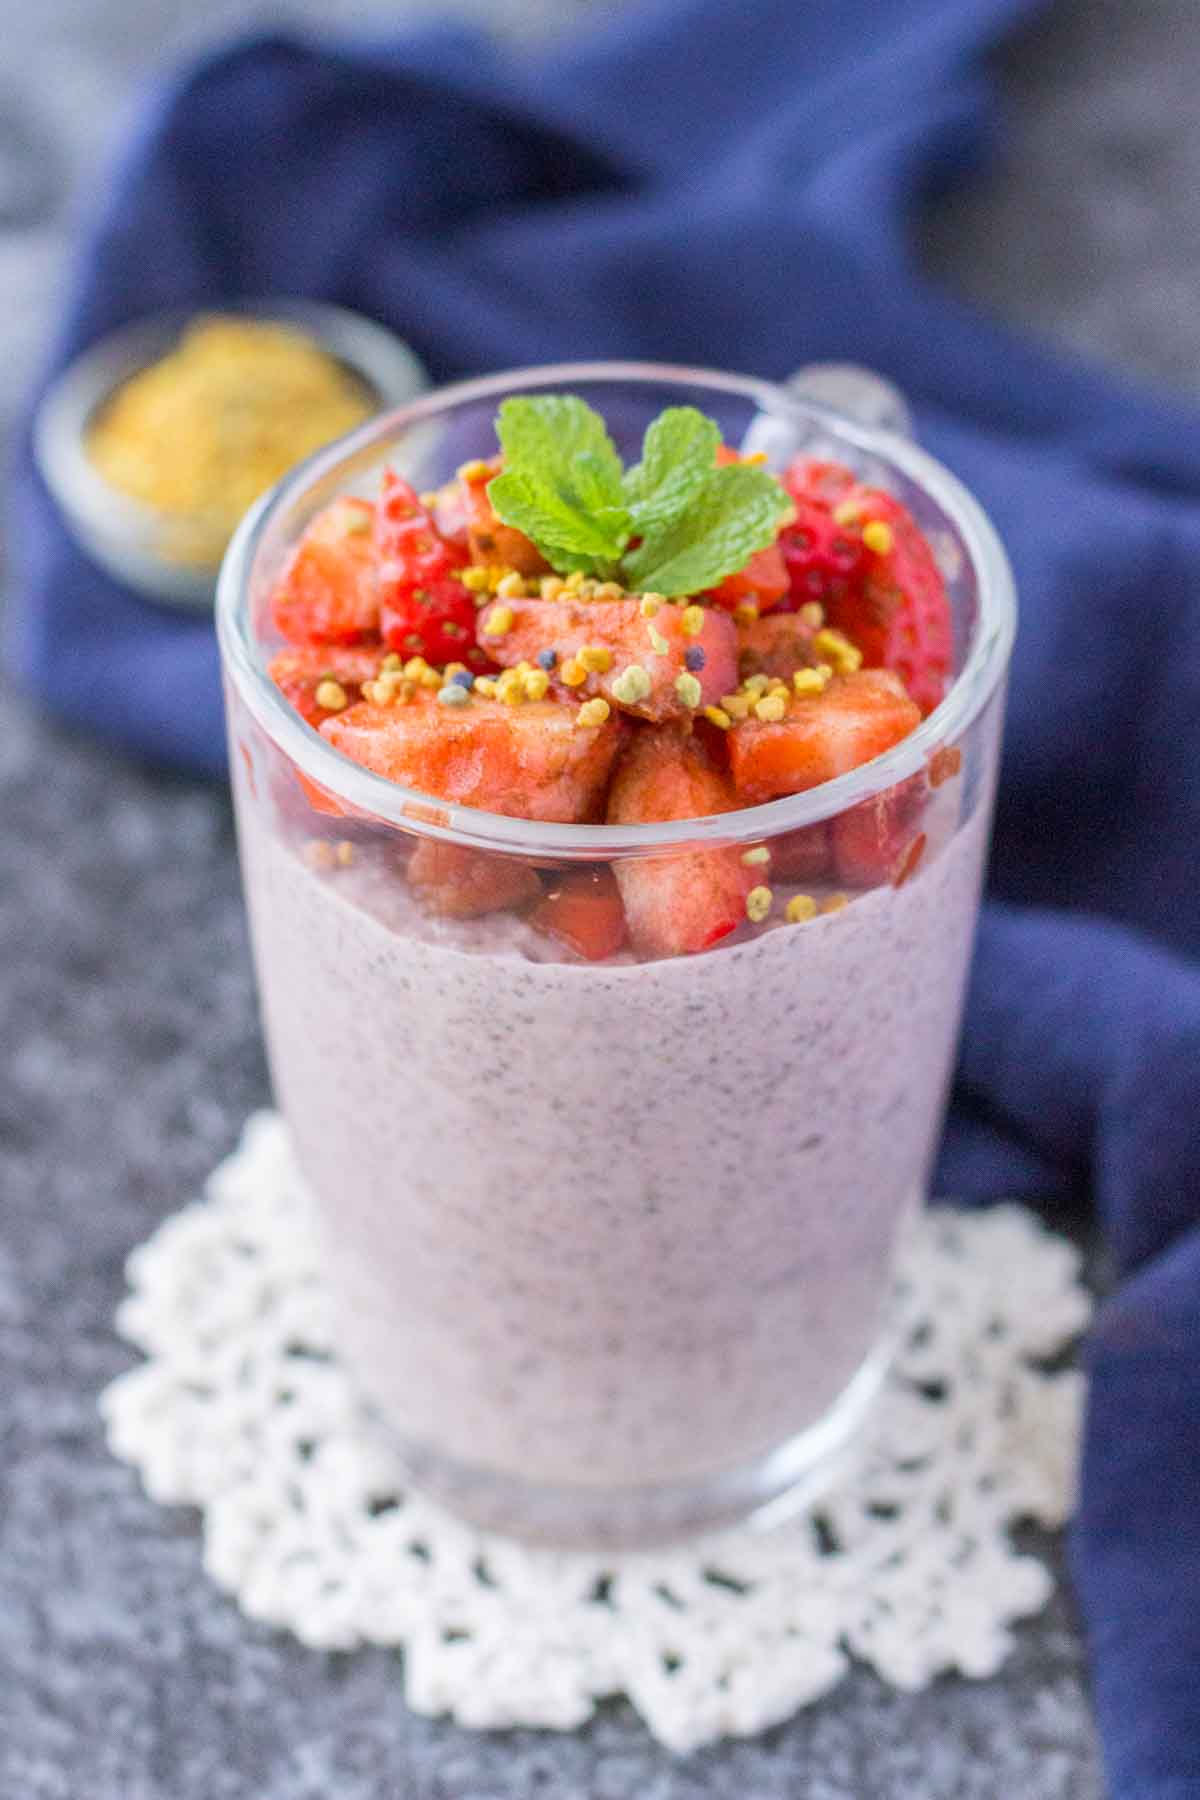
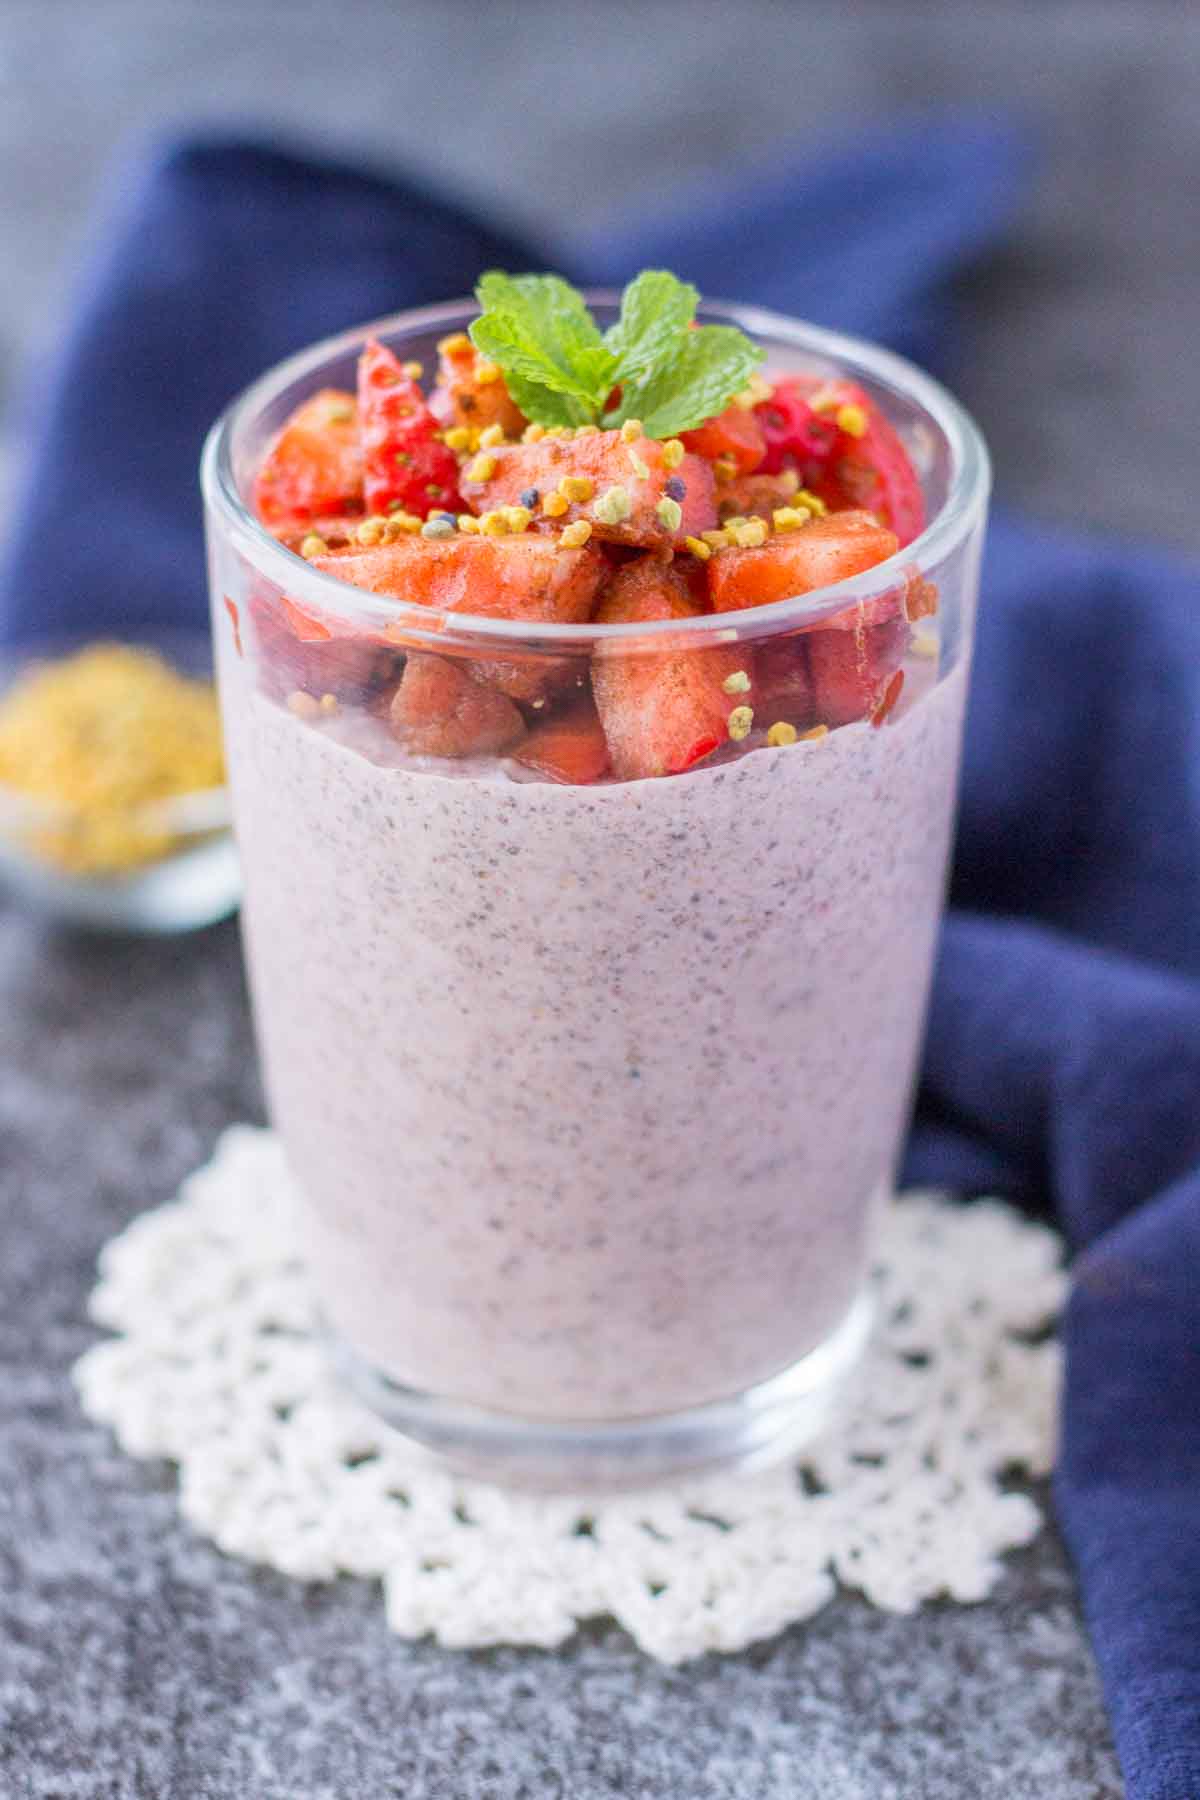
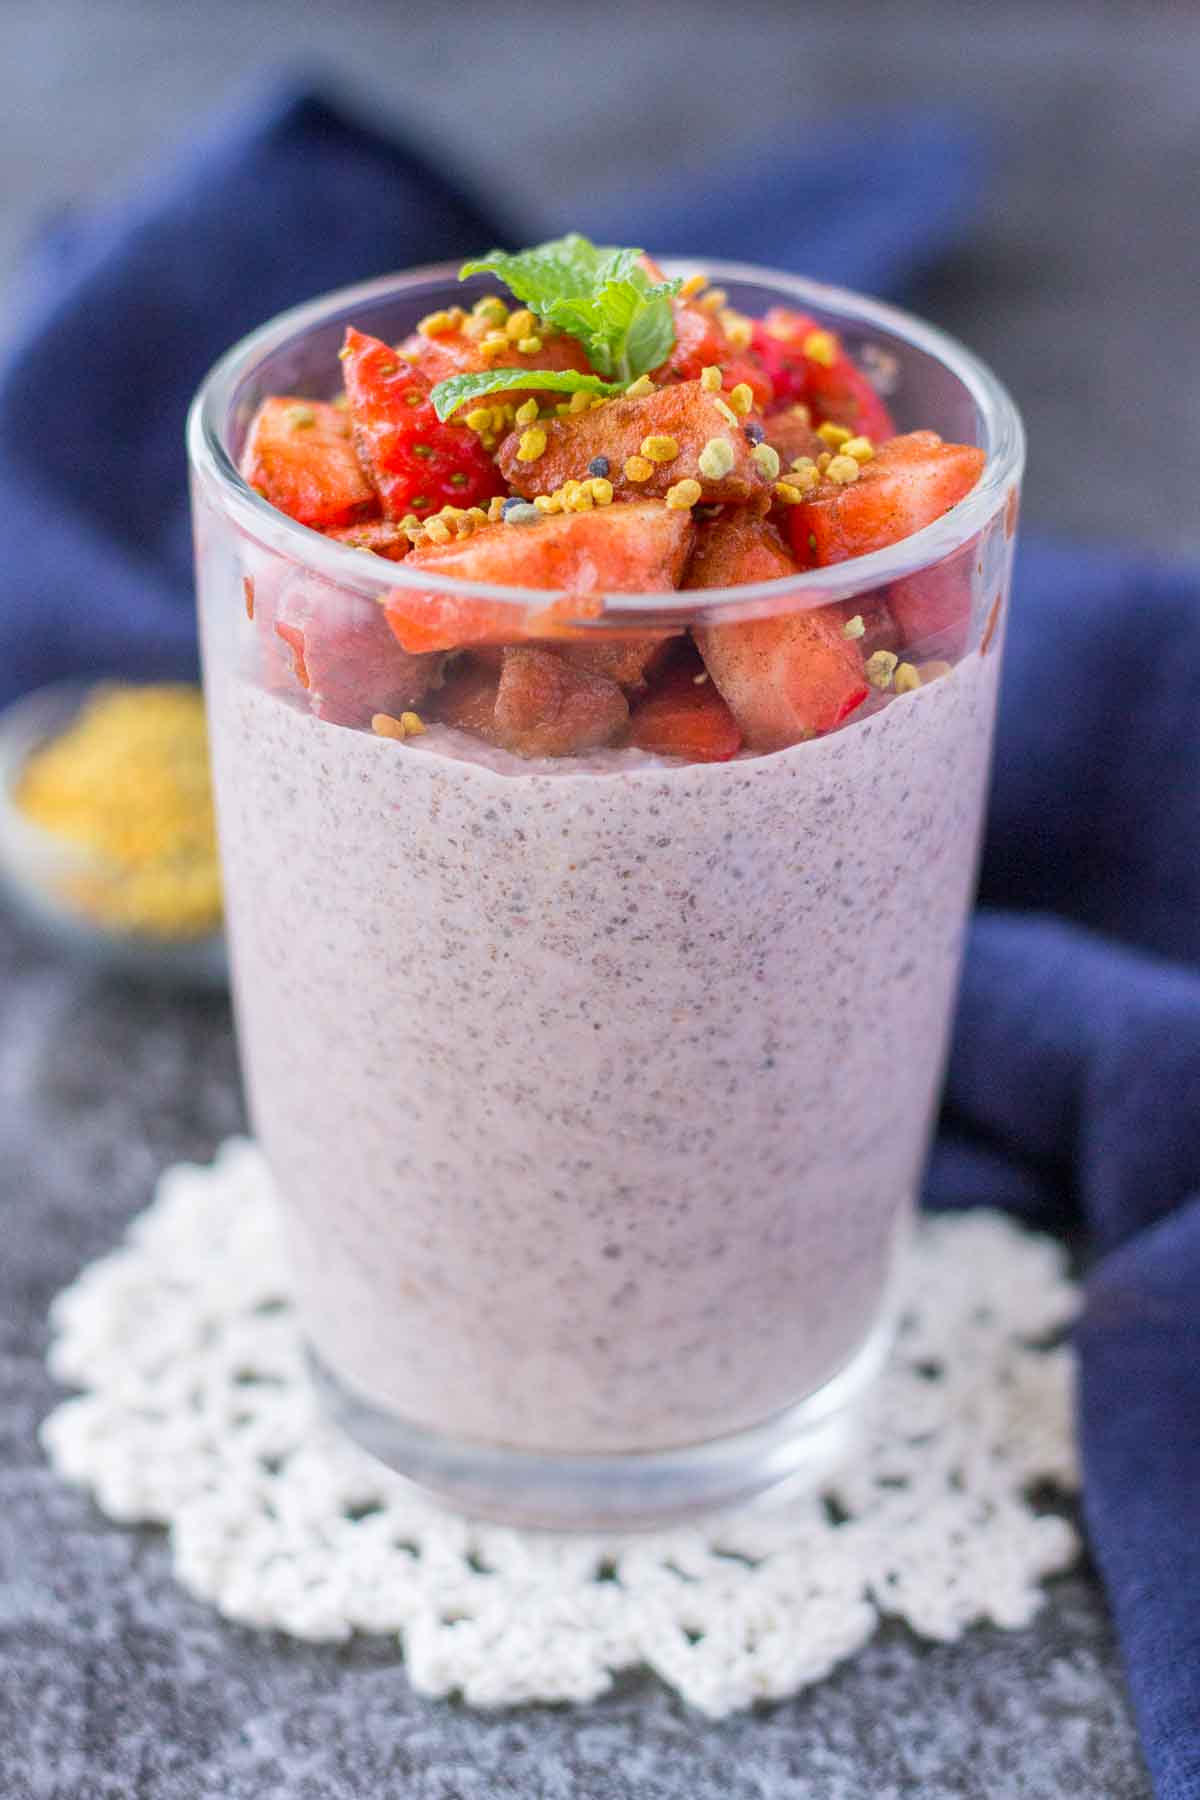
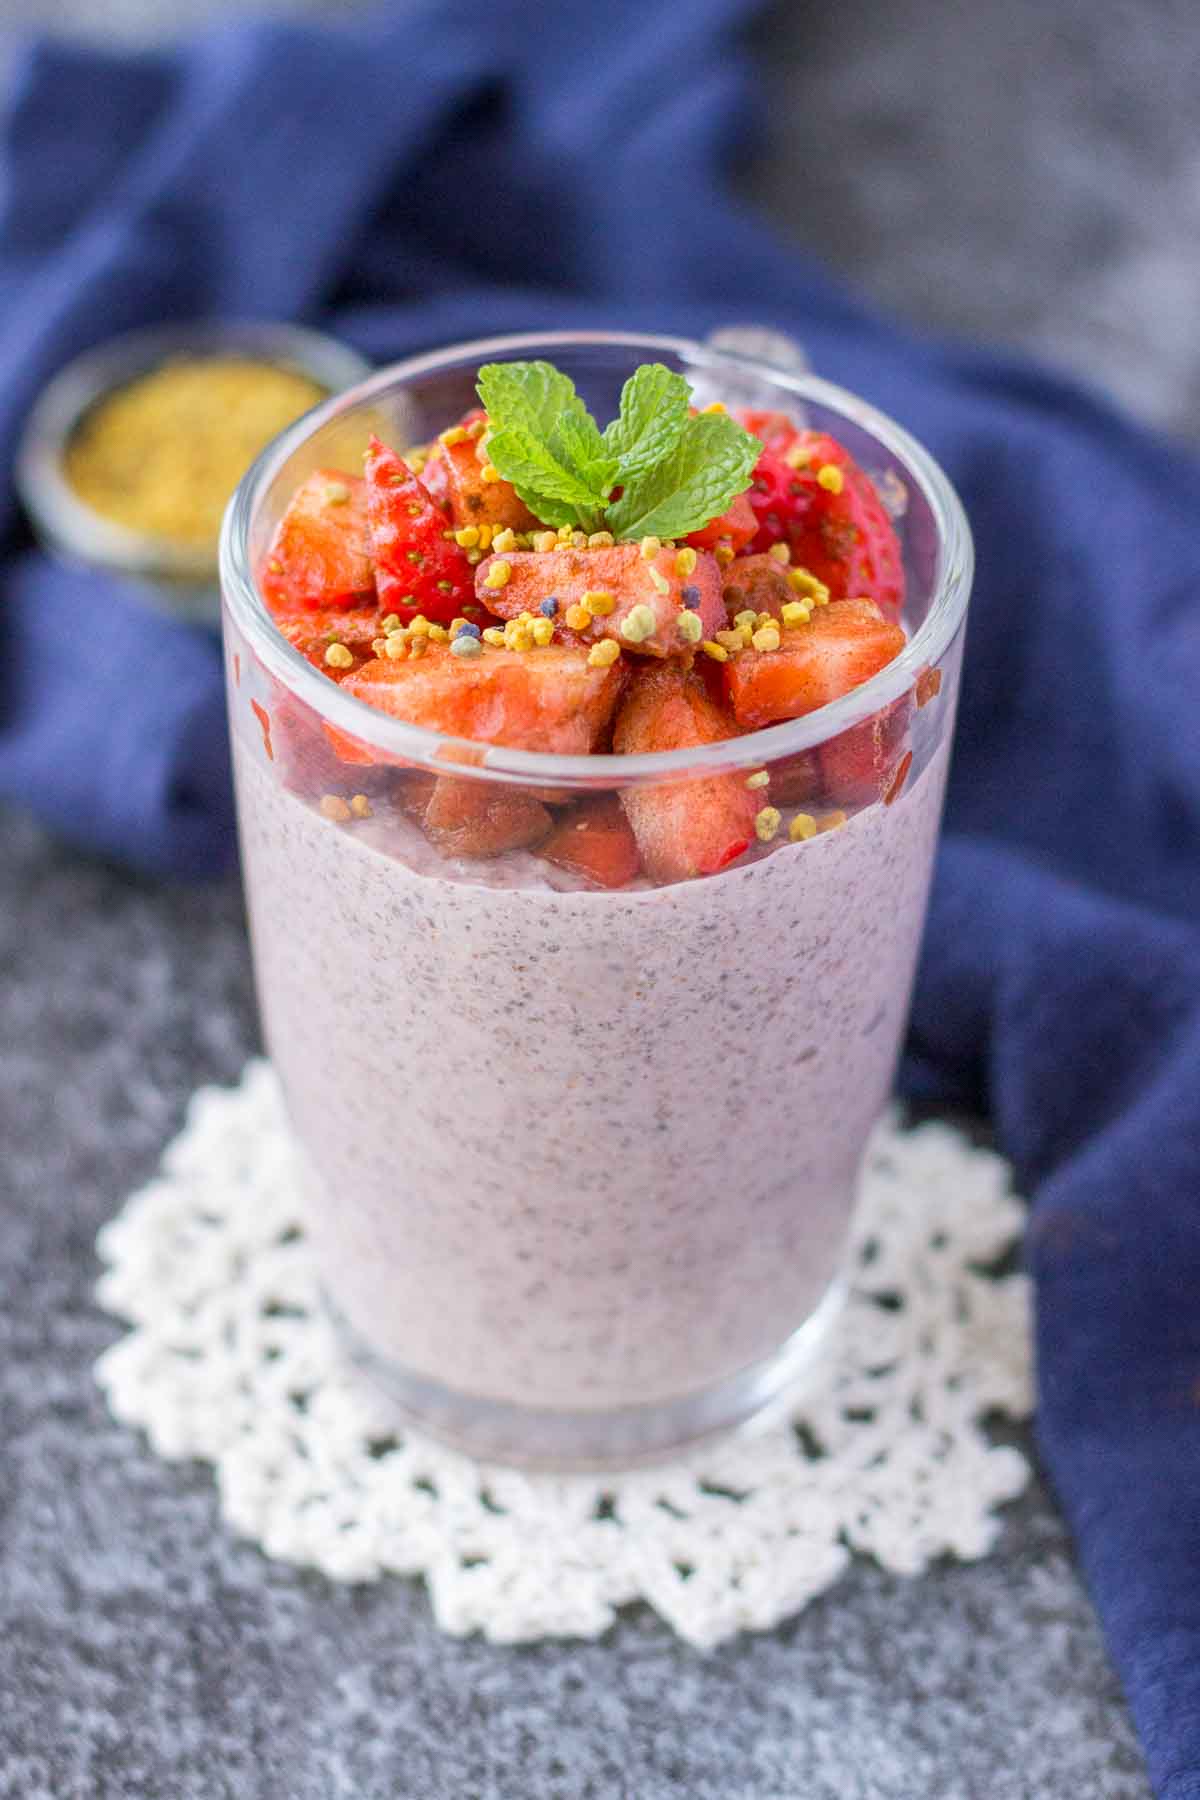
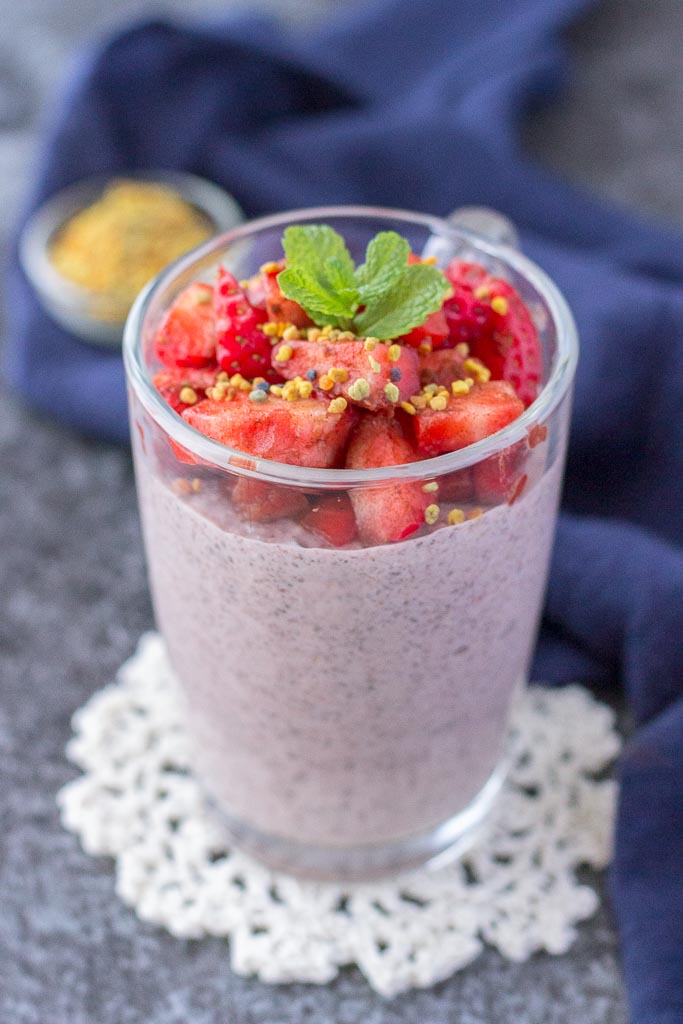
    • Strawberry Chia Pudding
    • Cinnamon Orange Granola
    • Carrot Cake Baked Oatmeal
    • Carrot Cake Overnight Oats
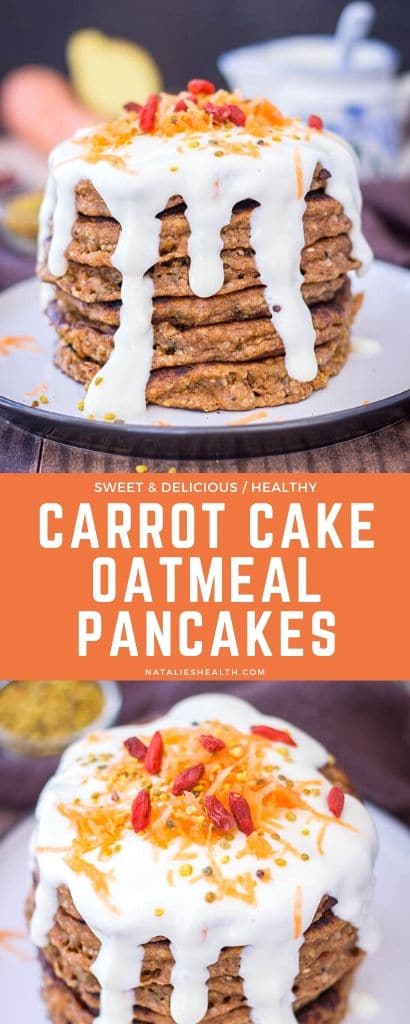
    • Carrot Cake Pancakes
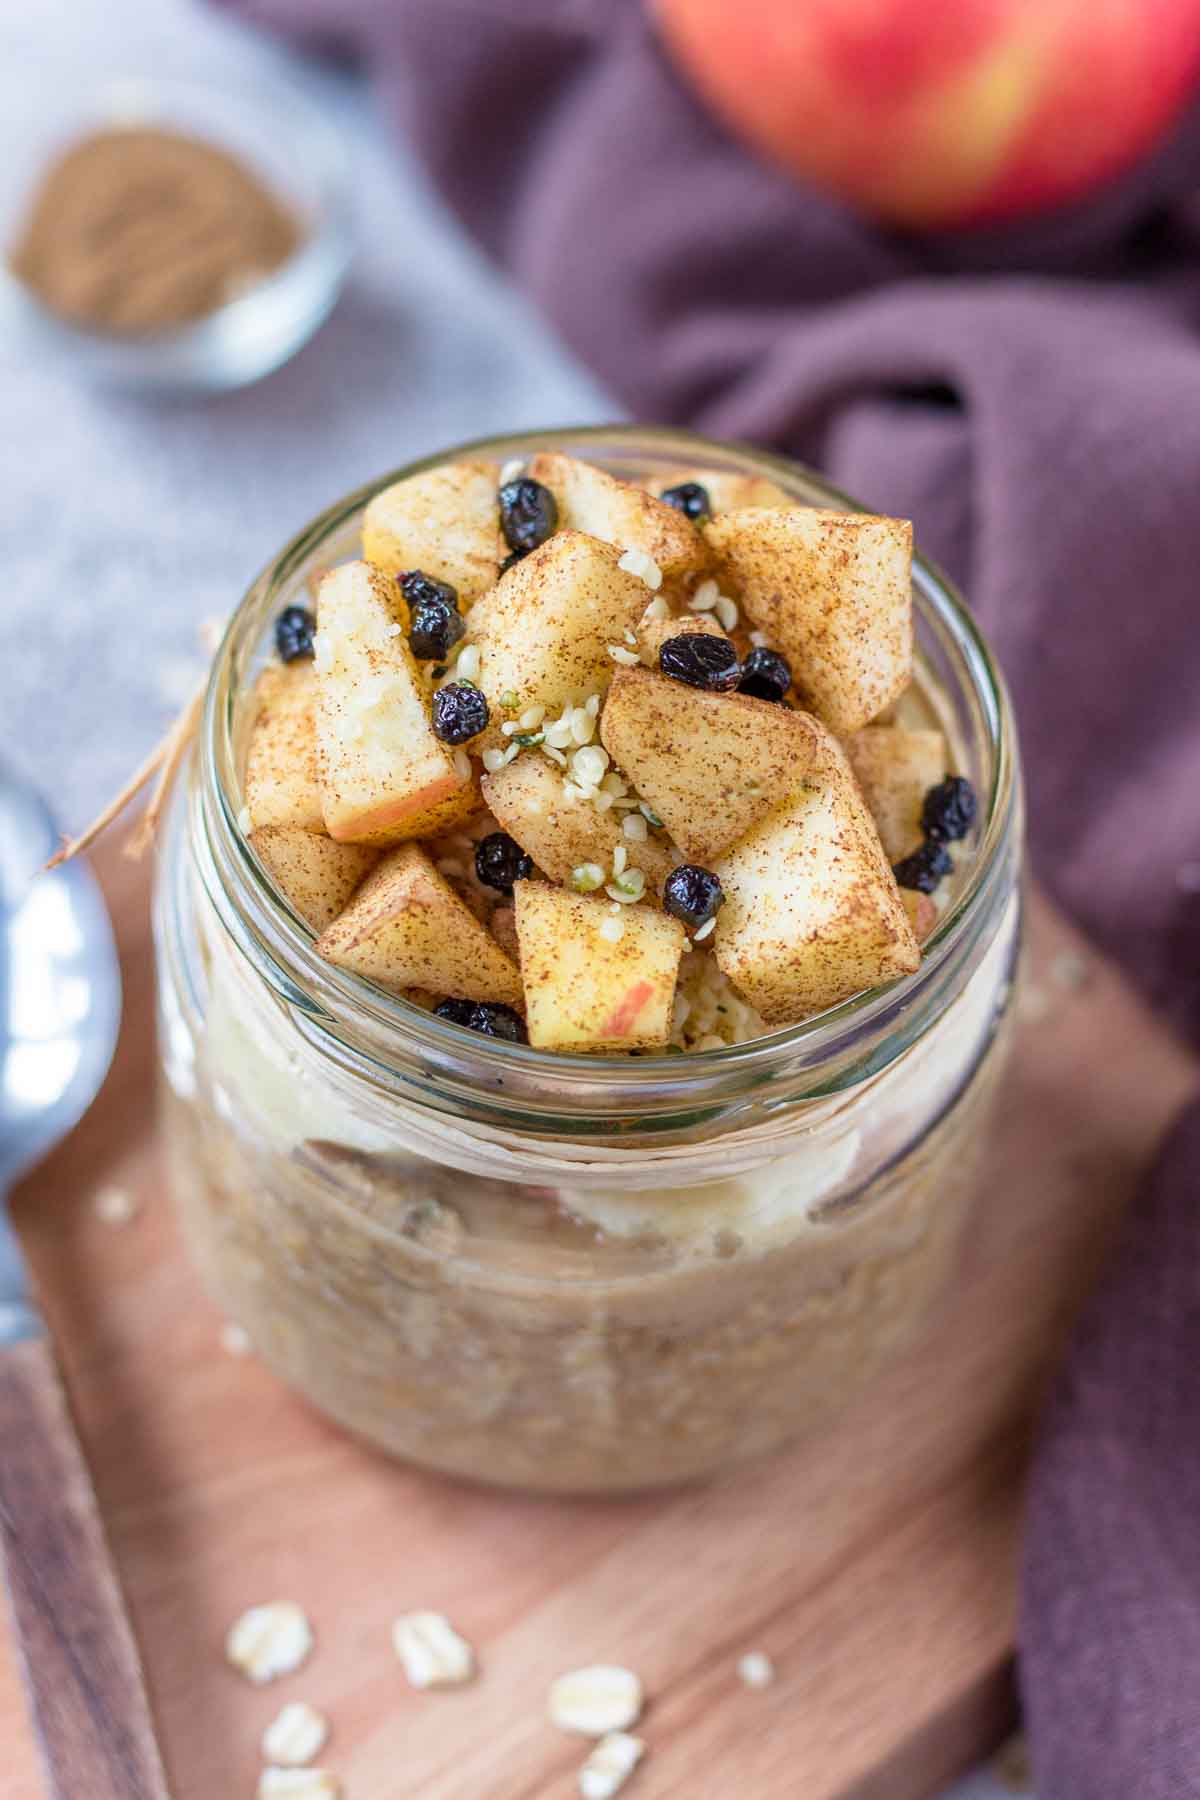
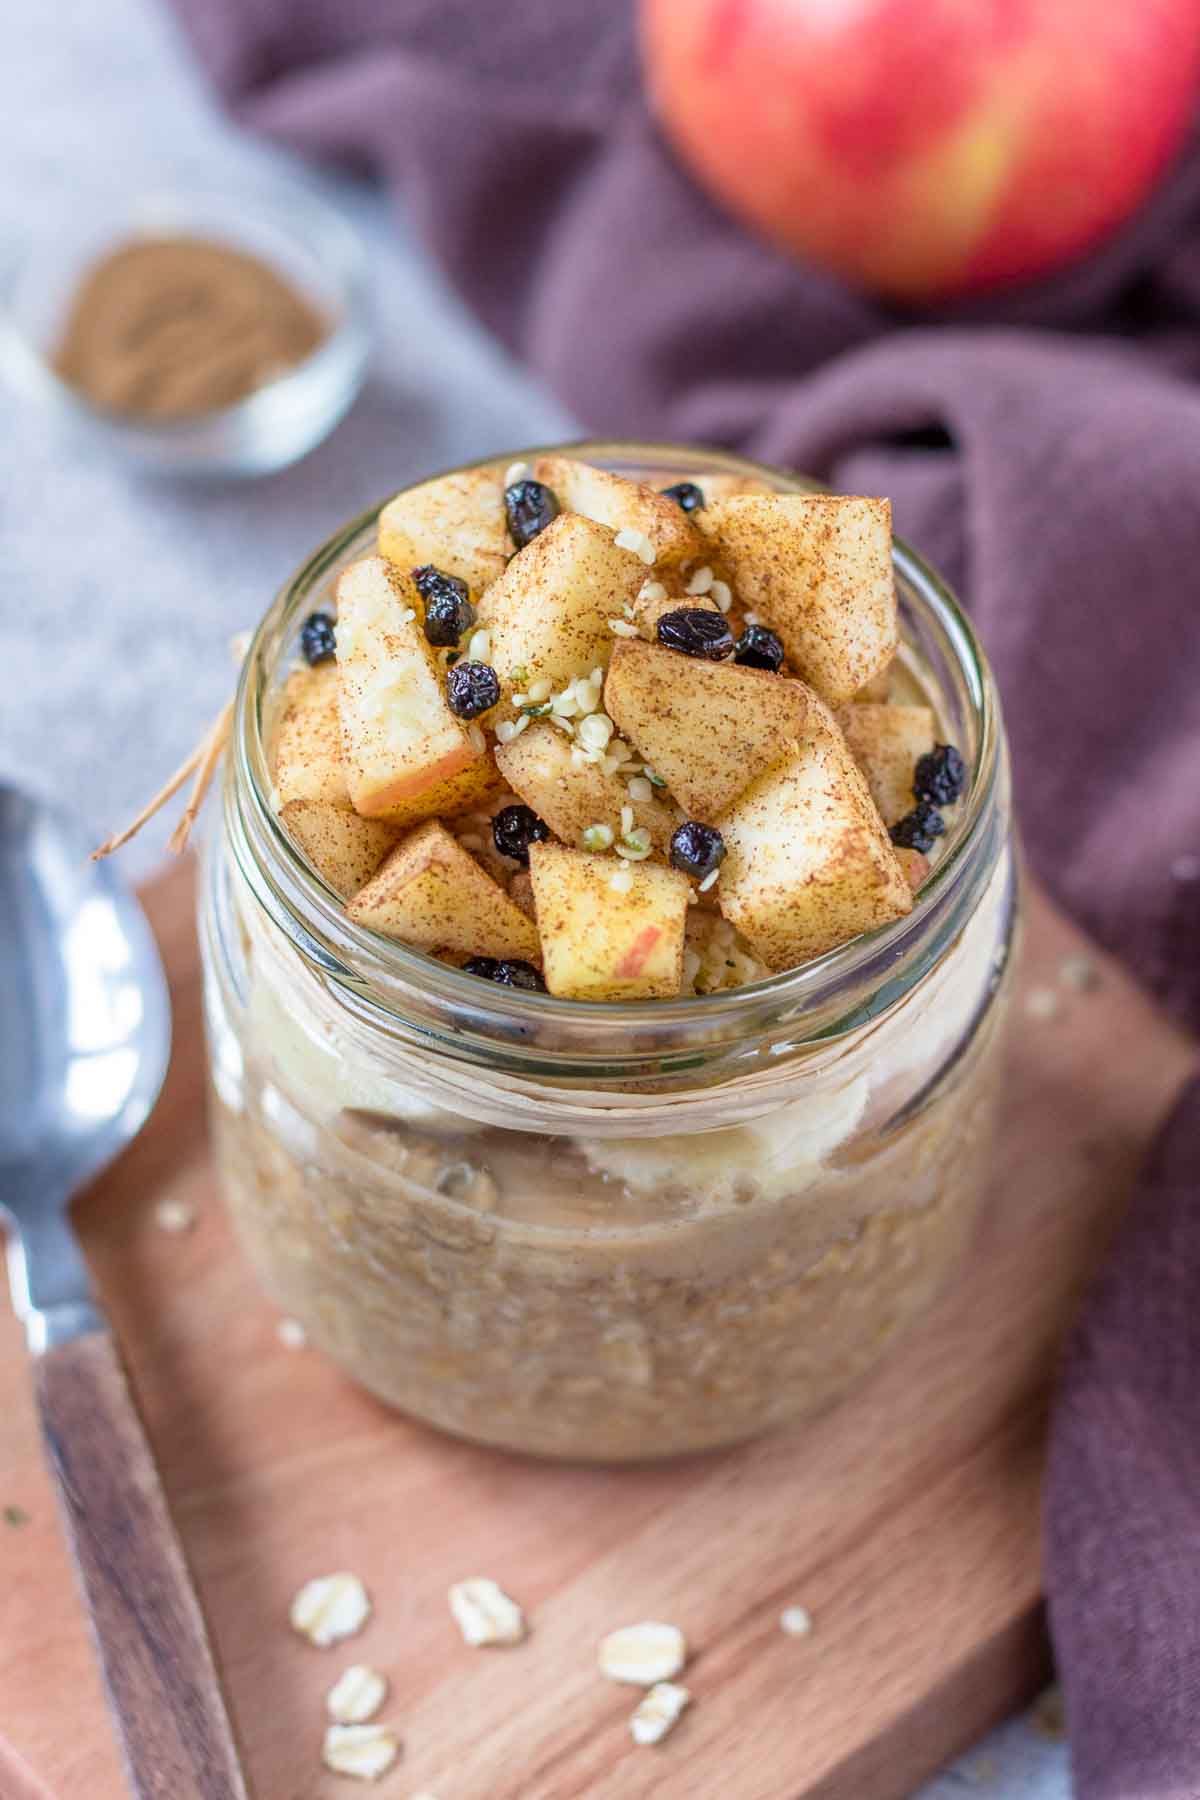
    • Apple Cinnamon Overnight Oats
    • Apple Cinnamon Baked Oatmeal
    • Apple Oatmeal Pancakes
    • Apple Cinnamon Oatmeal
    • Chickpea Avocado Toast
    • Avocado Egg Salad Sandwich

    Smoothies

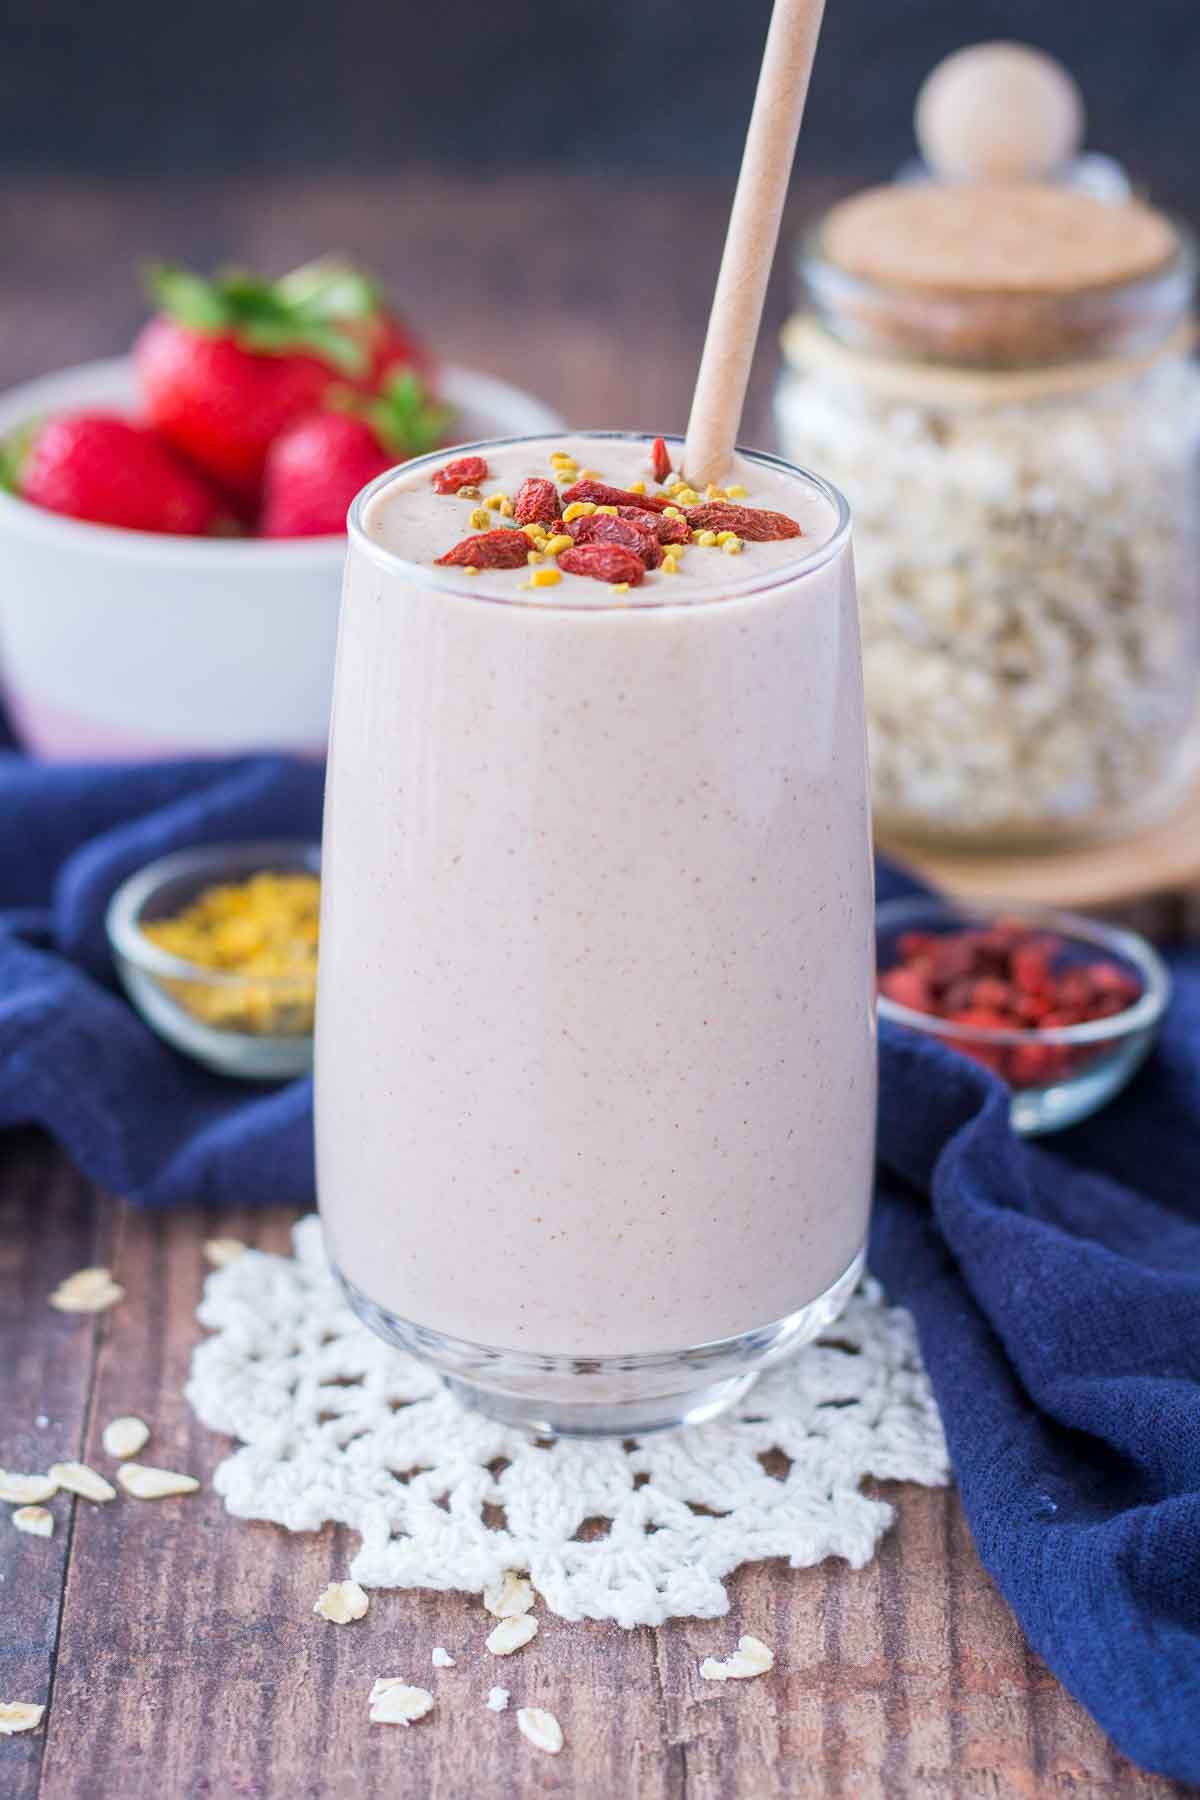
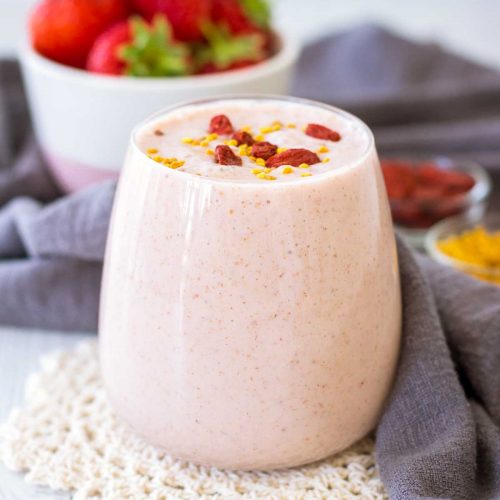
    • Strawberry Oatmeal Smoothie
    • Yogurt Lemon Smoothie
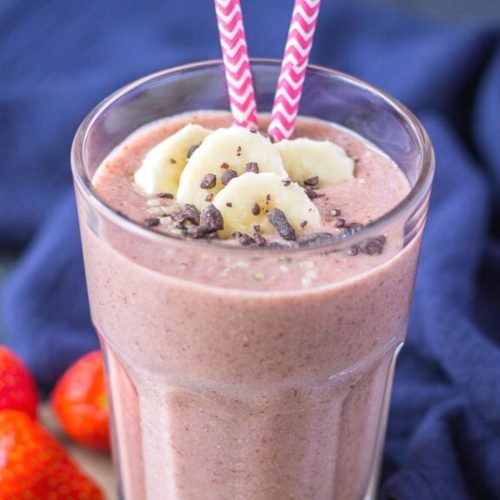
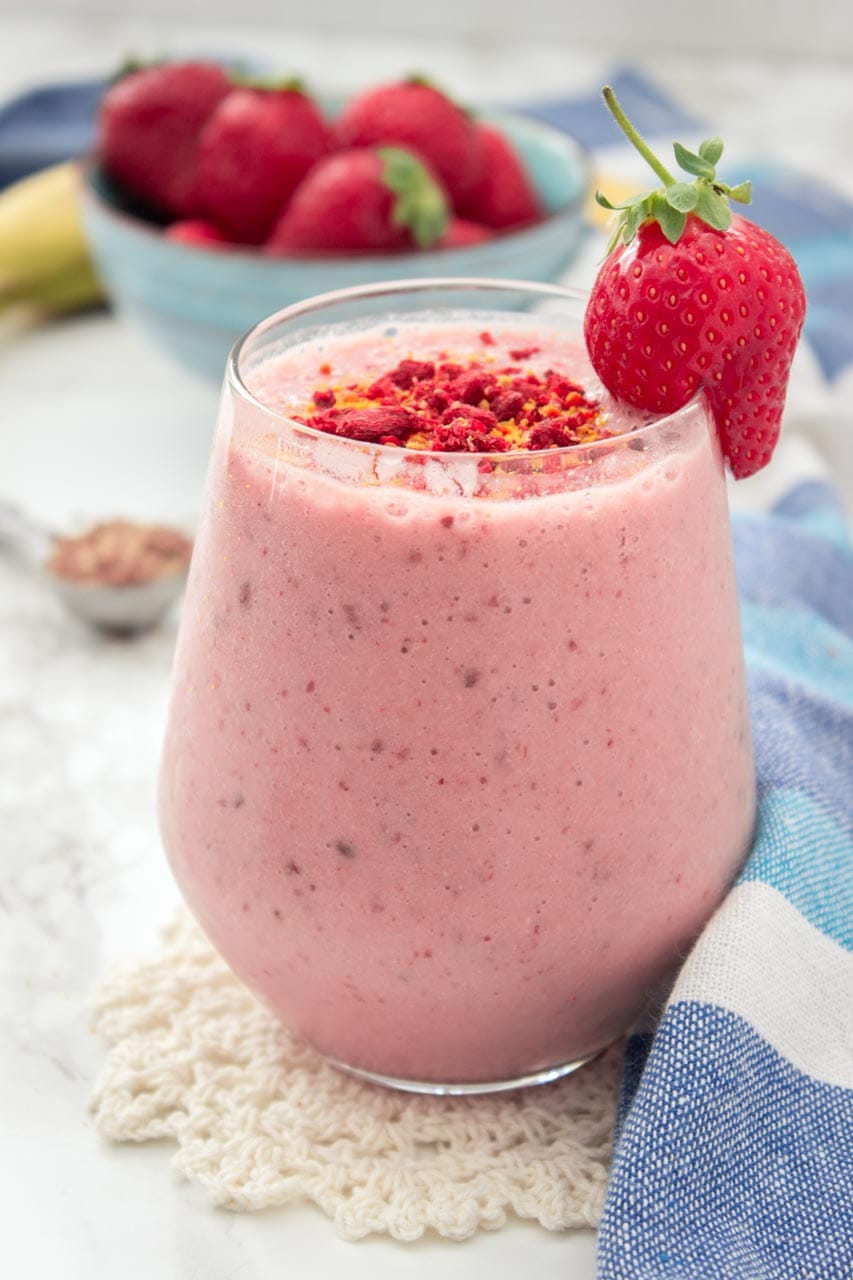
    • Strawberry Banana Smoothie
    • Strawberry Kefir Smoothie
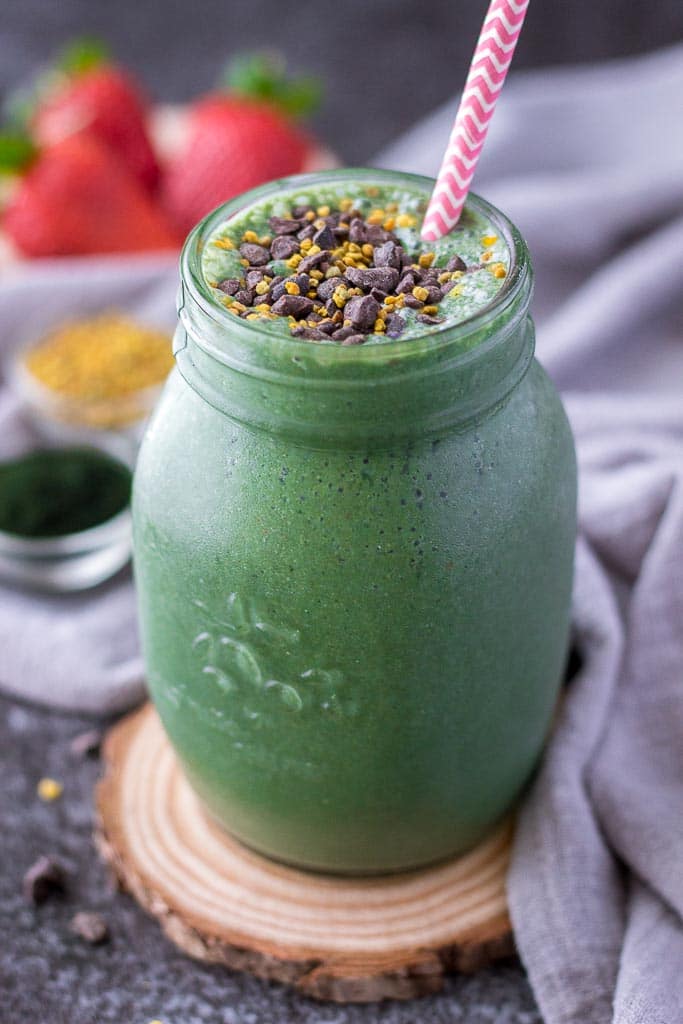
    • Strawberry Spirulina Smoothie
    • Strawberry Peanut Butter Smoothie
    • Strawberry Ginger Smoothie
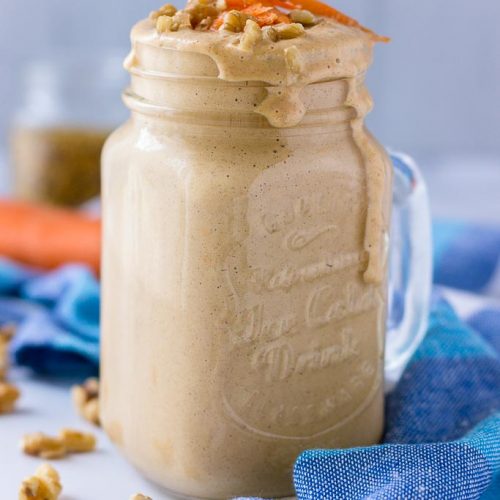
    • Carrot Cake Smoothie
    • Orange Mango Smoothie Bowl
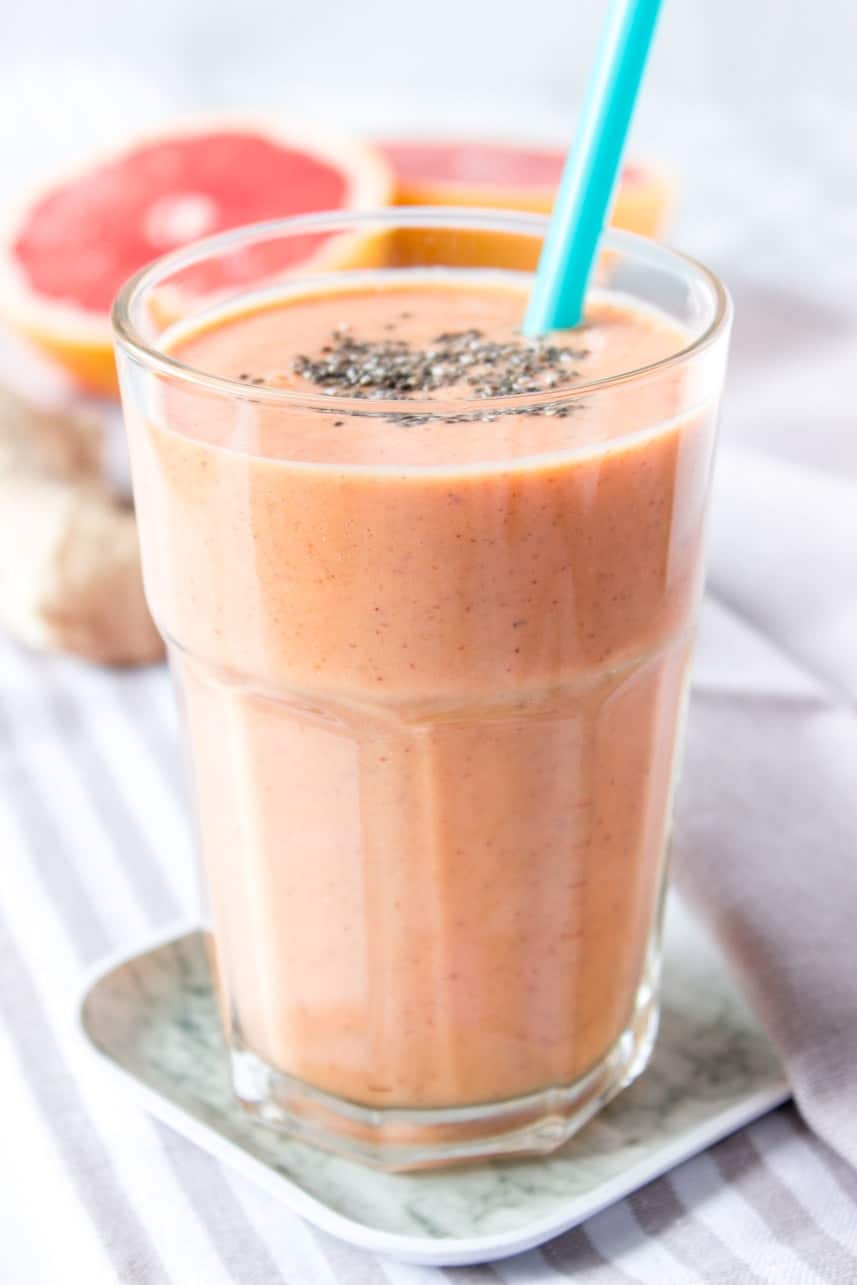
    • Grapefruit Ginger Smoothie
    • Ginger Banana Smoothie
    • Apple Peanut Butter Banana Smoothie
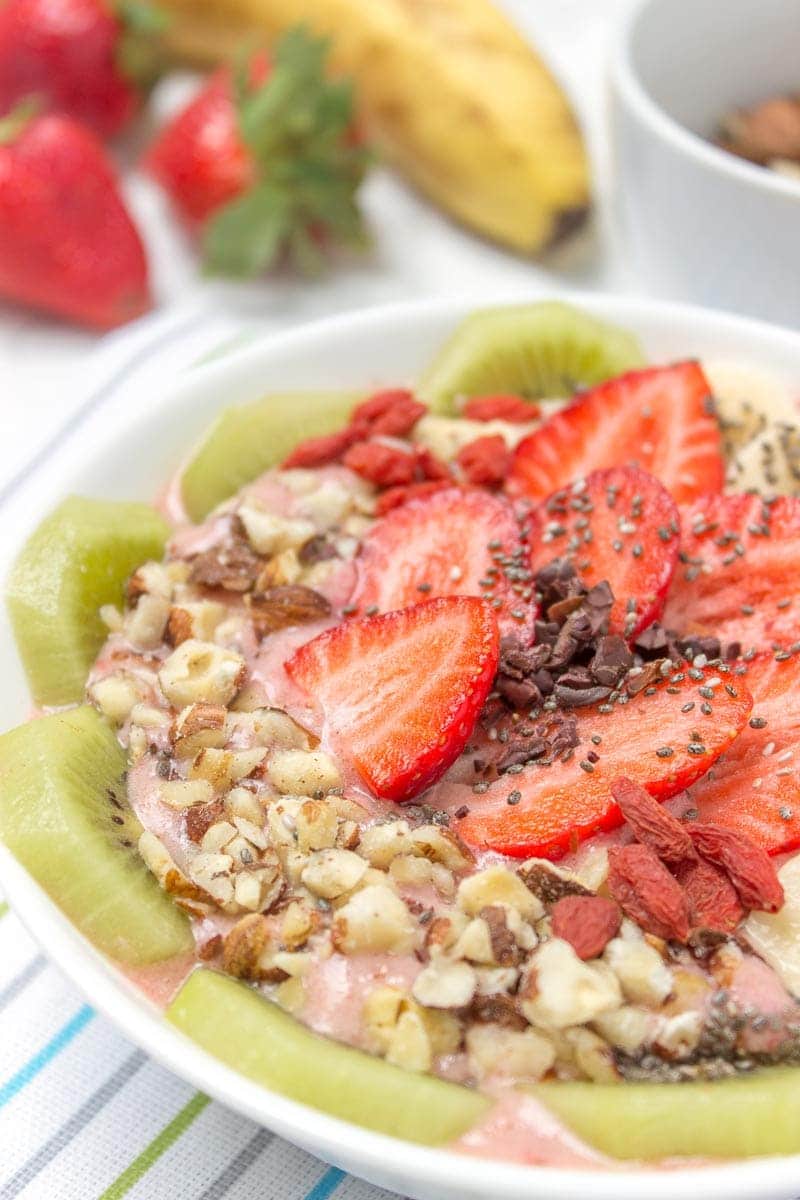
    • Strawberry Ginger Smoothie Bowl
    • Chocolate Avocado Smoothie
    • Apple Peanut Butter Smoothie
    • Kale Pineapple Smoothie
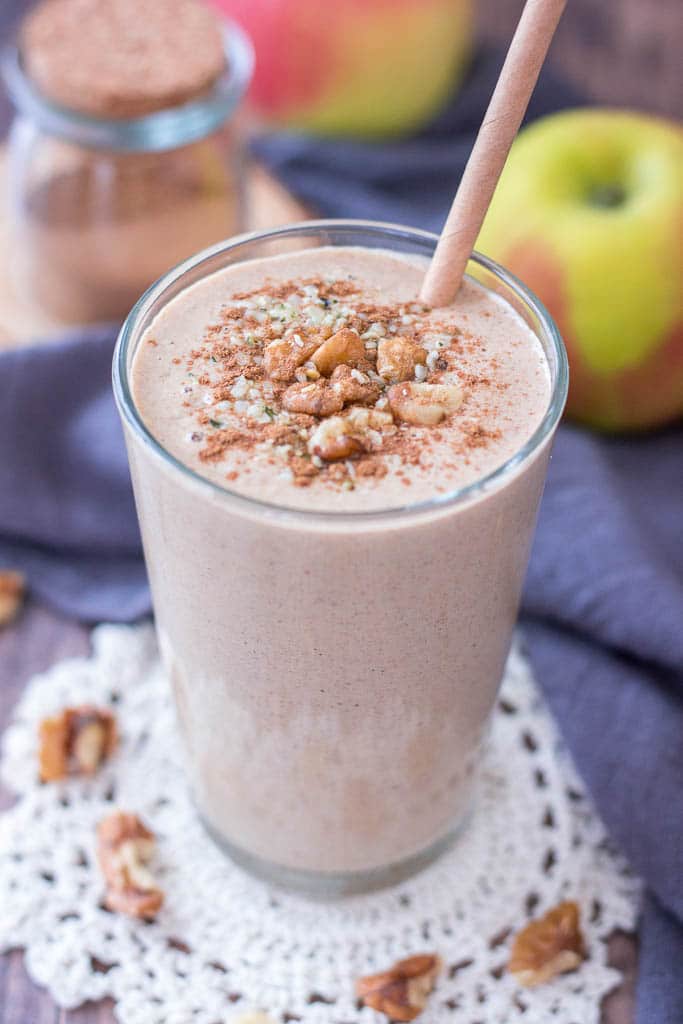
    • Apple Pie Smoothie
    • Cherry Banana Smoothie
    • Cherry Chocolate Smoothie

    Salads

    • Avocado Potato Salad
    • Pineapple Cucumber Salad
    • Cabbage Carrot Slaw
    • Arugula Beans Salad
    • Ginger Egg Salad
    • Black Bean Avocado Salad
    • Fava Beans And Asparagus Salad
    • Asparagus Feta Salad
    • Asparagus Chickpea Quinoa Salad
    • Spinach Artichokes Pasta Salad
    • Quinoa Avocado Salad
    • Arugula Chickpea Salad
    • Arugula Beets Salad
    • Herb Potato Salad
    • Ham Salad
    • Avocado Egg Salad

    Soups & Stews

    • Carrot Curry Soup
    • Beet Kohlrabi Soup
    • Carrot Ginger Soup
    • Leek Potato Stew
    • Spicy Broccoli Soup
    • Asparagus Soup
    • Leek Potato Soup
    • Spring Onion Potato Soup

    Main dishes

    • Basil Pesto Chicken Pasta
    • Turkey Burger With Greek Yogurt Topping
    • Garlic Butter Salmon With Asparagus
    • Creamy Lemon Chicken & Asparagus
    • Grilled Chicken & Asparagus Pesto Pasta
    • Chicken Asparagus Stir Fry
    • Chicken Piccata With Artichokes
    • Tuna Stuffed Avocados
    • Avocado Taco Boats
    • Sheet Pan Lemon Chicken With Leeks And Potatoes
    • Spring Onion And Mushroom Dumplings

    Side dishes

    • Roasted Garlic Parmesan Potatoes
    • Roasted Asparagus
    • Oven Roasted Potatoes And Asparagus
    • Lemon Parmesan Asparagus
    • Oven-Baked Asparagus Fries
    • Mushroom Asparagus Quiche
    • Roasted Artichokes
    • Baked Avocado Fries
    • Crushed Baked New Potatoes
    • Loaded New Potatoes
    • Spring Onion Asparagus Frittata

    Desserts

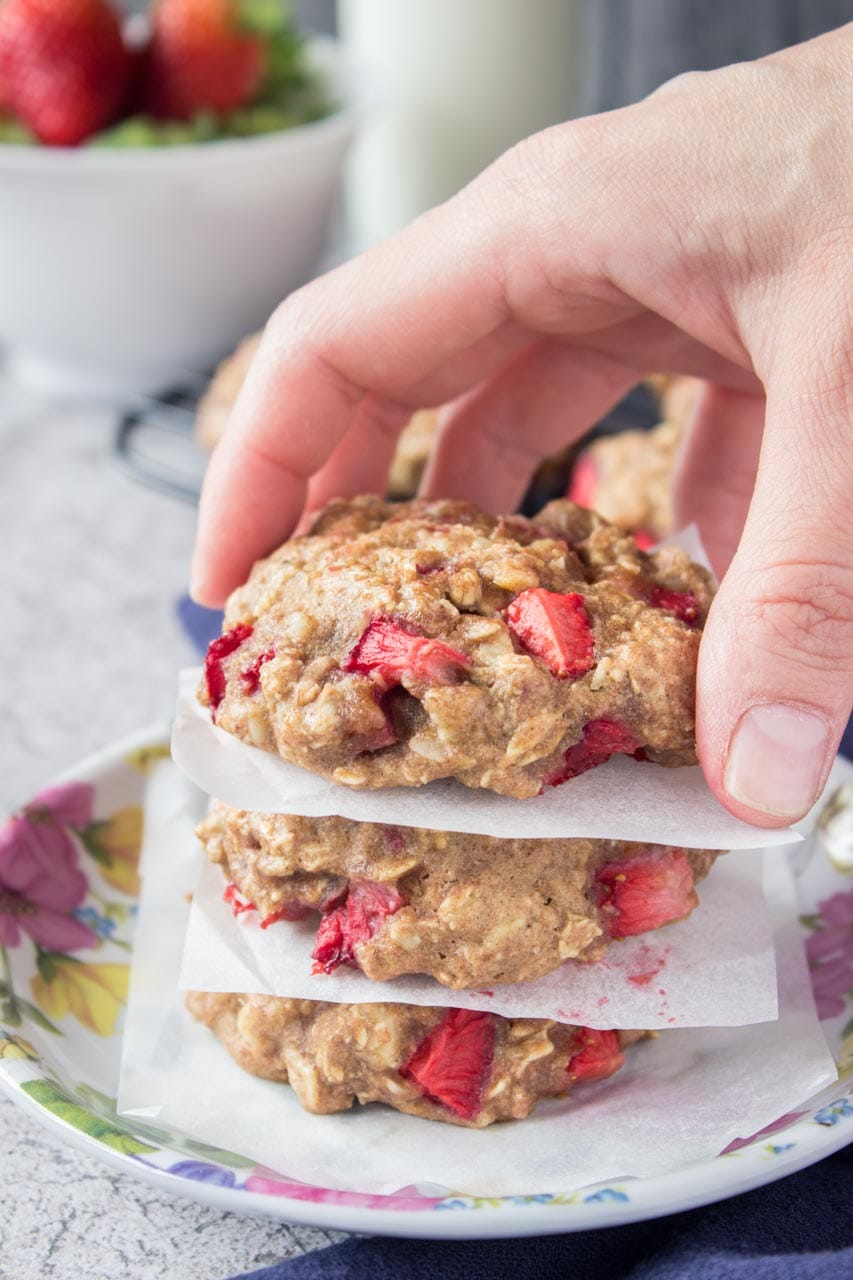
    • Strawberry Oatmeal Cookies
    • Lemon Oatmeal Muffins
    • Oatmeal Waffles
    • Strawberry Banana Muffins
    • Lemon Blueberry Pound Cake
    • Apple Cinnamon Muffins
    • Easy Apple Pear Crisp
    • Lemon Cardamom Pancakes
    • Carrot Cake Muffins with Cream Cheese Frosting
    • Orange Carrot Oatmeal Cookies
    • Carrot Cake Oatmeal Cookies
    • Apple Cinnamon Oatmeal Cookies
    • Apple Carrot Muffins
    • Strawberry Crumble
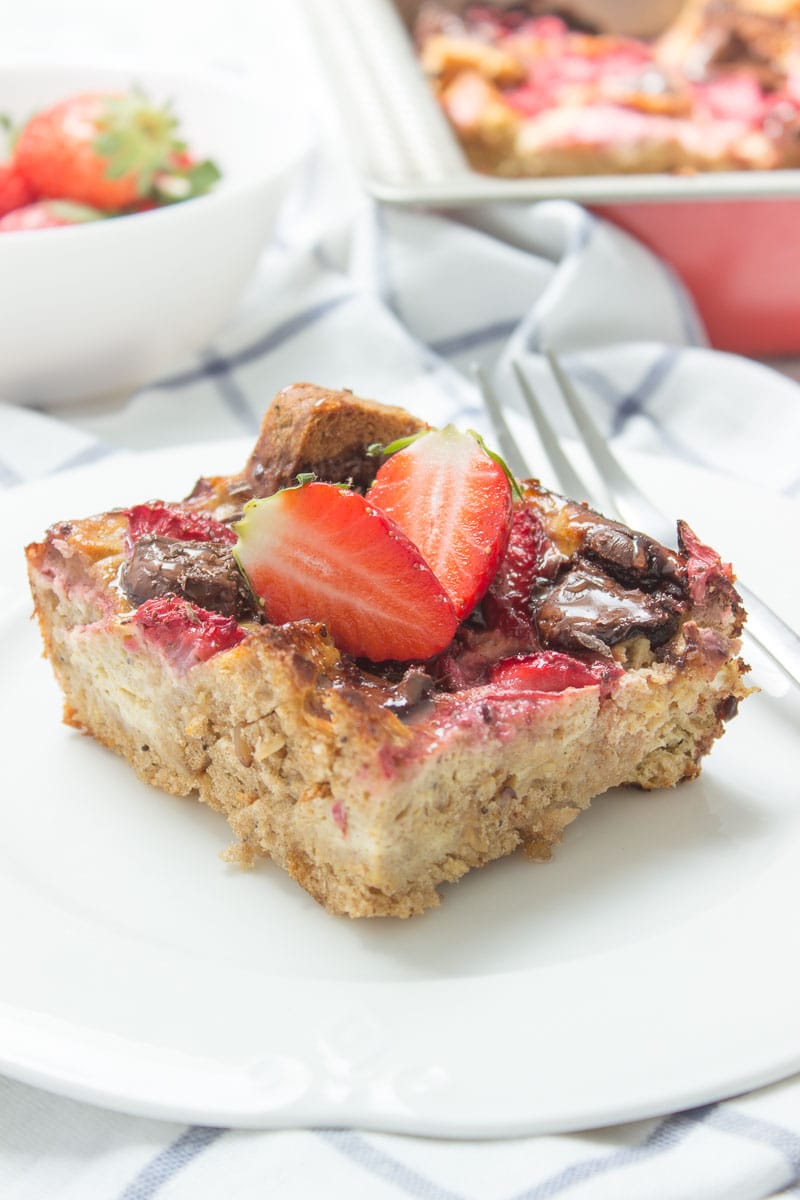
    • Strawberry Cookie Bars
    • Rhubarb Oatmeal Bars
    • Strawberry Rhubarb Crisp
    • Healthy Rhubarb Muffins

    Snacks

    • Carrot Cake Energy Balls
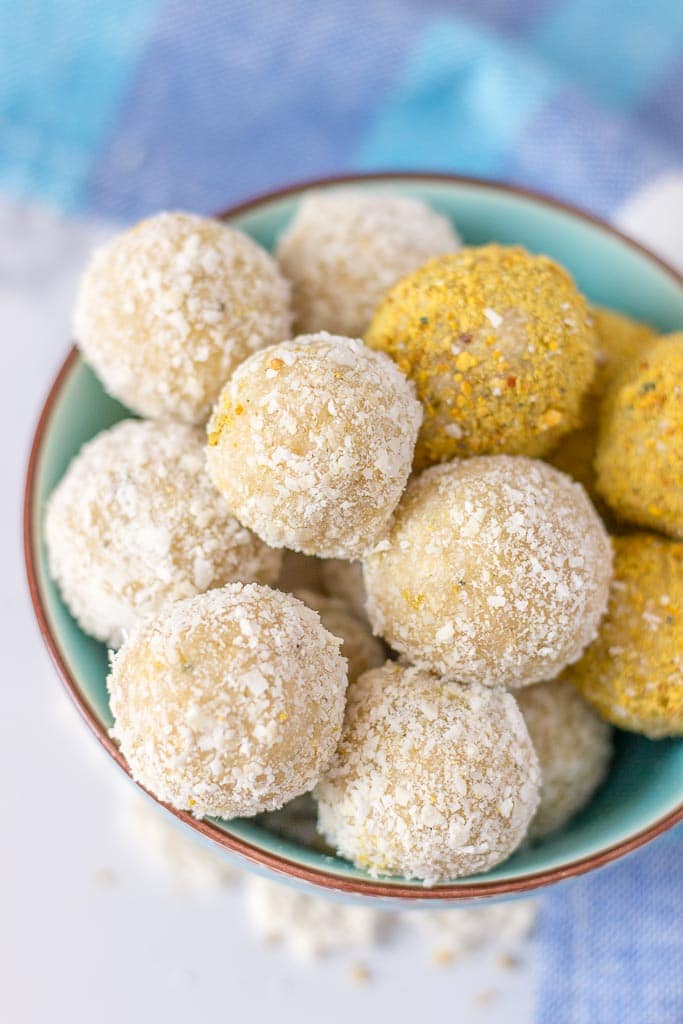
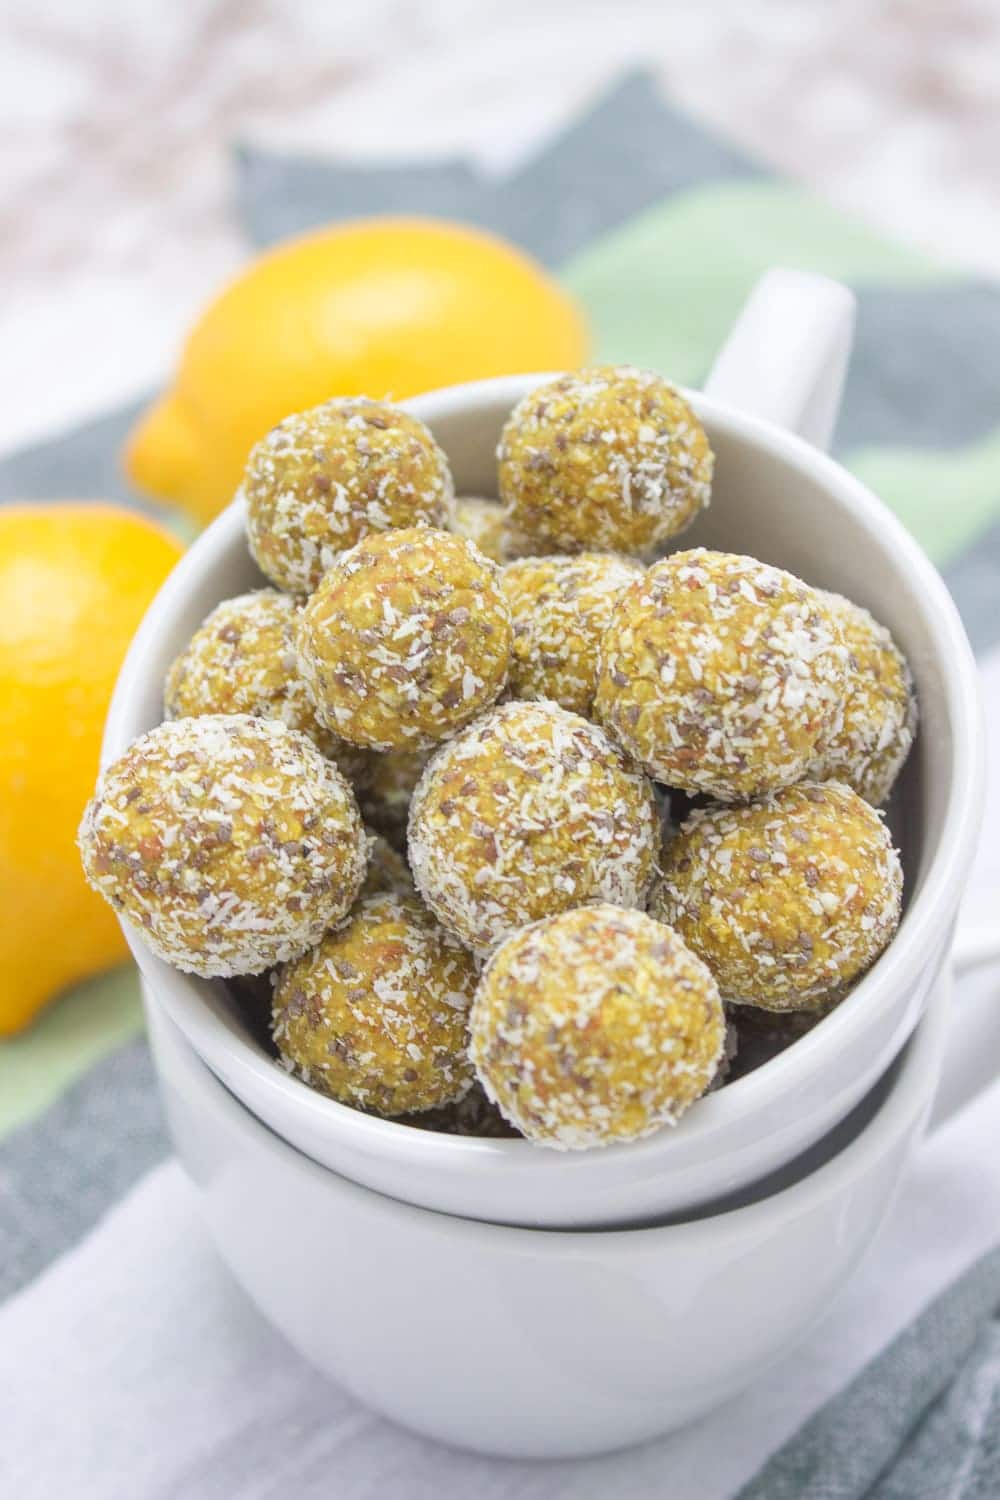
    • Lemon Turmeric Energy Balls
    • Apple Pie Energy Bites
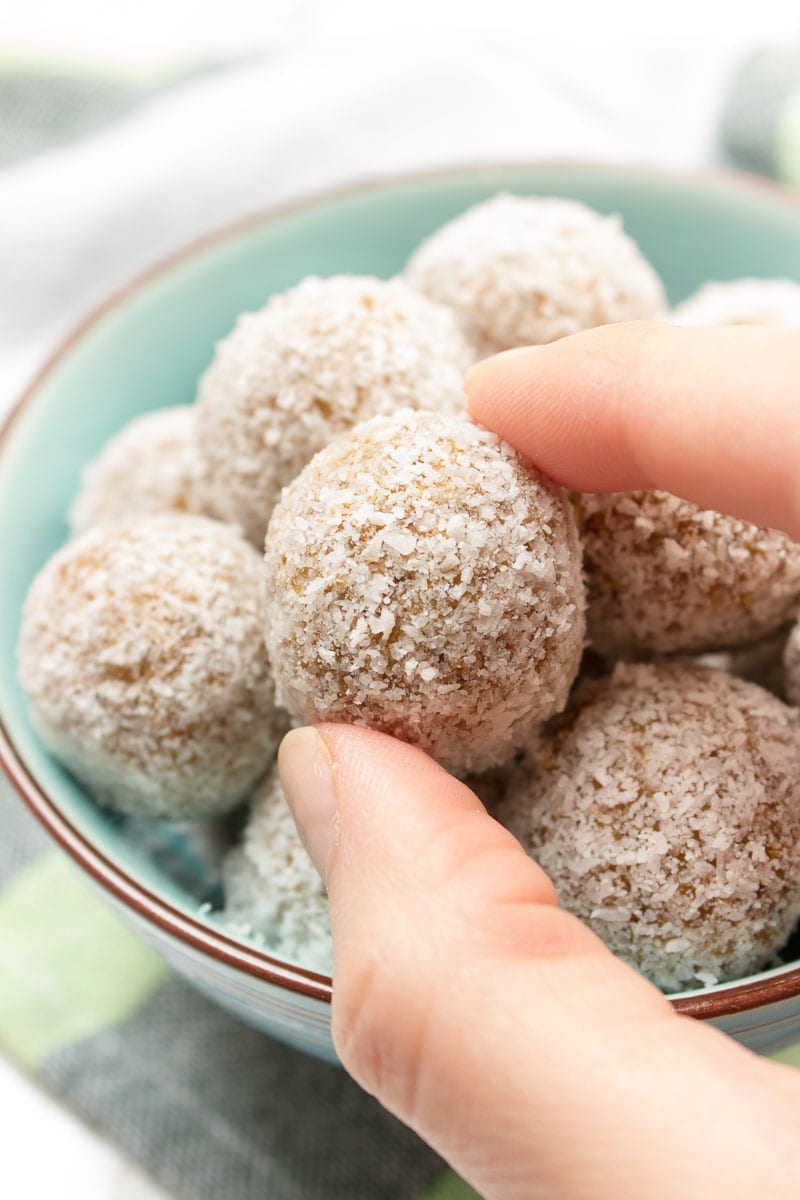
    • Lemon Coconut Energy Balls
    • Frozen Strawberry Bites
    • Strawberry Chocolate Trail Mix
    • Oven-Dried Strawberries

    Drinks

    • Cold Brew Iced Coffee
    • Shamrock Protein Shake
    • Easy Homemade Strawberry Milk
    • Iced Earl Grey Latte
    • Iced Matcha Latte
    • Iced Mocha Latte
    • Iced Coconut Matcha Latte

    More recipes

    • 10 Healthy Strawberry Recipes
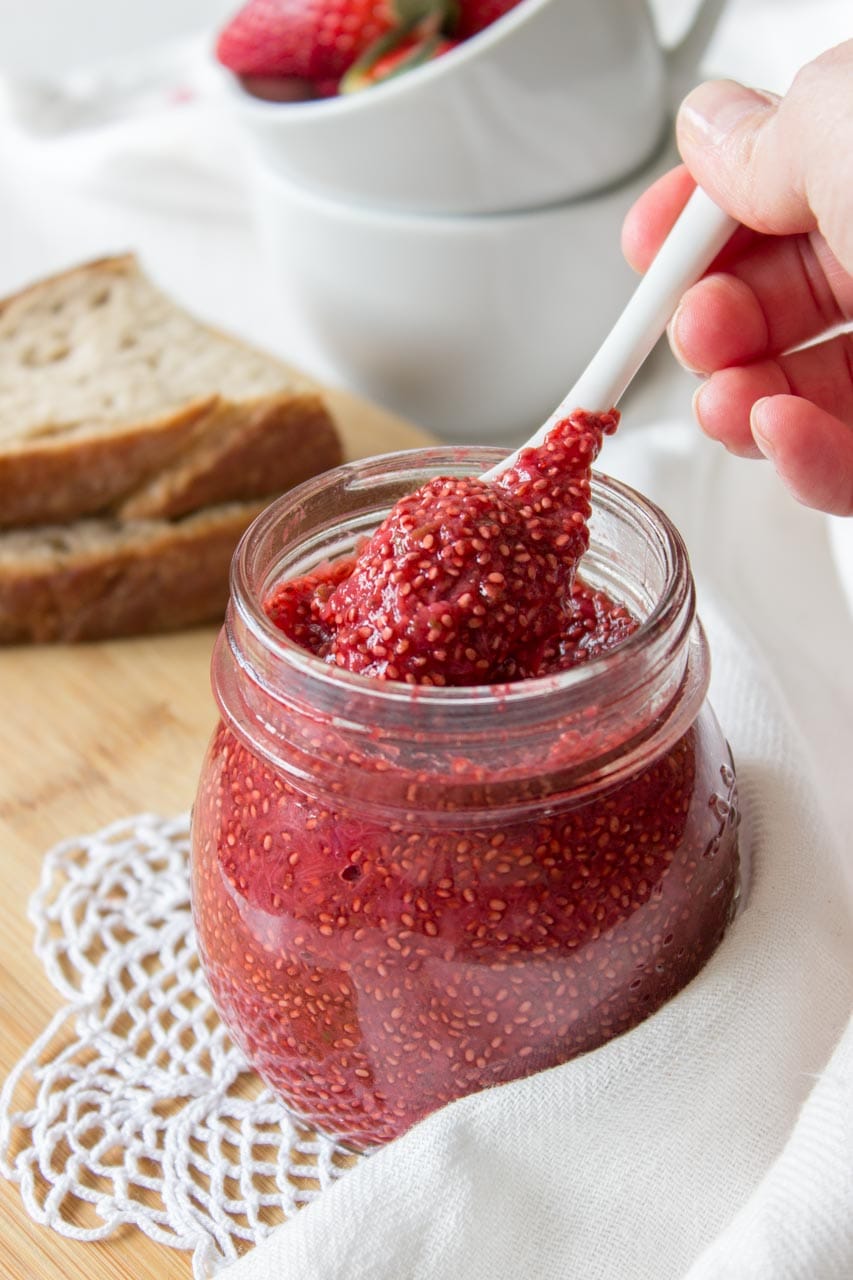
    • Strawberry Chia Seed Jam
    • 20 Healthy Apple Recipes
    • 20 Immune Boosting Smoothies
    • How To Cook Artichokes
    • 40+ Healthy Easter Recipes

    This post was originally published in April 2018. It has been updated and republished in April 2024.
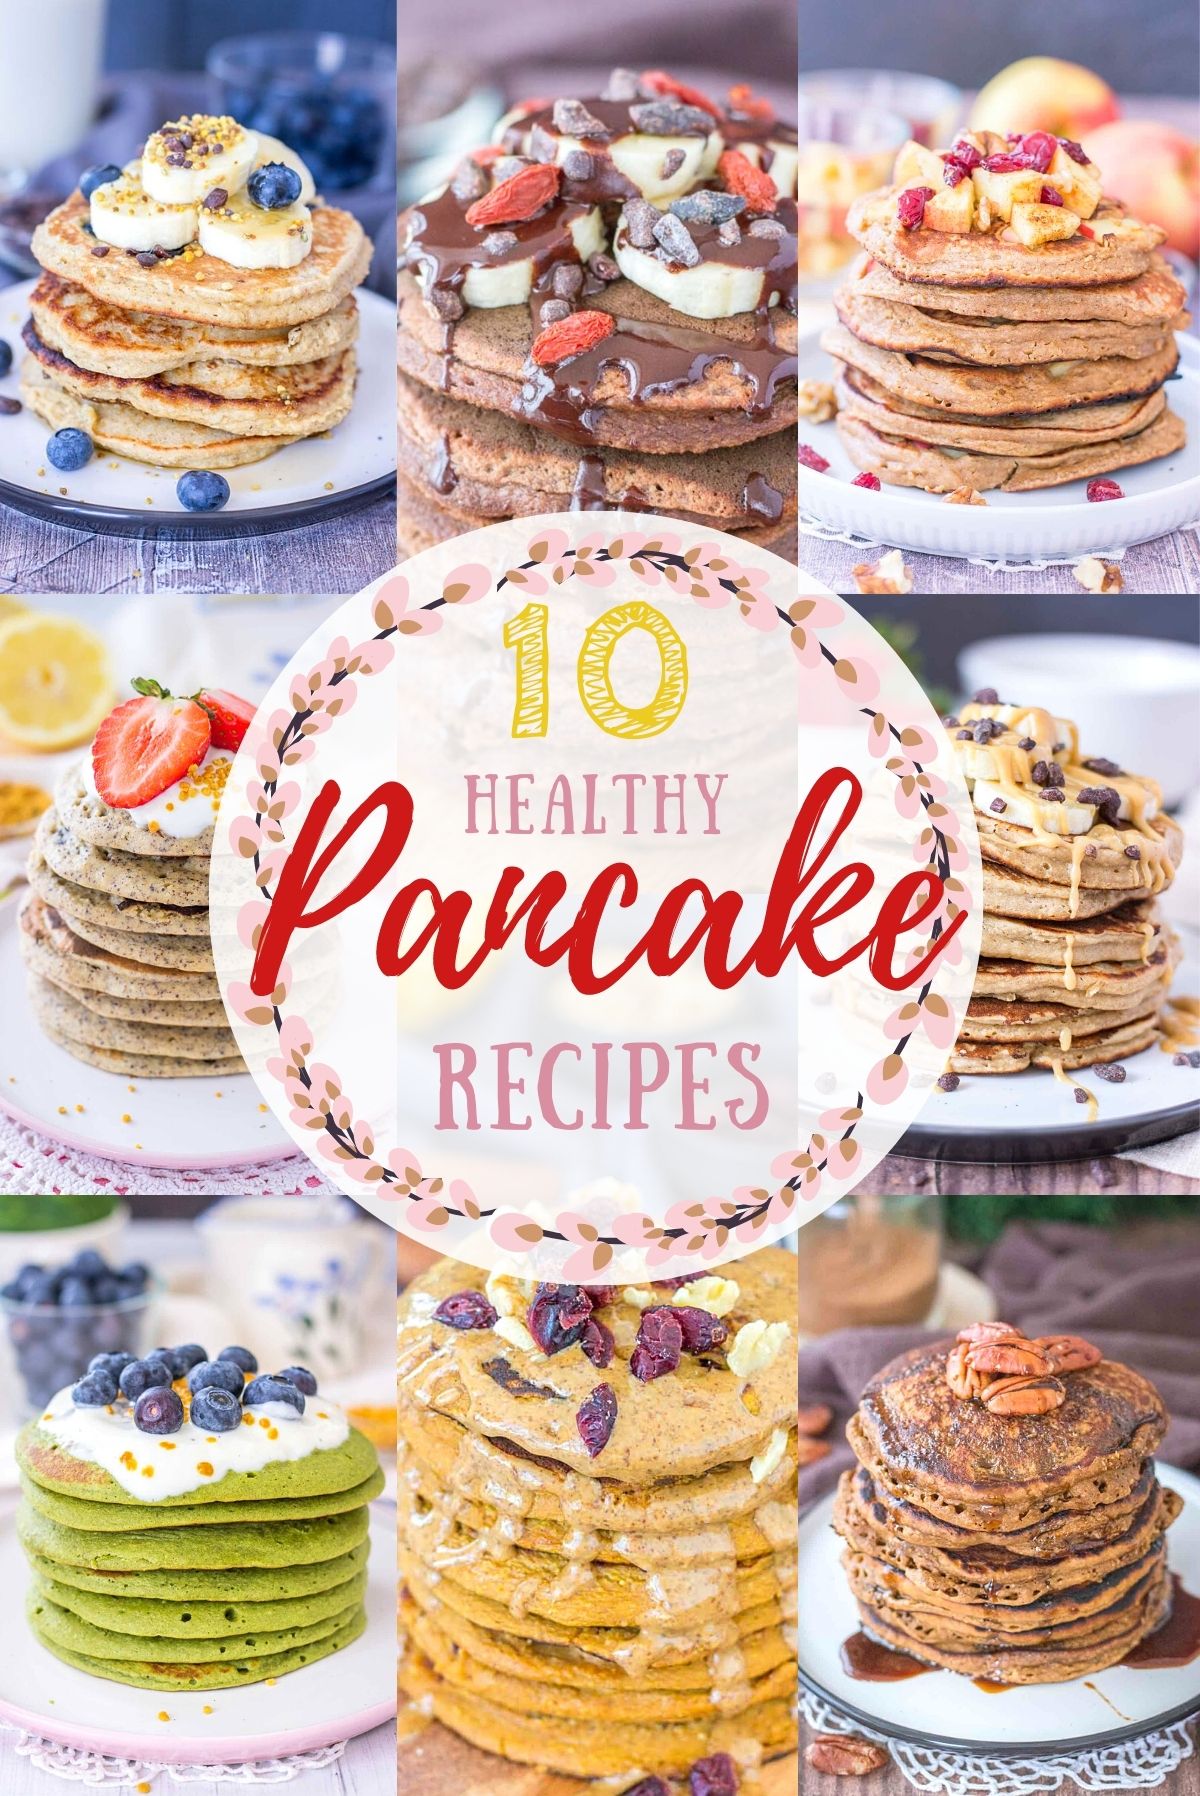
    10 Easy Healthy Pancakes Recipes

    February 24, 2022 by Natalie 36 Comments

    Healthy Pancakes Recipes

    Kickstart your day with a stack of healthy pancakes! There are plenty of delicious pancake recipes to choose - from simple banana pancakes to dark chocolate pancakes. They are sweet, fluffy and they will make you feel nourished. Also, get you ready to smash the day.

    [feast_advanced_jump_to]
    Healthy Pancakes Recipes

    Pancakes are a truly magical food. They can make you feel like you're having cake for breakfast. And while some will argue that there's no such thing as a healthy pancake recipe, I am here to show you that it's totally possible to have delicious homemade pancakes that are nourishing and healthy too.

    Can pancakes be healthy?

    Pancakes can be healthy. If you want to enjoy pancakes for breakfast that are equally tasty as nutritious and healthy, you just need to think outside the box.

    Classic pancakes are made with white processed flour, which is low in fiber and therefore less filling. Also, classic pancakes are lacking protein which is another important nutrient.

    People usually use high-fructose syrups to sweeten the pancakes, which is another factor that makes such classic pancakes extremely unhealthy.

    And here are some tips on how to make your favorite pancakes completely healthy.

    How to make healthy pancakes?

    Use the right flour

    Choose whole grains like whole-wheat flour or oatmeal flour (oats), which are full of heart-healthy fiber.

    Add some extras to the pancake batter

    Add hemp seeds or chia seeds, peanut butter, or almond butter to boost fibers, proteins, and healthy Omega-3s.

    Add more protein

    If you're looking for protein-packed pancakes for breakfast, add a scoop of protein powder. That will transform pancakes into a nutritious breakfast that will help you stay full through the morning.

    Be mindful with added sugars

    To sweeten your pancakes, you can use healthier alternatives like pure maple syrup or honey. Or low-carb sweeteners like stevia. And if you want your pancakes to be without added sugars, use a ripe banana. So simple.

    And now, it's time for the good stuff. Here are 10 healthy pancakes recipes that are sweet, satisfying, and totally delicious. 

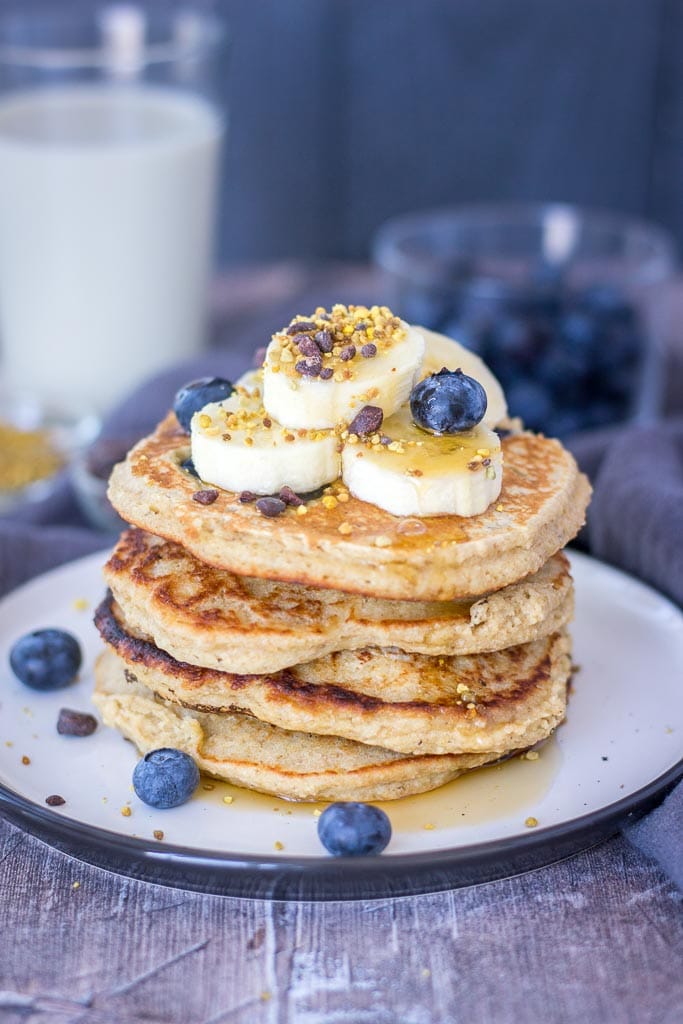
    Blueberry Banana Pancakes recipe with oats topped with banana

    Blueberry Banana Pancakes

    These Blueberry Banana Pancakes are a perfect family treat packed full of flavor. Sweet, fluffy, and incredibly satisfying. Easy to make. Great for celebrating Pancake Day and lazy weekends!

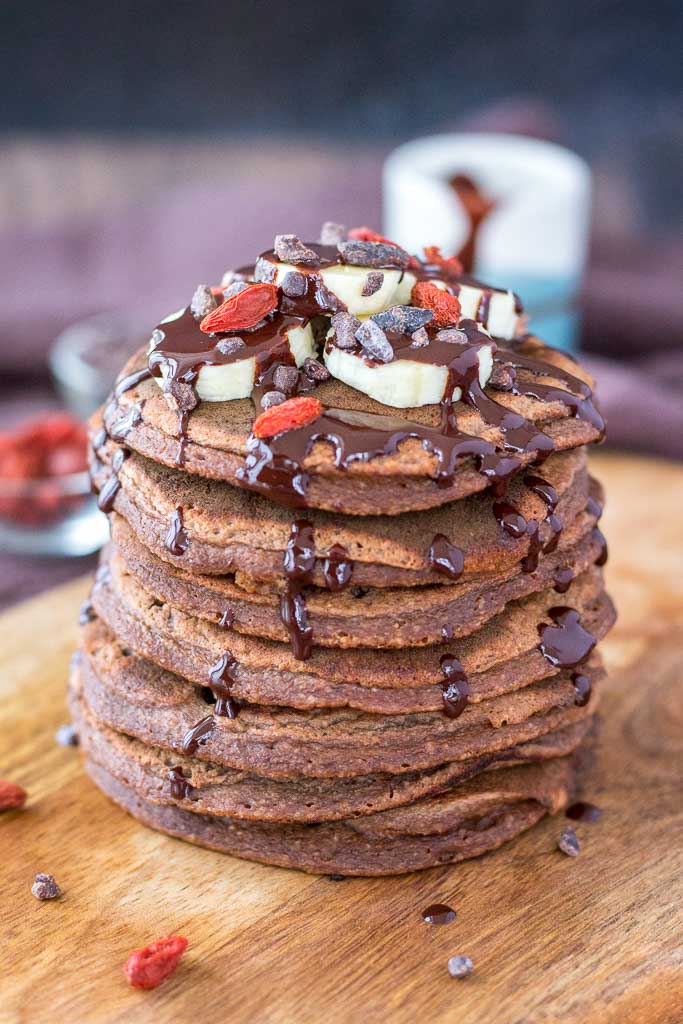
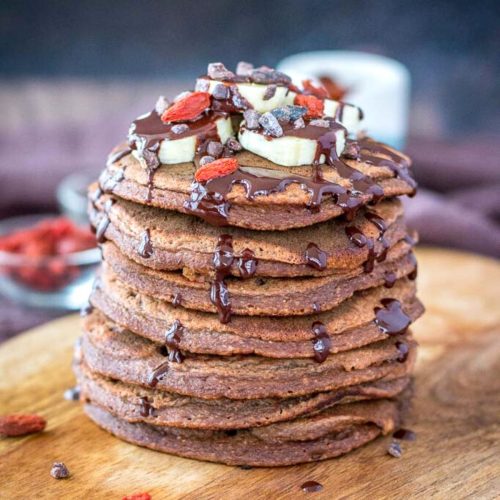
    Chocolate Banana Pancakes made with oatmeal topped with melted dark chocolate

    Chocolate Banana Pancakes

    These Chocolate Banana Pancakes are too good to be true. They are thick, fluffy, and loaded with dark chocolate flavor. Totally guilt-free, made without any added sugars, filled with heart-healthy OATS. So good!

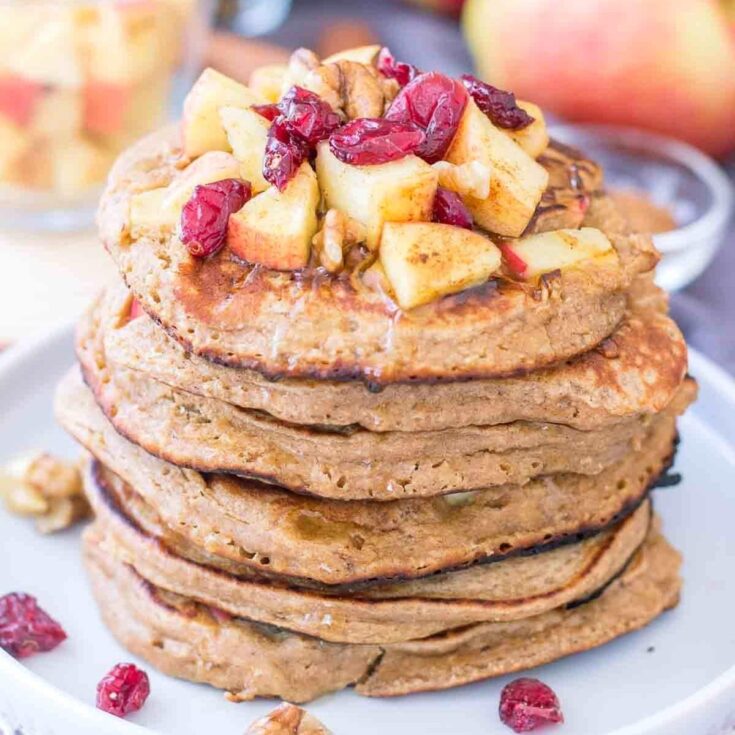
    Apple Oatmeal Pancakes featured image

    Apple Oatmeal Pancakes

    Sunday breakfast. Sorted! These Apple Oatmeal Pancakes are such a treat. Thick, fluffy, sweet. Filled with fresh apples and wonderful spices. Super filling, packed with healthy oats, made without refined unhealthy sugar. Total family win!

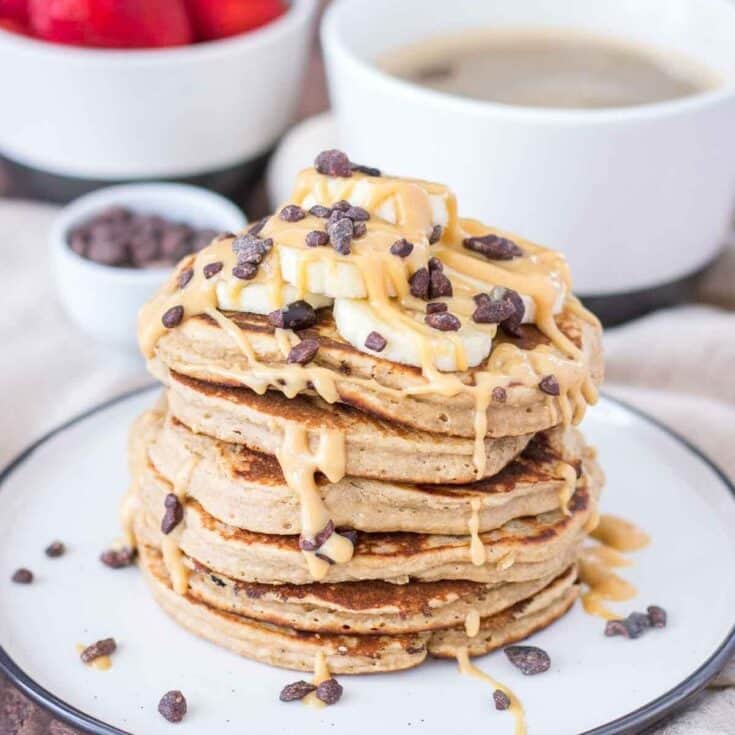
    Peanut Butter Oatmeal Pancakes featured image

    Peanut Butter Oatmeal Pancakes

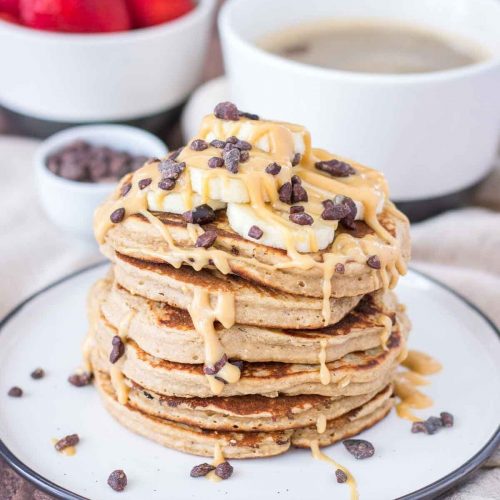
    These Peanut Butter Pancakes are amazing. Fluffy, sweet, loaded with flavor. Incredibly delicious! + Made with simple ingredients and without added sugars! Wholesome, satisfying, and 100% addictive. Perfect for celebrating a Pancake Day!

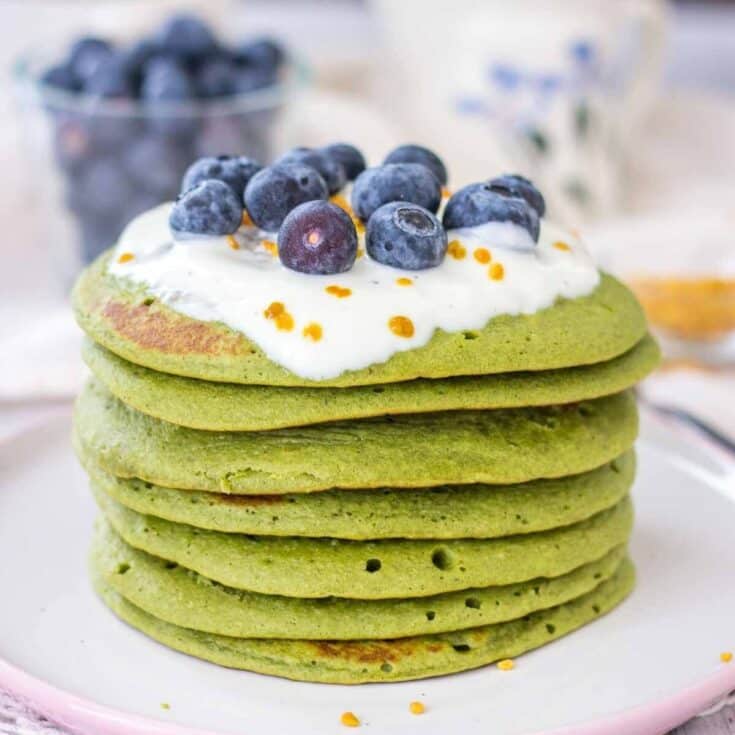
    Matcha Pancakes featured image

    Matcha Pancakes

    Ready to completely rock Pancake Day this year?! Try these Matcha Pancakes. They are sweet, vanilla flavored, and filled with spinach & matcha! Easy to make, filling, and packed with heart-healthy oats. Perfect healthy breakfast, brunch, or quick dessert.

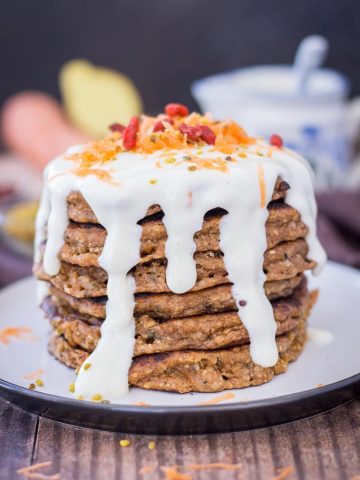
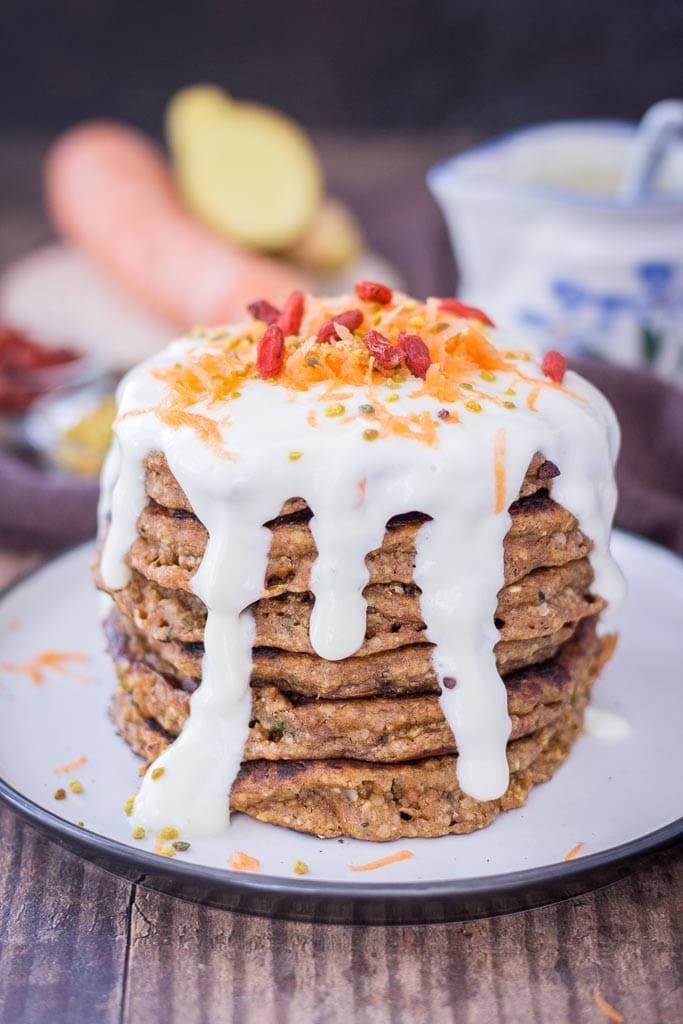
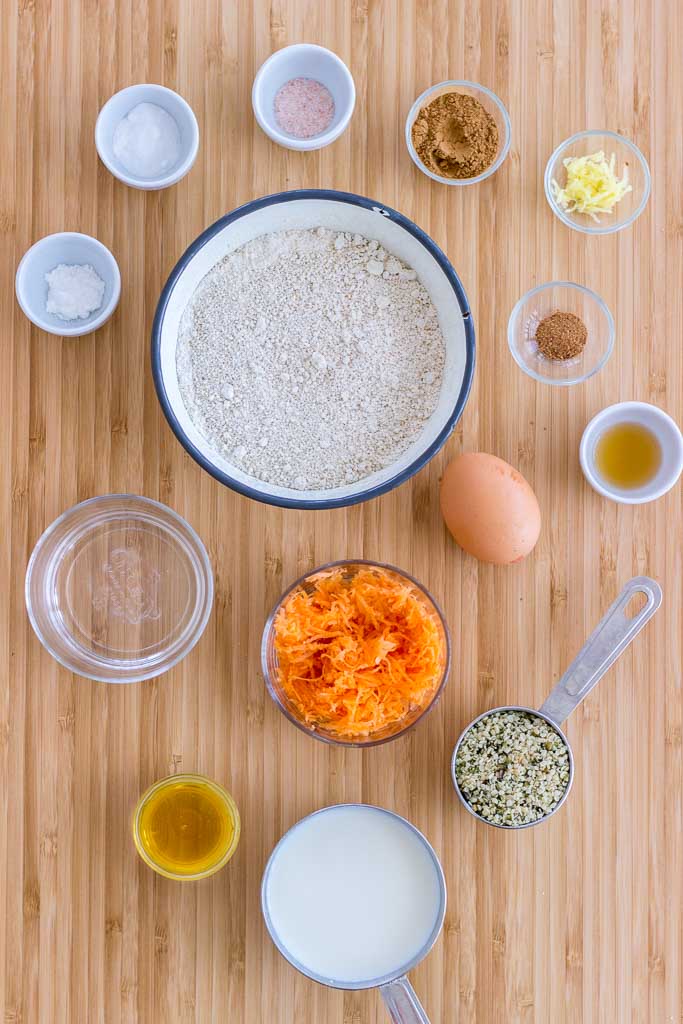
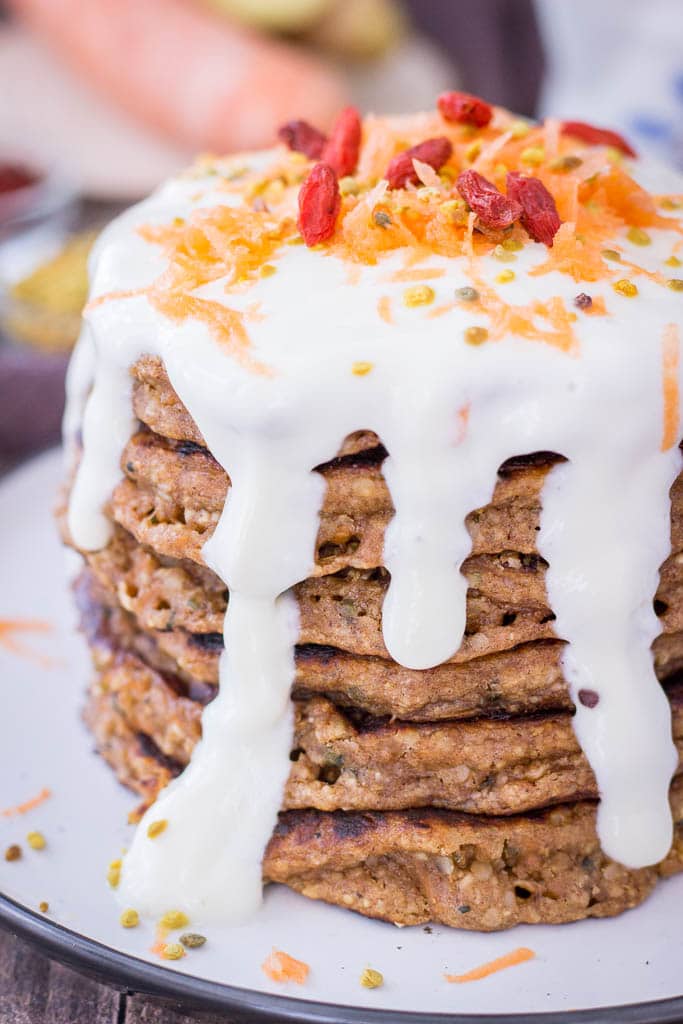
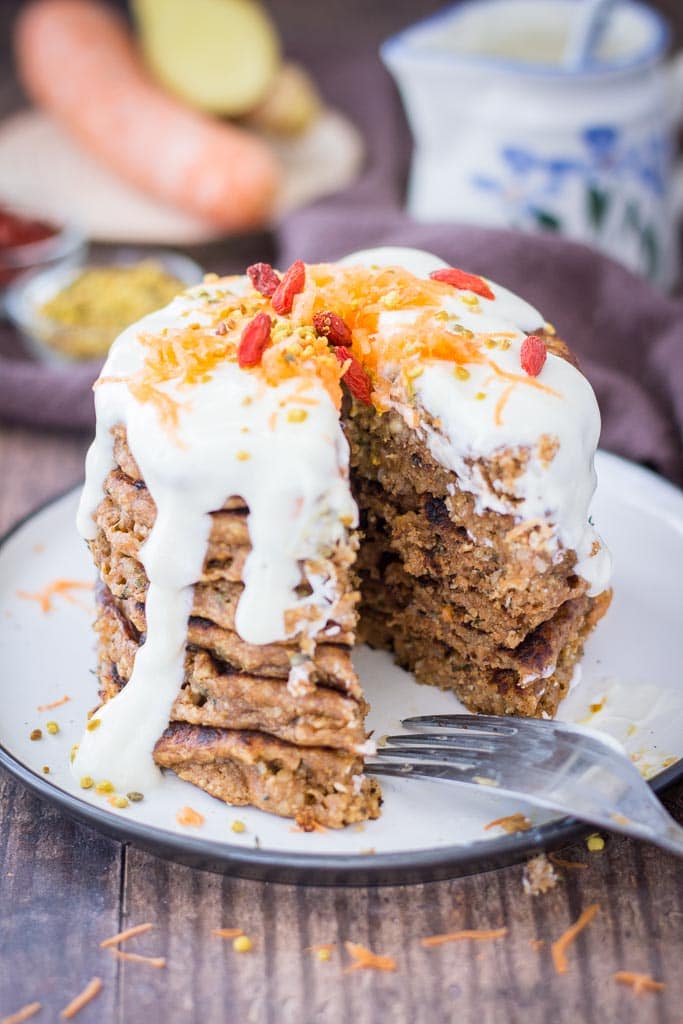
    Carrot Cake Pancakes topped with Maple Cream Cheese drizzle

    Carrot Cake Pancakes

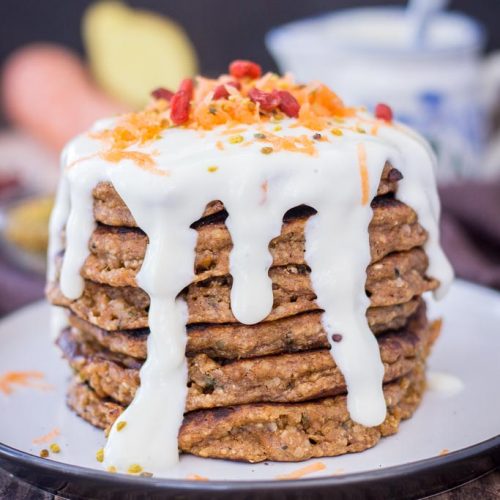
    Carrot cake fans, rejoice! These Carrot Cake Pancakes are a clever way to enjoy your favorite cake straight in the morning. These pancakes are fluffy, sweet, and full of beautiful spices. Perfect for mornings or for celebrating a Pancake Day

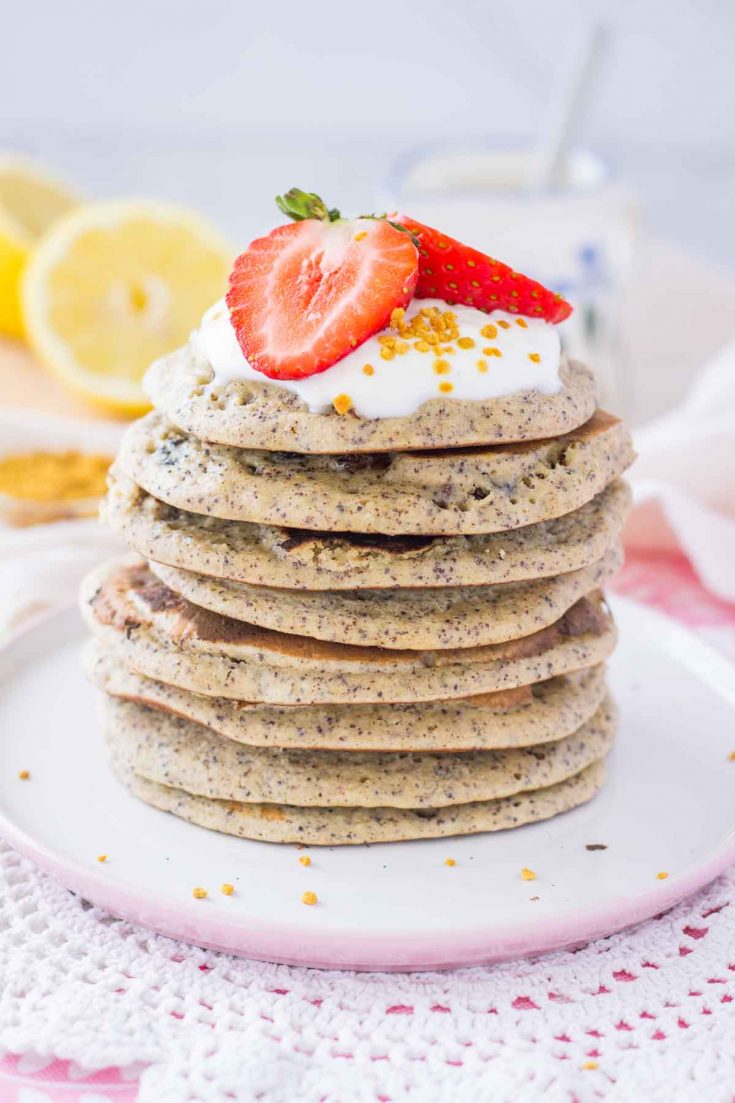
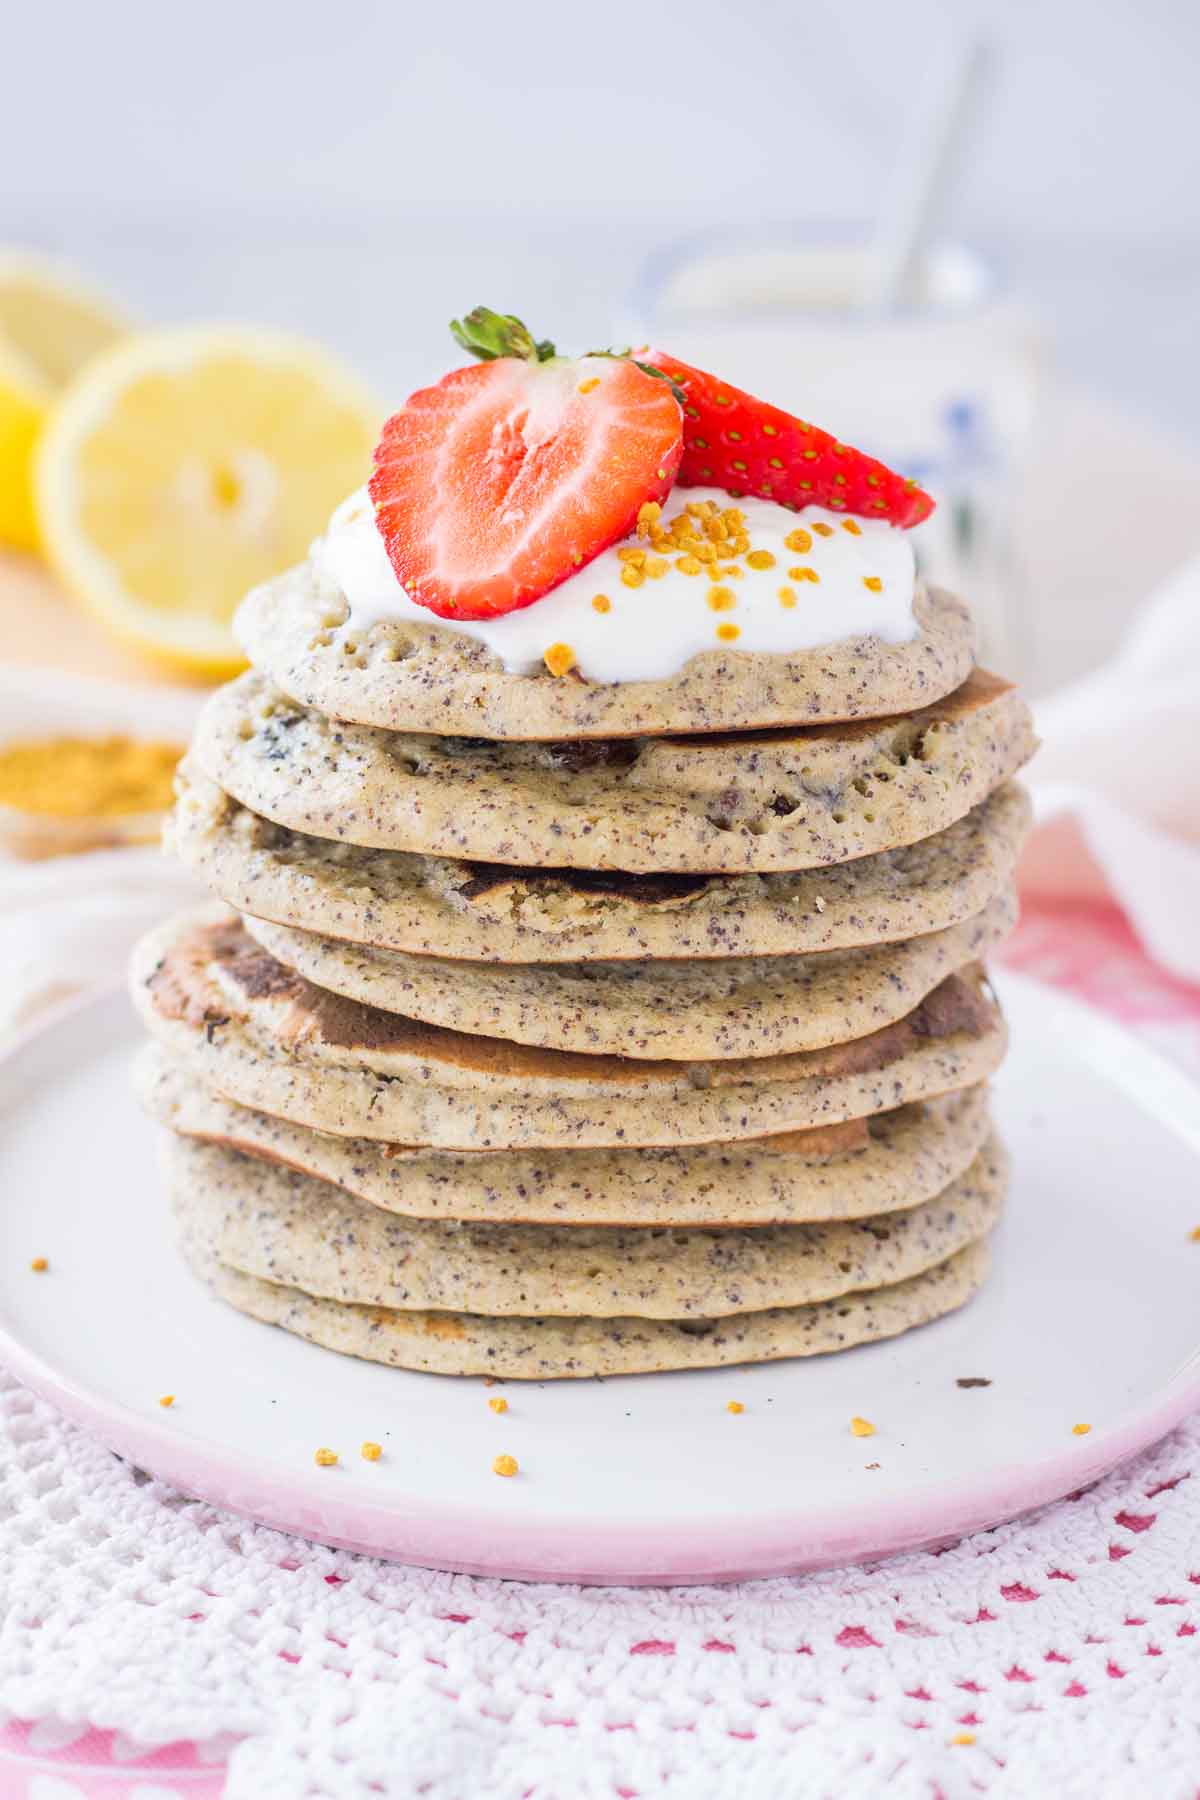
    Lemon Poppy Seed Pancakes served on a plate topped with yogurt and strawberries.

    Lemon Poppy Seed Pancakes

    These Lemon Poppy Seed Pancakes are gorgeous. Thick and fluffy, sweet and tangy. Bright and so refreshing. They are so easy to make with simple ingredients. Perfect for celebrating Pancake Day, cozy weekend mornings, or any other day you want to treat yourself.

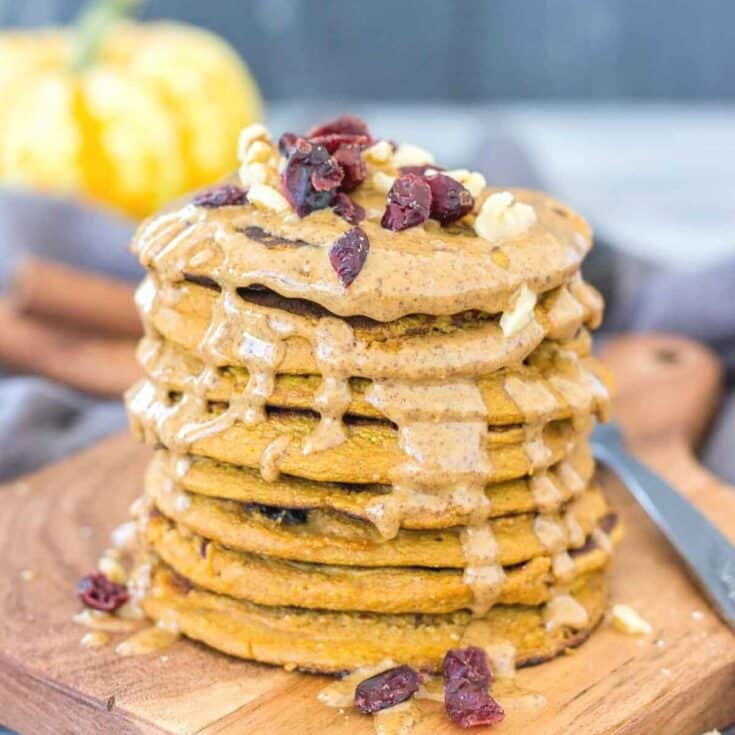
    Pumpkin Oatmeal Pancakes featured image

    Pumpkin Oatmeal Pancakes

    These Pumpkin Pancakes are such a delicious breakfast. They are sweet and incredibly tasty, filled with amazing flavors. Nutty, cozy, delightful! Packed with healthy oats and made without unhealthy processed sugars.

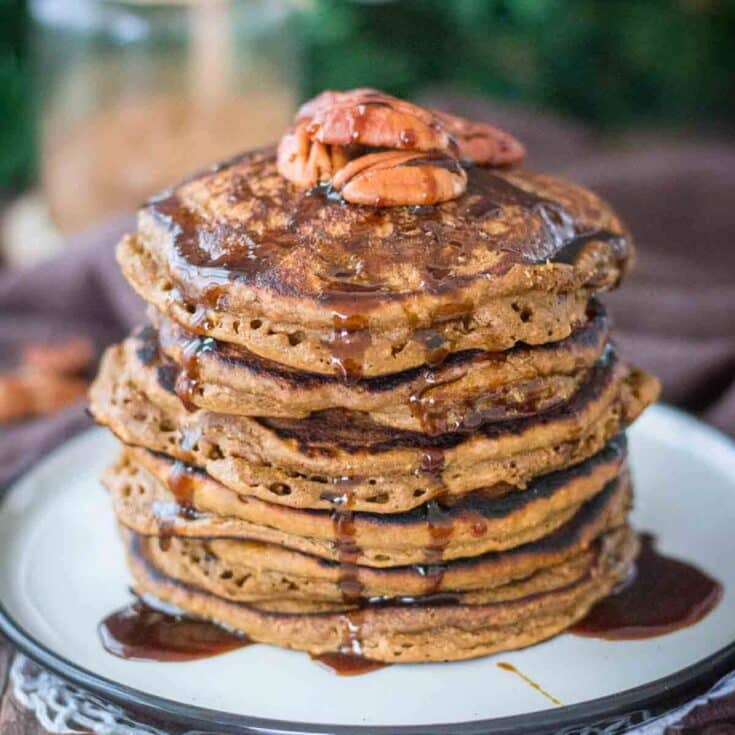
    Gingerbread Pancakes featured image

    Gingerbread Pancakes

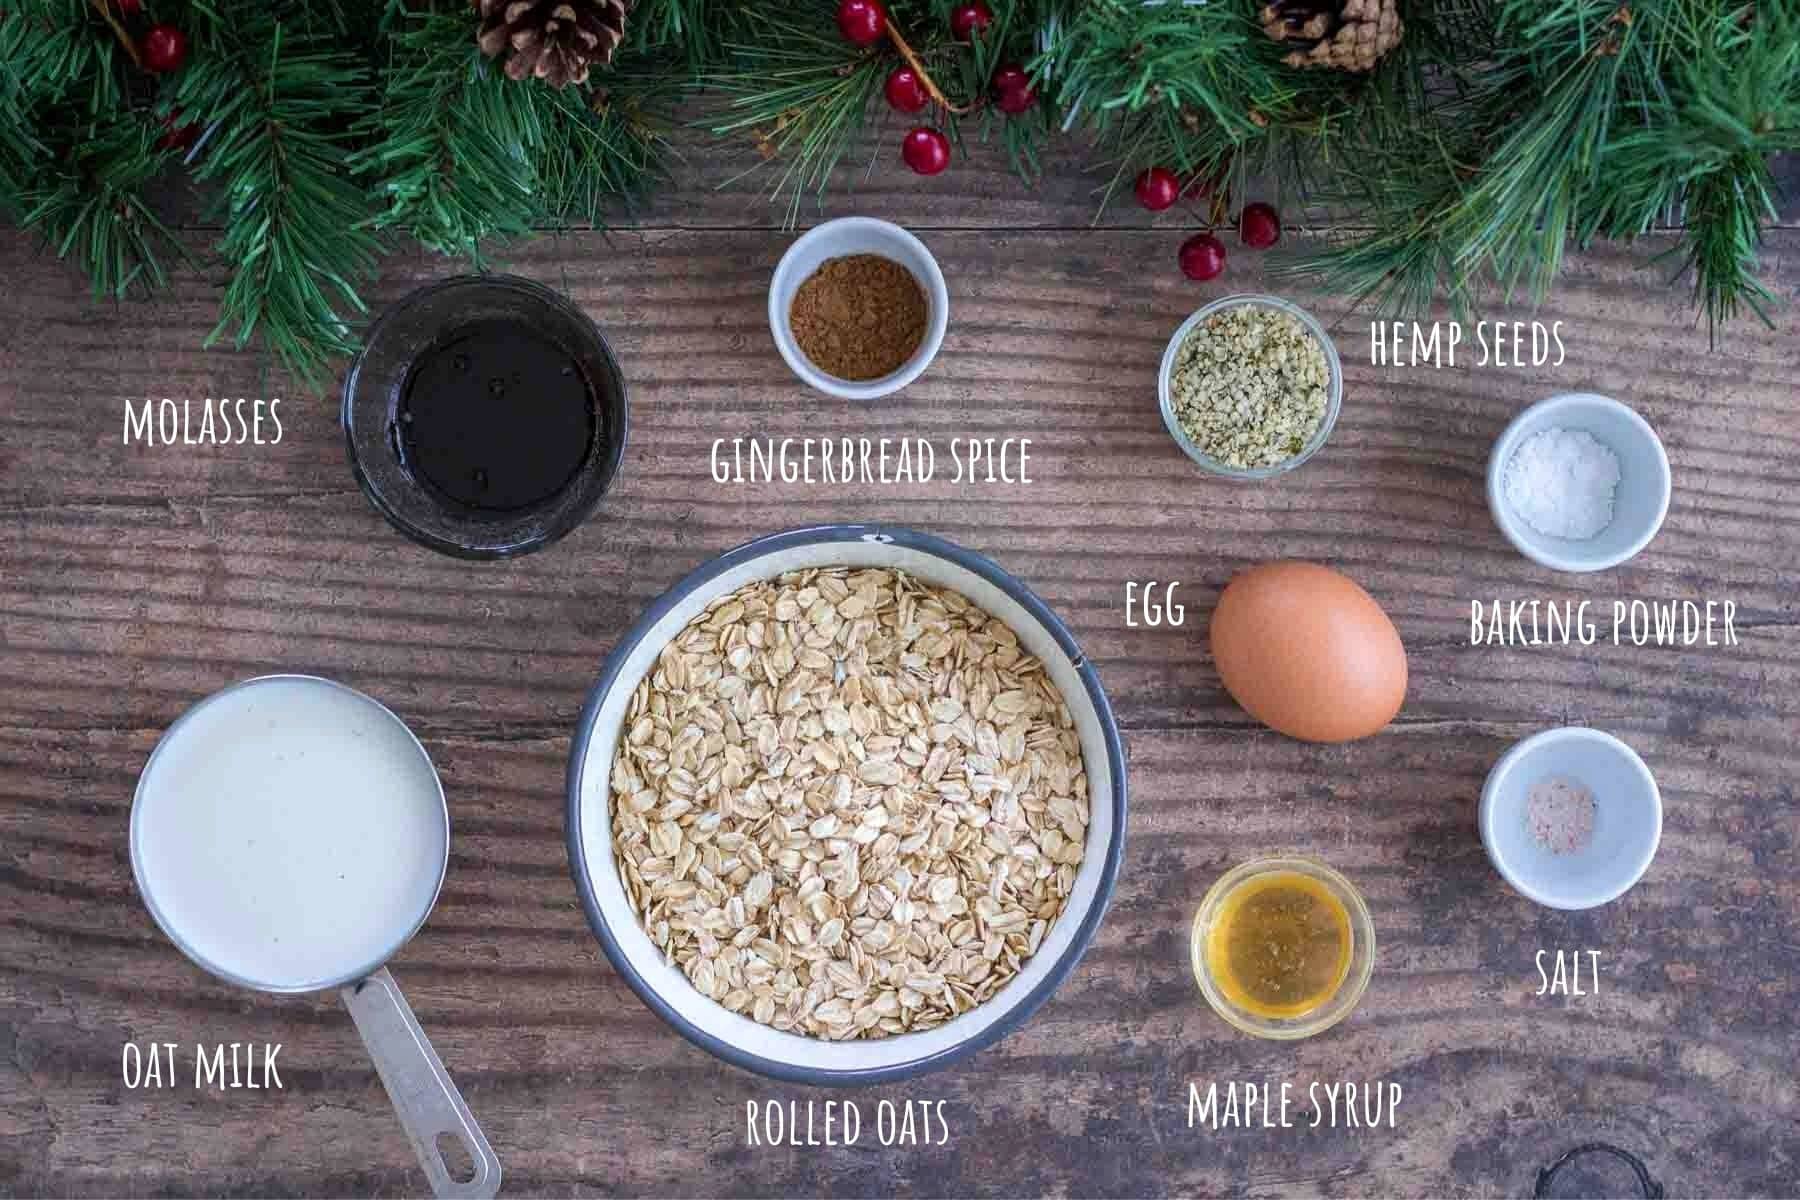
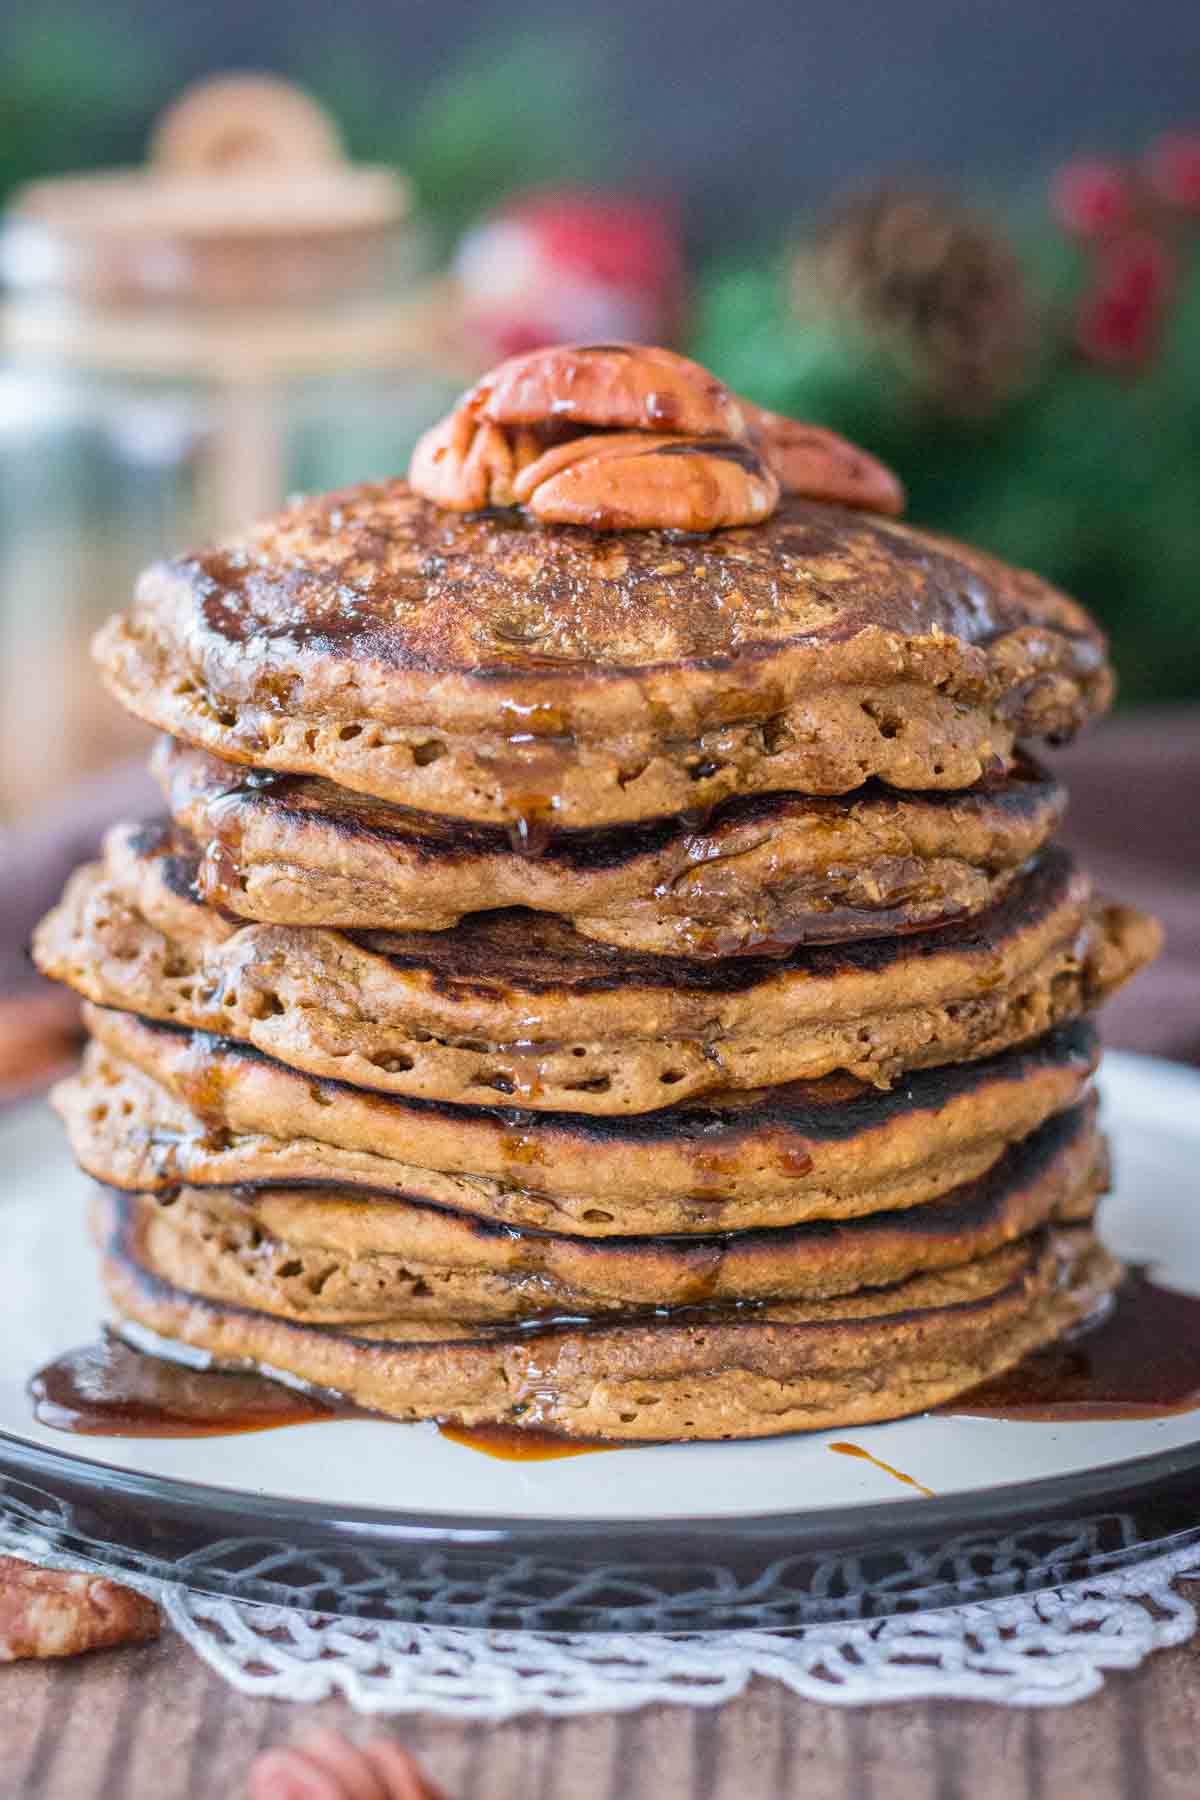
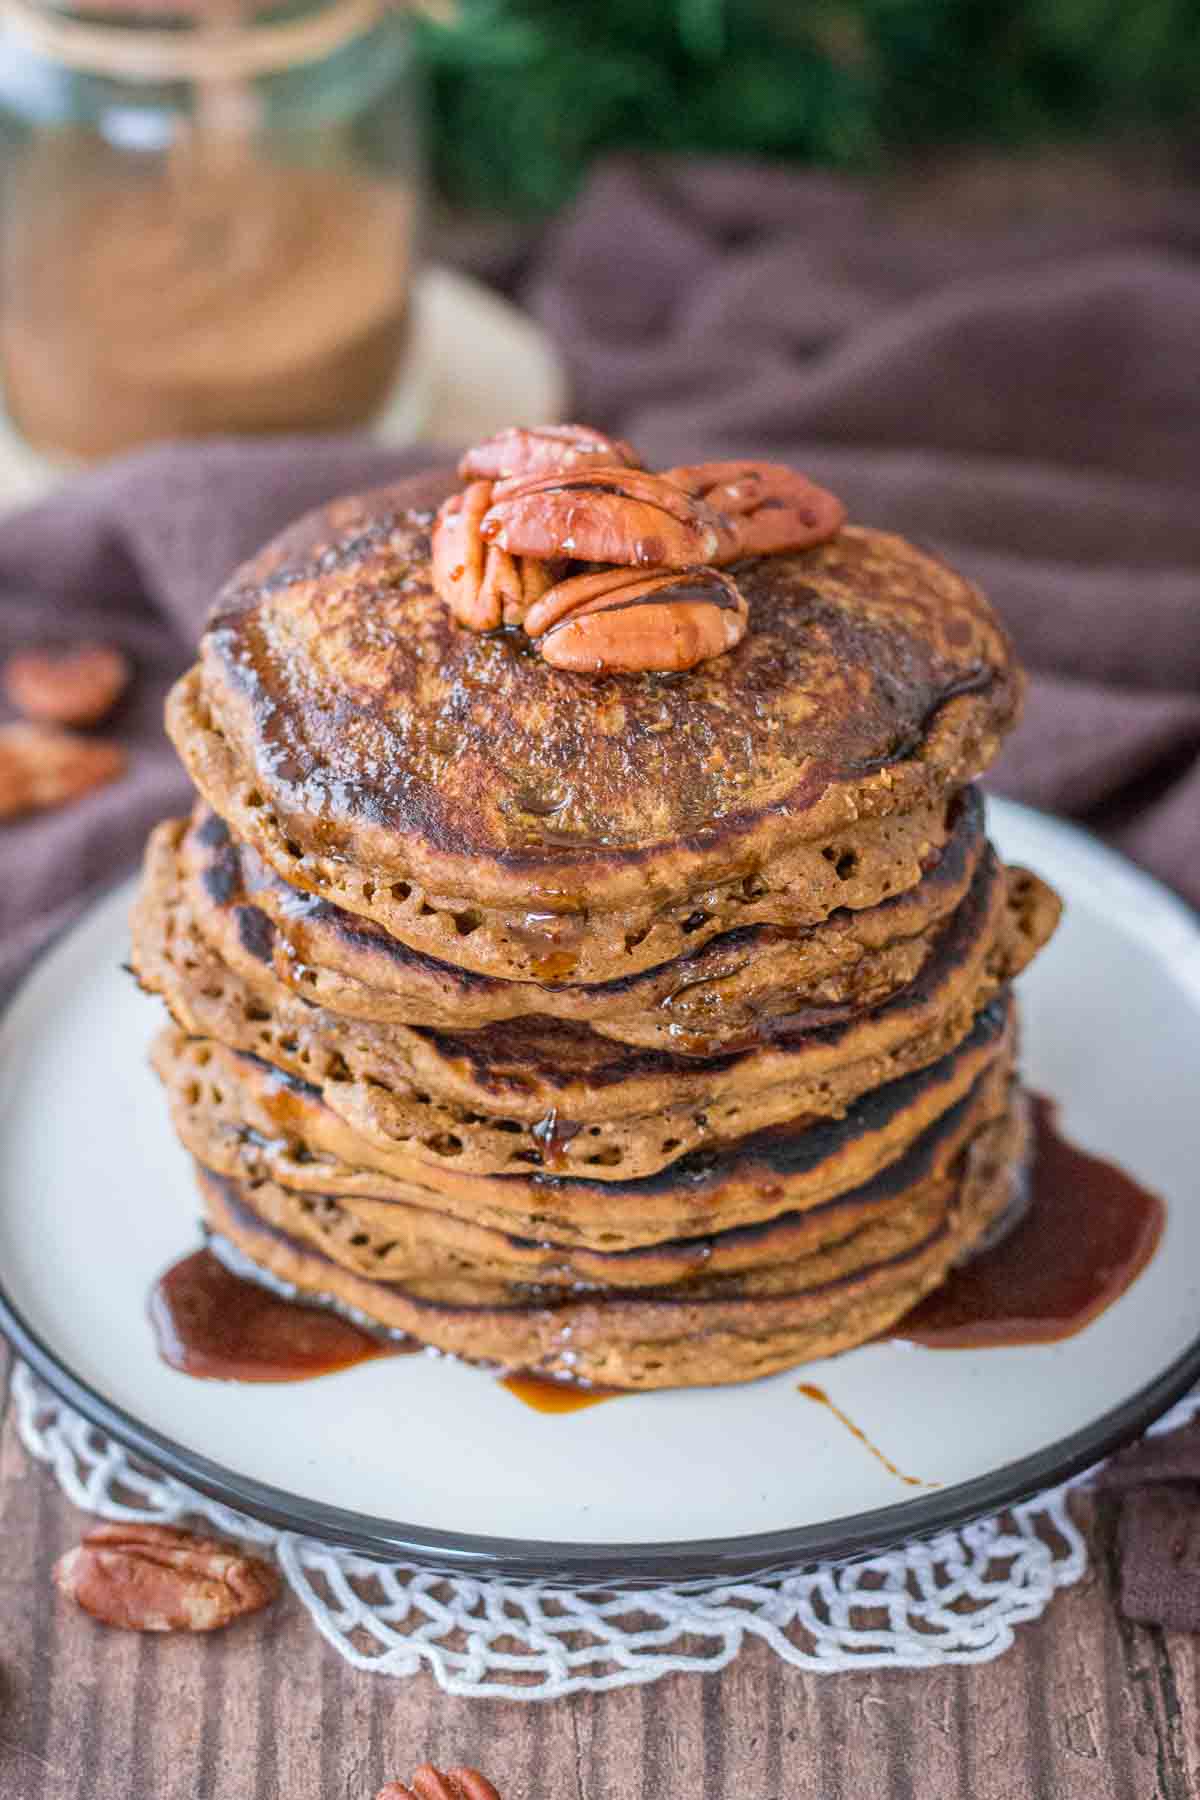
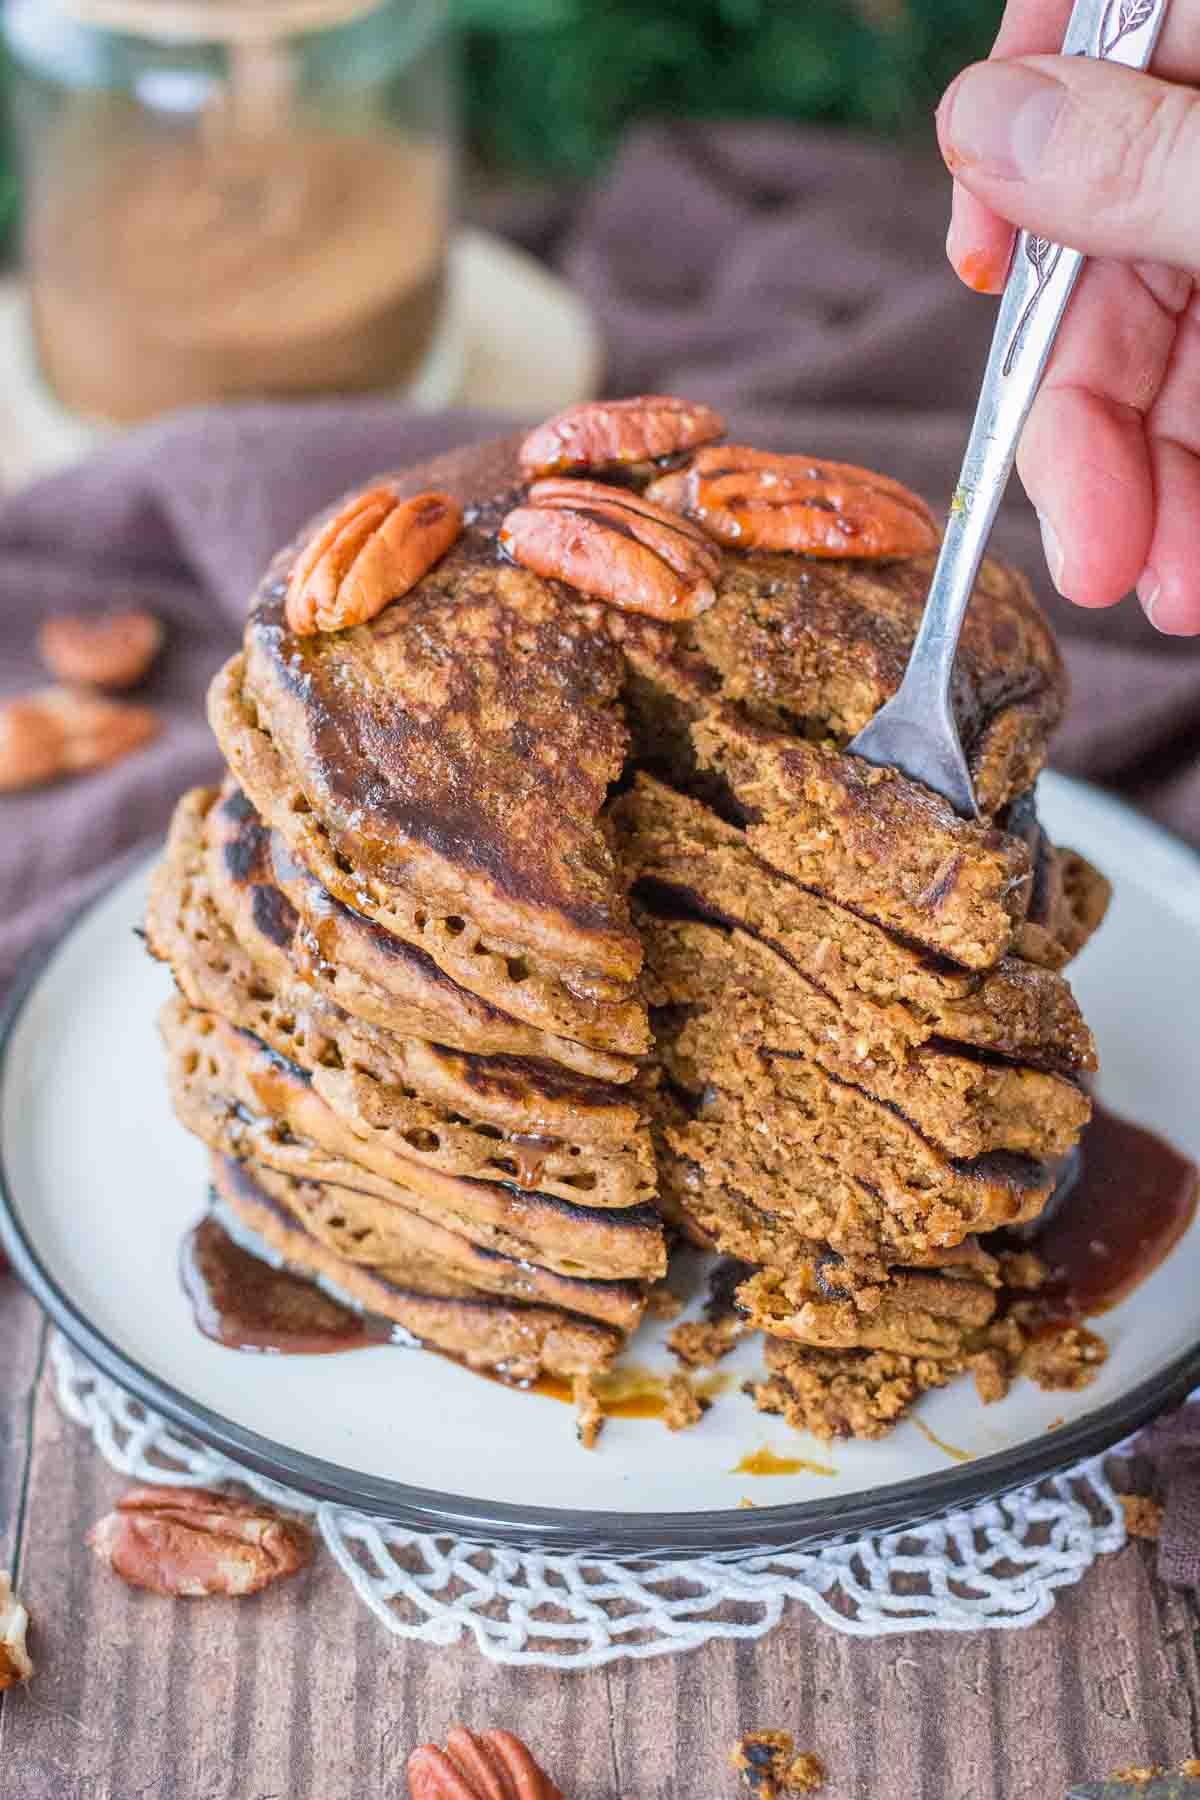
    It's always a good time for Gingerbread Pancakes! They are fluffy and flavorful, loaded with deep dark molasses and beautiful spices. So good! And it takes 15 minutes to make them with a few simple pantry ingredients.

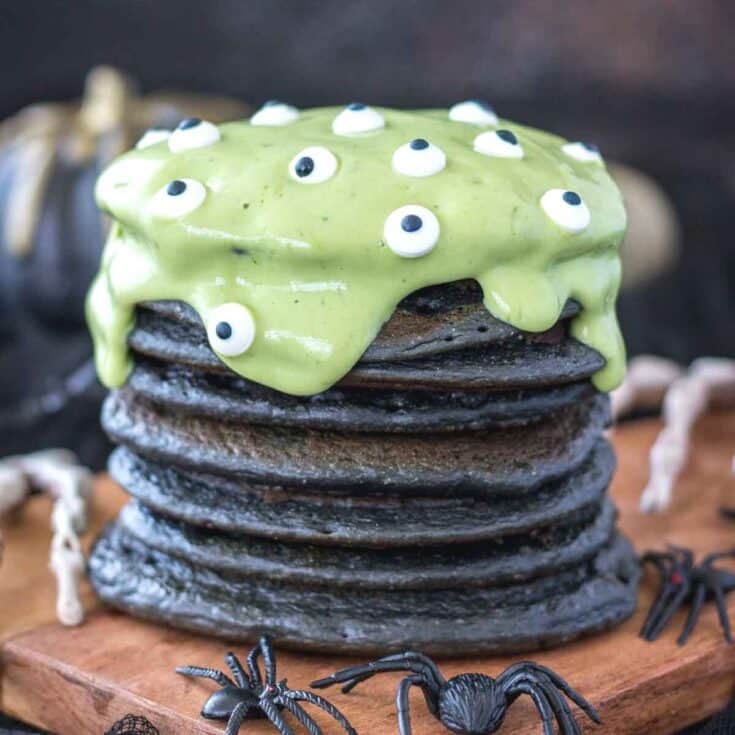
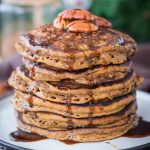
    Halloween Pancakes featured image

    Halloween Pancakes

    Looking for a fun and completely different pancake recipe? These spooky Halloween Pancakes are the perfect thing. They are fun, sweet, and vanilla-flavored, made with wholesome ingredients, and without added sugar.

    Matcha Protein Shake

    February 8, 2022 by Natalie 45 Comments

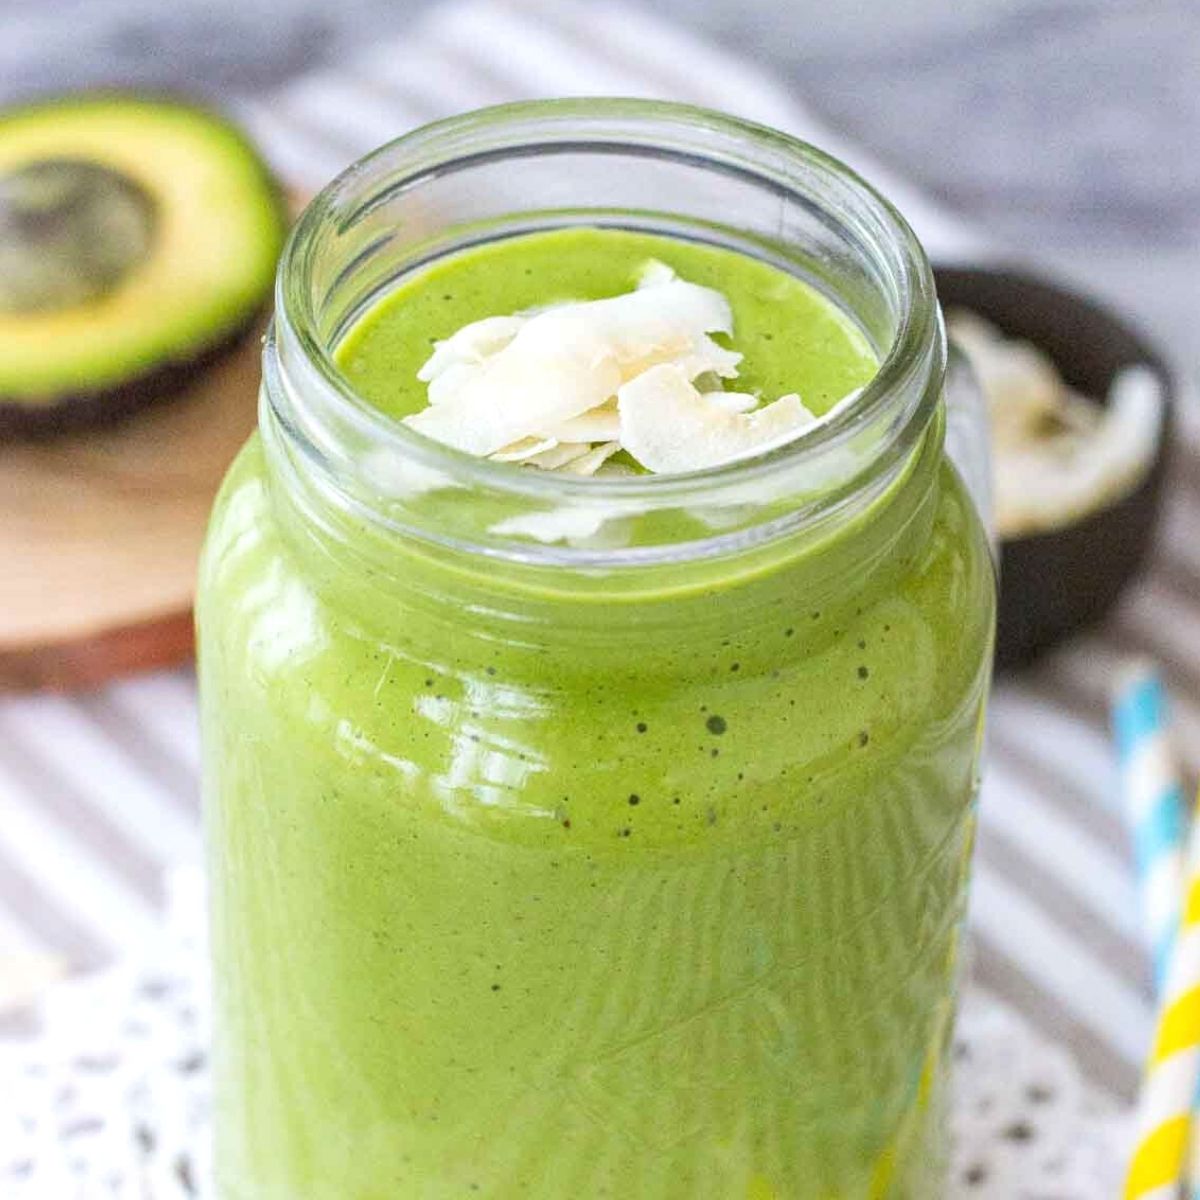
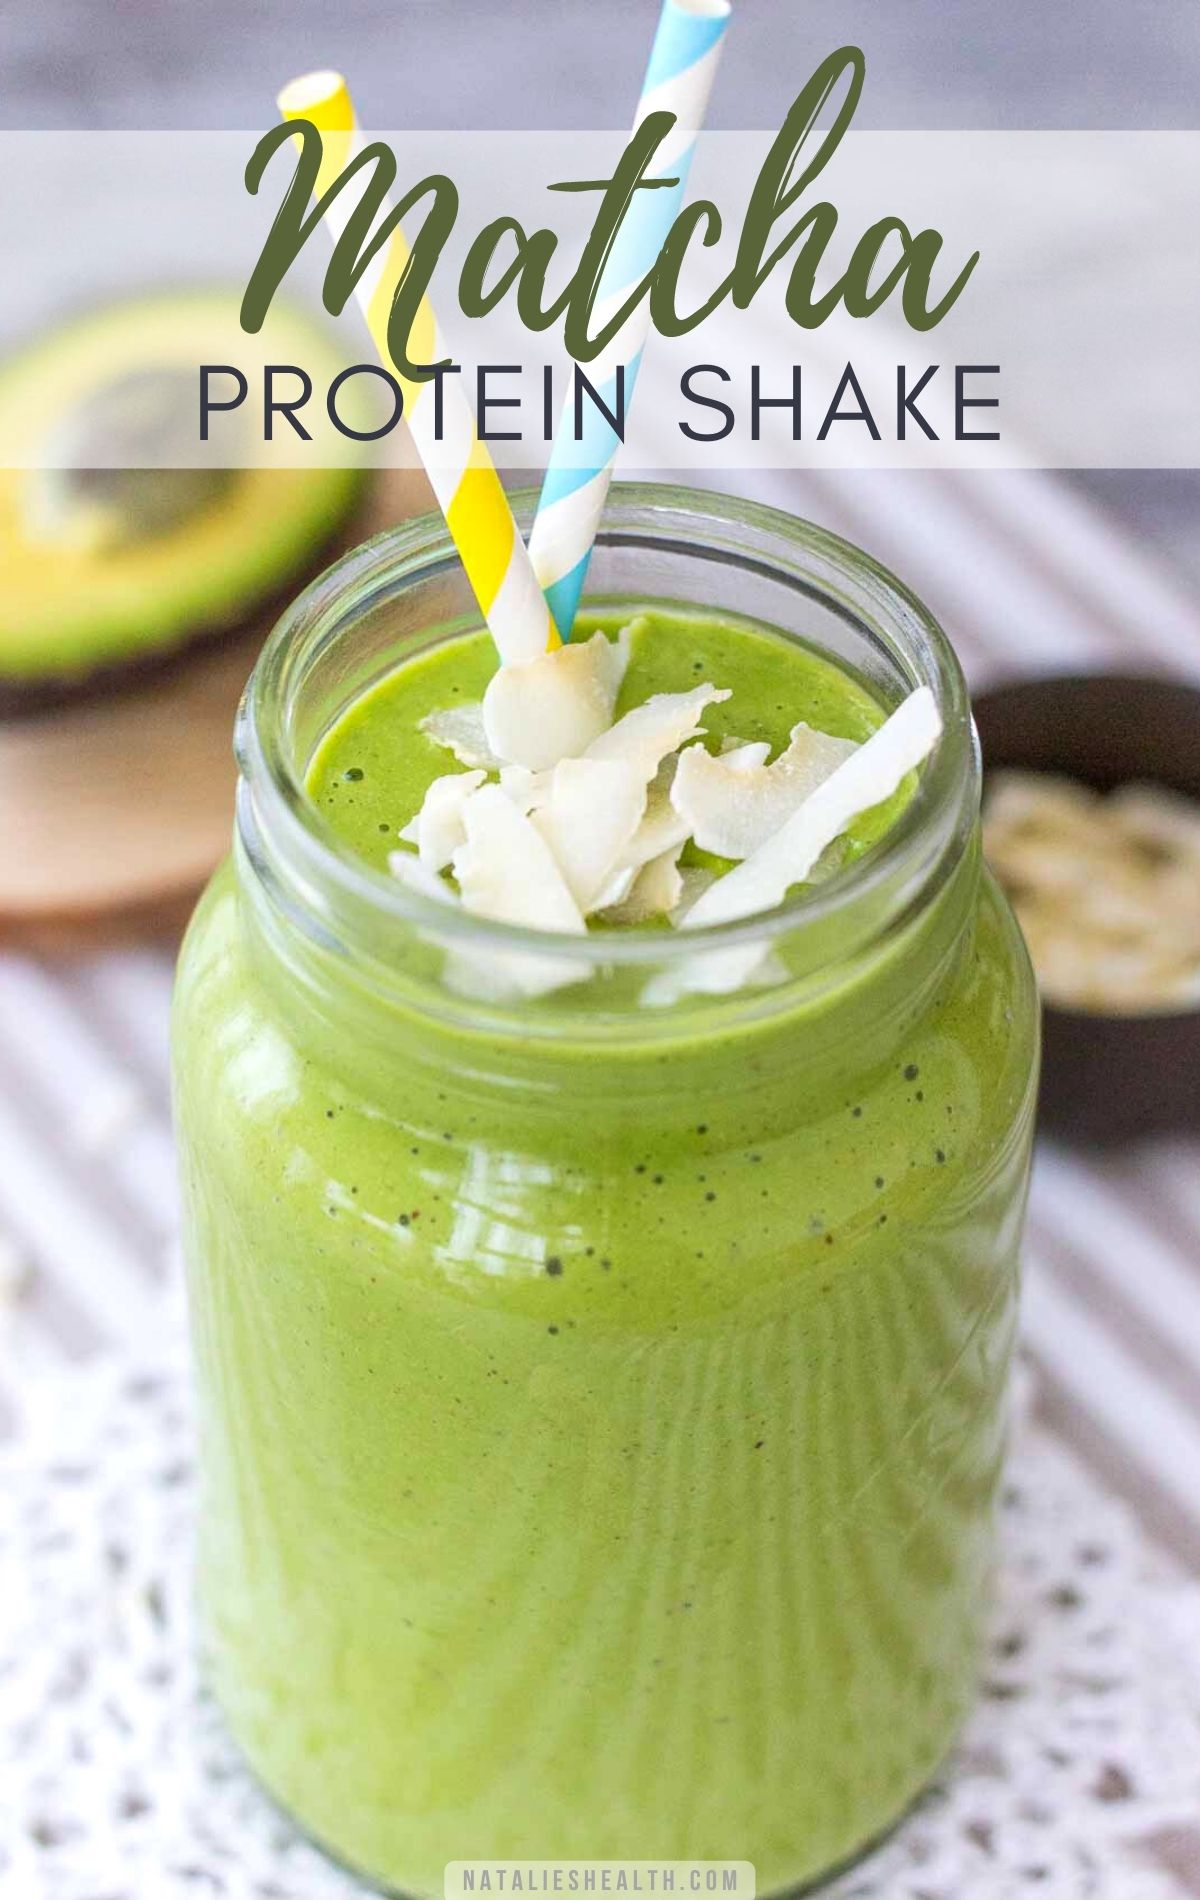
    Matcha Protein Shake

    This fantastic Matcha Protein Shake will seriously blow your mind. It's extra thick, nutty and so creamy. Vibrant, flavorful, and packed with superfoods - spinach, matcha, avocado. So healthy! Ideal breakfast or pre-workout meal.

    [feast_advanced_jump_to]
    Matcha Protein Shake PIN image

    For me, breakfast has to be delicious, no compromising. It's the first meal of the day, after night fasting and I expect all my senses to explode. But breakfast also has to be healthy, filling, and balanced. Meaning it has to include fiber, fats, and proteins. This magical trio keeps blood sugar stable keeping us full for hours.

    When I'm making smoothies or shakes, I always combine ingredients to get delicious flavors, but also to create a complete meal. Using wholesome ingredients and superfoods I ensure my body gets all it needs for the busy day ahead.

    This Matcha Protein Shake is quite perfect. It's sweet, nutty, extra thick, packed with superfoods, like avocado, spinach, and incredible matcha. It's a complete, well-balanced meal with a neat bonus - it has no added sugars.

    Why this protein shake is so good?

    • It's incredibly thick, creamy, extra delicious.
    • It's packed with proteins and superfoods - avocado, matcha, spinach.
    • It's very filling, great to add to your weight loss meal list.
    • It's made with wholesome ingredients and has no added sugar.
    • It's easy, made within minutes and so satisfying.
    • Great breakfast, pre-workout meal or afternoon pick-me-up drink!

    Ingredients used

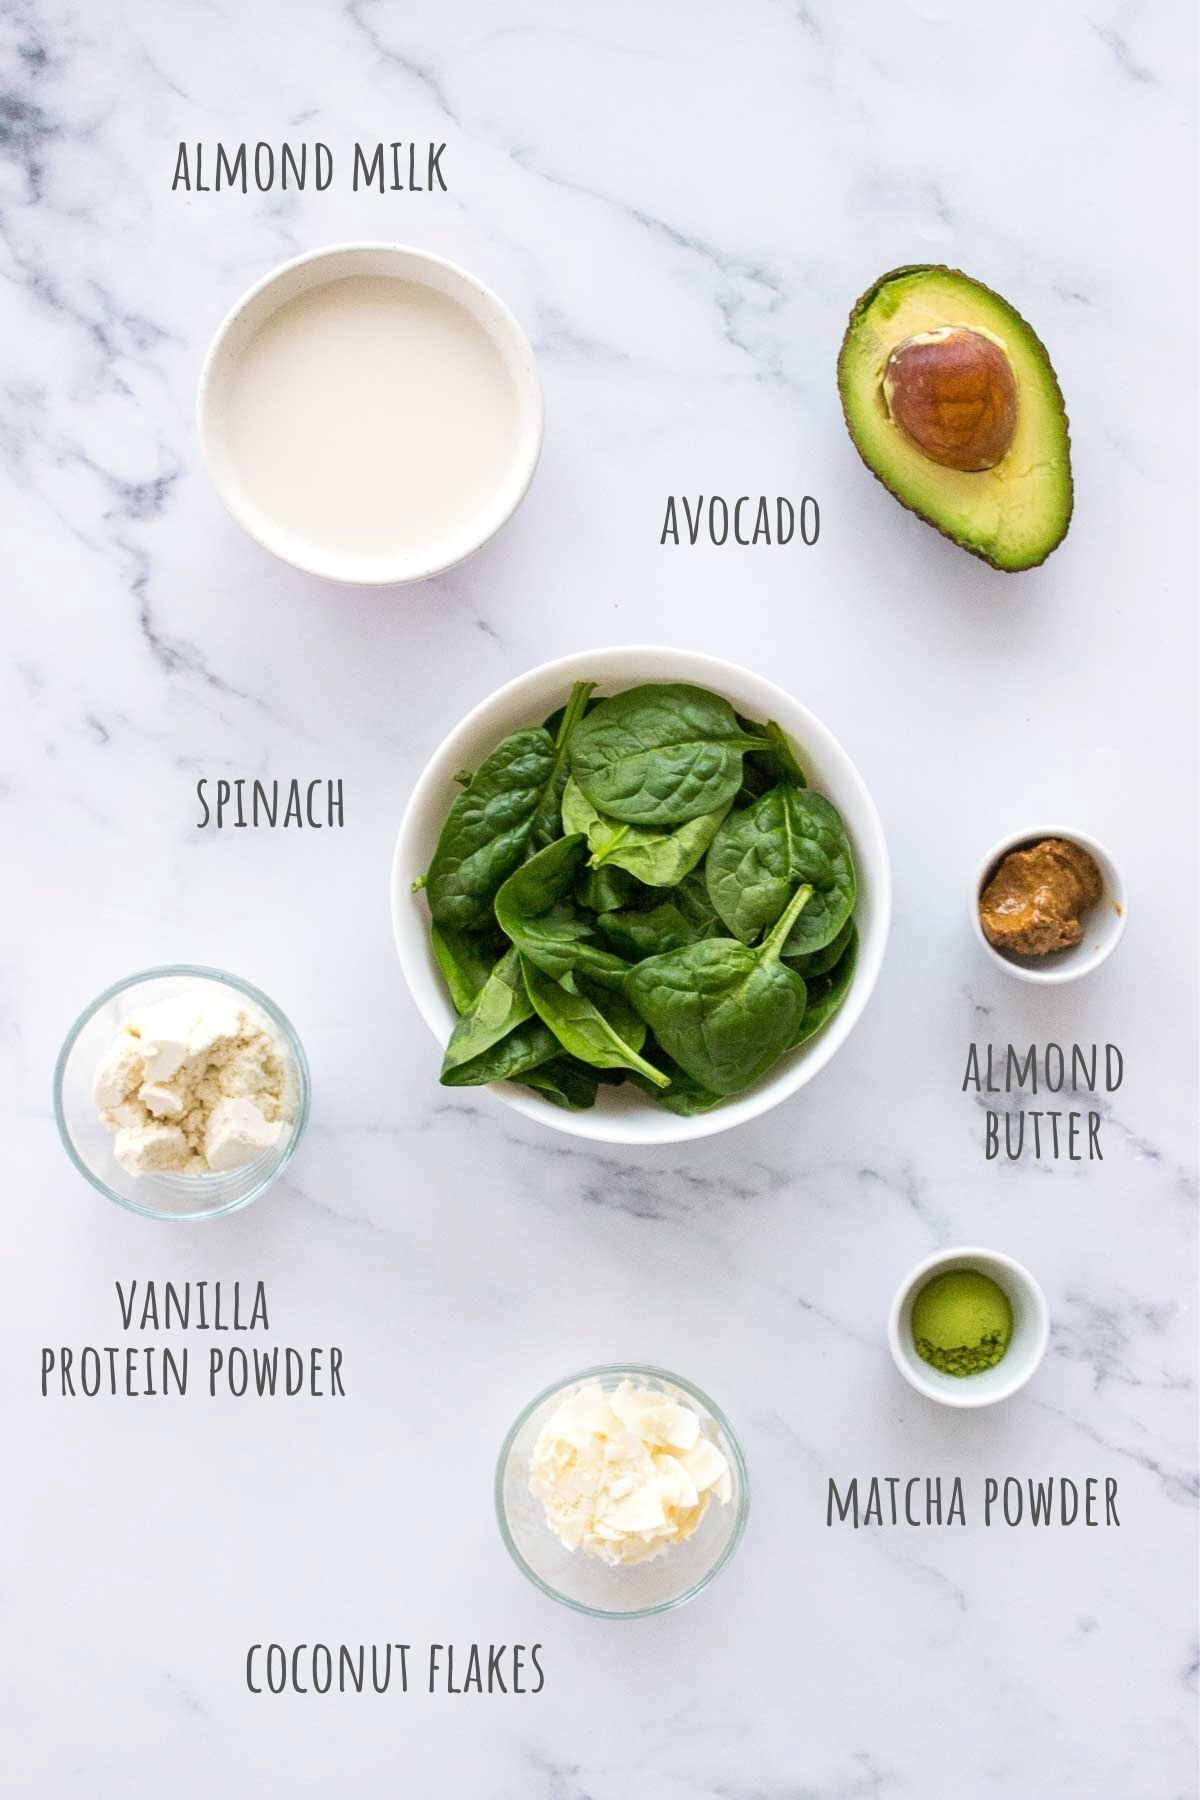
    You will need just a few simple ingredients for this matcha protein shake recipe.

    Matcha Protein Shake ingredients
    • Milk: I used unsweetened almond milk, but you can use any milk you like in this recipe, dairy or plant-based.
    • Avocado: He's my favorite fatty friend and a great addition to smoothies and protein shakes. He makes shakes extra creamy, but importantly, he's packed with essential heart-healthy and anti-inflammatory Omega-3’s. Avocado is also rich in magnesium, potassium, and fiber. Quite a superfood with many health benefits. (1)
    • Spinach: It's a superfood, loaded with tons of nutrients in a low-calorie package. He's important for skin, hair, and bone health. He also provides protein, iron, vitamins, and minerals. (2) I used mild and delicate baby spinach.
    • Matcha powder: I used pure ceremonial grade matcha. Matcha is packed with antioxidants. It boosts metabolism and help burns calories.
    • Almond butter: I used creamy almond butter without added salts. Almond butter is a very good source of proteins and healthy monounsaturated and polyunsaturated fats, as well as fibers. (3) A great addition to smoothies and shakes as it makes them more nutritious.
    • Protein powder: I like to use a vanilla-flavored protein powder.
    • Coconut flakes: They are product of dried coconut meat and great source of healthy medium-chain triglycerides (MCTs), fiber and protein. (4)
    Pouring Matcha Protein Shake into glass

    How to make Matcha Protein Shake

    Making this healthy matcha shake is super easy. All you need is a good blender and 5 minutes of your time.

    Step by step instructions

    • Start with measuring all the ingredients. I like to use measuring cups.
    • Take the blender and add all ingredients. Note: add wet ingredients first for easier blending.
    • Turn on the blender and mix at high speed until you get a smooth texture.
    • If the shake is too thick, add a little more liquid – milk or water. Blend again until shake is smooth.
    • Taste the shake and add additional sweetener if you like. (See "Sweetener recommendation" section for my suggestions)
    • Transfer the shake into a shaker or smoothie cup. 
    • Add toppings (optional): I used coconut flakes. Be creative here and add toppings you like. 
    • Serve and enjoy!
    • Makes 1 cup that serves 1 person as a full meal, or 2 people as a light meal.
    Topping matcha green tea shake with coconut

    Substitutions

    • You can use any dairy or plant-based milk here.
    • You can substitute almond butter with peanut butter, or any other nut-butter.
    • You can add seeds like chia seeds, ground flax seeds, or hemp seeds to make shake more nutritious.
    • You can substitute spinach with fresh kale.
    • You can substitute coconut flakes with coconut oil or MCT oil.

    Smoothie variations

    Make it vegan: Use plant-based milk. Use plant-based protein powders.

    This smoothie is keto. To make it even more keto-friendly, use MCT oil instead of coconut flakes. Omit almond butter to cut down carbs. Alternatively use ½ cup unsweetened almond milk and ½ cup coconut cream.

    Matcha green tea Shake

    Tips for storing

    • Store in a shaker with a lid and keep refrigerated for up to one day.
    • If you left the shake standing long it will set. Don't forget to shake or stir it before drinking!
    • Remember, all smoothies and shakes oxidate when left standing. That's not bad. But it's best to have the smoothie fresh.

    Recipe tips

    When you're adding ingredients to a blender, always add the liquids first. Doing this will help your blender run easily and it will prevent lumps.

    Use a high-power blender to ensure everything blends well and shake is silky smooth. 

    Frozen avocado is the best for making this green tea protein shake. It blends into a thick very refreshing drink with a cold punch.

    If you don't have a frozen avocado, just slice the avocado and pop it in the freezer for at least 1 hour. Alternatively, just use ice cubes.

    If the shake is too thick, add more liquids, water (recommended), or milk, until you achieve desired consistency. It should be creamy, but not too dense. 

    Matcha Protein Shake in a glass jar with straw

    Sweetener recommendation

    This protein matcha shake uses vanilla flavored protein powder, which contains a low-carb sweetener that gives enough sweetness. I don't recommend adding any extra sugar. But if you find this shake not sweet enough, you can add some. Just be mindful.

    • Add 1-2 dates, date syrup, liquid honey, or maple syrup.
    • If you are using dates, make sure you soak them in warm water for at least 10 minutes. Drain them before using them.
    • Use liquid stevia or any liquid low-carb sweetener for the keto / low-carb option.
    • Coconut sugar or any other cristal sugar won't work well here. It will not dissolve well in a cold smoothie mixture.
    Matcha Protein Shake in a glass jar with straw

    This Matcha Protein Shake will definitely get you excited to wake up in the morning. The powerful combination of fiber, healthy fats and protein makes it very filling. Added almond butter and coconut flakes make this matcha shake extra delicious, extra nutty.

    It's the best matcha protein shake you'll ever try - an ideal breakfast, pre-workout meal, or afternoon pick-me-up drink. Give it a try, and let me know what you think in the comments below.

    You may also like:

    • Matcha Smoothie
    • Coffee Protein Smoothie
    • Chocolate Avocado Smoothie

    Recipe

    Matcha Protein Shake
    Print Recipe
    4.99 from 171 votes

    Matcha Protein Shake

    This fantastic Matcha Protein Shake will seriously blow your mind. It's extra thick, creamy, and luxurious. Vibrant, flavorful, and packed with superfoods - spinach, matcha, avocado. So healthy! 
    Prep Time5 minutes mins
    Total Time5 minutes mins
    Course: Breakfast
    Cuisine: American, International
    Keyword: matcha green tea protein shake, matcha protein shake, matcha protein shake recipe, matcha protein smoothie, matcha shake recipe, matcha shakes
    Servings: 1 serving
    Calories: 569kcal
    Author: Natalie

    Equipment

    • Blender

    Ingredients

    • 1 cup unsweetened almond milk
    • 1 scoop Vanilla protein powder
    • ½ avocado
    • 1 cup spinach I used baby spinach
    • 1 teaspoon matcha powder
    • 1 tablespoon almond butter
    • ¼ cup coconut flakes

    Instructions

    • Add all ingredients into a blender. Note: add wet ingredients first for easier blending.
    • Turn on the blender and mix at high speed until you get a smooth texture.
    • If the shake is too thick, add a little more liquid – milk or water. Blend again until shake is smooth.
    • Taste the shake and add additional sweetener if you like. (See "Sweetener recommendation" section for my suggestions)
    • Transfer the shake into a shaker or smoothie cup.
    • Add toppings (optional): I used coconut flakes. Be creative here and add toppings you like.
    • Serve and enjoy!

    Notes

    Makes 1 cup that serves 1 person as a full meal, or 2 people as a light meal. As a measure, I used USA cup (240ml).
    Substitutions
    • You can use any dairy or plant-based milk here.
    • You can substitute almond butter with peanut butter, or any other nut-butter.
    • You can add seeds like chia seeds, ground flax seeds, or hemp seeds to make shake more nutritious.
    • You can substitute spinach with fresh kale.
    • You can substitute coconut flakes with coconut oil or MCT oil.
    Make it vegan: Use plant-based milk. Use plant-based protein powders.
    Store in a shaker with a lid and keep refrigerated for up to one day.

    Nutrition

    Serving: 1serving | Calories: 569kcal | Carbohydrates: 25g | Protein: 30g | Fat: 42g | Saturated Fat: 16g | Polyunsaturated Fat: 6g | Monounsaturated Fat: 17g | Cholesterol: 62mg | Sodium: 442mg | Potassium: 1013mg | Fiber: 13g | Sugar: 5g | Vitamin A: 3160IU | Vitamin C: 19mg | Calcium: 557mg | Iron: 3mg

    More recipes to try

    • Shamrock Protein Shake featured image
      Shamrock Protein Shake
    • Peanut Butter Protein Shake featured image
      Peanut Butter Protein Shake
    • Avocado Smoothie featured image
      Avocado Smoothie
    • Added Sugar-free Iced Coffee Protein Shake with superfoods hemp seeds
      Iced Coffee Protein Shake

    Avocado Smoothie

    January 26, 2022 by Natalie 65 Comments

    Avocado Smoothie featured image

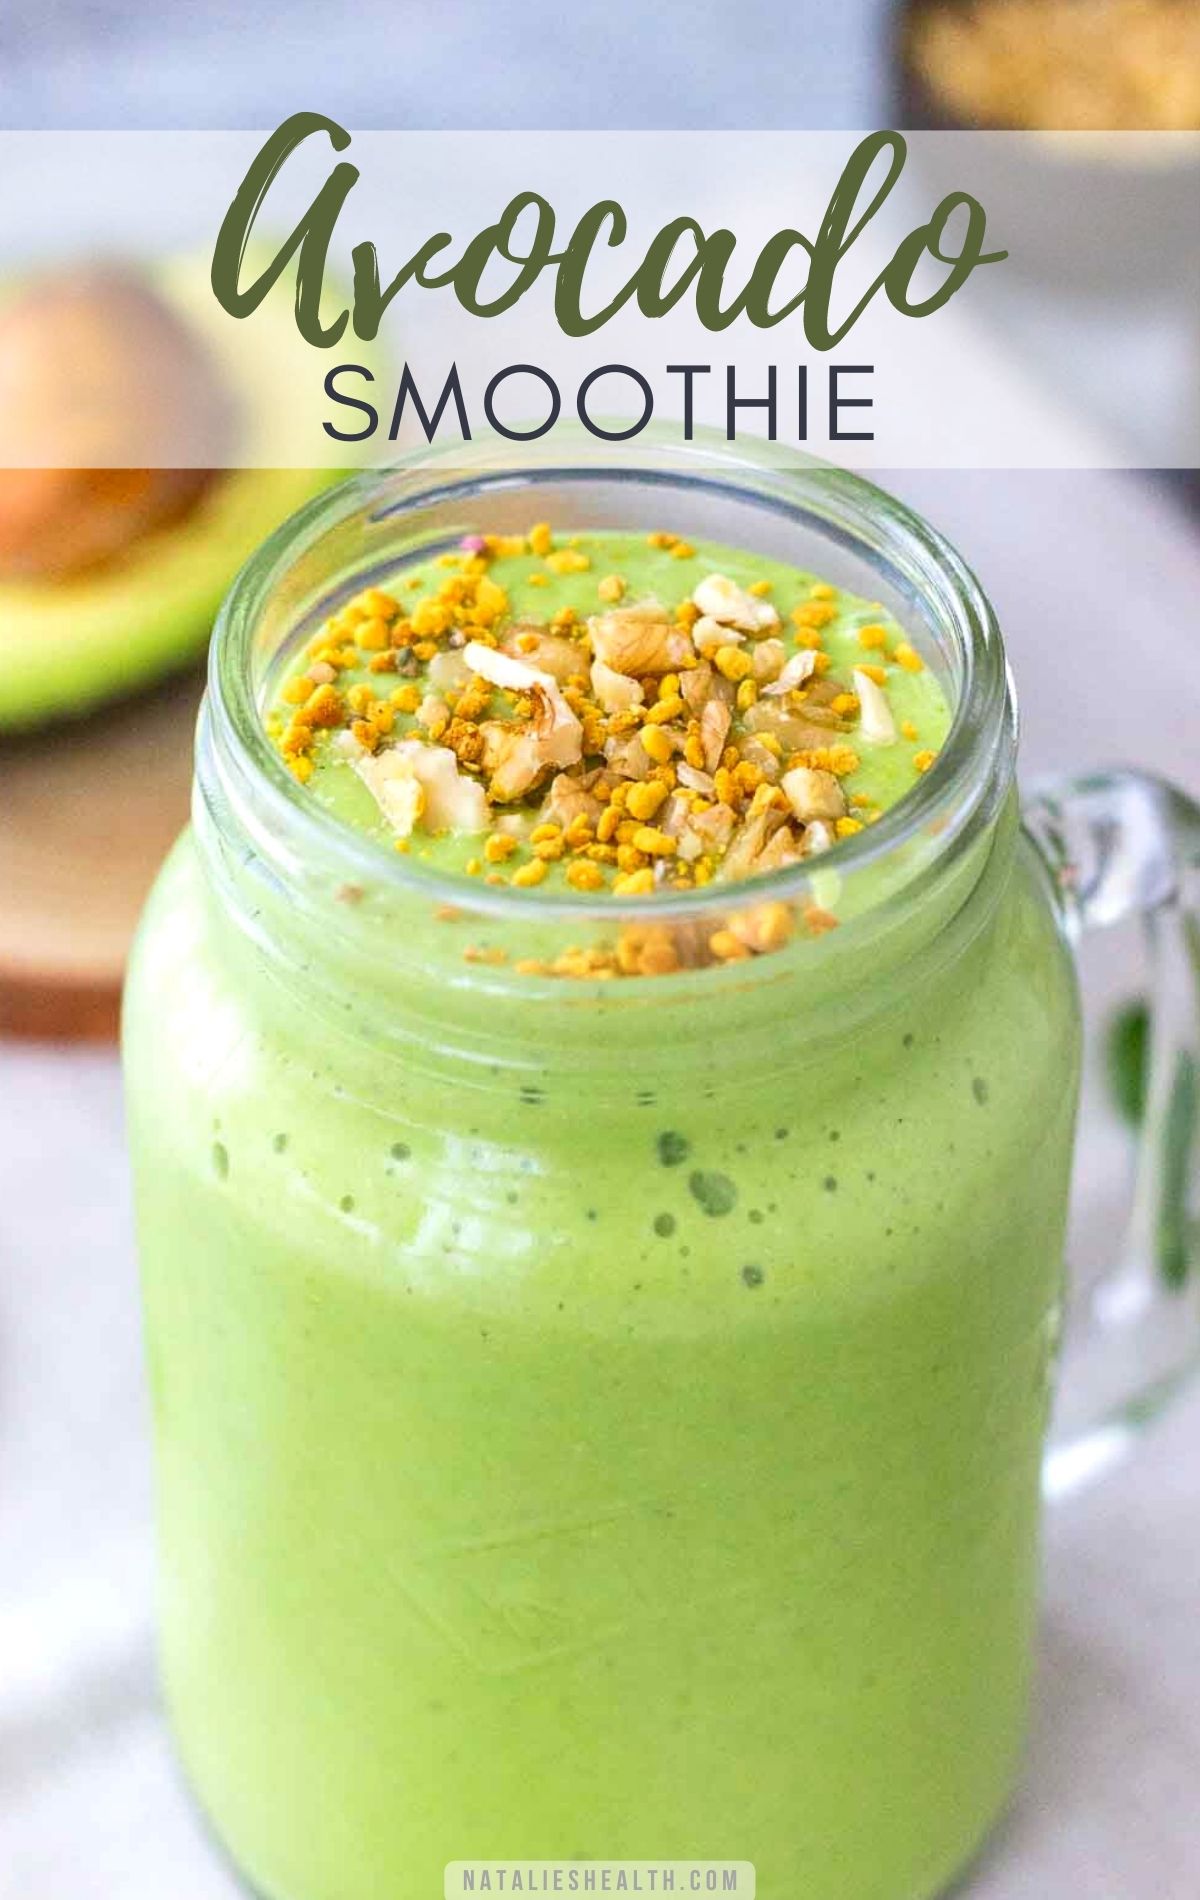
    This Avocado Smoothie will totally delight you. It's sweet, creamy, and absolutely beautiful. Full of nutrients, luxurious and so vibrant. It's packed with superfoods and made without added sugars. Fantastic breakfast!

    [feast_advanced_jump_to]
    Avocado Smoothie PIN image

    I’ve been meaning to share this avocado smoothie recipe for quite some time. It’s been on my breakfast list for ages but I never shared the recipe online.

    Recently my days became hectic again, and I find this smoothie to be a perfect solution to all my morning needs. It's a very popular breakfast option at the moment - because it's very easy to make, quite nutritious, and full of greens and avocado goodness. Fantastic breakfast when you are in a hurry.

    And if you wonder about the taste of avocado or greens in this smoothie, don't worry. The taste is perfectly camouflaged with sweet banana and vanilla. It's a truly wonderful smoothie to have any time of day really.

    Why this smoothie is so good?

    • It's incredibly thick, creamy, so luxuriously delicious.
    • It's packed with nutrients - fibers, proteins, and superfoods.
    • It's filling thus ideal for weight loss.
    • It packs a serious amount of healthy Omega-3s.
    • It's made with all healthy ingredients and has no added sugar.
    • It's adaptable - can be made keto-friendly.
    • It's easy to whip up. Ideal breakfast!

    Ingredients used

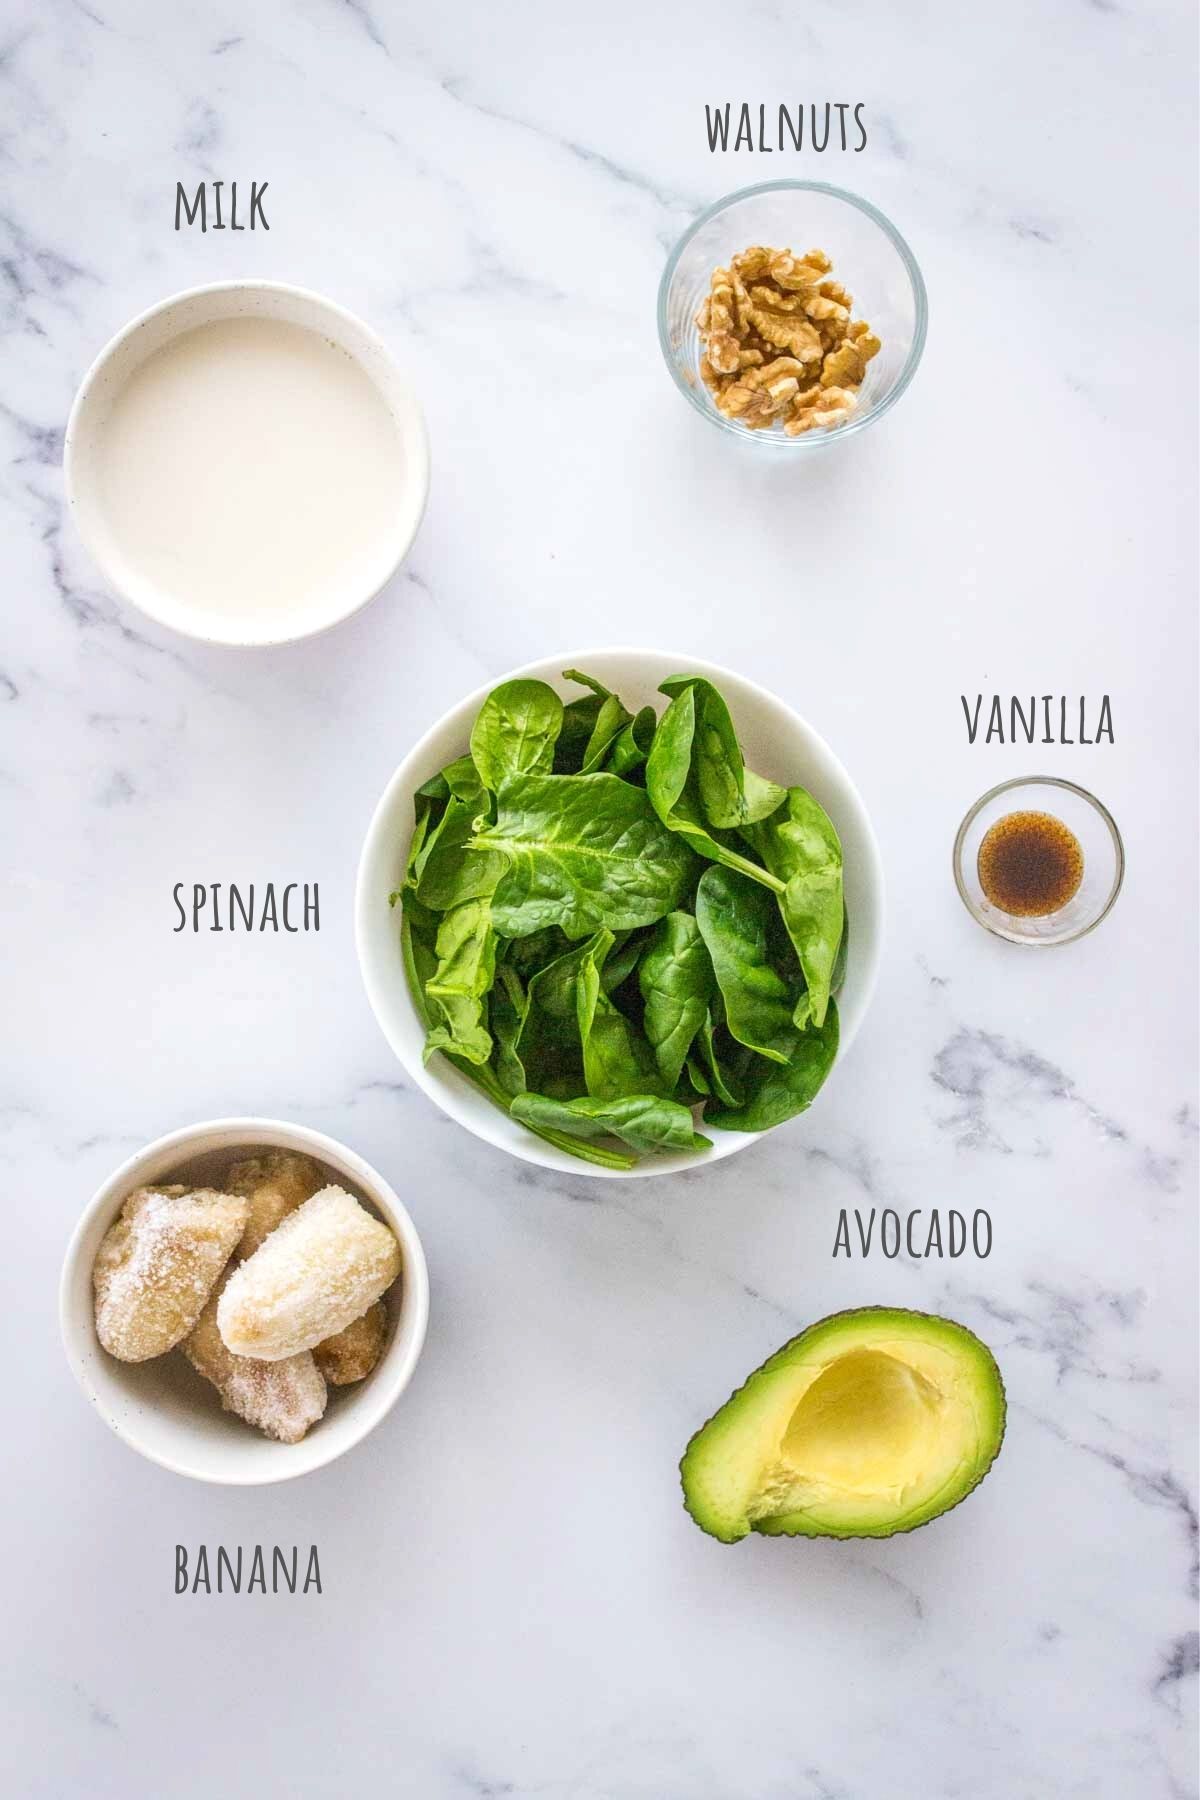
    For this avocado smoothie recipe, you will need just a few simple ingredients.

    Avocado Smoothie ingredients
    • Milk: I used unsweetened almond milk, but you can use any milk you like in this recipe, dairy or plant-based.
    • Banana: It's full of essential nutrients, especially gut-friendly fibers, very filling, and great for energy. I used an overripe frozen banana.
    • Spinach: It's a superfood, loaded with tons of nutrients in a low-calorie package. He's important for skin, hair, and bone health. He also provides protein, iron, vitamins, and minerals. (1) I used mild and delicate baby spinach.
    • Avocado: He's my favorite fatty friend and a great addition to smoothies. He makes smoothies extra creamy, but importantly, he's packed with essential heart-healthy and anti-inflammatory Omega-3’s. Avocado is also rich in magnesium, potassium, and fiber. Quite a superfood with many health benefits. (2)
    • Walnuts: They are a very good source of Omega-3, and quite nutritious. And since they are calorie-dense, they are great for weight loss too. (3)
    • Vanilla: For extra flavor.
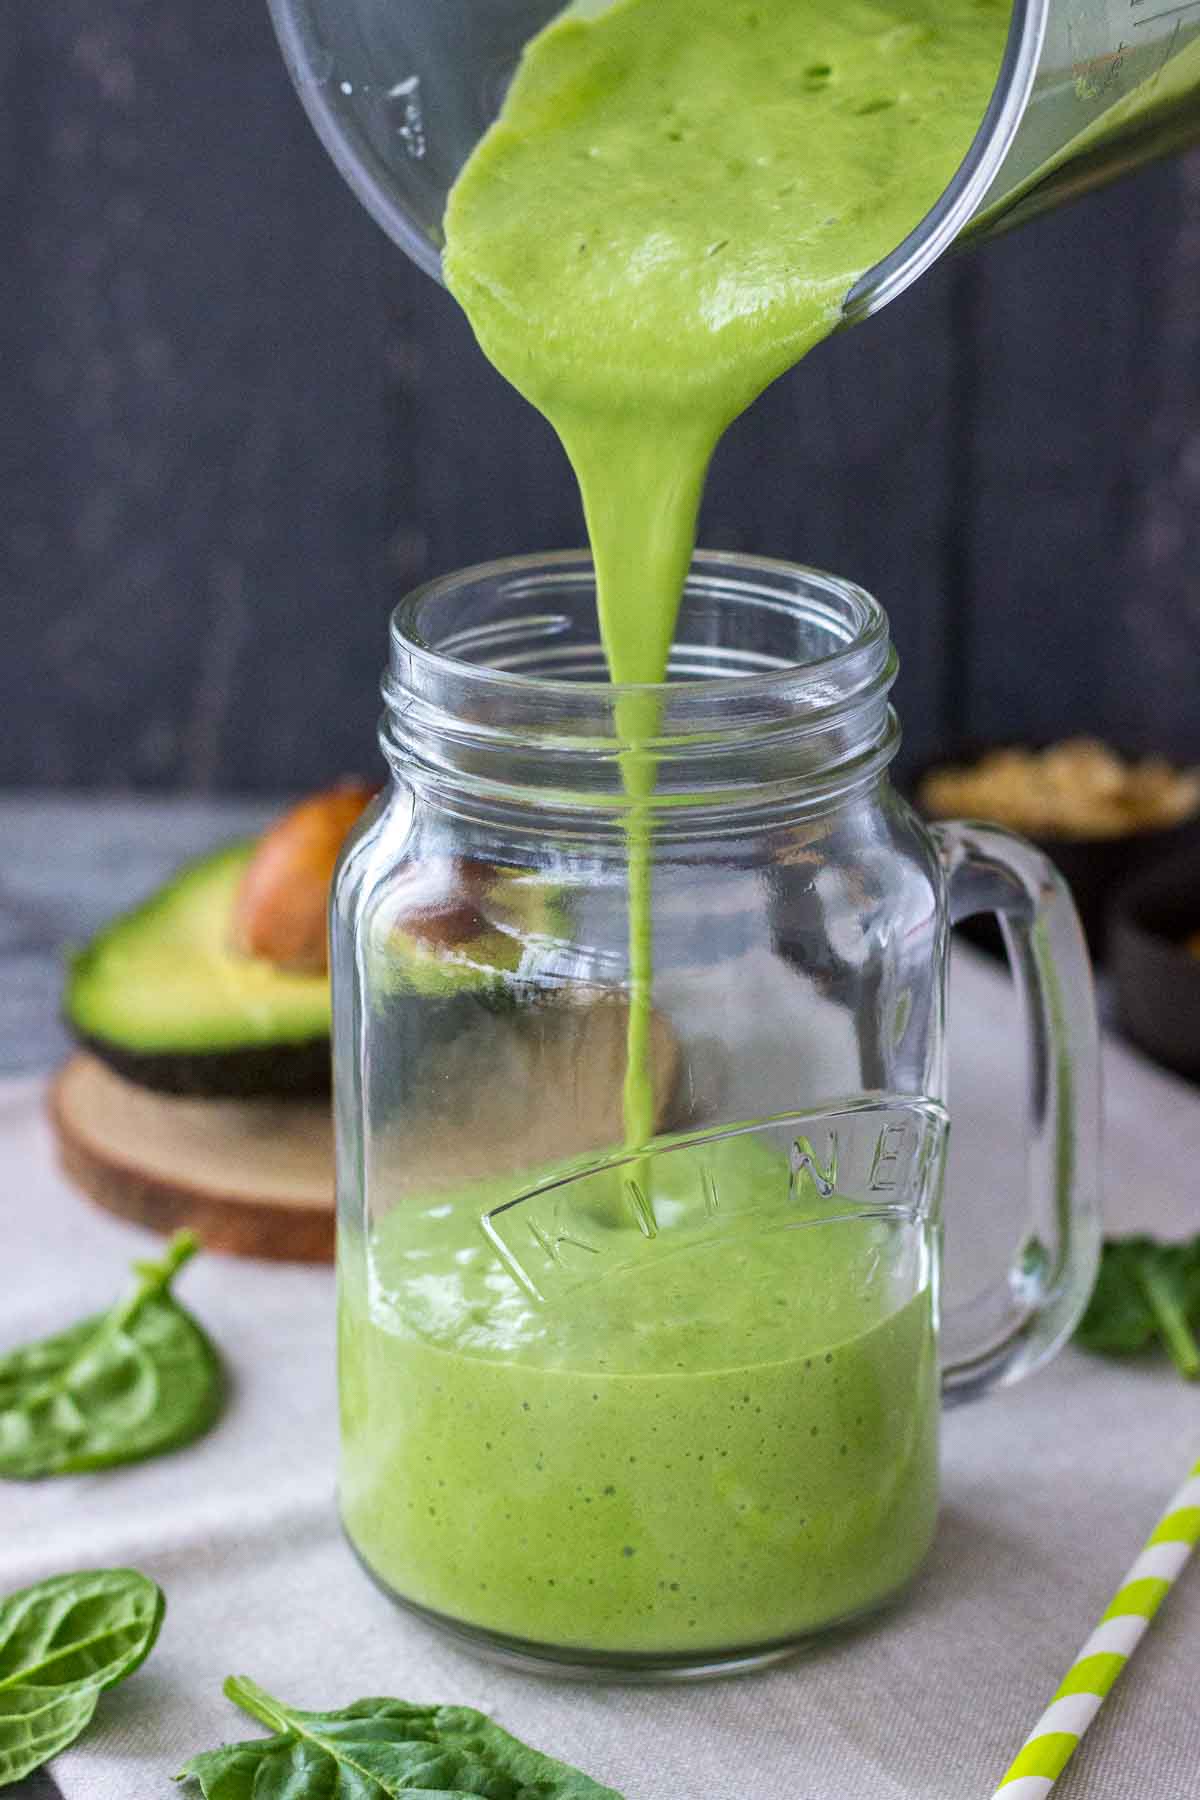
    • Pouring Avocado Smoothie in a glass
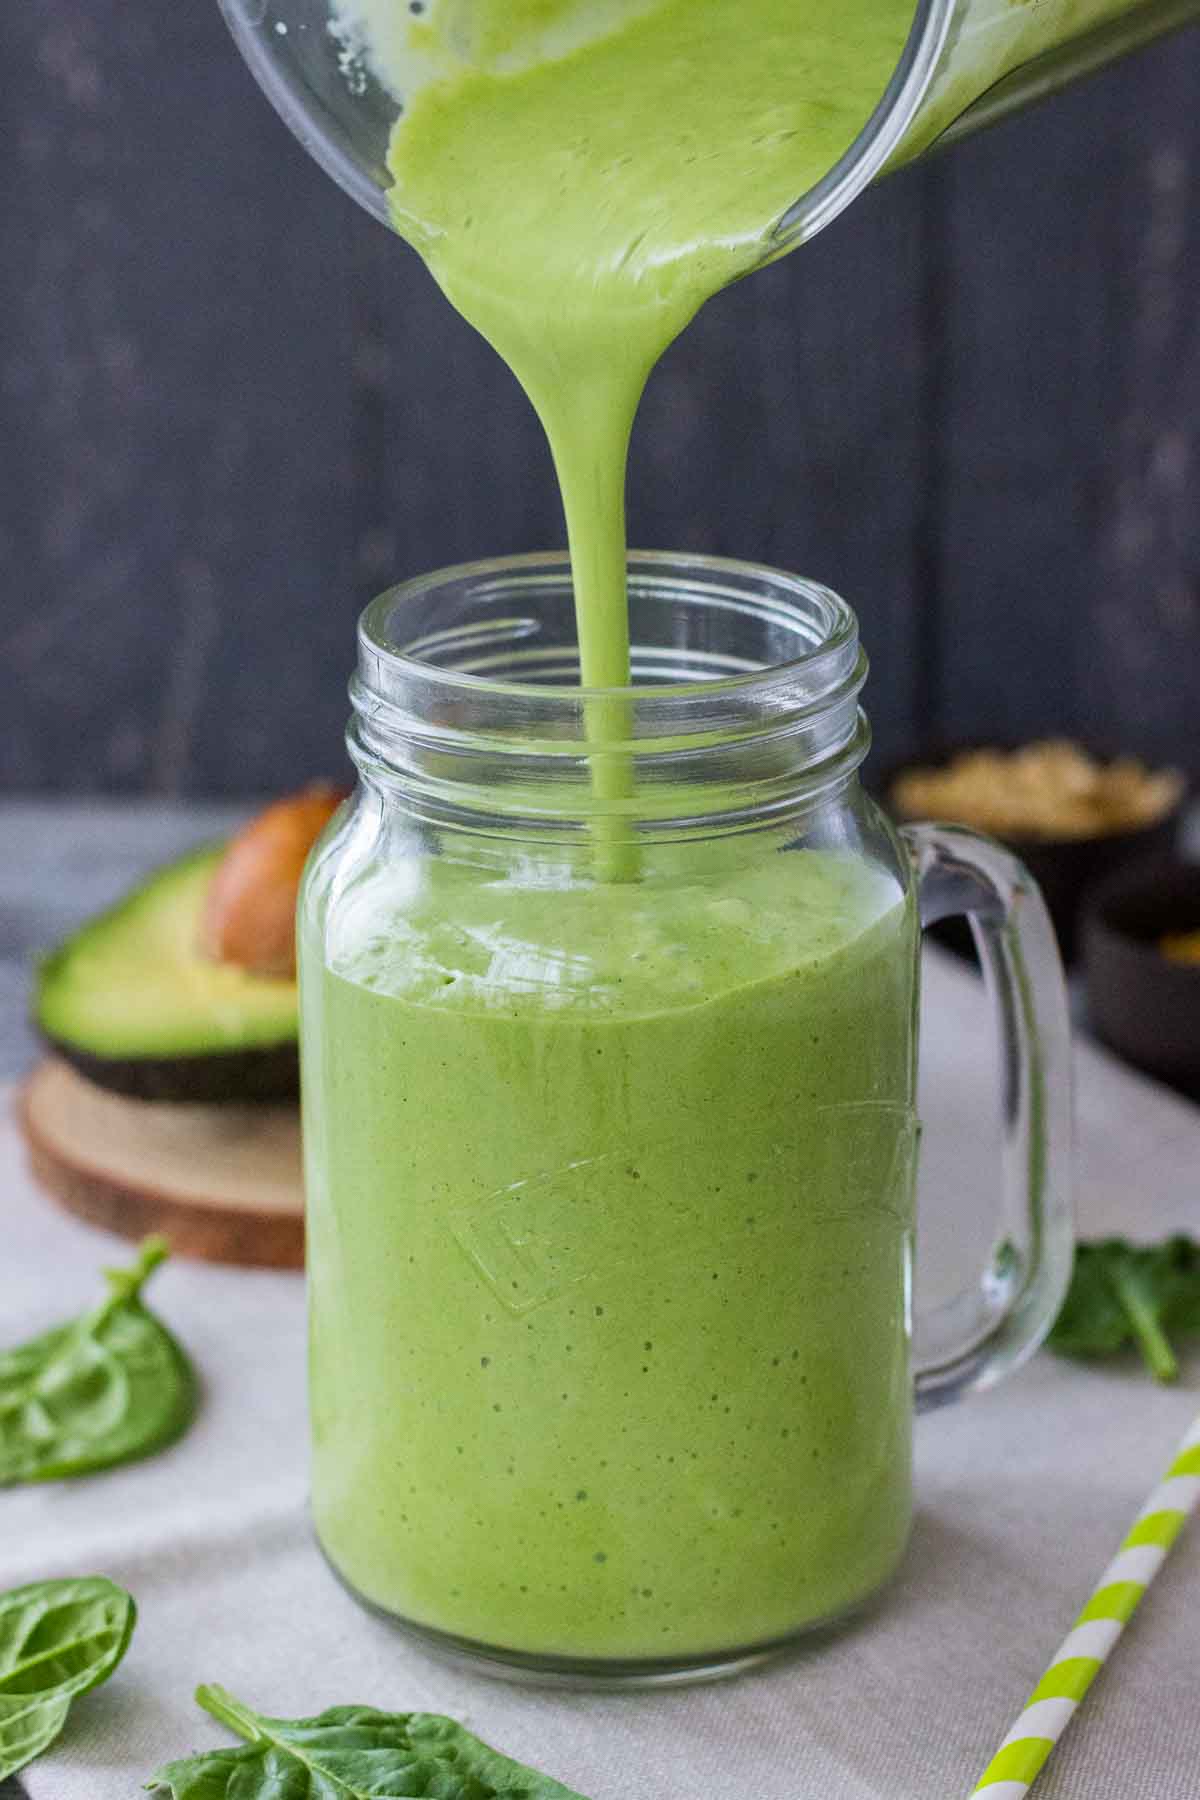
    • Creamy Avocado Smoothie in a glass

    How to make Avocado Smoothie

    Making this healthy avocado smoothie is totally easy. It will take you no more than 5 minutes. All you need is a good blender.

    Step by step instructions

    • Start with measuring all the ingredients. I like to use measuring cups.
    • Take the blender and add all ingredients. Note: add wet ingredients first for easier blending.
    • Turn on the blender and mix at high speed until you get a smooth texture.
    • If the smoothie is too thick, add a little more liquid – milk or water. Blend again until smoothie is smooth.
    • Taste the smoothie and add additional sweetener if you like. (See "Sweetener recommendation" section for my suggestions)
    • Transfer the smoothie into a smoothie cup. 
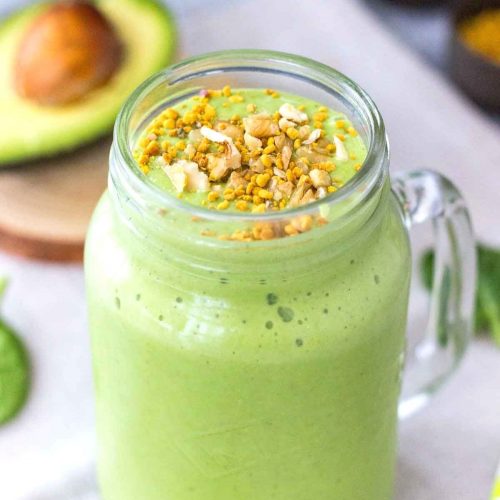
    • Add toppings (optional): I used chopped walnuts and bee pollen. Be creative here and add toppings you like. 
    • Serve and enjoy!
    • Makes 1 cup that serves 1 person as a full meal, or 2 people as a light meal.
    Topping Avocado smoothie with walnuts

    Substitutions

    • You can use any dairy or plant-based milk here.
    • You can substitute walnuts with any other nuts, or seeds (ground flax seeds, hemp seeds or chia seeds). 
    • You can substitute spinach with fresh kale.
    • Substitute vanilla with cinnamon.

    Smoothie variations

    Make it without banana: Banana is added for natural sweetness so if you omit banana you have to add some extra sweetener. See the "Sweetener recommendation" section for my suggestions.

    Make it weight-loss friendly: Use only half a banana to cut calories.

    Make it vegan: Use plant-based milk. Omit bee pollen as a topping.

    Make it keto: Omit banana. Use the whole avocado. Add in 1 teaspoon MCT oil or collagen (optional). Alternatively use ½ cup almond milk and ½ cup coconut cream. You'll need to add sweetener. I recommend liquid stevia or any other liquid low-carb sweetener. Cristal low-carb sugars won't work here. Omit bee pollen as a topping.

    Avocado Smoothie served in a glass

    Tips for storing

    • Store in a smoothie cup with a lid and keep refrigerated for up to one day.
    • If you left the smoothie standing long it will set. Don't forget to shake or stir it before drinking!
    • Remember, all smoothies oxidate when left standing. That's not bad. But it's best to have the smoothie fresh.

    Recipe tips

    • When you're adding ingredients to a blender, always add the liquids first. Doing this will help your blender run easily and it will prevent lumps.
    • Use a high-power blender to ensure everything blends well and the smoothie is silky smooth. 
    • Frozen banana is the best for making this avocado smoothie. It blends into a thick very refreshing drink with a cold punch.
    • If you don't have a frozen banana at hand, just slice the banana and pop it in the freezer for at least 1 hour. Or just use ice cubes.
    • If the smoothie is too thick, add more liquids, water (recommended) or milk, until you achieve desired consistency. It should be creamy, but not too dense. 
    Avocado Smoothie topped with walnuts

    Sweetener recommendation

    This smoothie uses banana as a natural sweetener. I don't recommend adding any extra sugar. But if you find smoothie not sweet enough, you can add some. Be mindful thou.

    • Add 1-2 dates, date syrup, liquid honey, or maple syrup.
    • If you are using dates, make sure you soak them in warm water for at least 10 minutes. Drain them before using them.
    • Use liquid stevia or any liquid low-carb sweetener for the keto / low-carb option.
    • Coconut sugar or any other cristal sugar won't work well here. It will not dissolve well in a cold smoothie mixture.
    Avocado Smoothie in a glass with a straw

    You may also like:

    • Coffee Protein Smoothie
    • Apple Peanut Butter Smoothie
    • Cherry Banana Smoothie

    Recipe

    Avocado Smoothie featured image
    Print Recipe
    5 from 92 votes

    Avocado Smoothie

    This Avocado Smoothie is sweet, creamy, and absolutely beautiful. Full of nutrients, luxurious and so vibrant. It's packed with superfoods and made without added sugars. Fantastic breakfast!
    Prep Time5 minutes mins
    Total Time5 minutes mins
    Course: Breakfast, Smoothie
    Cuisine: American, International
    Keyword: avocado smoothie, avocado smoothie recipe, best avocado smoothie, healthy avocado smoothie, keto avocado smoothie
    Servings: 1 cup
    Calories: 517kcal
    Author: Natalie

    Equipment

    • Blender

    Ingredients

    • ½ avocado
    • 1 ripe banana frozen
    • 1 cup baby spinach
    • 1 ½ cup almond milk unsweetened
    • ¼ cup walnuts
    • 1 teaspoon vanilla extract

    Instructions

    • Take the blender and add all ingredients. Note: add wet ingredients first for easier blending.
    • Turn on the blender and mix at high speed until you get a smooth texture.
    • If the smoothie is too thick, add a little more liquid – milk or water. Blend again until smoothie is smooth.
    • Taste the smoothie and add additional sweetener if you like.
    • Transfer the smoothie into a smoothie cup.
    • Add toppings (optional): I used chopped walnuts and bee pollen. Be creative here and add toppings you like.

    Notes

    Makes 1 cup that serves 1 person as a full meal, or 2 people as a light meal. As a measure, I used a US cup (240ml). Nutrition values are calculated without toppings.
    Substitutions
    • You can use any dairy or plant-based milk here.
    • You can substitute walnuts with any other nuts, or seeds (ground flax seeds, hemp seeds or chia seeds). 
    • You can substitute spinach with fresh kale.
    • Substitute vanilla with cinnamon.
    Smoothie variations
    • Make it without banana: Banana is added for natural sweetness so if you omit banana you have to add some extra sweetener. See the "Sweetener recommendation" section for my suggestions.
    • Make it weight-loss friendly: Use only half a banana to cut calories.
    • Make it vegan: Use plant-based milk. Omit bee pollen as a topping.
    • Make it keto: Omit banana. Use the whole avocado. Add in 1 teaspoon MCT oil or collagen (optional). Alternatively use ½ cup almond milk and ½ cup coconut cream. Use liquid stevia or any other liquid low-carb sweetener. 
    Store in a smoothie cup with a lid and keep refrigerated for up to one day. Don't forget to shake or stir it before drinking!

    Nutrition

    Serving: 1cup | Calories: 517kcal | Carbohydrates: 42g | Protein: 10g | Fat: 39g | Saturated Fat: 4g | Polyunsaturated Fat: 18g | Monounsaturated Fat: 15g | Sodium: 520mg | Potassium: 1206mg | Fiber: 14g | Sugar: 16g | Vitamin A: 3041IU | Vitamin C: 29mg | Calcium: 526mg | Iron: 3mg

    More recipes to try

    • Matcha Smoothie with matcha green tea avocado and spinach
      Matcha Smoothie
    • Chocolate Avocado Smoothie featured image
      Chocolate Avocado Smoothie
    • Shamrock Protein Shake featured image
      Shamrock Protein Shake
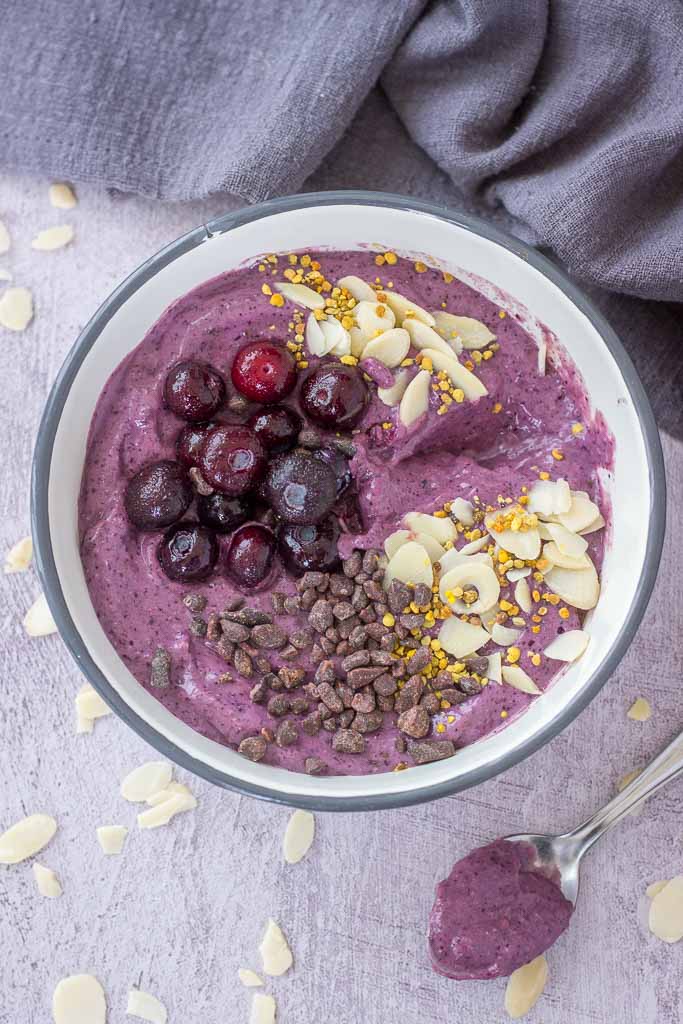
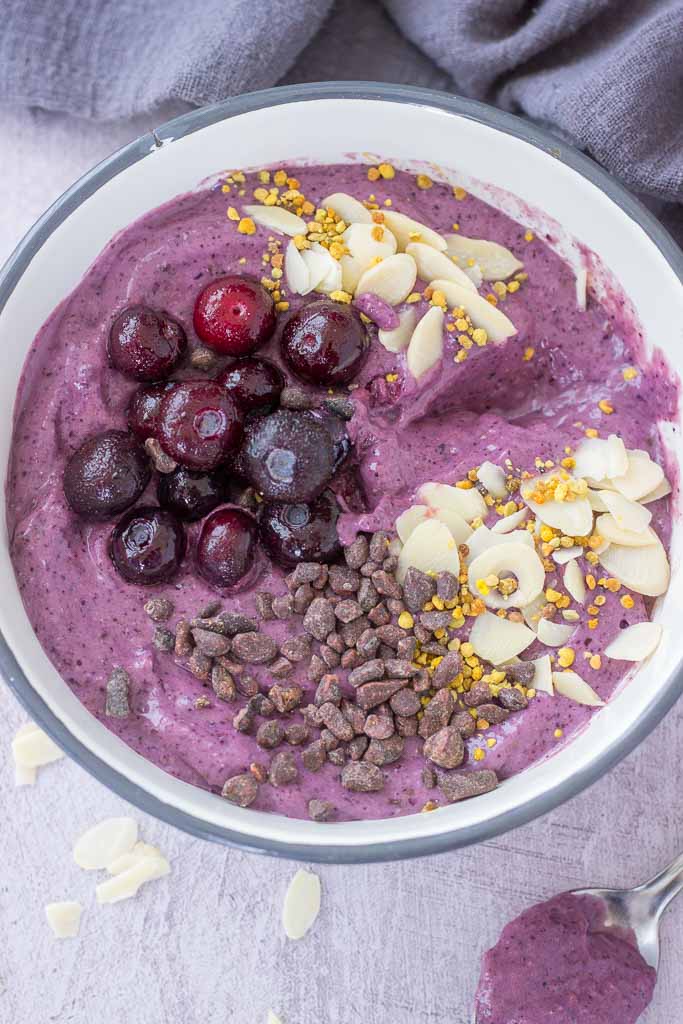
    • Blueberry Avocado Smoothie in a bowl
      Blueberry Avocado Smoothie Bowl

    Coffee Protein Smoothie

    January 19, 2022 by Natalie 46 Comments

    Coffee Protein Smoothie featured image

    This Coffee Protein Smoothie is the perfect way to start your day! It's thick, creamy, cooling, and absolutely delicious. Packed with proteins and naturally sweetened with banana, this coffee smoothie will quickly boost your mood and fill you up with energy.

    [feast_advanced_jump_to]

    Mornings can be hectic, especially when you have kids. Sometimes mornings can be so stressful that you lose yourself in the tasks and completely neglect yourself and your needs - like having proper breakfast or a cup of coffee.

    Skipping breakfast is equally bad as not having a coffee in the morning. That's why I love combining two of my favorite drinks in one - protein shake and a coffee.

    This great-tasting healthy Coffee Protein Smoothie is the answer to all my hectic morning needs. It combines all essential nutrients and amazing flavors. You not only get a boost from the caffeine, but it also has added protein to give you energy for the day ahead. Win-win!

    Why should you make it?

    • It's thick, creamy, filled with coffee flavor.
    • It's packed with essential nutrients - fibers and proteins.
    • It's quite filling and nutritious, a great smoothie for weight loss.
    • It packs a good amount of healthy Omega-3s.
    • It's made with wholesome ingredients and has no added sugar.
    • It's super easy to whip up with simple ingredients.
    • Perfect healthy breakfast or a post-workout meal.

    Ingredients used

    For this coffee smoothie recipe, you will need only a few simple ingredients.

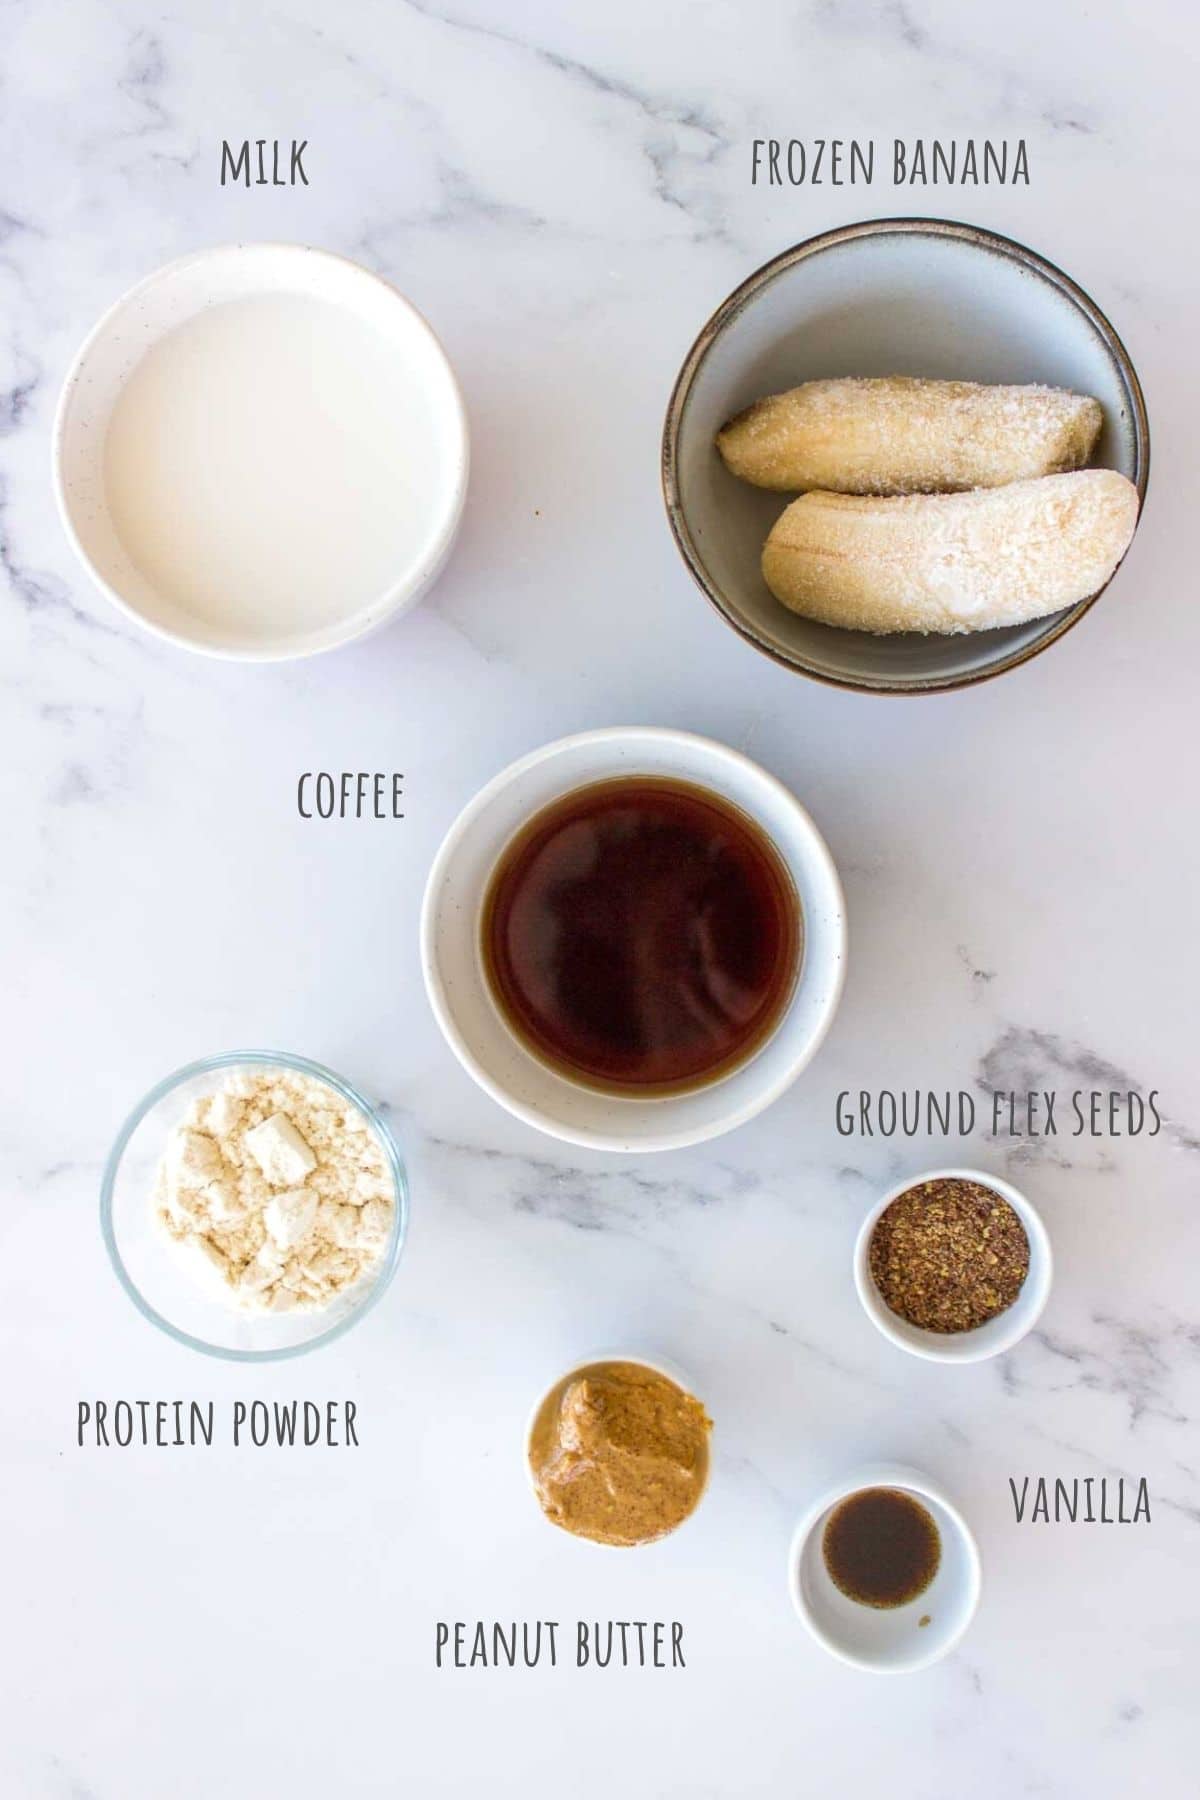
    • Coffee: I used cold brew coffee, but you can use regular coffee you usually drink. Instant coffee works fine too.
    • Milk: I used unsweetened almond milk, but you can use any milk you like in this recipe, dairy or plant-based.
    • Banana: It's packed with many nutrients, especially gut-friendly fibers, very filling, and great for energy. I like to use an overripe frozen banana.
    • Protein powder: I like to use a vanilla-flavored protein powder.
    • Peanut butter: I used creamy peanut butter without added sugars or oils. Peanut butter is packed with proteins and healthy fats, as well as fibers. (1) A great addition to smoothies as it makes them more nutritious.
    • Ground flax seeds: They are an excellent source of healthy Omega-3s, but also a great source of fiber.
    • Vanilla: For extra flavor.
    • Sweetener (optional): See "Recipe tips" for recommendations.
    Coffee Protein Smoothie in a tall glass with a straw

    How to make Coffee Protein Smoothie

    Making this coffee protein smoothie is quite easy. It will take you 5 minutes and all you need is a good blender.

    Step by step instructions

    • Start with preparing and measuring all the ingredients. I use measuring cups.
    • Take the blender and add all ingredients. Note: add wet ingredients first for easier blending.
    • Mix everything at high speed until you get a smooth texture.
    • If the smoothie is too thick, add a little more liquid – milk or water. Blend again until everything is well combined.
    • Taste the smoothie and add additional sweetener if the smoothie is not sweet enough to your taste. (See "Recipe tips" section for sweetener recommendation)
    • Transfer the smoothie into a smoothie glass. 
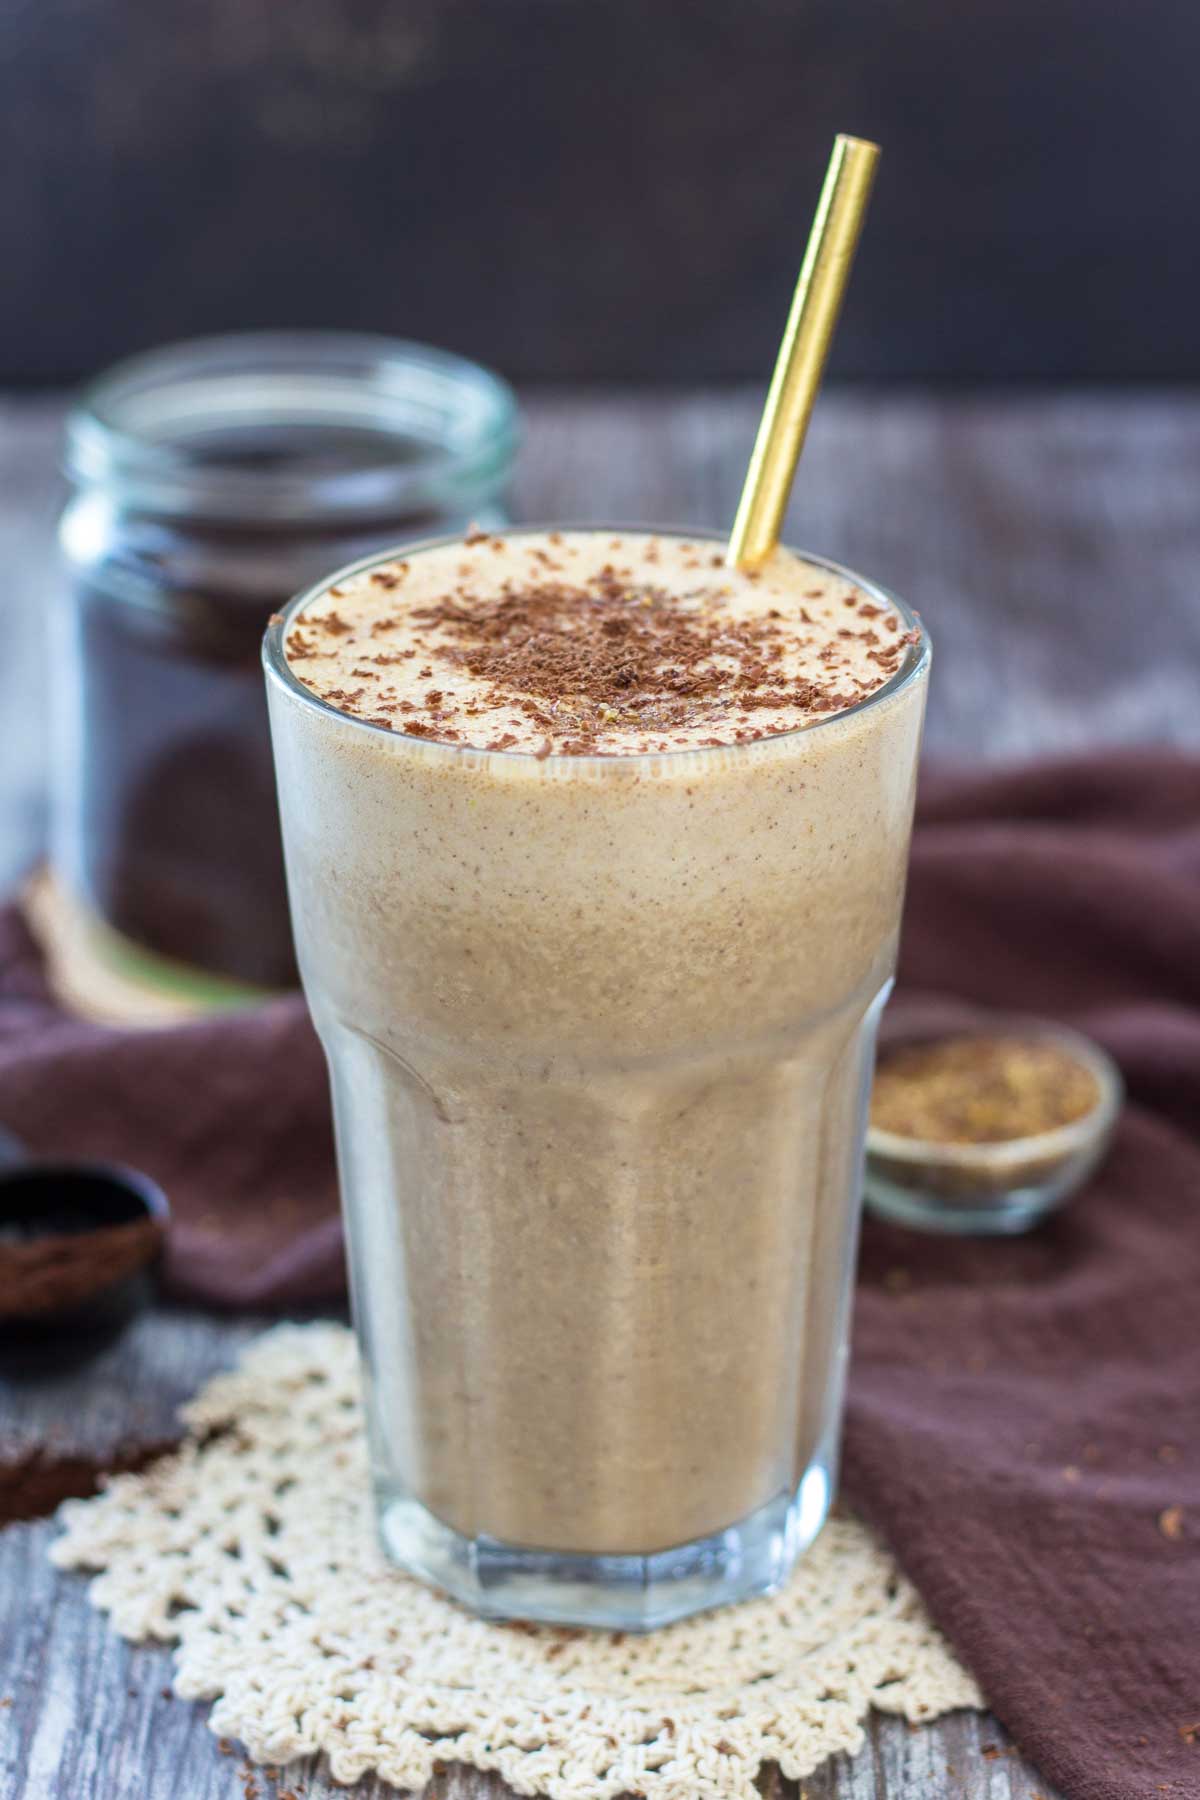
    • Add toppings (optional): I used ground flax seeds and shredded dark chocolate. Be creative here and add toppings you like. 
    • Serve and enjoy!
    • Makes 1 serving that serves 1 person as a full meal, or 2 servings as a light meal.
    Coffee Protein Smoothie in a tall glass

    Substitutions

    • You can use any dairy or plant-based milk here except coconut milk. Coconut milk won't work well here.  
    • You can substitute ground flax seeds with hemp seeds or chia seeds (it will add more proteins and Omega-3's). 
    • You can substitute peanut butter with any nut butter.
    • You can use cold brew coffee, regular brewed coffee, or instant coffee.
    • Substitute vanilla with cinnamon.
    • You can use any protein powder here. If you're using unflavored make sure you taste the smoothie and add additional sweetener (if desired).
    • You can substitute protein powder with collagen powder.

    Smoothie variations

    • Make it without banana: Substitute banana with ½ avocado. Note: in this case, you will need to add extra sweetener. Banana is added for creaminess but also for sweetness.
    • Make it weight-loss friendly: Use only half banana to cut calories.
    • Make it vegan: Use plant-based milk and vegan protein powder.
    • Make it keto: Substitute banana with ½ avocado. Add in 1 teaspoon MCT oil.
    Coffee Protein Smoothie in a tall glass with a straw

    Tips for storing

    • Store in a glass jar with a lid or shaker and keep refrigerated for up to one day.
    • If you left the smoothie standing too long it will set. Don't forget to shake or stir before drinking!
    • Remember, all smoothies oxidate when left standing. That's not bad. But to reap all benefits from ingredients, it's best to have the smoothie freshly made.

    Recipe tips

    • When adding ingredients to a blender, always add the liquids first. Doing this will help your blender run easily and this will prevent making lumps.
    • Use a high-power blender to ensure everything blends well and the smoothie is silky smooth. 
    • Frozen banana is the best for making this coffee protein smoothie. It blends into a thick very refreshing drink that gives you a cold punch.
    • If you don't have a frozen banana at hand, just slice the banana and pop it in the freezer for at least 1 hour. Or just add in some ice cubes, for that cool kick.
    • If the smoothie is too thick, add more liquids, water (recommended) or milk, until you achieve desired consistency. It should be runny but not too watery.
    • Make sure you use ground flax seeds. Grinding flax seeds is the best way to make the most of their health benefits. 
    • If you're using regular brewed coffee, cool it down to room temperature before using.

    Sweetener recommendation

    This smoothie uses banana as a natural sweetener. I don't recommend adding any extra sugar. But if you find smoothie not sweet enough, you can add some. Be mindful thou.

    • Add 1-2 dates, date syrup, liquid honey, or maple syrup.
    • If you are using dates, make sure you soak them in warm water for at least 10 minutes. Drain them before using them.
    • Stevia or any low-carb sweetener is a good option too.
    • Coconut sugar or any other cristal sugar won't work well here. It will not dissolve well in a cold smoothie mixture.
    Hand holding Coffee Protein Smoothie

    You may also like:

    • Chocolate Peanut Butter Smoothie
    • Coffee Oatmeal Smoothie
    • Iced Coffee Protein Shake

    Recipe

    Coffee Protein Smoothie featured image
    Print Recipe
    5 from 65 votes

    Coffee Protein Smoothie

    This Coffee Protein Smoothie is thick, creamy, cooling, and absolutely delicious. Packed with proteins and naturally sweetened with banana, this smoothie will quickly boost your mood and your energy.
    Prep Time5 minutes mins
    Total Time5 minutes mins
    Course: Breakfast, Smoothie
    Cuisine: American, International
    Keyword: coffee protein smoothie, coffee protein smoothie for weight loss, healthy coffee protein smoothie
    Servings: 1 serving
    Calories: 429kcal
    Author: Natalie

    Equipment

    • Blender

    Ingredients

    • 1 cup cold brewed coffee
    • ½ cup milk I used unsweetened almond
    • 1 banana I used frozen
    • 1 tablespoon peanut butter
    • 1 tablespoon ground flax seeds
    • 1 /2 teaspoon vanilla extract
    • 1 scoop vanilla protein powder

    Instructions

    • Take the blender and add all ingredients. Note: add wet ingredients first for easier blending.
    • Mix everything at high speed until you get a smooth texture.
    • If the smoothie is too thick, add a little more liquid – milk or water. Blend again until everything is well combined.
    • Taste the smoothie and add additional sweetener if the smoothie is not sweet enough to your taste. (See "Recipe tips" section for sweetener recommendation)
    • Transfer the smoothie into a smoothie glass.
    • Add toppings (optional): I used ground flax seeds and shredded dark chocolate. Be creative here and add toppings you like.
    • Serve and enjoy!

    Notes

    Makes 1 serving that serves 1 person as a full meal, or 2 servings as a light meal.
    As a measure, I used a US cup (240ml). Nutrition values are calculated without toppings.
    Substitutions
    • You can use any dairy or plant-based milk here except coconut milk. Coconut milk won't work well here.  
    • Substitute ground flax seeds with hemp seeds or chia seeds.
    • Substitute peanut butter with any nut butter.
    • You can use cold brew coffee, regular brewed coffee, or instant coffee.
    • Substitute vanilla with cinnamon.
    • You can use any protein powder here. If you're using unflavored make sure you taste the smoothie and add additional sweetener (if desired).
    Make it without banana: Substitute banana with ½ avocado. Note: in this case, you will need to add extra sweetener. 
    Make it weight-loss friendly: Use only half a banana.
    Make it vegan: Use plant-based milk and vegan protein powder.
    Make it keto: Substitute banana with ½ avocado. Add in 1 teaspoon MCT oil.
    Store in a glass jar with a lid or shaker and keep refrigerated for up to one day. Add more liquid - milk or water, if needed, and shake or stir the smoothie before drinking.

    Nutrition

    Serving: 1serving | Calories: 429kcal | Carbohydrates: 54g | Protein: 29g | Fat: 13g | Saturated Fat: 2g | Polyunsaturated Fat: 4g | Monounsaturated Fat: 4g | Cholesterol: 62mg | Sodium: 239mg | Potassium: 904mg | Fiber: 7g | Sugar: 28g | Vitamin A: 322IU | Vitamin C: 10mg | Calcium: 362mg | Iron: 2mg

    More recipes to try

    • Peanut Butter Protein Shake featured image
      Peanut Butter Protein Shake
    • Chocolate Avocado Smoothie featured image
      Chocolate Avocado Smoothie
    • Shamrock Protein Shake featured image
      Shamrock Protein Shake
    • Apple Peanut Butter Smoothie served with a straw in a glass jar topped with creamy peanut butter and crushed peanuts
      Apple Peanut Butter Smoothie

    Pumpkin Oatmeal Pancakes

    October 25, 2021 by Natalie 90 Comments

    Pumpkin Oatmeal Pancakes featured image

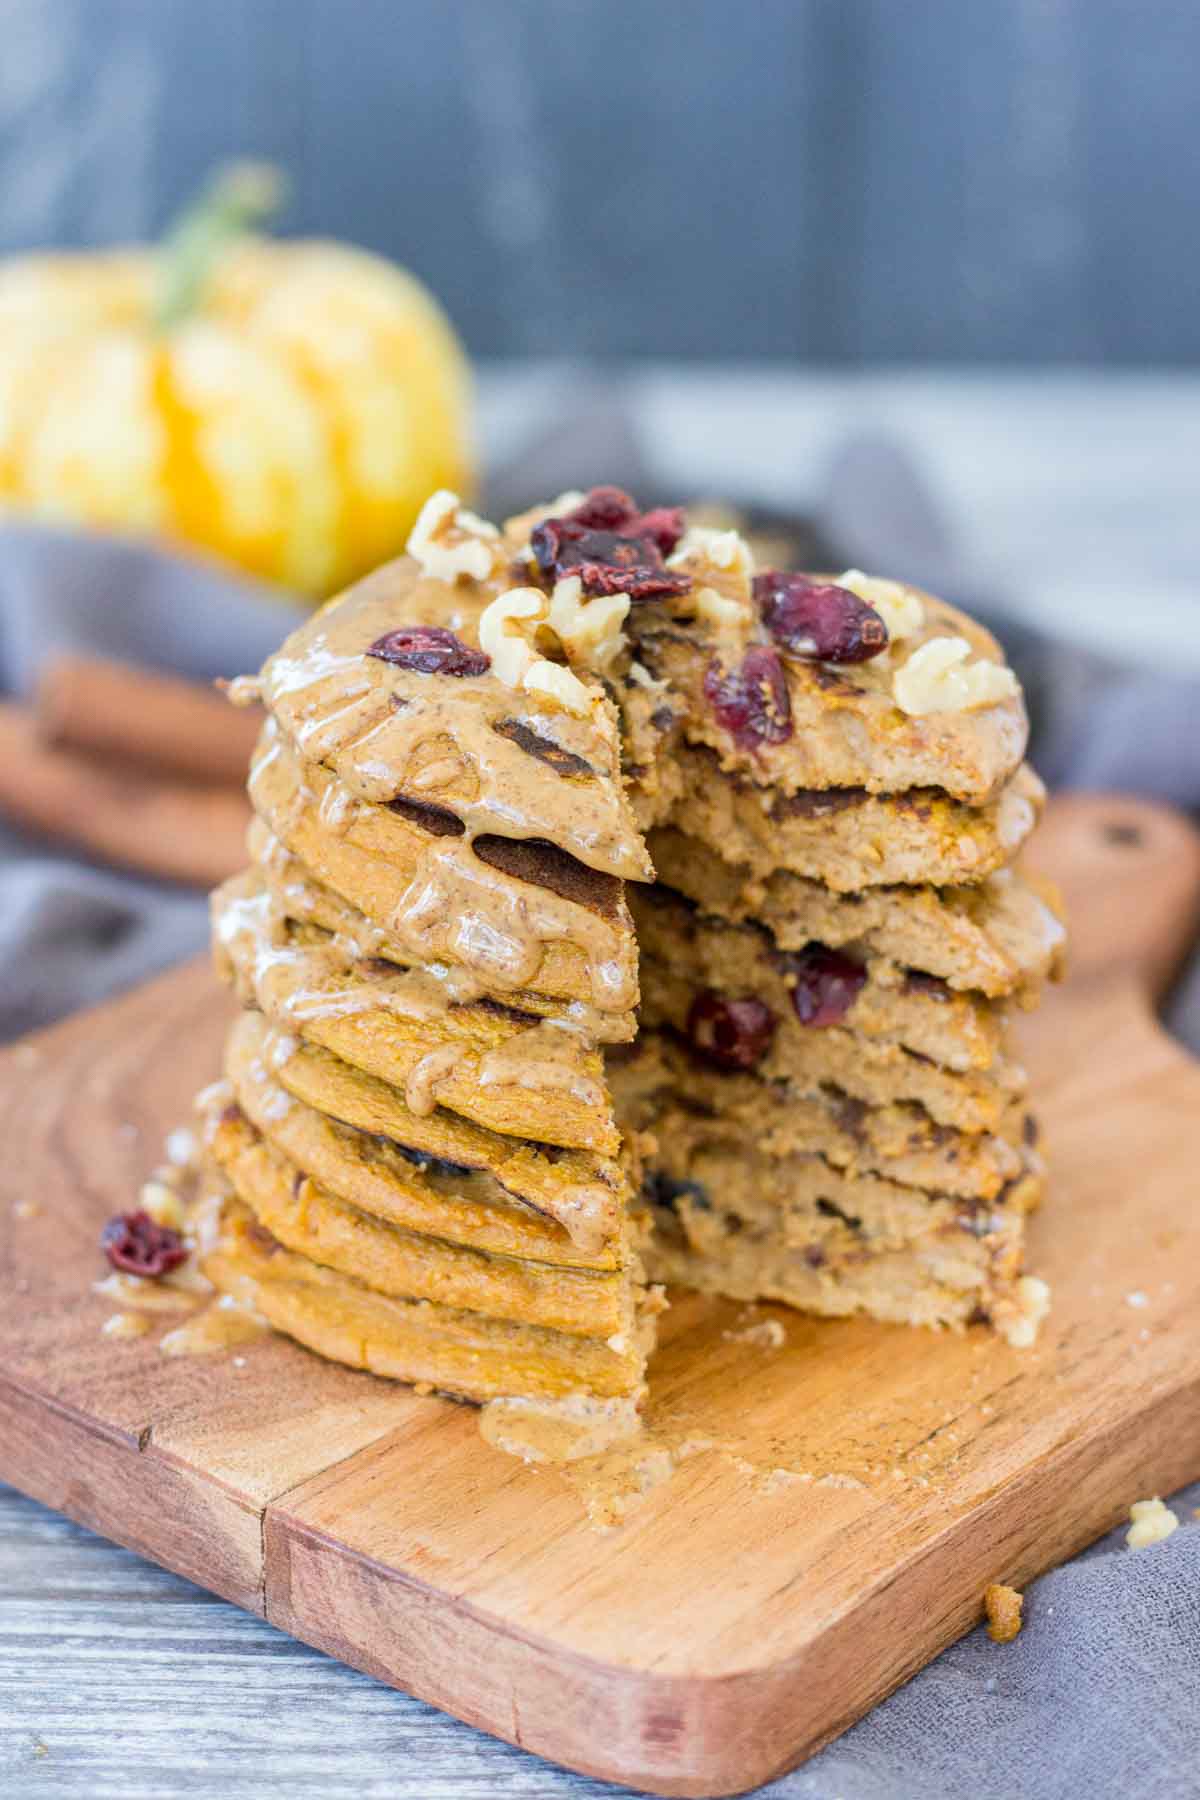
    These Pumpkin Oatmeal Pancakes are a wonderful seasonal treat. They are fluffy, sweet, filled with fresh pumpkin, and beautiful flavors. Also, they are wholesome, made with simple ingredients, without refined sugar. Perfect cozy, healthy, and filling breakfast that will brighten your morning.

    [feast_advanced_jump_to]
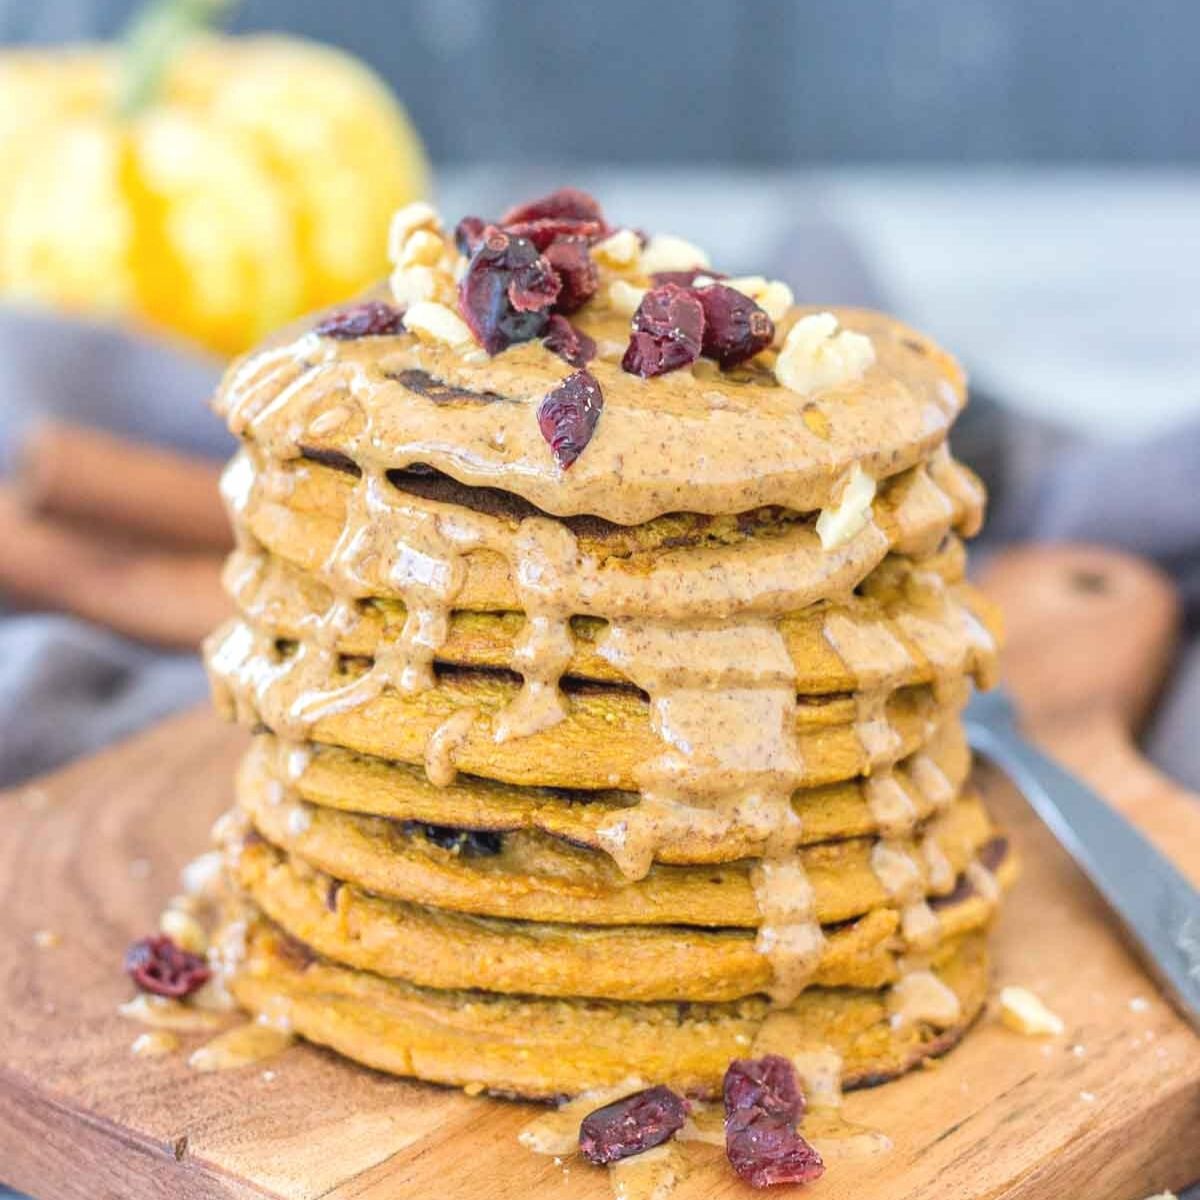
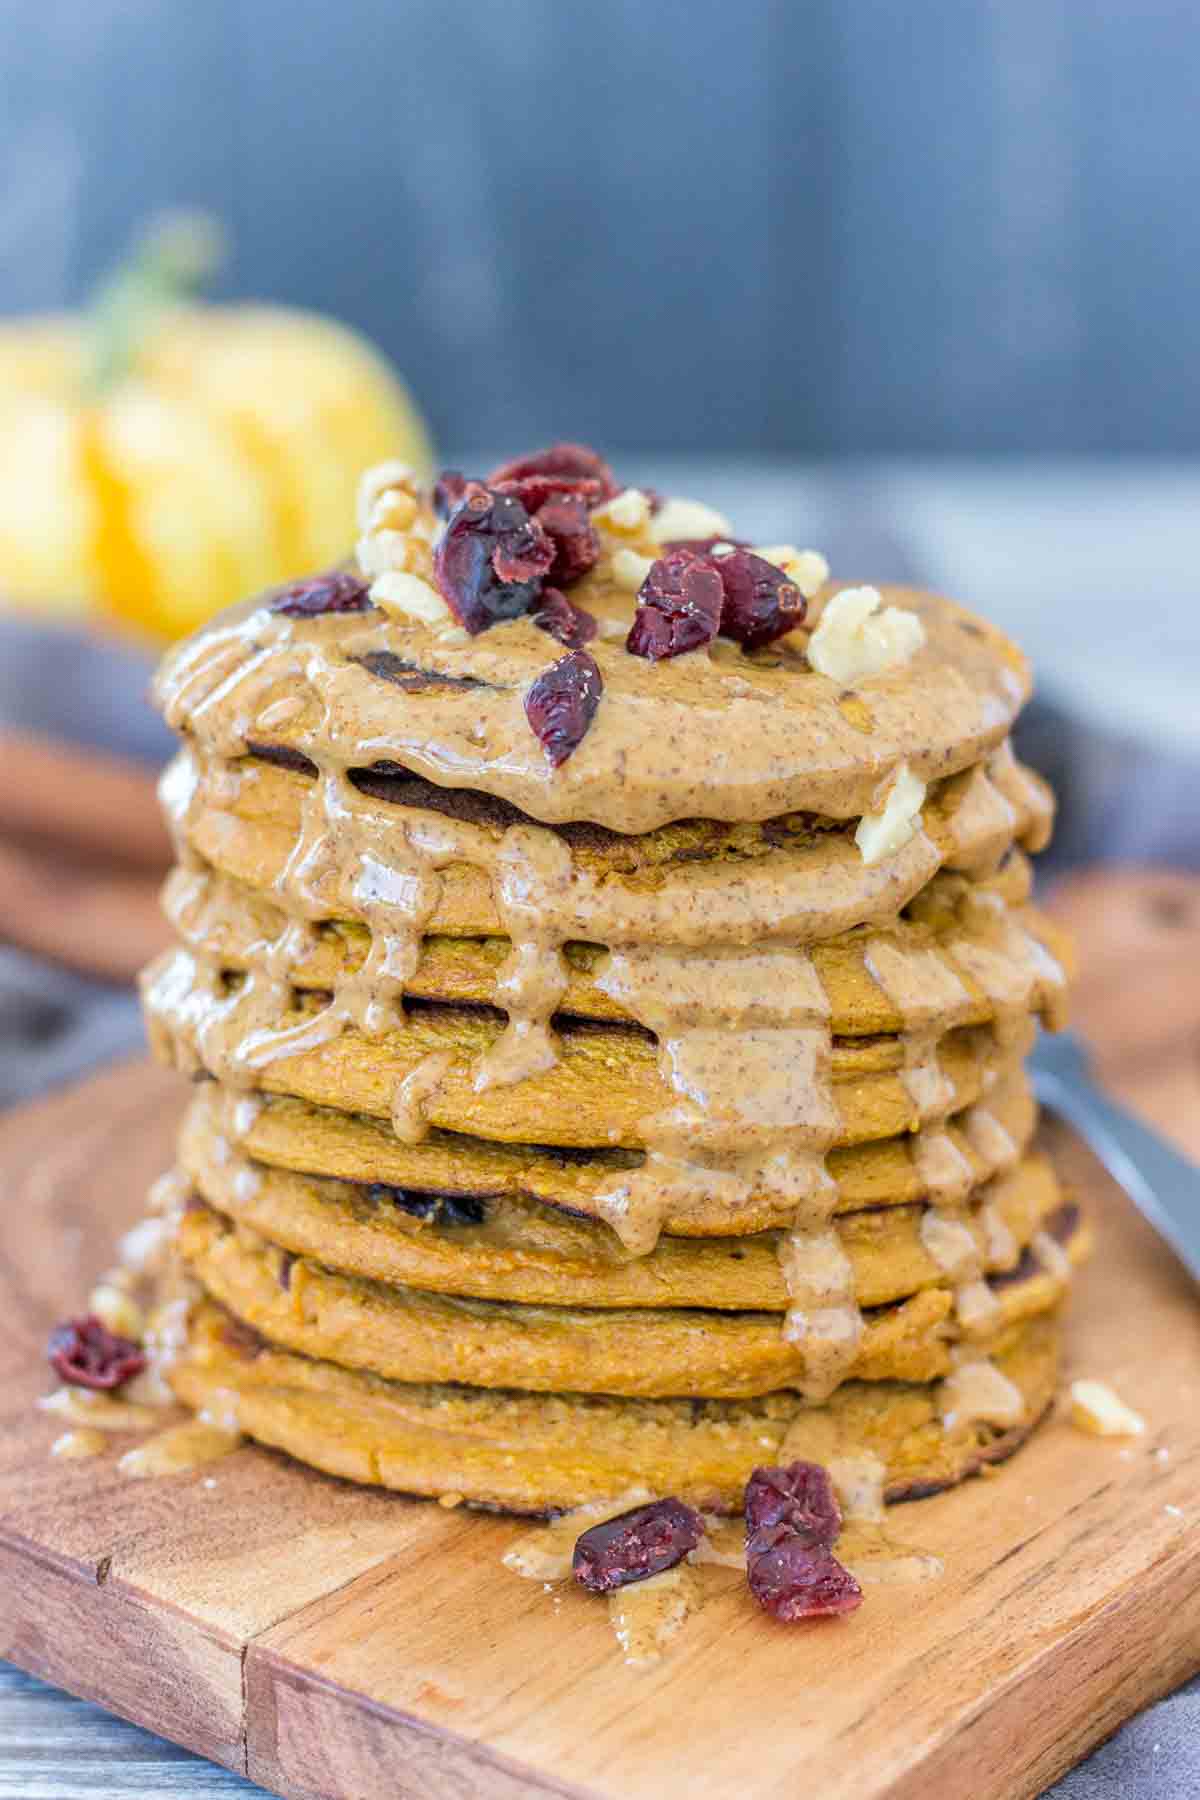
    Pumpkin Pancakes on a wooden plate

    I'm delighted to say, pumpkins really got me. Not one day passes without something pumpkin-ish served on my plate. Pumpkin Granola in the morning or Pumpkin Muffins on afternoons, anything pumpkin is my obsession.

    Since I love having oatmeal pancakes for breakfast I decided to make Pumpkin Oatmeal Pancakes and add them to my Pumpkin Cookbook.

    They turned out fantastic. Perfectly flavored, and sweet. Just what one true pumpkin lover needs in the morning.

    Why should you try them?

    • These pumpkin pancakes are dense but fluffy, full of wonderful seasonal flavors. So sweet and tasty!
    • They are packed with hearty OATS and fibers, good for digestion and immunity, proteins, and Omega-3s.
    • They are filling and nutritious. Perfect quick and healthy breakfast, brunch, kids school snack, or afternoon dessert.
    • They are made with just a few simple pantry ingredients, without refined sugar. Delicious yet 100% guilt-free! 
    • They are filled with fresh pumpkins, beautiful spices, and sweet-sour cranberries. Such a treat!
    • These homemade oatmeal pancakes are easy to make in just 15 minutes!

    Ingredients used

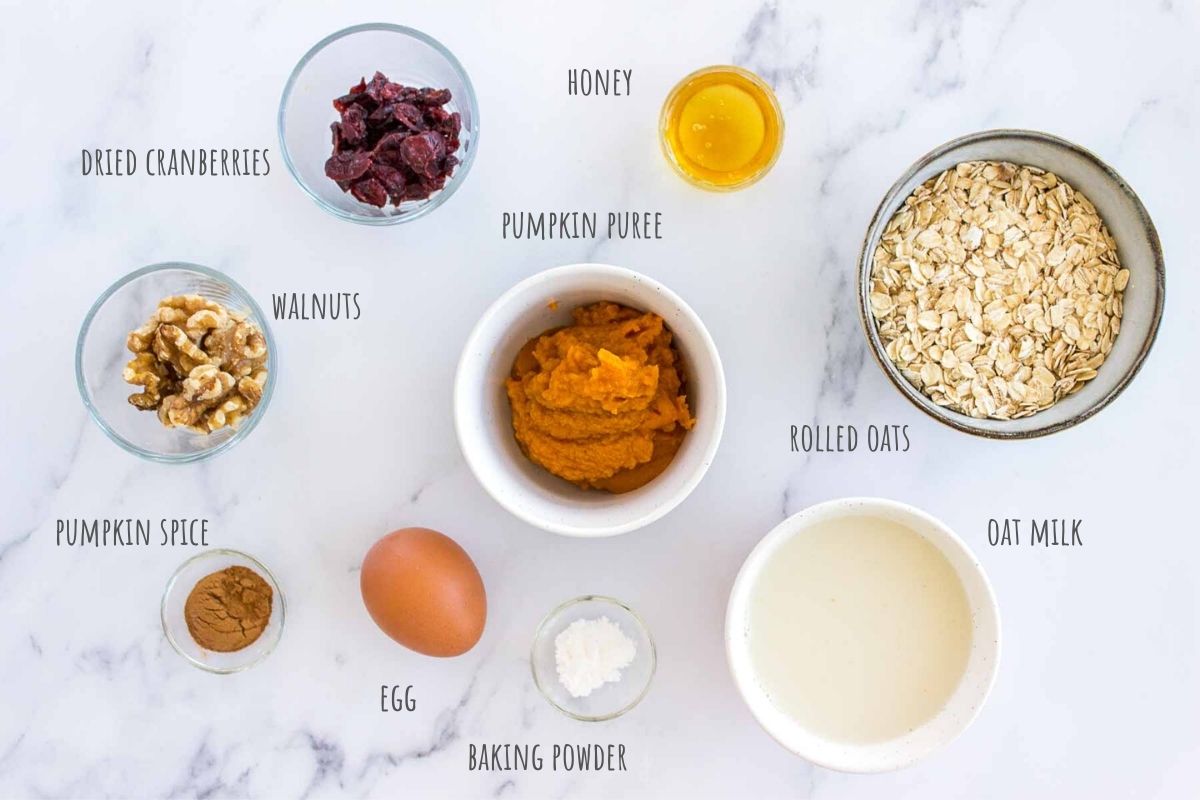
    This pumpkin oatmeal pancake recipe is very simple. You will need only a few pantry ingredients:

    Pumpkin Oatmeal Pancakes  ingredients
    • Oats. Hearty, healthy, and filling, oats are the most used ingredients in my cooking. I use them as a substitute for regular flour. Oats are an excellent source of fiber, especially beta-glucan, a type of soluble fiber that keeps our hearts healthy. They also support healthy digestion and strong immunity. I used rolled oats in this recipe, but you can use quick oats if you like.
    • Milk of choice. I used oat milk, but you can use whatever milk you prefer. Note that coconut milk won't work well here.
    • Pumpkin puree. Pumpkin puree is not only sweet and flavorful but also loaded with nutrients. It's packed with vitamins and minerals, and especially high in beta-carotene, a potent antioxidant that our body turns into vitamin A which is essential for a strong immune system. (1)
    • Sweetener. I used honey, but you can easily use maple syrup. Honey gave subtle sweetness yet didn't overload the pancakes with sugary calories.

    To give the pancakes extra flavor and boost, I tossed in some superfoods as well:

    • Pumpkin spice. I love my homemade Pumpkin Pie Spice blend. It features super spice Ceylon cinnamon known for its anti-inflammatory properties. (2).
    • Walnuts. Walnuts are very nutritious. They are a good source of Omega-3 and an excellent source of powerful antioxidants that fights inflammation. 
    • Dried cranberries. To balance sweet pumpkin flavors. 

    Other pantry ingredients you’ll need:

    • Egg - I used free-range, pasture-raised. 
    • Baking powder.
    • Pinch of salt.
    • Extra virgin coconut oil/coconut oil cooking spray - for greasing the pancake pan.
    • For the topping: dried cranberries and chopped walnuts. 

    Look at the "Substitutions" section below if you are missing some of the ingredients.

    Pumpkin Pancakes on a wooden plate

    How to make Pumpkin Oatmeal Pancakes

    Pumpkin Oatmeal Pancakes are really easy to make. It will take you 15 minutes TOPS! - and you need only basic equipment.

    Equipment used

    • Measuring cups.
    • High speed blender. 
    • Pancake pan - or any pan with non-stick surface.
    • Flexible silicone spatula - for flipping the pancakes. 

    Step by step instructions

    • Step 1: Prepare the ingredients.
      • Start with preparing and measuring all the ingredients. Use measuring cups.
      • Chop dried cranberries a bit (optional).
    • Step 2: Mix the ingredients.
      • Place all the ingredients except dried cranberries in a blender. Note: add wet ingredients first for easier blending.
      • Mix everything at high speed until you get a smooth texture.
      • This is a good time to taste the pancake batter and add additional sweetener if you think the mixture is not sweet enough.
      • Let the batter rest for a minute. Oats will soak some of the moisture, and pancake batter will thicken.
      • If pancake batter turns out too dense, add a bit more liquid - milk or water. Mix again. Pancake batter should be dense but runny.
    • Step 3: Bake the pancakes.
      • In the meantime, heat the pancake pan over medium heat and coat it with coconut oil cooking spray or coconut oil using the brush. 
      • For each pancake, drop ¼ cup of batter into the pan.
      • Top the pancake with chopped cranberries. Push the cranberry pieces into the batter.
      • Cook for 1-2 minutes until pancake is lightly browned. 
      • Flip the pancake carefully with a flexible silicone spatula and cook for another minute. Transfer to a plate. 
      • Make sure to coat the pan before every pancake or batch of pancakes to prevent sticking.
      • Repeat the process with the remaining pancake batter.
    • Step 4: Add toppings and serve.
      • Top the pancakes with different toppings. You can be creative here and use ingredients you like.
      • Serve and enjoy!
    Pumpkin Pancakes on a wooden plate

    Tips for serving

    • Top pumpkin pancakes with fresh fruits: banana slices, pears, plums, or any stone fruit.
    • Drizzle them with maple syrup or honey.
    • Top them with nut butter: almond butter, peanut butter.
    • Sprinkle them with chopped nuts: walnuts, pecans, peanuts, hazelnuts, and dried fruits: cranberries, raising, sultanas, goji berries, apricots, chopped dates.

    Tips for storing

    • Keep oatmeal pancakes in an air-tight food container refrigerated. They will last up to 4 days.
    • To freeze pancakes: Take the pancakes and place each pancake individually in a wax paper bag or stack between wax paper. Store wrapped pancakes in a large freezer zip-lock bag. Keep in the freezer for up to 3 months. Thaw on room temperature.
    • You can warm pancakes in the microwave. But don't overheat them. They will become soggy.

    Substitutions

    • You can use rolled oats or quick oats.
    • You can swap oat milk for almond milk, cashew milk, or organic soy milk. Cow’s milk works fine here too. Coconut milk won’t work well here. 
    • You can substitute maple syrup and use honey. Date syrup or molasses are a great option too. Note that using date syrup or molasses will turn pancakes dark.
    • You can substitute coconut oil with avocado oil.
    • Substitute walnuts with pecans.
    • Make it vegan: Swap egg with a flax or chia egg. Use non-dairy milk.
    • Make it gluten-free: Use certified gluten-free oats.
    Pumpkin Pancakes on a wooden plate

    Recipe tips

    • When adding ingredients to a blender, always add the liquids first. Doing this will help your blender run easily and this will prevent making lumps.
    • Use a high-power blender to ensure everything blends well and the batter is smooth. 
    • Make sure you let the batter rest for a minute. Oats will soak some of the moisture, and pancake batter will thicken. This is very important because you don't want runny pancake batter.
    • If you let the batter sit overnight, it will become dense so you may need to add a bit more liquid - milk or water.
    • Always taste the butter. If you feel that pancakes are not sweet enough for your taste, add more sweetener.
    • Sweetener recommendations:
      • I recommend using honey or maple syrup. Make sure you use honey in runny form.
      • Date syrup or molasses are great options too. Note, they might change the pancake color to more dark.
      • You can use stevia or any low-carb sweetener.
      • Adding sweetener is totally based on your preference.
    • Make sure to use organic virgin coconut oil rather than refined versions.
    Pumpkin Pancakes on a wooden plate

    These beautiful pumpkin pancakes are just what you need on a foggy cold Autumn morning. They are sweet and incredibly tasty, filled with wonderful flavors ad sweet-sour cranberries. Nutty, cozy, delicious!

    Plus, they are so healthy but totally indulging. Make them asap! Trust me, you won't regret it.

    Recipe

    Pumpkin Pancakes on a wooden plate
    Print Recipe
    4.95 from 150 votes

    Pumpkin Oatmeal Pancakes

    These Pumpkin Oatmeal Pancakes are a wonderful seasonal treat. They are fluffy, sweet, filled with fresh pumpkin, and beautiful flavors. Perfect cozy, healthy, and filling breakfast that will brighten your morning.
    Prep Time2 minutes mins
    Cook Time12 minutes mins
    Resting time1 minute min
    Total Time15 minutes mins
    Course: Breakfast
    Cuisine: American, International
    Keyword: apple cinnamon oatmeal pancakes, healthy pumpkin pancakes, pumpkin oatmeal pancakes, pumpkin pancakes
    Servings: 8 pancakes
    Calories: 118kcal
    Author: Natalie

    Equipment

    • Measuring cups
    • Blender
    • Pancake pan
    • Flexible silicone spatula

    Ingredients

    • 1 cup rolled oats
    • 1 ¼ cup oat milk
    • 1 medium egg
    • 1 teaspoon baking powder
    • ¾ cup pumpkin puree
    • 1 tablespoon honey or maple syrup
    • ¼ cup walnuts
    • 1 teaspoon pumpkin spice
    • Pinch of salt
    • ¼ cup dried cranberries
    • Coconut oil or cooking spray for greasing the pan

    Instructions

    • Measure all the ingredients. Chop dried cranberries(optional).
    • Place all the ingredients except dried cranberries in a blender. Note: add wet ingredients first for easier blending.
    • Mix everything at high speed until you get a smooth texture.
    • Taste the pancake batter and add additional sweetener if you think the mixture is not sweet enough.
    • Let the batter rest for a minute. Oats will soak some of the moisture, and pancake batter will thicken.
    • Pancake batter should be dense but runny. If pancake batter turns is too dense, add a bit more liquid - milk or water. Mix again.
    • Heat the pancake pan over medium heat and coat it with cooking spray or coconut oil using the brush.
    • For each pancake, drop ¼ cup of batter into the pan.
    • Top the pancake with chopped cranberries. Push the cranberry pieces into the batter.
    • Cook for 1-2 minutes until pancake is lightly browned.
    • Flip the pancake carefully with a flexible silicone spatula and cook for another minute. Transfer to a plate.
    • Make sure to coat the pan before every pancake or batch of pancakes to prevent sticking.
    • Repeat the process with the remaining pancake batter.
    • Top the pancakes with different toppings.
    • Serve and enjoy!

    Notes

    Makes 8 pancakes that serve 4 people.
    Substitution
    • You can use rolled oats or quick oats.
    • You can swap oat milk for almond milk, cashew milk, or organic soy milk. Cow’s milk works fine here too. Coconut milk won’t work well here. 
    • You can substitute honey and use maple syrup. Date syrup or molasses are a great option too. Note that using date syrup or molasses will turn pancakes dark.
    • You can substitute coconut oil with avocado oil.
    • Substitute walnuts with pecans.
    • Make it vegan: Swap egg with a flax or chia egg. Use non-dairy milk.
    • Make it gluten-free: Use certified gluten-free oats.
    Tips for storing
    • Keep oatmeal pancakes in an air-tight food container refrigerated. They will last up to 4 days.
    • To freeze pancakes: Take the pancakes and place each pancake individually in a wax paper bag or stack between wax paper. Store wrapped pancakes in a large freezer zip-lock bag. Keep in the freezer for up to 3 months. Thaw on room temperature.
    • Pancakes can be warmed in the microwave. Don't overheat them.
    As a measure, I used a US cup (240ml). See "Recipe tips" for more info.

    Nutrition

    Serving: 1pancake | Calories: 118kcal | Carbohydrates: 18g | Protein: 3g | Fat: 4g | Saturated Fat: 1g | Polyunsaturated Fat: 2g | Monounsaturated Fat: 1g | Trans Fat: 1g | Cholesterol: 20mg | Sodium: 28mg | Potassium: 180mg | Fiber: 2g | Sugar: 9g | Vitamin A: 3682IU | Vitamin C: 1mg | Calcium: 94mg | Iron: 1mg

    More recipes to try

    • Apple Oatmeal Pancakes featured image
      Apple Oatmeal Pancakes
    • Matcha Pancakes featured image
      Matcha Pancakes
    • Peanut Butter Oatmeal Pancakes featured image
      Peanut Butter Oatmeal Pancakes
    • Carrot Cake Pancakes topped with Maple Cream Cheese drizzle
      Carrot Cake Pancakes

    Maca Latte

    October 12, 2021 by Natalie 64 Comments

    Maca Latte featured image

    This Maca Latte is the perfect energizing drink. It's bold but super smooth and tastes amazing. It's packed with antioxidants and super easy to make - a wonderful, wholesome alternative to classic coffee.

    [feast_advanced_jump_to]
    Maca Latte

    Just recently, I shared the recipe for Matcha Maca Latte and realized that it would be a real shame not to share yet another morning drink I like - an incredible Maca Latte.

    I've been making this maca coffee for years and couldn't recommend it more. It's a powerful super drink that tastes amazing!

    Why do you need to try Maca Latte?

    • This Maca Latte is smooth, rich, and tastes fantastic.
    • It features the superfood maca powder, which boosts stamina, energy, and sex drive.
    • It packs an incredible amount of powerful antioxidants.
    • It's low in calories and great for weight loss.
    • It's full of wonderful earthy maca and cinnamon flavor.
    • It's energizing, brain-boosting, healthy drink, perfect for mornings.
    • It's vegan, easy to make, and in one word - a miracle drink!
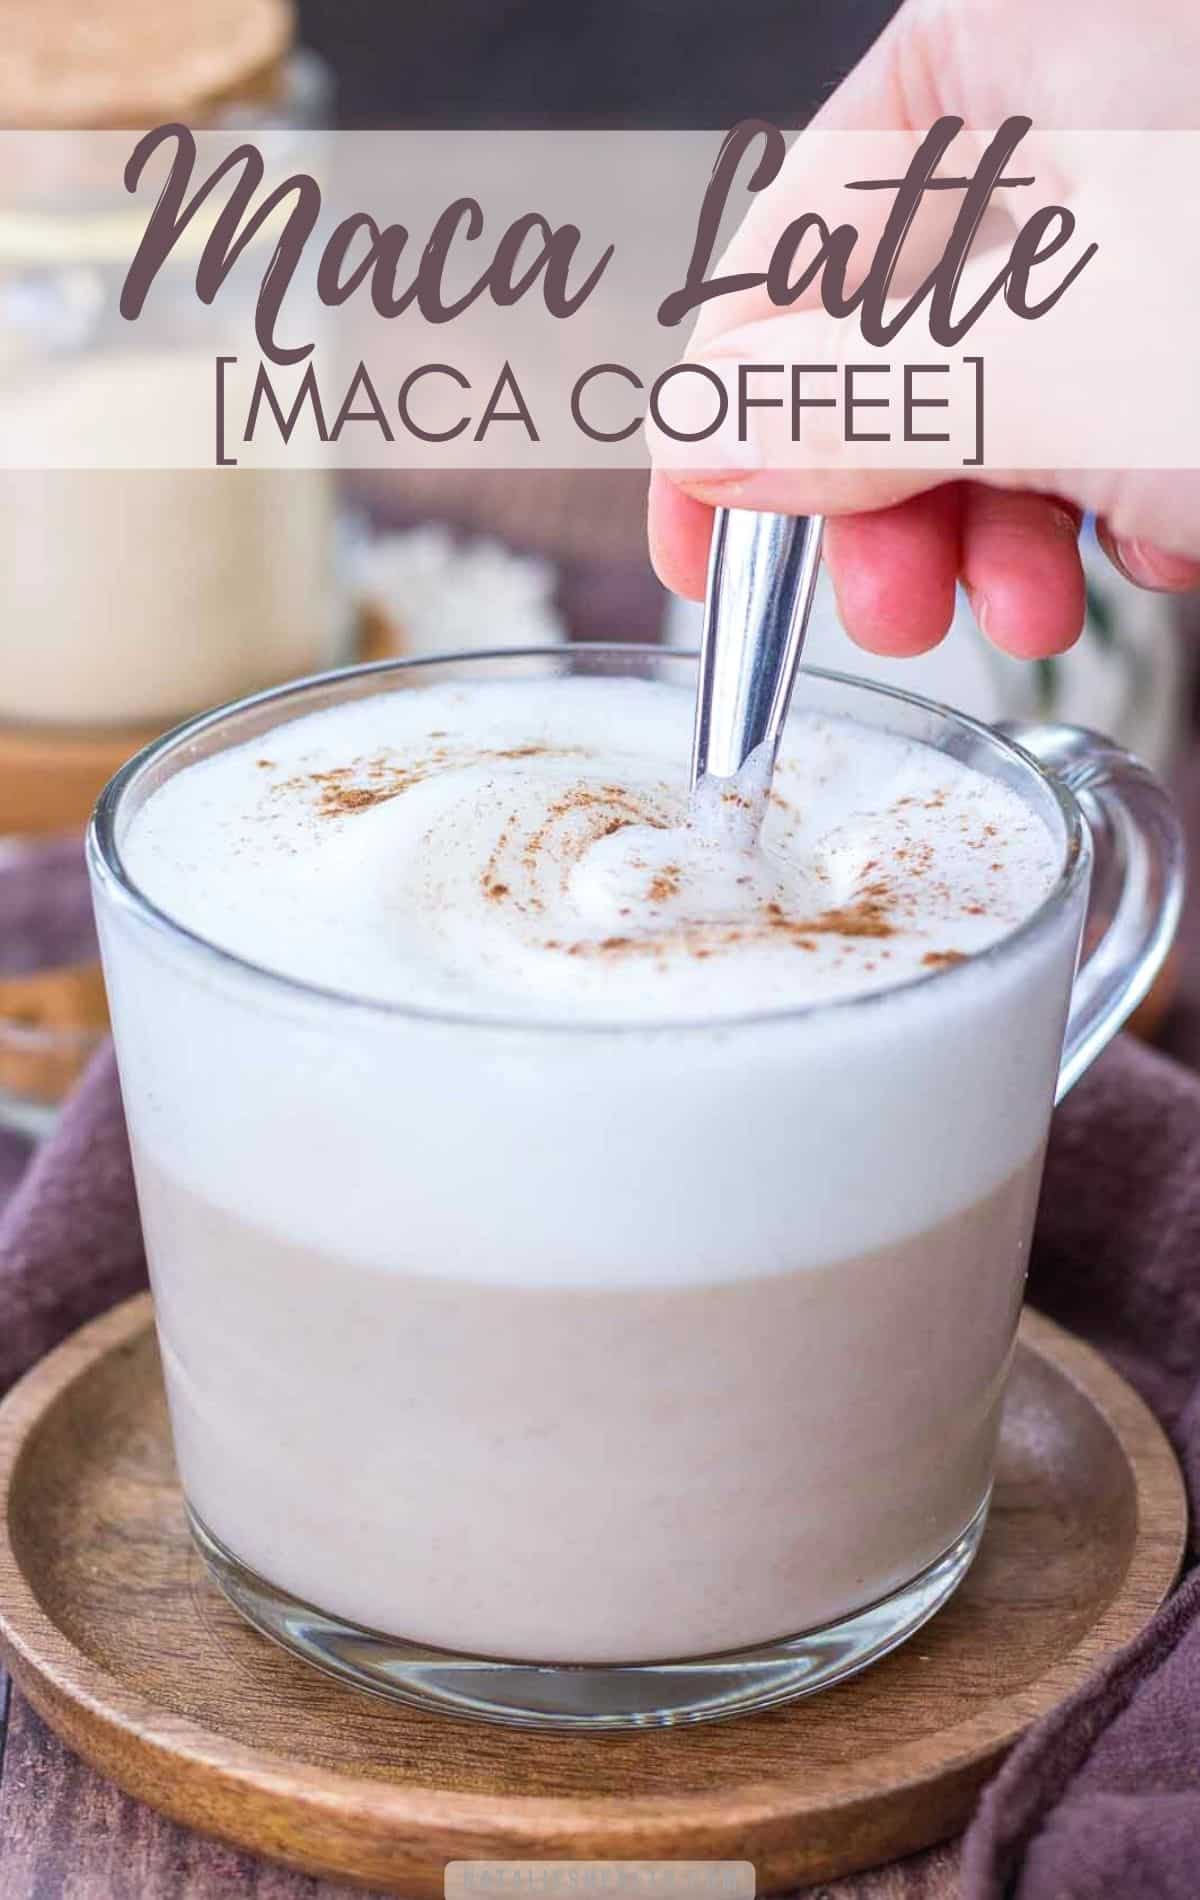
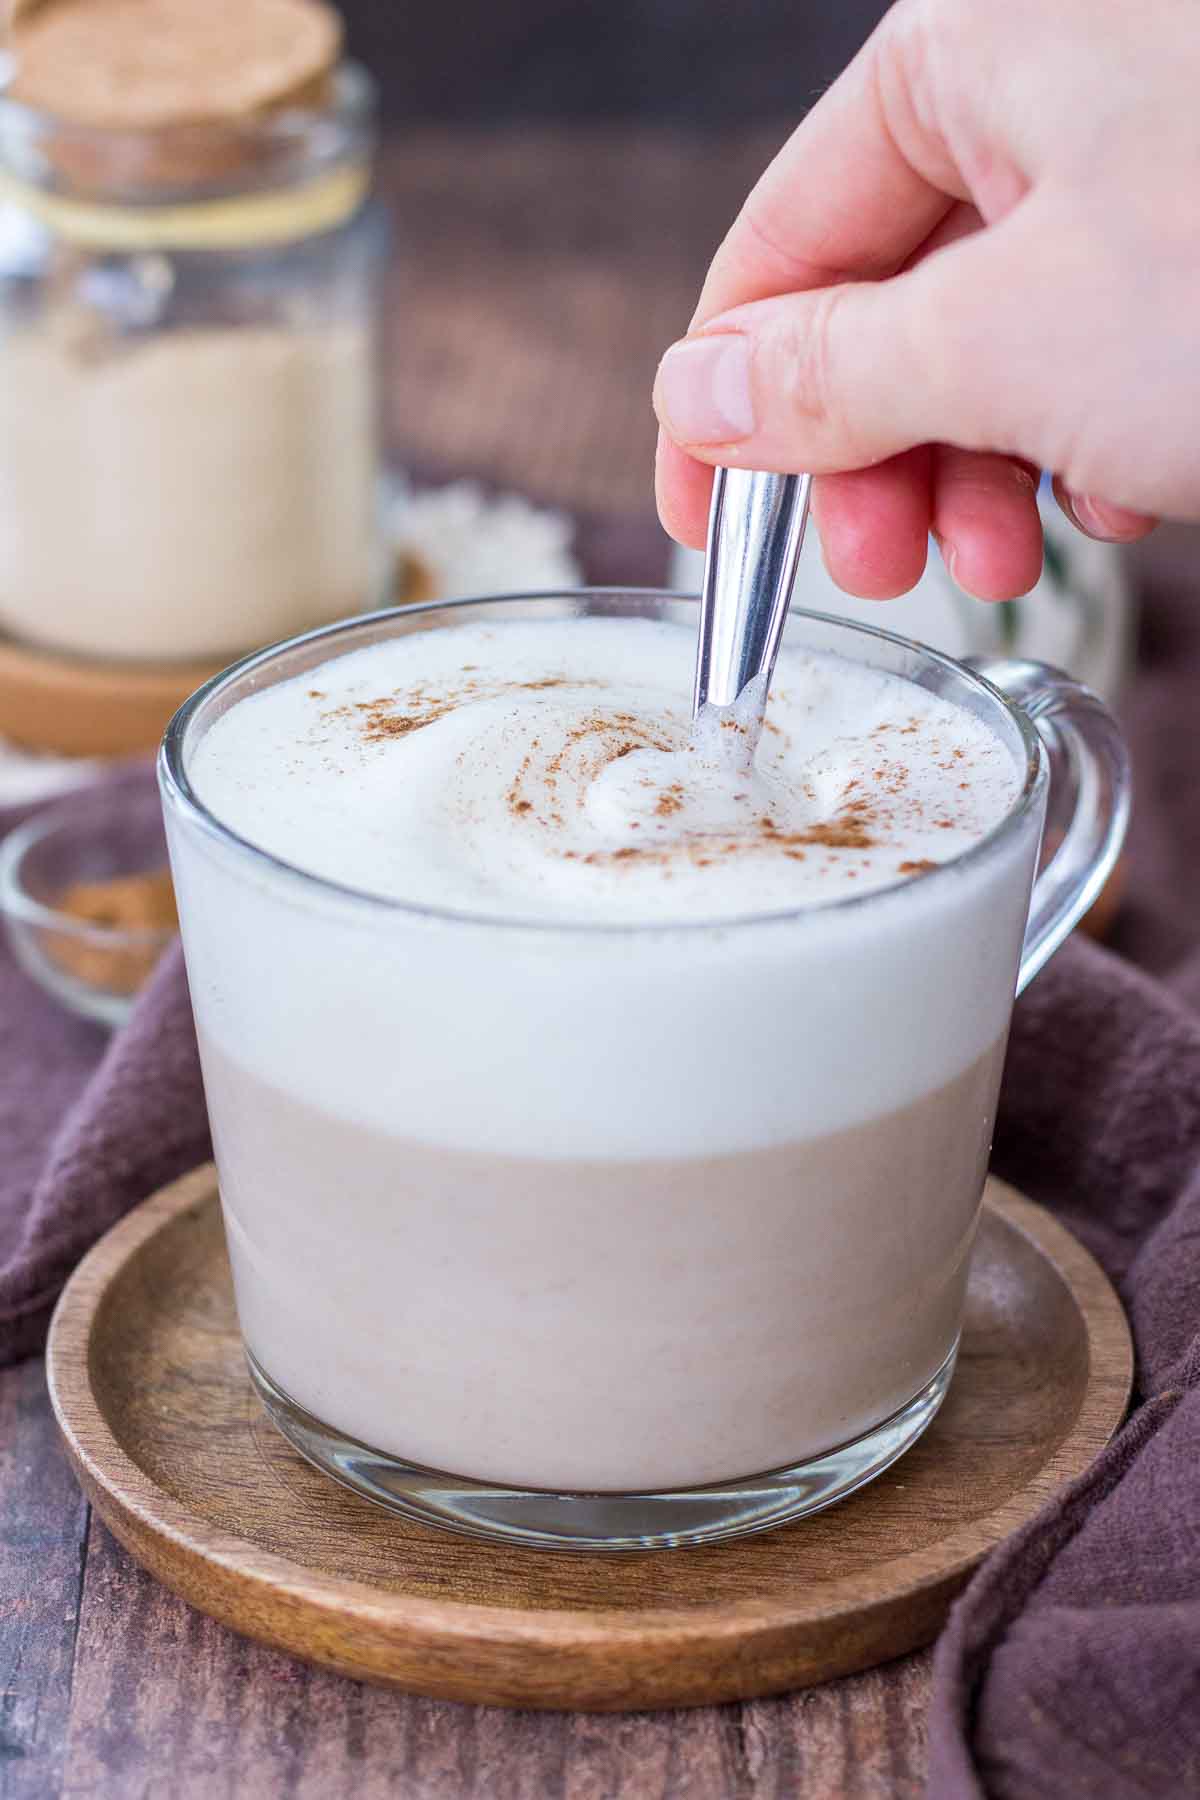
    Maca Latte served in a clear mug topped with milk foam and cinnamon

    What is maca powder?

    Maca powder contains fiber, amino acids, vitamins, and minerals. It also contains other bioactive compounds and antioxidants, including alkaloids, responsible for many maca powder benefits.

    Maca is an adaptogen, which means it can help to support hormonal, nervous, and cardiovascular systems. It is also quite effective for improving libido and stamina. (2)

    Maca has an earthy, sweet flavor with hints of caramel and vanilla. It is delicious in smoothies, mixed into overnight oats, or in a lovely Maca Latte.

    How to use maca powder?

    Maca is such a great ingredient. I've been using it for many years.

    I love adding maca to my morning smoothies, energy balls, iced drinks, and hot drinks - like this hot chocolate.

    It has a powerful effect on my body and gives me a huge energy boost. It awakes me but doesn't create nervous energy like coffee sometimes does.

    Maca Latte served in a clear mug topped with milk foam and cinnamon

    Ingredients used

    To make Maca Latte at home, you will need only three ingredients:

    Maca Latte ingredients
    • Maca powder. I used yellow maca powder. You can buy maca in any health store. It's quite inexpensive compared to the benefits it gives.
    • Ceylon cinnamon. Also known as “true” cinnamon. Cinnamon is packed with powerful antioxidants that have anti-inflammatory properties. (1, 2)
    • Milk. The best milk to use here is oat milk, organic soy, or almond milk. Cashew works well too. Coconut milk and cow's milk won't work well here.
    • Hot water.
    • Sweetener (optional). Honey or pure maple syrup is the best. See "Recipe tips" for more suggestions.

    How to make Maca Latte

    Making this maca drink is very simple, and it takes 5 minutes to complete. You will need some equipment. I recommend using a bamboo whisk. But there are ways to make it using a shaker or handheld frother. See "Recipe tips" for suggestions.

    • Step 1: Prepare the ingredients.
      • Start with preparing all the ingredients.
      • Put the kettle on for hot water.
      • Put the milk in a small saucepan or microwave to heat. If you have an automatic milk frother, add the milk to the frother, heat, and froth the milk.
    • Step 2: Mix the ingredients.
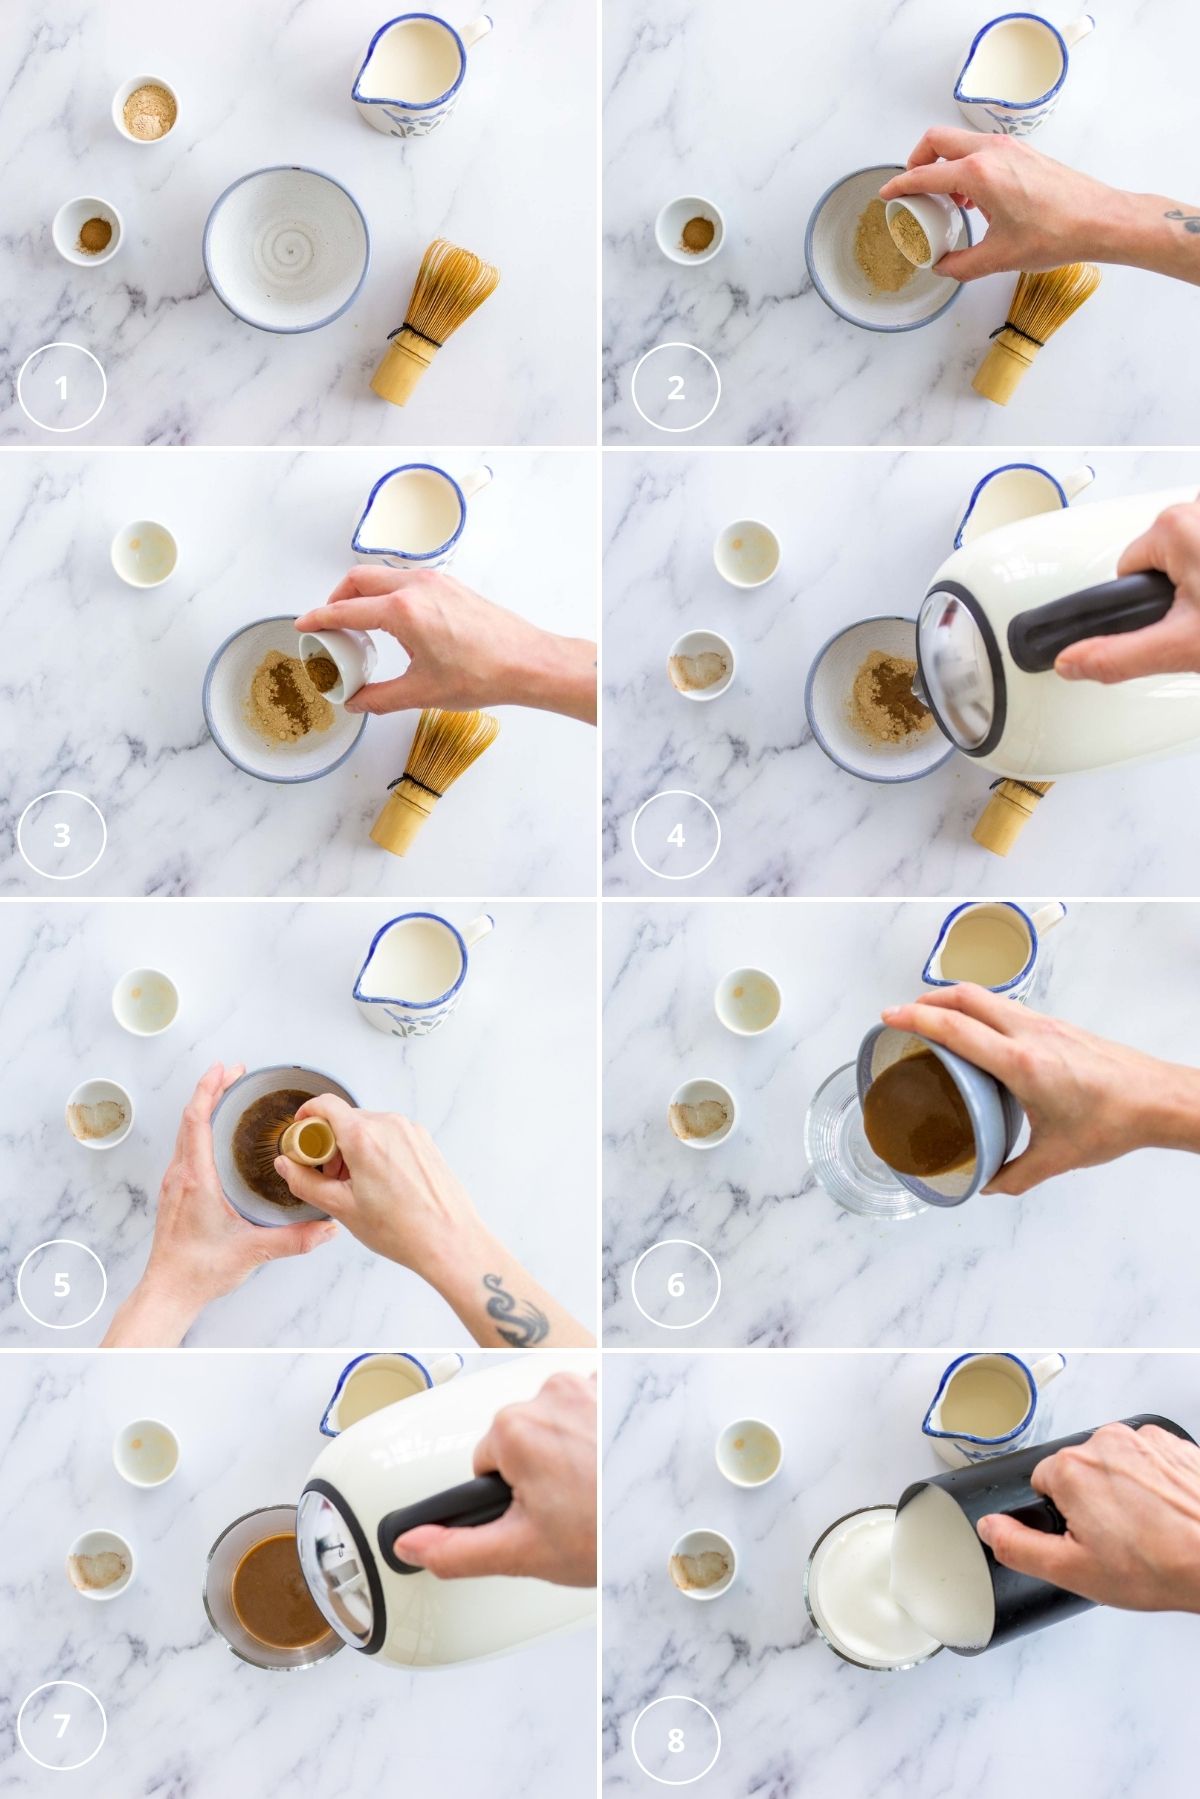
      • Add a teaspoon of maca powder into a small bowl.
      • Add in a teaspoon of cinnamon.
      • Add in a small amount of hot (but not boiling) water, 2 - 3 tablespoons.
      • Take the bamboo whisk and whisk until completely dissolved. Whisking in an "m" motion can help achieve a nice foam texture.
    • Step 3: Assemble the drink.
      • Transfer the maca mixture into a mug.
      • Add more hot water (if desired), about ¼ cup.
      • Pour the frothed milk into a mug over the maca.
      • Add sweetener, if desired, and to taste.
      • Enjoy hot!
    Maca Latte Process Shots

    Substitutions

    • You can substitute oat milk with almond milk, organic soy milk, or cashew milk.
    • You can substitute yellow maca powder with darker types - black or red maca powder. Black and red maca powder are more suitable for men.

    Recipe variations

    • Add in some vanilla for more flavor.
    • Make it seasonal. Add Pumpkin Spice.
    • Make it keto (bulletproof Maca Latte): Add a teaspoon of MCT oil.
    • Make it anti-inflammatory: Add a teaspoon of turmeric powder.
    • Make it caffeinated: Mix in a shot of espresso or your favorite coffee.
    Maca Latte served in a clear mug topped with milk foam and cinnamon

    Recipe tips

    • If you don’t have a bamboo whisk, you can use a metal whisk, handheld frother, or simple shaker. Bamboo whisks are gentle on the maca and help dissolve more completely. I highly recommend investing in a matcha set!
    • When whisking maca, make sure there are no lumps.
    • Maca Latte tastes best lightly sweetened. So don't go wild with adding sweeteners.
    • Sweetener recommendation:
      • You can use honey or maple syrup here. Make sure you use honey in liquid form, not raw.
      • Use stevia or any low-carb sweetener for a low-calorie option.
      • Other sweeteners like coconut sugar and date syrup are not good here. They change the taste of maca too much.
    • I tested oat, almond, soy, and cashew milk, and they all stood out as winners. Cow milk and coconut milk change the taste considerably. Therefore they are not a good option.
    Maca Latte served in a clear mug topped with milk foam and cinnamon

    Faq

    Does maca have caffeine?

    Maca doesn't contain any caffeine.

    Can you put maca powder in coffee?

    Absolutely. Maca is one of the most energizing foods on the planet, which makes it the perfect extra kick in your coffee!

    Which maca is best for females?

    Yellow maca is the most common form of maca and is primarily used for overall vitality and wellness in both men and women. Yellow maca is also considered the best form of maca for decreasing stress levels, enhancing mood, and improving focus.

    Is maca the same as matcha?

    It may be pronounced similarly, but maca differs from matcha in many ways. While matcha powder is made of tea leaves and originates from Japan, maca is the root from Peru.

    Maca Latte served in a clear mug topped with milk foam and cinnamon

    This maca coffee is smooth and warming, perfect for cozy mornings. It's energizing and works wonders for our bodies. It's healing and absolutely amazing.

    Don't be afraid to try it out. And if you need inspiration beyond this Maca Latte, try some of my other recipes that include maca powder.

    More maca recipes to try

    • Chocolate Maca Balls
    • Turmeric Maca Powder Cacao Energy Balls
    • Peanut Butter Maca Overnight Oats
    • Chocolate Maca Tahini Brownies

    Recipe

    Maca Latte served in a clear mug topped with milk foam and cinnamon
    Print Recipe
    4.98 from 178 votes

    Maca Latte

    This Maca Latte is the perfect caffeine-free pick-me-up drink. It's bold but super smooth and tastes amazing. It's packed with antioxidants and super easy to make—a wonderful, wholesome alternative to coffee.
    Prep Time5 minutes mins
    Total Time5 minutes mins
    Course: Drinks
    Cuisine: American, International
    Keyword: maca drink, maca latte recipe, matcha maca latte
    Servings: 1 cup
    Calories: 114kcal
    Author: Natalie

    Equipment

    • Bamboo whisk
    • Milk frother

    Ingredients

    • 1 teaspoon maca powder
    • ½ teaspoon Ceylon cinnamon
    • ¾ cup oat milk
    • Hot water
    • Sweetener: maple syrup or light honey to taste if desired

    Instructions

    • Prepare all the ingredients: Put the kettle on for hot water. Put the milk in a small saucepan or microwave to heat. If you have an automatic milk frother, add the milk to the frother, heat, and froth the milk.
    • Put maca and cinnamon in a small bowl.
    • Add in a small amount of hot water, about 2 - 3 tablespoons.
    • Take the bamboo whisk and whisk until completely dissolved. Whisking in an "m" motion can help achieve a nice foam texture.
    • Transfer the mixture into a mug.
    • Add more hot water (if desired), about ¼ cup.
    • Pour the frothed milk into a mug over the maca.
    • Add sweetener, if desired, and to taste.
    • Enjoy hot!

    Notes

    Substitutions
    • You can substitute oat milk with almond milk, organic soy milk, or cashew milk.
    • You can substitute yellow maca powder with darker types - black or red maca powder. Black and red maca powder are more suitable for men.
    Recipe variations
    • Add in some vanilla for more flavor.
    • Make it seasonal, add Pumpkin Spice.
    • Make it keto (bulletproof Maca Latte): Add in a teaspoon of MCT oil.
    • Make it anti-inflammatory: Add a teaspoon of turmeric powder.
    • Make it caffeinated: Mix in a shot of espresso or your favorite coffee.
    See "Recipe tips" for more recipe info. As a measure, I used a US cup (240ml).

    Nutrition

    Serving: 1cup | Calories: 114kcal | Carbohydrates: 22g | Protein: 4g | Fat: 2g | Sodium: 85mg | Potassium: 173mg | Fiber: 3g | Sugar: 15g | Vitamin A: 372IU | Vitamin C: 1mg | Calcium: 289mg | Iron: 2mg

    More recipes to try

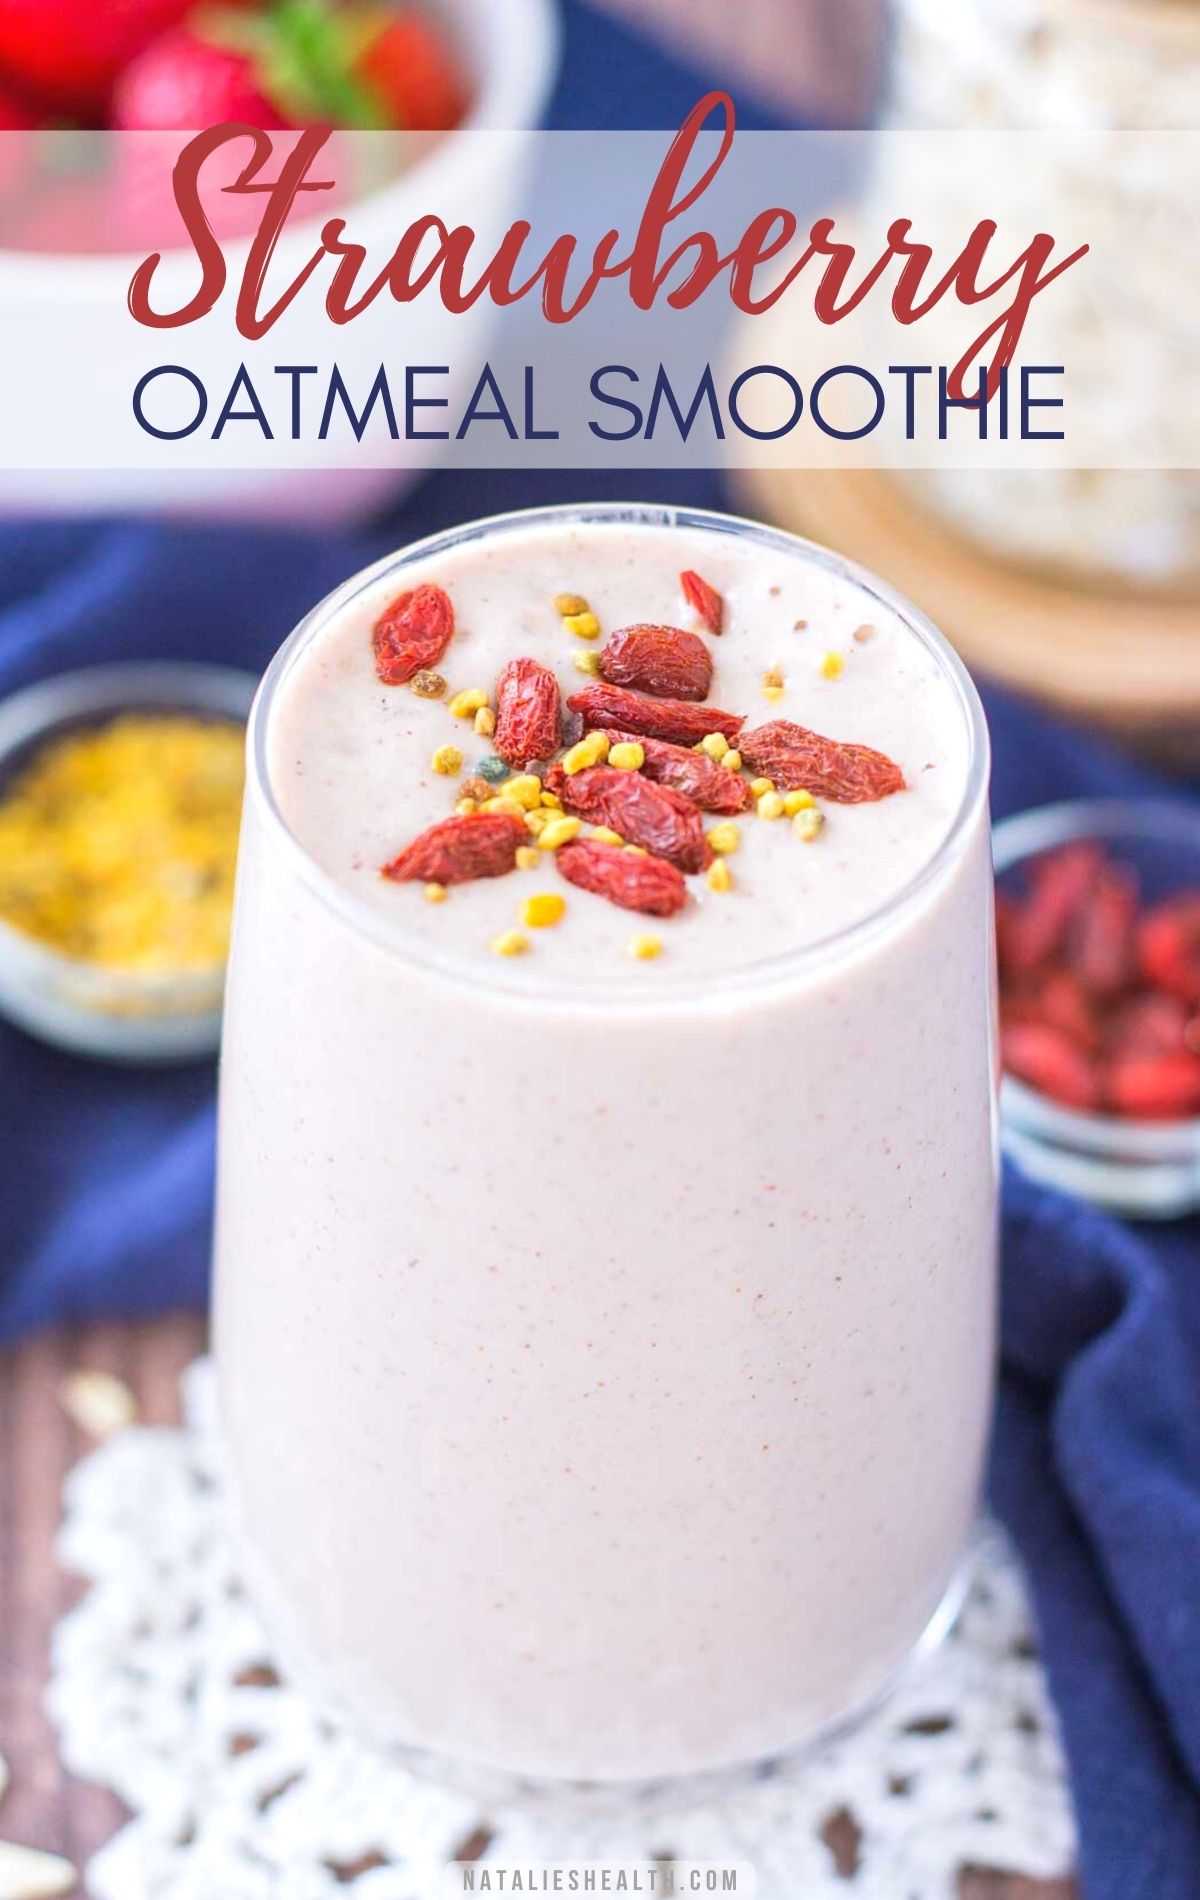
    • Strawberry Oatmeal Smoothie Featured Image
      Strawberry Oatmeal Smoothie
    • Almond Butter Energy Balls
    • Healthy Chocolate Peanut Butter Chia Seed Pudding with maca powder and raw cacao powder
      Chocolate Peanut Butter Chia Seed Pudding
    • 6 ingredient Vegan Gluten Free No Bake Peanut Butter Balls with Chocolate Chips
      No Bake Peanut Butter Balls

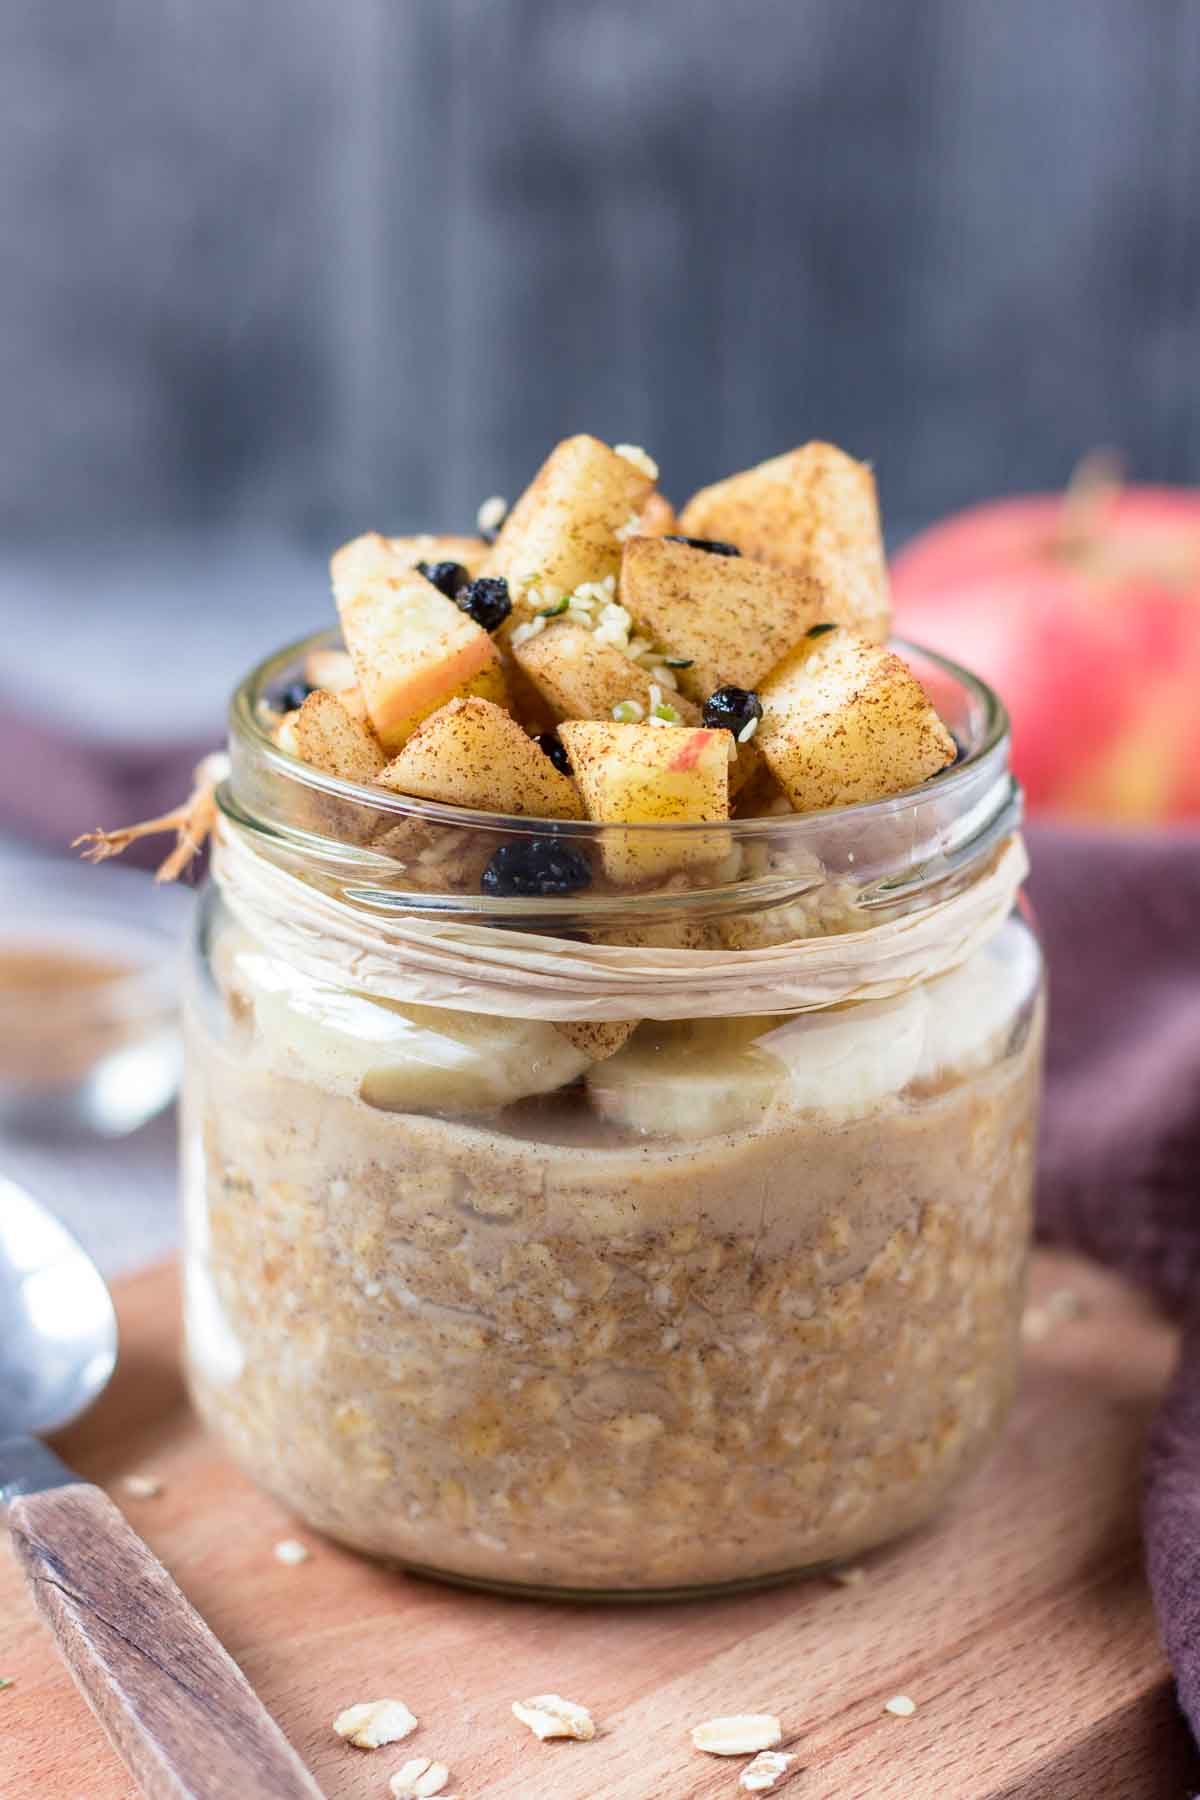
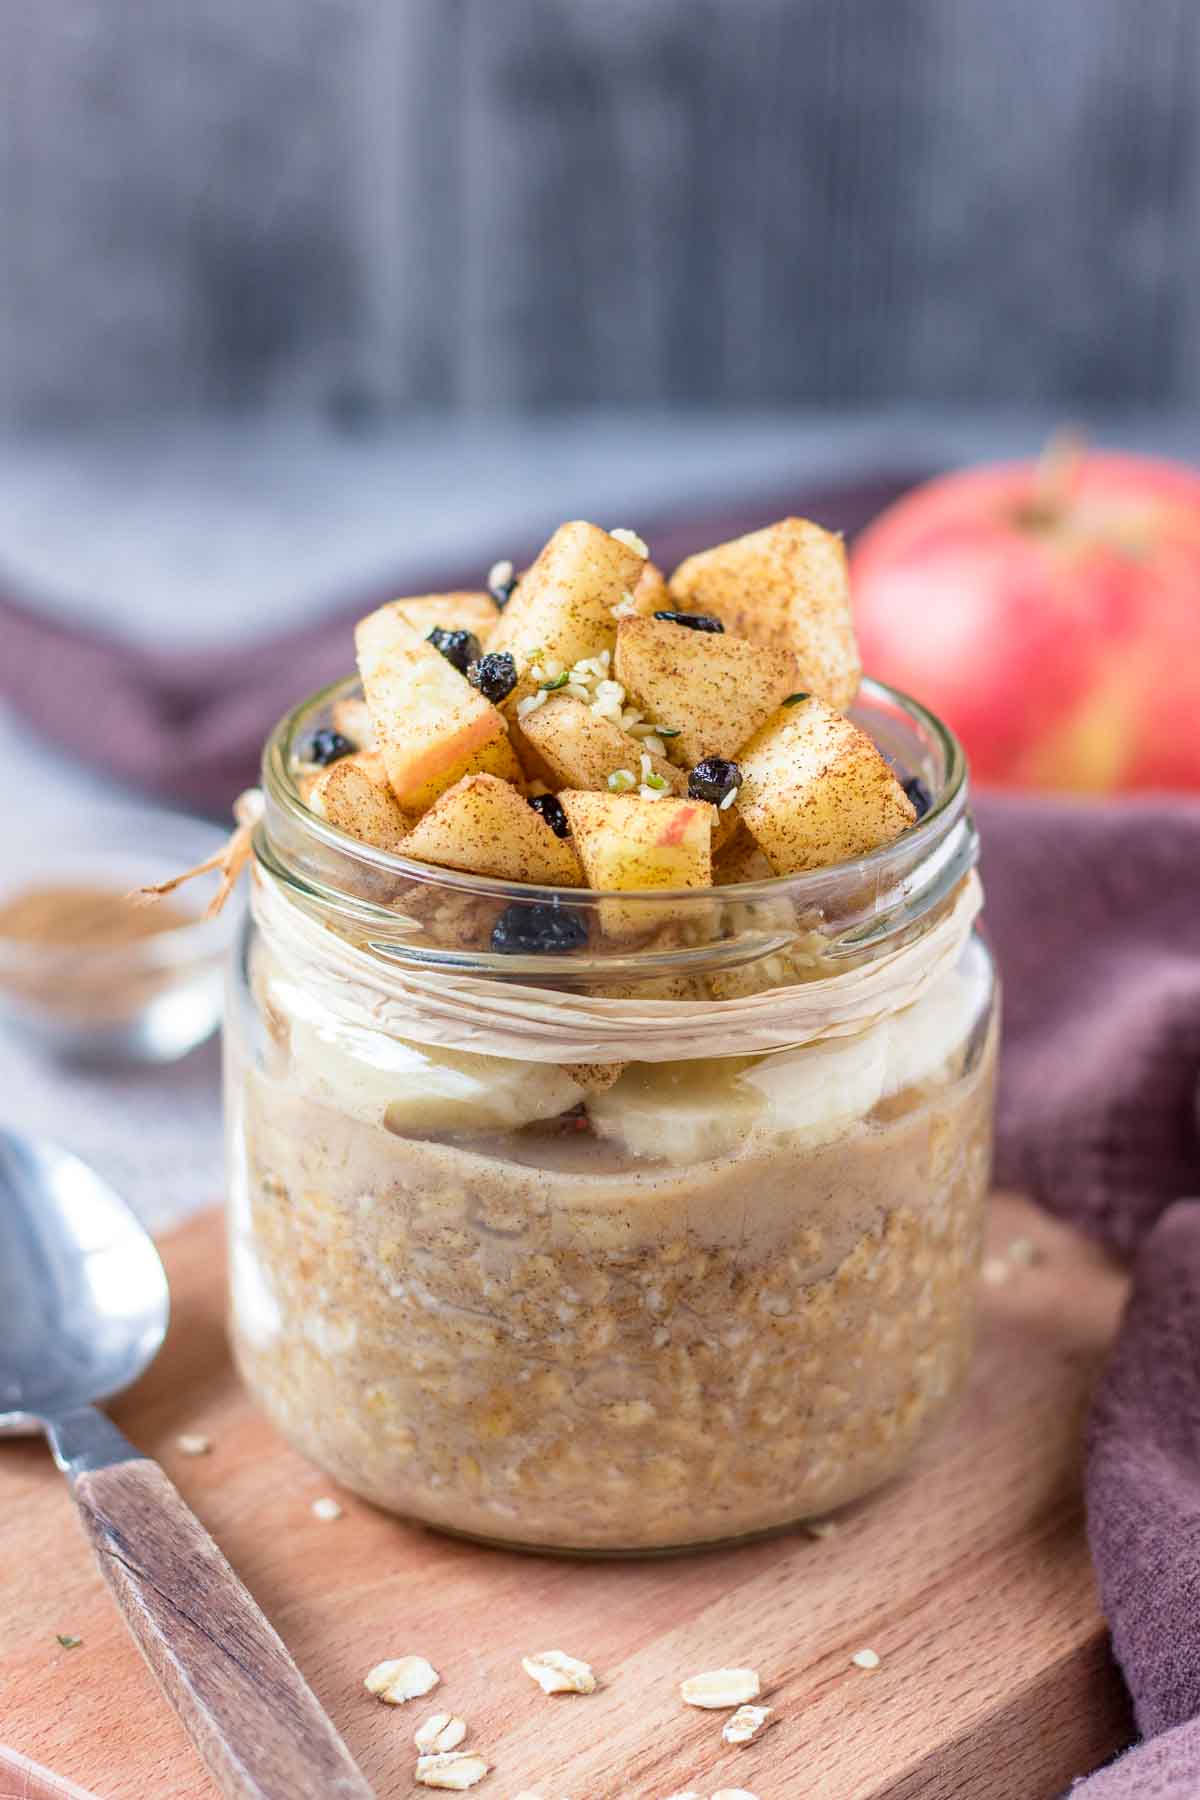
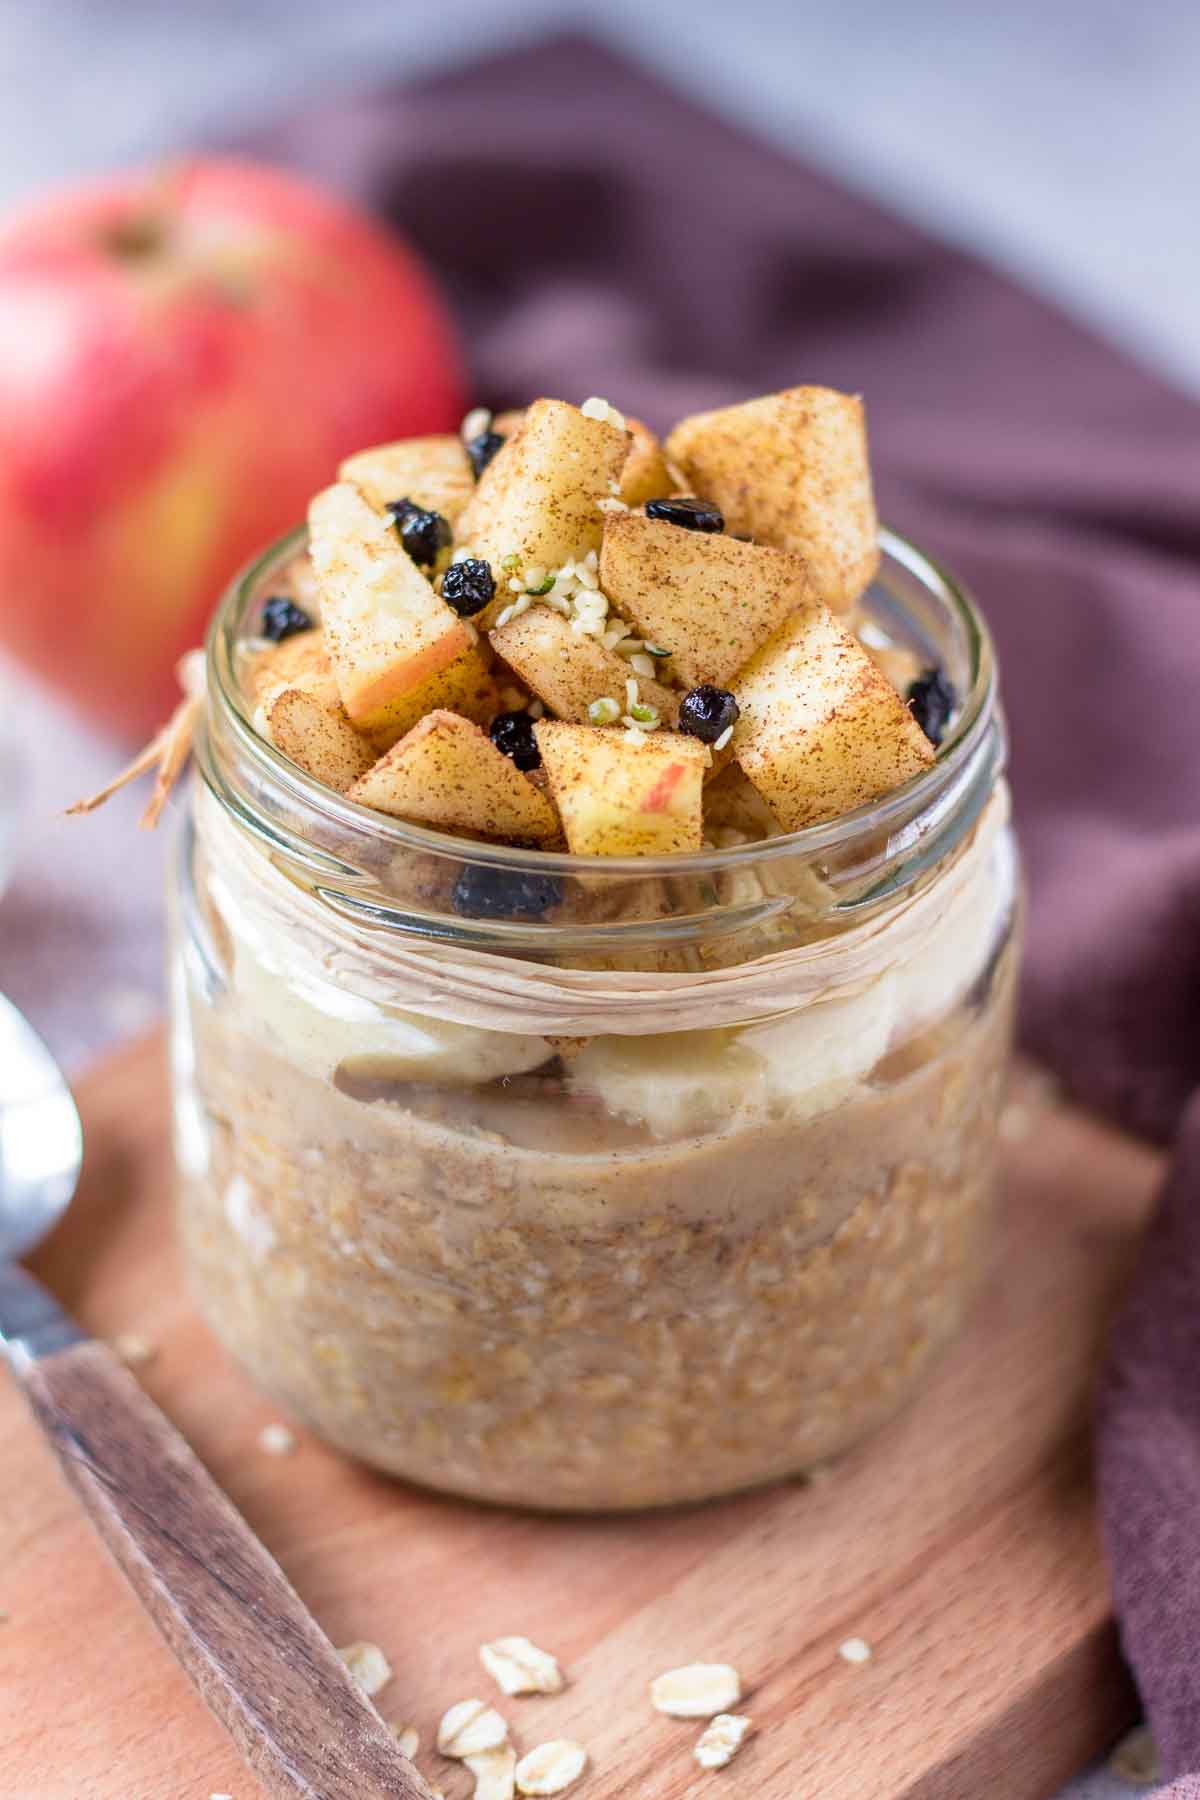
    Apple Cinnamon Overnight Oats

    September 28, 2021 by Natalie 87 Comments

    Apple Cinnamon Overnight Oats featured image

    These Apple Cinnamon Overnight Oats are creamy, perfectly flavored, and filled with fresh apples. They are easy to make with pantry ingredients. So healthy and made without added sugar. Perfect make-ahead energizing breakfast.

    [feast_advanced_jump_to]
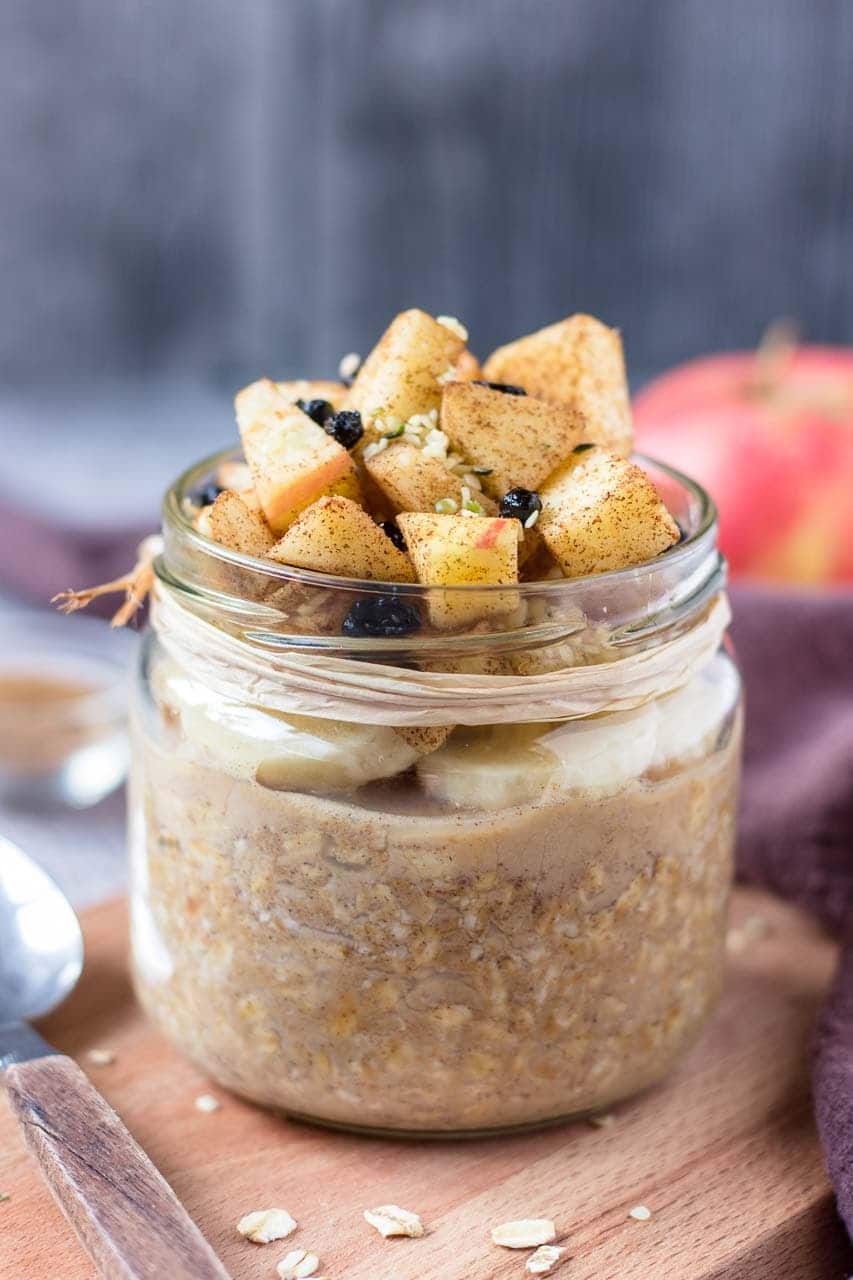
    Apple Cinnamon Overnight Oats topped with banana slices and fresh diced apple

    If you've been following my Instagram stories lately, you've probably noticed my obsession with overnight oats. Well, school started weeks ago, and the comfort of having a regular breakfast has completely gone for me. So I'm doing these make-ahead meals to ease the stress the following day and save myself a bit of time.

    Overnight oats are the perfect choice for busy mornings. They are easy to make ahead, which is super convenient. But they are also incredibly nutritious and always delicious. It's a simple meal but never dull.

    These Apple Cinnamon Overnight Oats are inspired by early Fall and beautiful juicy apples that are now in season. They taste just like grandma's sweet apple pie and smell amazing. Sweet, perfectly flavored, with bits of fresh apples. So good! 

    Why do you need to make this?

    • These apple overnight oats are a healthy meal and quite nutritious – packed with protein and fiber.
    • They are effortless to make with only a few pantry ingredients.
    • These overnight oats are full of seasonal flavors.
    • They are made without unhealthy refined sugars.
    • They require very little prep time, just 5 minutes, while the refrigerator does the rest of the work!
    • They are energizing and very satisfying. Perfect make-ahead breakfast.
    • Gluten-free, dairy-free, and vegan.

    Ingredients used

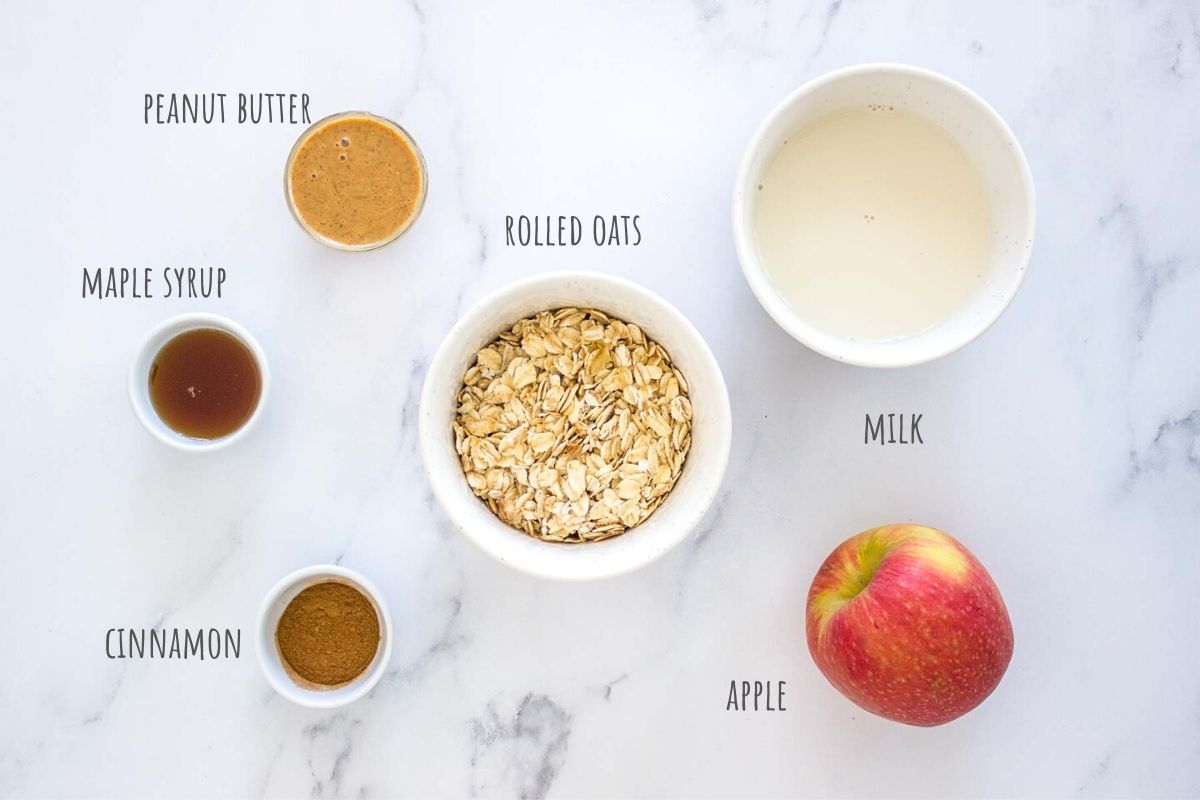
    This apple cinnamon overnight oats recipe is very simple. You will need only basic pantry ingredients: 

    Apple Cinnamon Overnight Oats ingredients
    • Rolled oats. Oats are whole grain, meaning they are rich in fiber, especially beta-glucan, a type of soluble fiber that keeps our heart healthy. They also support healthy digestion, which is essential for strong immunity. I used rolled oats.
    • Milk. I like using oat milk, but any type of milk will work.
    • Peanut Butter. I used creamy all-natural peanut butter here. Peanut butter is packed with proteins, healthy fats, and fibers. 
    • Apple. Fresh, sweet, and loaded with nutrients, apples are now in season and beautiful.
    • Sweetener. I used pure maple syrup, but you can easily use honey here if you like.
    • Ceylon cinnamon. Also known as “true” cinnamon. Cinnamon is packed with powerful antioxidants that have anti-inflammatory properties. (1, 2) Cinnamon gave these apple overnight oats a wonderful flavor.

    How to make Apple Cinnamon Overnight Oats

    Making these apple and cinnamon overnight oats is very simple. You just mix the ingredients, then let them sit in the refrigerator while you sleep. In the morning only add toppings.

    Equipment used

    • Measuring cups.
    • Bowl / wide-mouth jar with the lid.

    Step by step instructions

    • Step 1: Prepare the ingredients.
      • Start with preparing and measuring all the ingredients. I like to use measuring cups.
    • Step 2: Prepare the oats.
      • Place oats in a small bowl or a jar.
      • Add in milk, peanut butter, cinnamon, and sweetener.
      • Stir the mixture to combine using the spoon.
      • Taste the mixture and add additional sweetener if needed.
      • Secure with a lid and place in the refrigerator for at least 60 minutes to 6 hours. The best is to leave the oats overnight! 
    • Step 3: Assemble the oats.
      • The next day, add a diced fresh apple.
      • Add toppings (optional). I used dried blueberries and sliced banana. You can be creative here and use toppings you like.
      • Serve and enjoy! 
    Apple Cinnamon Overnight Oats topped with banana slices and fresh diced apple

    Substitutions

    • You can substitute oat milk with any milk - organic soy milk, cashew milk, or almond milk. Cow’s milk works well too. Coconut milk won't work well here.
    • You can substitute rolled oats with quick oats. Note: quick oats will turn very mushy if you leave them soaking overnight. But if you like creamier, softer texture, then quick oats are the way to go.
    • You can substitute maple syrup with honey. See "Recipe tips" for more suggestions.
    • You can substitute peanut butter with almond butter or cashew butter.

    Tips for storing

    • Store overnight oats in a sealed container or a jar with the lid.
    • Keep overnight oats in the refrigerator for up to 3 days, but they are best to eat within 24 hours.
    Apple and cinnamon overnight oats topped with banana slices and fresh diced apple

    Recipe variations

    • Add in some dried fruits: raisins, sultanas, or dried cranberries.
    • Pair fresh apples with more fruits: mango, pear, strawberry, raspberry.
    • Boost the oats with more fibers and Omega-3s by mixing in some ground flax seeds, chia seeds, or hemp seeds.
    • Some other toppins suggestions: pine nuts, chopped hazelnuts, chestnuts, pecans, walnuts.
    • Try other spices: nutmeg, allspice, pumpkin pie spice.
    • Make it weight loss friendly: use low-carb sweetener.
    • Make it protein-packed: Add a scoop of protein powder. This will transform apple overnight oats into a great protein-packed, pre-workout meal. I recommend vanilla protein powder.
    • Make it gluten-free: Use certified gluten-free oats.
    Apple and cinnamon overnight oats served in a jar

    Recipe tips

    • Rolled oats are the best for making overnight oats. Instant quick oats are also ok but can turn out mushy. I wouldn't recommend using steel-cut oats here because they won't soften quite the same.
    • I like to put my overnight oats in a glass jar with a lid because the jar is easy to store. But any airtight container or bowl with plastic wrap over the top will do.
    • Warming the oats. If you prefer warm oats, you can heat the oats in the microwave (for 45-60 seconds) or transfer oats to a saucepan and heat over medium heat until warmed. You may need to add more liquid as oats get thick while cooking.
    • Sweetener recommendation:
      • You can use honey or maple syrup here. Make sure you use honey in liquid form, not raw.
      • Date syrup or molasses are great options too. Note that they can make oats darker in color. That's perfectly ok.
      • Use stevia or any low-carb sweetener for a low-calorie option.
    • For Apple Protein Overnight Oats: If you're adding protein powder, then omit adding sweetener. Protein powder will give oats enough sweetness.
    Apple and cinnamon overnight oats served in a jar

    Recipe

    Apple Cinnamon Overnight Oats topped with banana slices and fresh diced apple
    Print Recipe
    4.92 from 84 votes

    Apple Cinnamon Overnight Oats

    These Apple Cinnamon Overnight Oats are creamy, perfectly flavored, and filled with fresh apples. They are easy to make with pantry ingredients. So healthy and made without added sugar. Perfect make-ahead energizing breakfast.
    Prep Time5 minutes mins
    Resting time6 hours hrs
    Total Time6 hours hrs 5 minutes mins
    Course: Breakfast
    Cuisine: American, International
    Keyword: apple and cinnamon overnight oats, apple cinnamon overnight oats, apple cinnamon overnight oats recipe, apple overnight oats, apple overnight oats recipe, healthy overnight oats
    Servings: 1 serving
    Calories: 358kcal
    Author: Natalie

    Equipment

    • Measuring cups
    • Wide-mouth jar

    Ingredients

    • ½ cup rolled oats
    • ½ cup oat milk
    • 1 tablespoon peanut butter creamy all-natural
    • 1 tablespoon pure maple syrup
    • 1 teaspoon Ceylon cinnamon
    • 1 apple
    • Toppings: sliced banana, diced fresh apples, dried blueberries, hemp seeds, chia seeds (optional)

    Instructions

    • Place oats in the small bowl or a wide-mouth jar.
    • Add in milk, peanut butter, cinnamon and sweetener.
    • Stir the mixture to combine using the spoon.
    • Taste the mixture and add additional sweetener if needed.
    • Secure with a lid and place in the refrigerator for at least 60 minutes to 6 hours. Best is to leave the oats overnight!
    • The next day, add diced fresh apples.
    • Add toppings (optional). I used sliced banana, dried blueberries.
    • Serve and enjoy!

    Notes

    Substitutions
    • You can substitute oat milk with any milk - organic soy milk, cashew milk, or almond milk. Cow’s milk works well too. Coconut milk won't work well here.
    • You can substitute rolled oats with quick oats. Note: quick oats will turn very mushy if you leave them soaking overnight. But if you like creamier, softer texture, then quick oats are the way to go.
    • You can substitute maple syrup with honey. See "Recipe tips" for more suggestions.
    • You can substitute peanut butter with almond butter or cashew butter.
    Tips for storing
    • Store overnight oats in a sealed container or in a jar with the lid.
    • Keep overnight oats in the refrigerator for up to 3 days, but they are best to eat within 24 hours.
    Read "Recipe tips" for more info. Find more recipe variations under the "Recipe variations" section.
    As a measure, I used a US cup (240ml).

    Nutrition

    Serving: 1serving | Calories: 358kcal | Carbohydrates: 60g | Protein: 12g | Fat: 10g | Saturated Fat: 2g | Sodium: 156mg | Potassium: 420mg | Fiber: 9g | Sugar: 21g | Vitamin A: 246IU | Vitamin C: 4mg | Calcium: 211mg | Iron: 3mg

    This post is originally published in September 2018. It's updated with new information and republished in September 2021. The recipe stayed the same.

    More recipes to try

    • Peach Overnight Oats featured image
      Peach Overnight Oats
    • Peanut Butter Maca Overnight Oats featured image
      Peanut Butter Maca Overnight Oats
    • Strawberry overnight oats with yogurt topped with banana and almond butter
      Strawberry Overnight Oats
    • Pumpkin Overnight Oats topped with walnuts and goji berries
      Pumpkin Overnight Oats

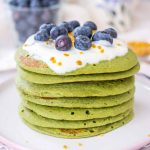
    Matcha Pancakes

    September 14, 2021 by Natalie 112 Comments

    Matcha Pancakes featured image

    These Matcha Pancakes are such a treat. Soft, sweet, vanilla flavored, absolutely delicious. So easy to make too, using only a few simple ingredients. Loaded with heart-healthy oats and made without unhealthy refined sugars, these matcha green tea pancakes make a perfect healthy breakfast or brunch.

    [feast_advanced_jump_to]
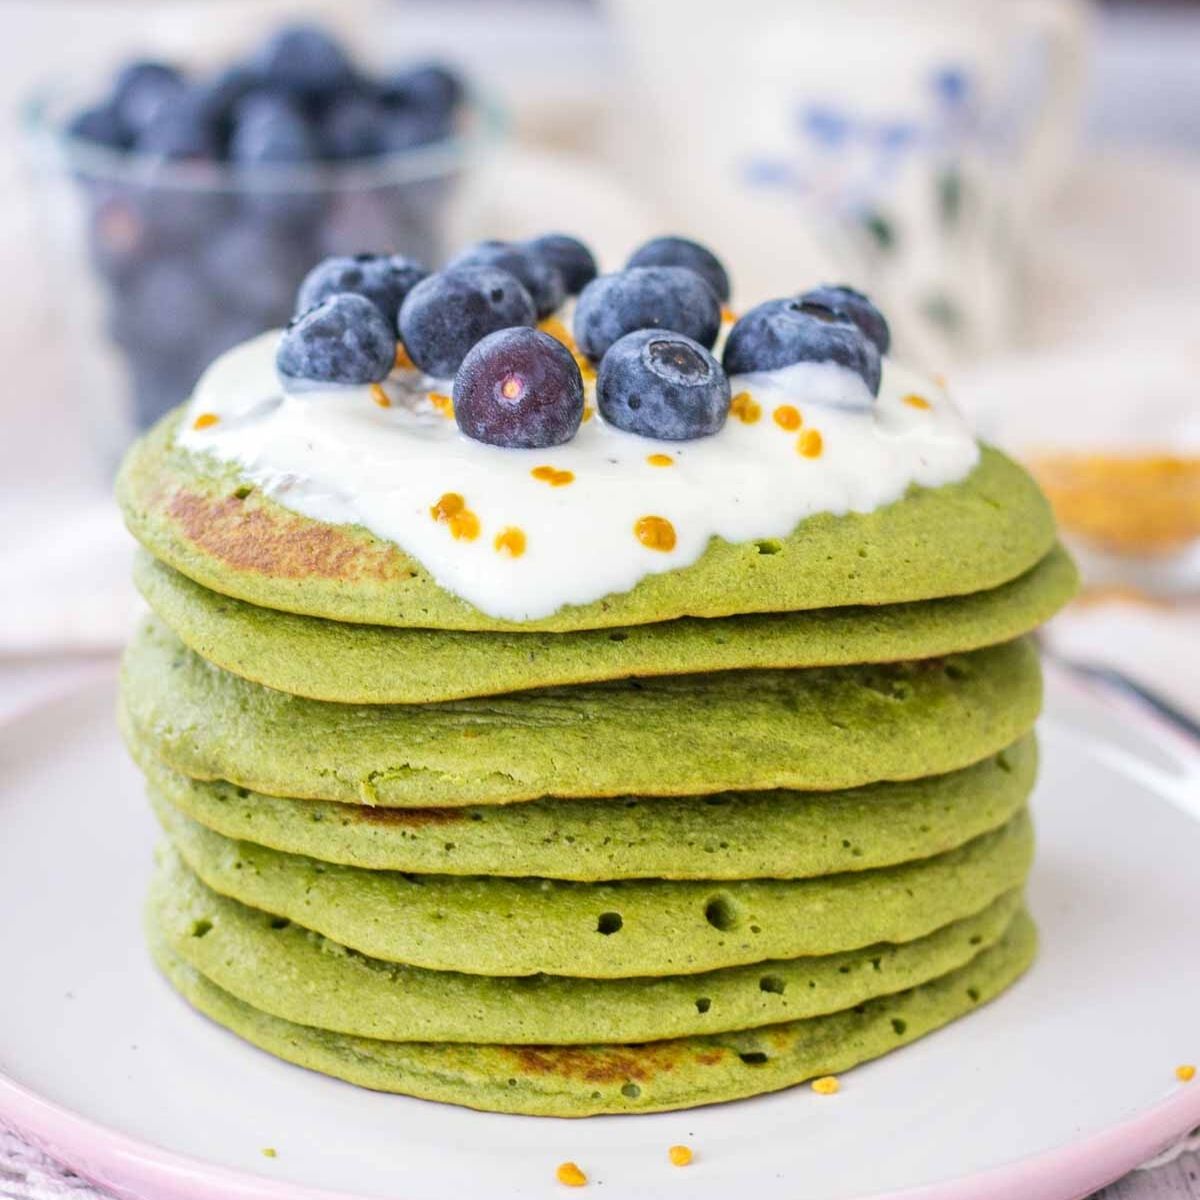
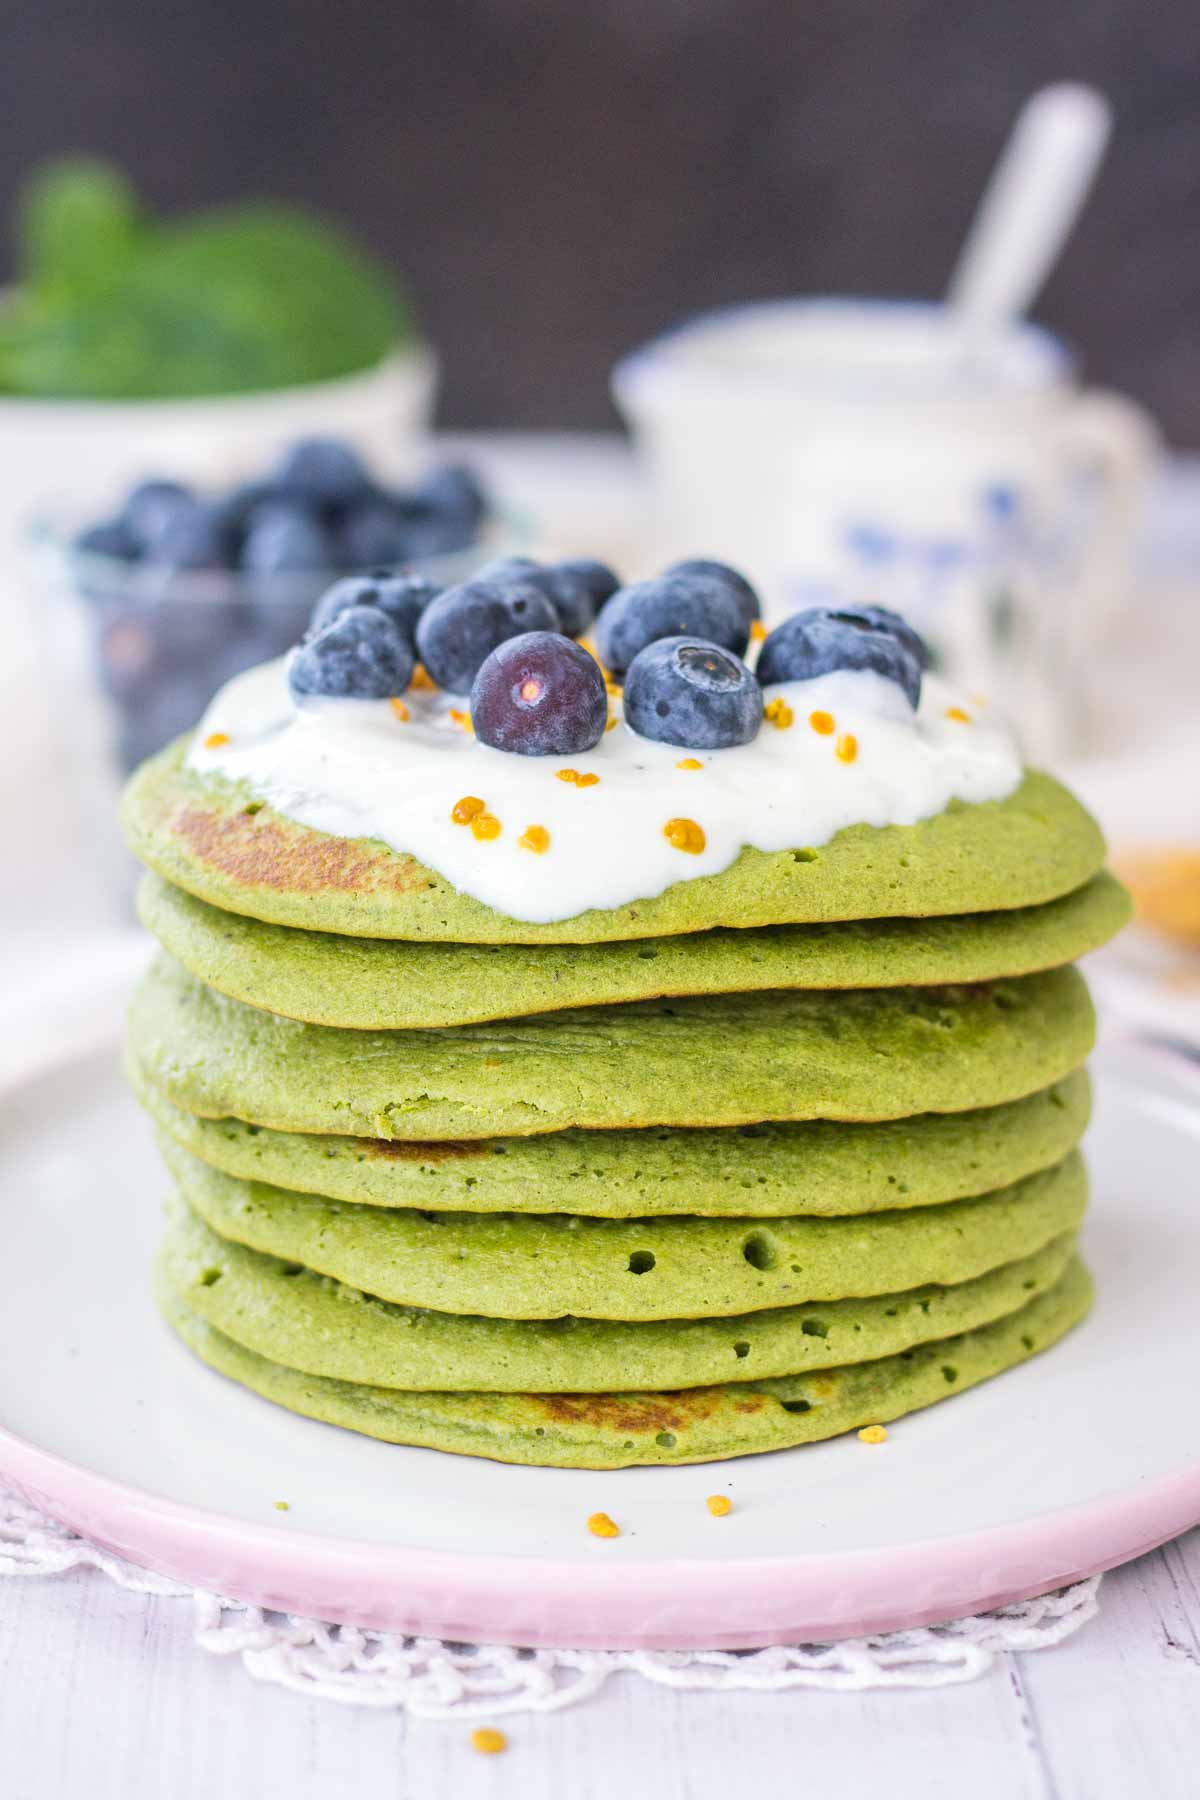
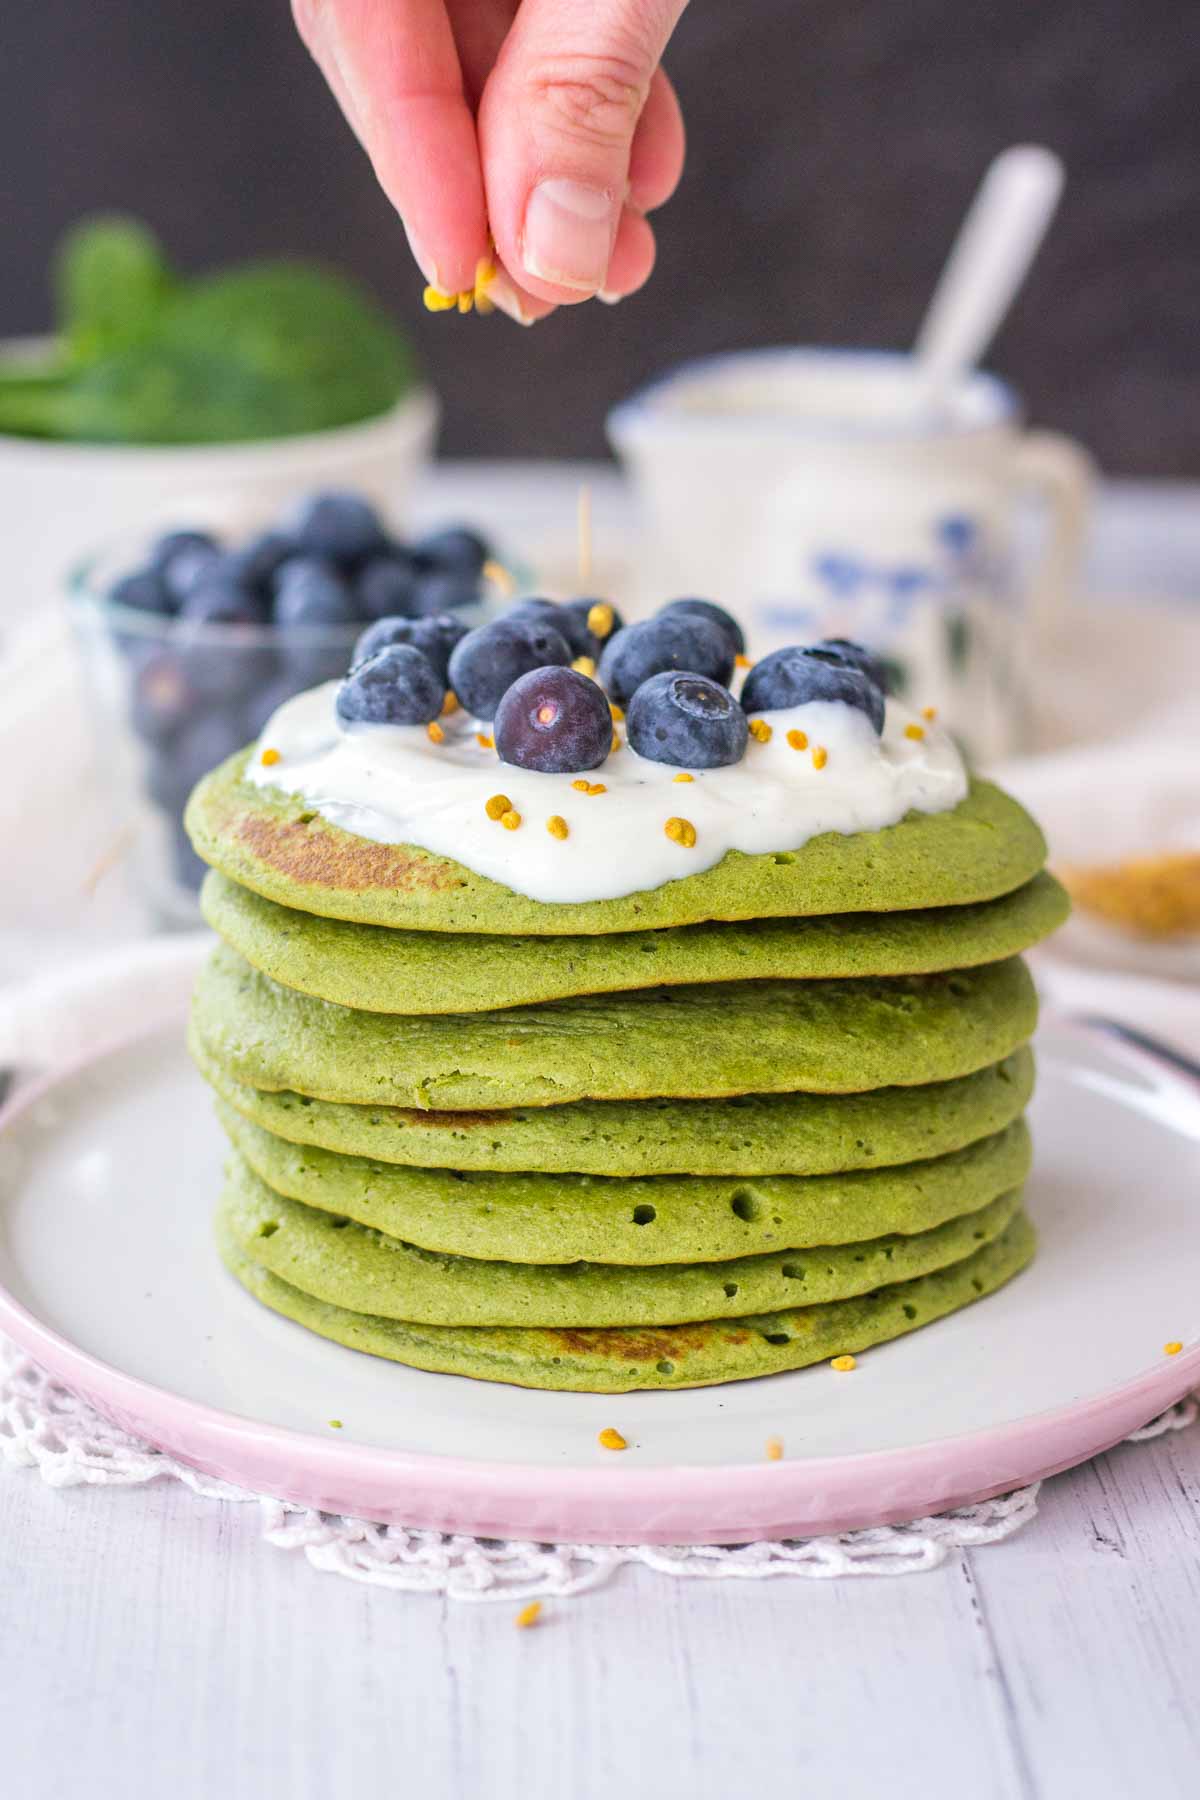
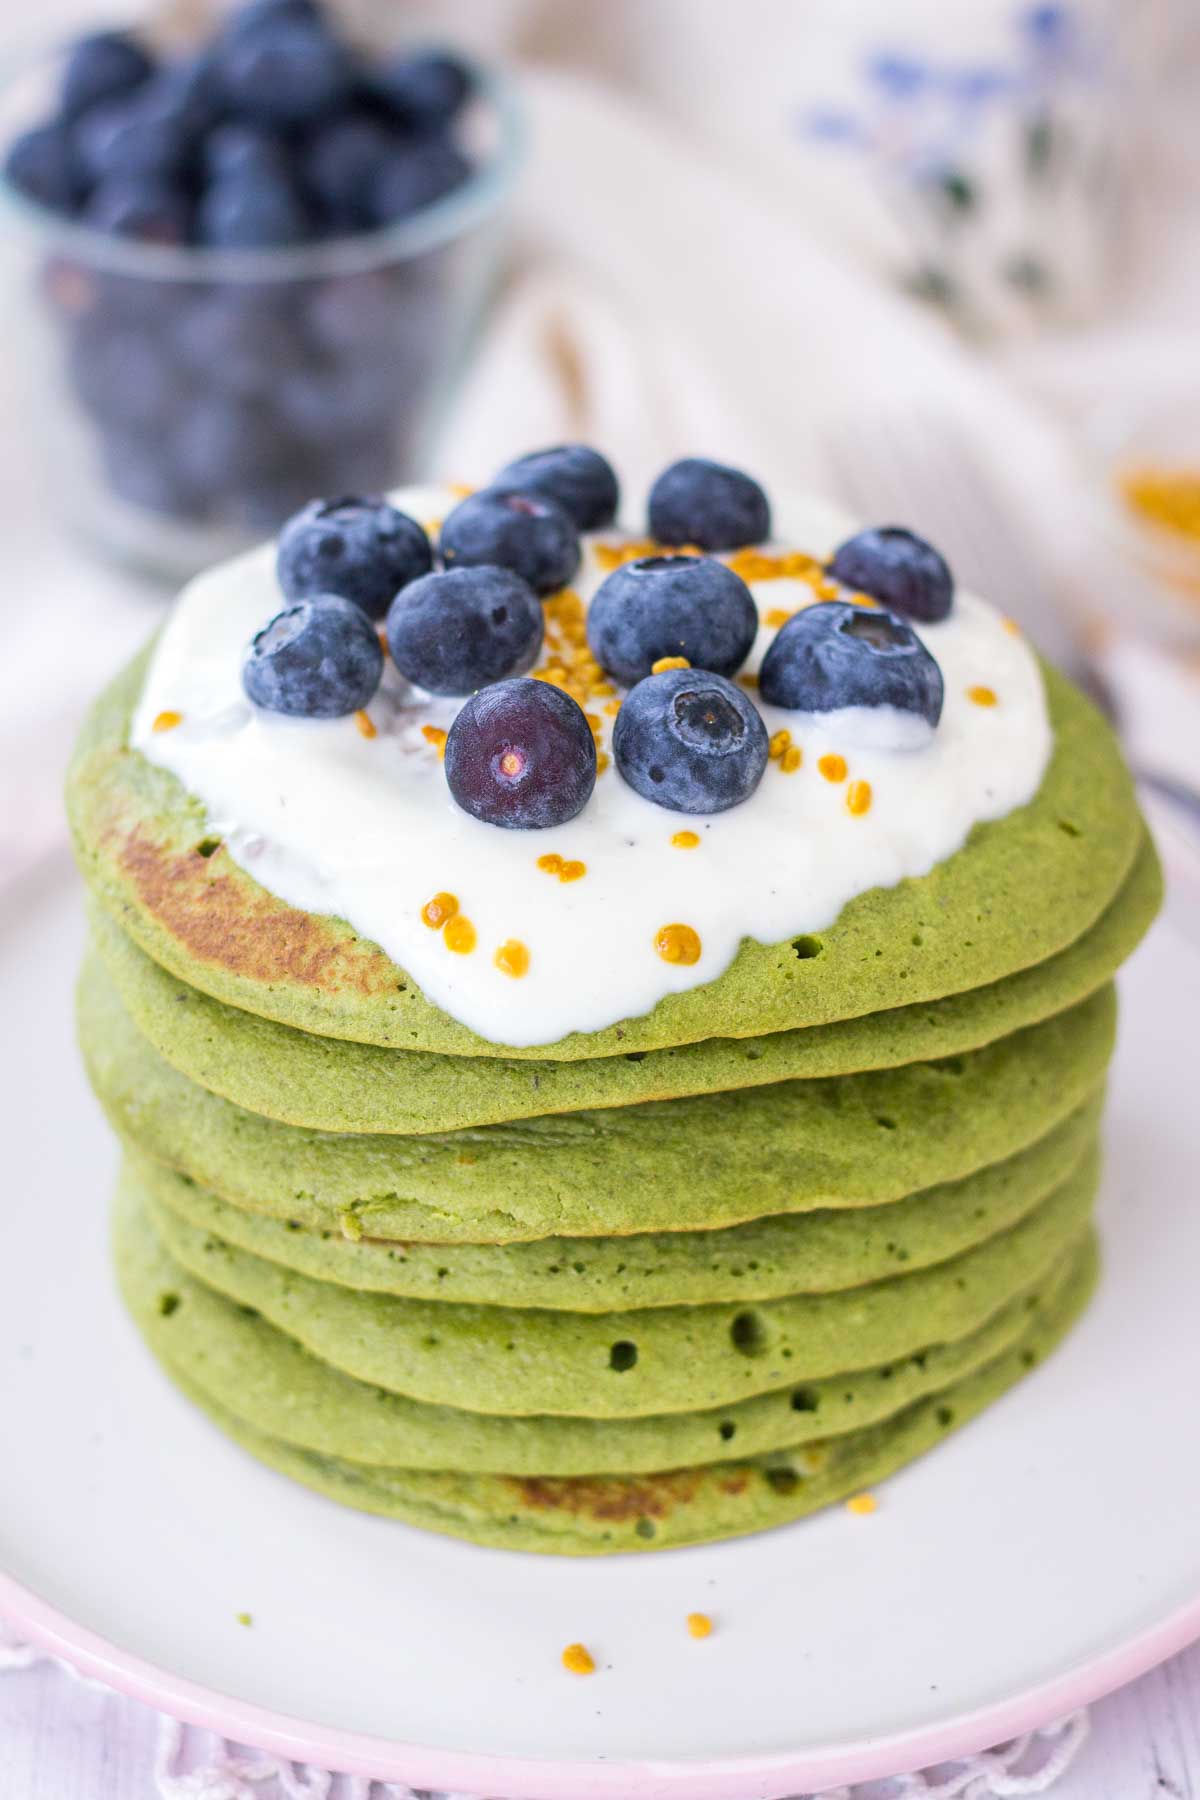
    Healthy Matcha Pancakes topped with yogurt and blueberries.

    My son is entering his teenage years, and with this change, he started to be more watchful about his body and health. I prepare healthy meals for my boys, but I never force them to eat everything I do. I always provide alternatives. But recently, I've noticed a shift in my son's eating behavior. He now chooses healthier stuff more than before.

    He loves my Blueberry Pancakes, and I wanted to test him with something new (secretly, I wanted to see if I could sneak more greens into his favorite meals). I made green pancakes with spinach, to which he was hesitant at first. But the strong vanilla scent got him, and surprisingly, he ended up loving the new pancakes.

    That gave me a boost to make some more green pancakes for him. And boost a recipe a bit by adding some more superfoods - Matcha.

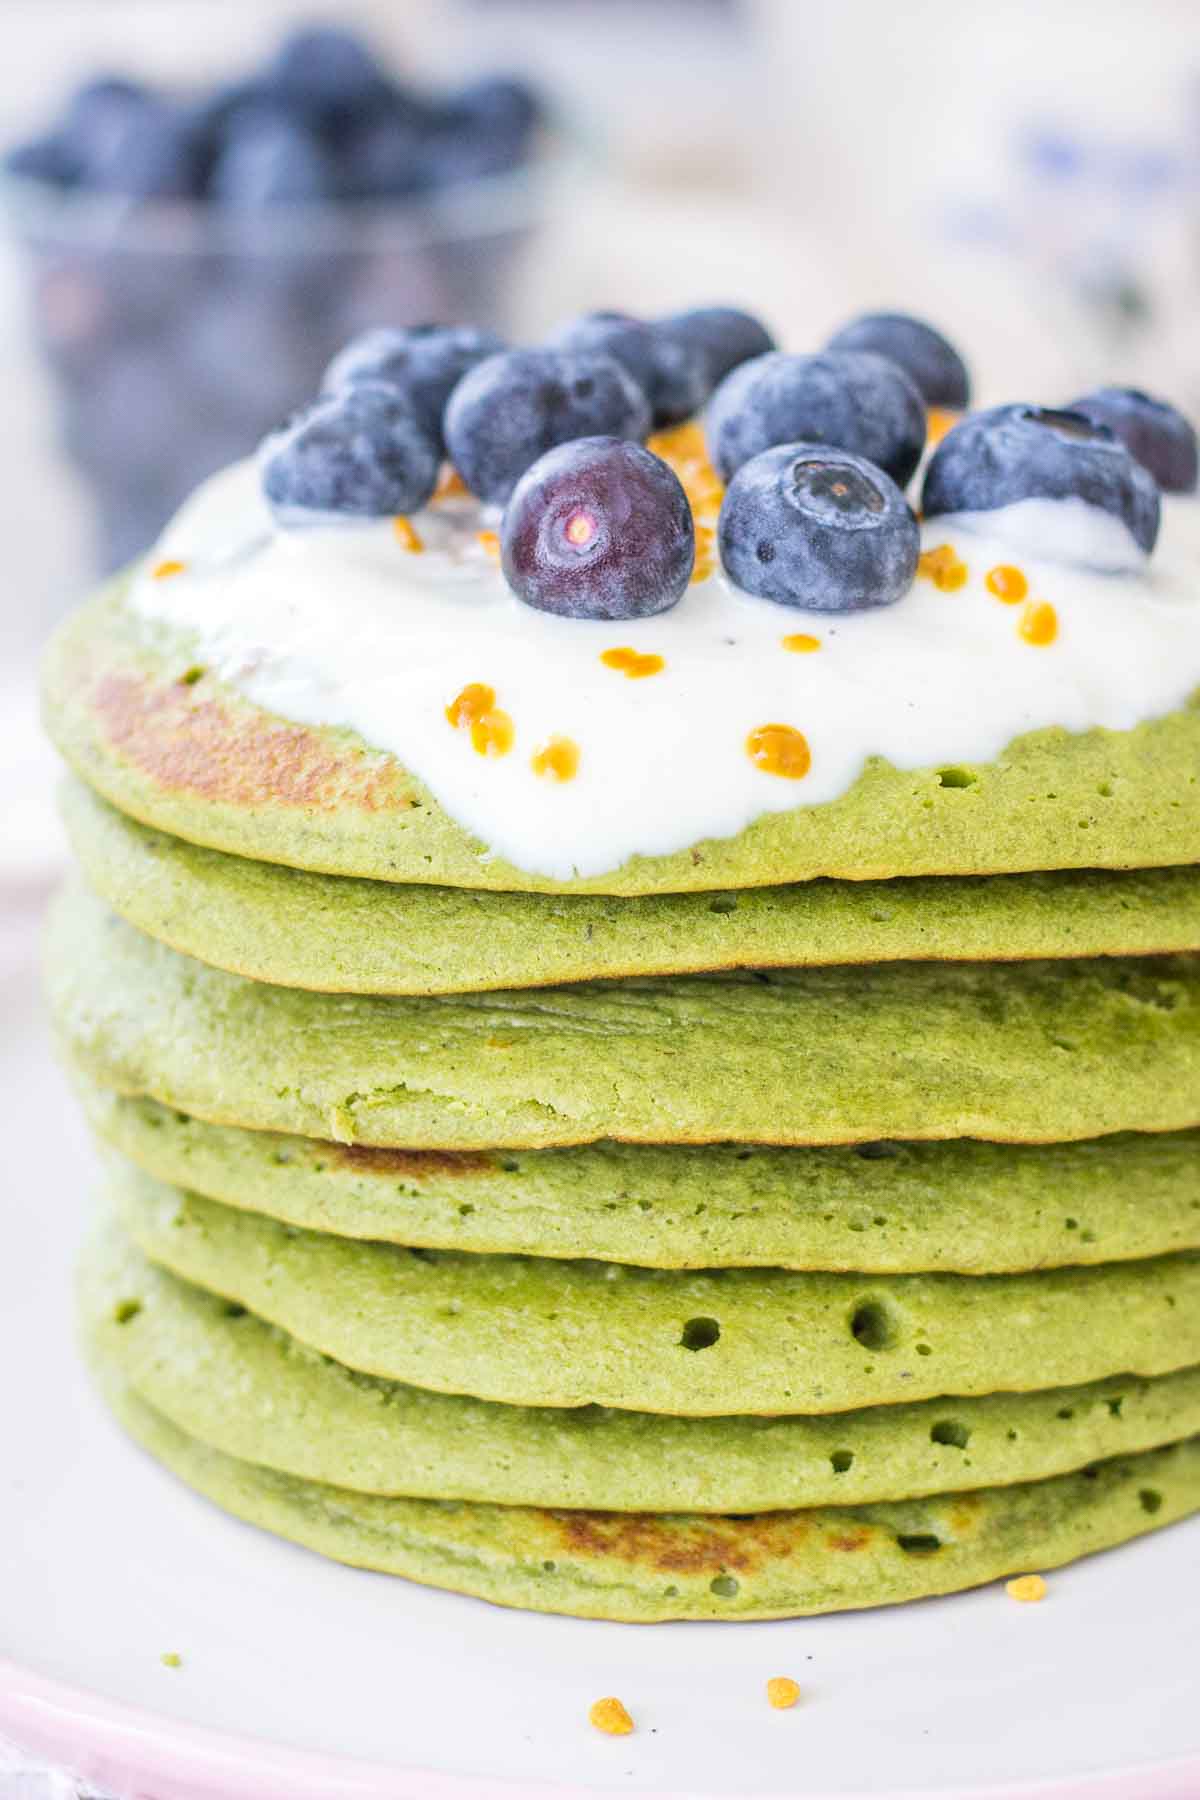
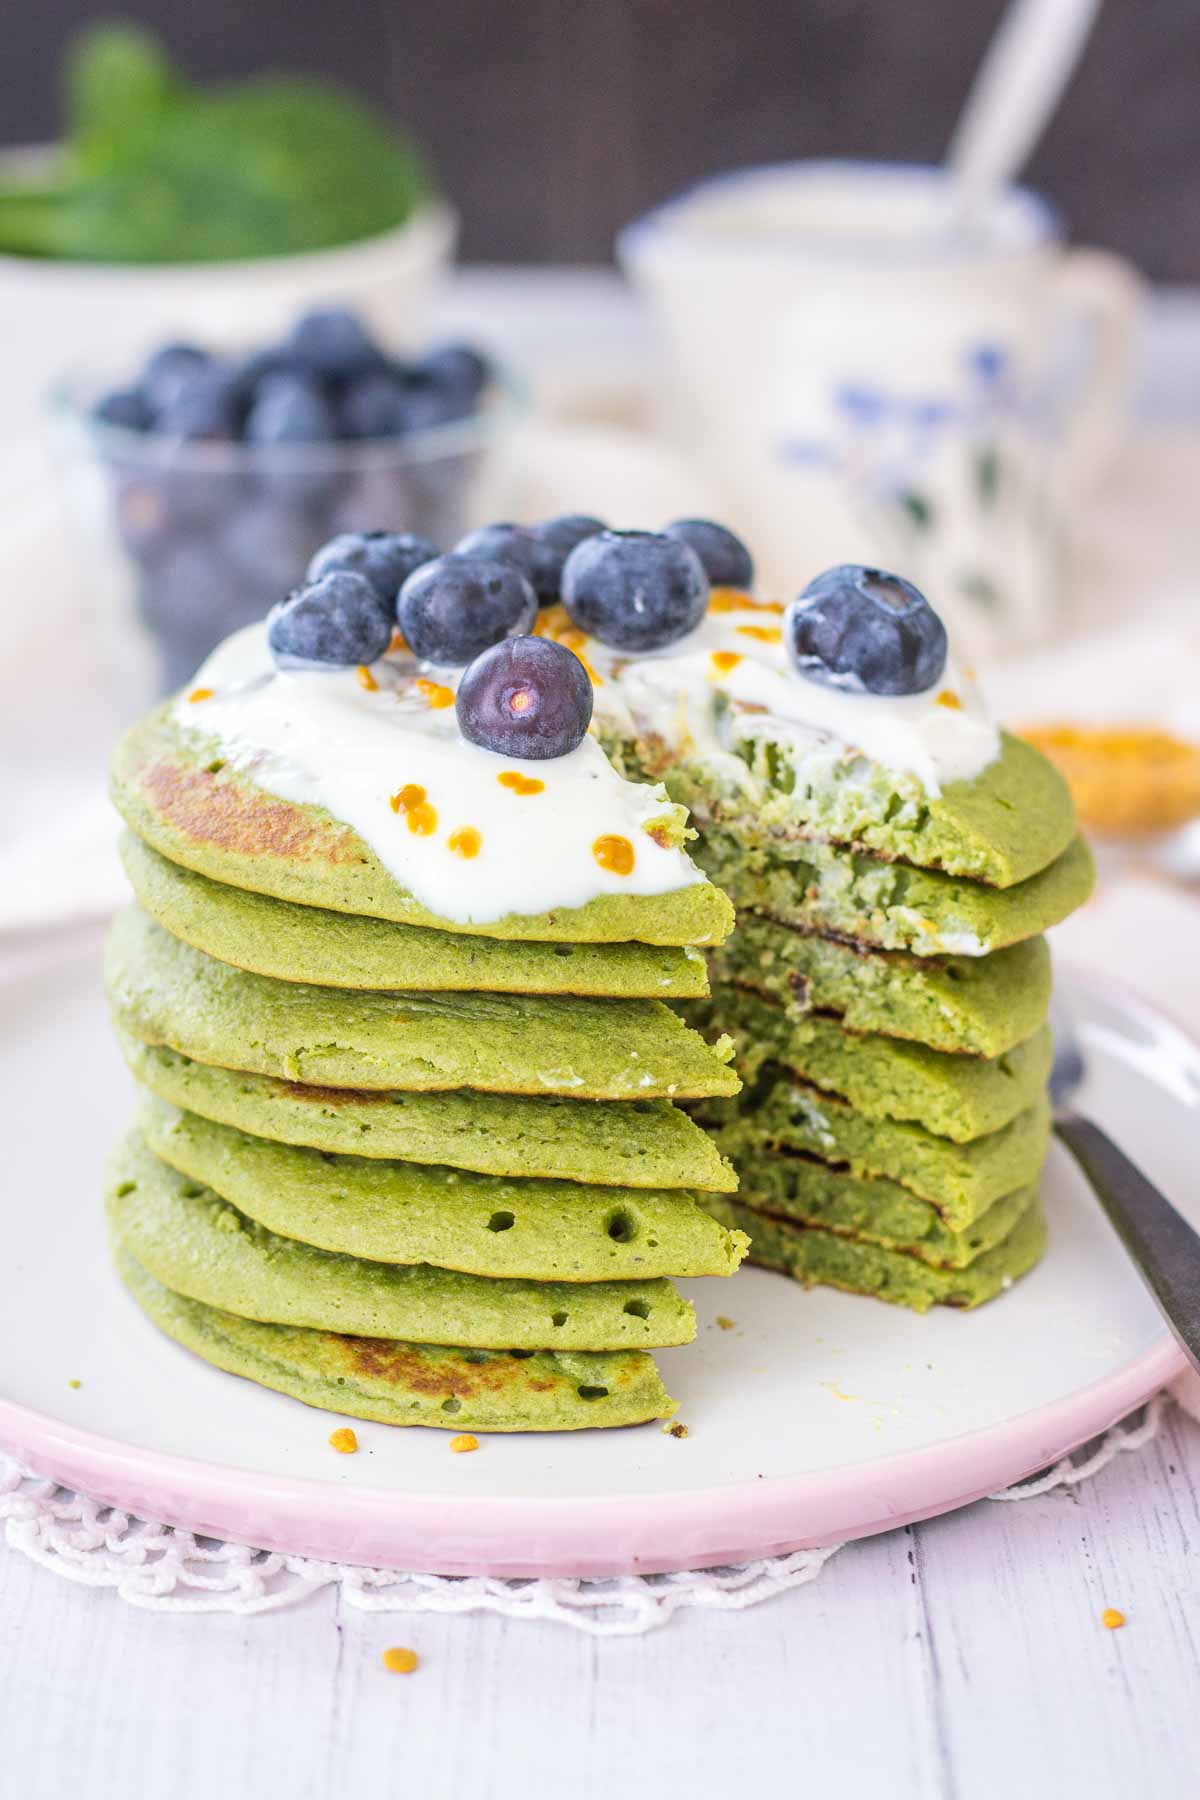
    • Matcha Pancakes topped with yogurt and blueberries served on a plate.

    Why should you make them?

    These matcha pancakes are in one word delicious. Sweet, vanilla-flavored, and just beautiful. They are: 

    • They are utterly delicious. Sweet, vanilla flavored.
    • They are made with wholesome but super simple pantry ingredients.
    • They are easy to make in just 15 minutes.
    • They don't have added unhealthy refined sugars.
    • These healthy matcha pancakes are low-calorie and nutritious – packed with fibers, and plant-based proteins. Great for weight-loss.
    • They are also made with heart-healthy OATS, and loaded with powerful antioxidants from superfoods - matcha and spinach.
    • They are perfect family breakfast, kids school snack, brunch, or afternoon dessert.
    • Plus, delicious and satisfying, 100% guilt-free!

    Ingredients used

    This matcha pancake recipe is super simple. You will need only a few pantry ingredients: 

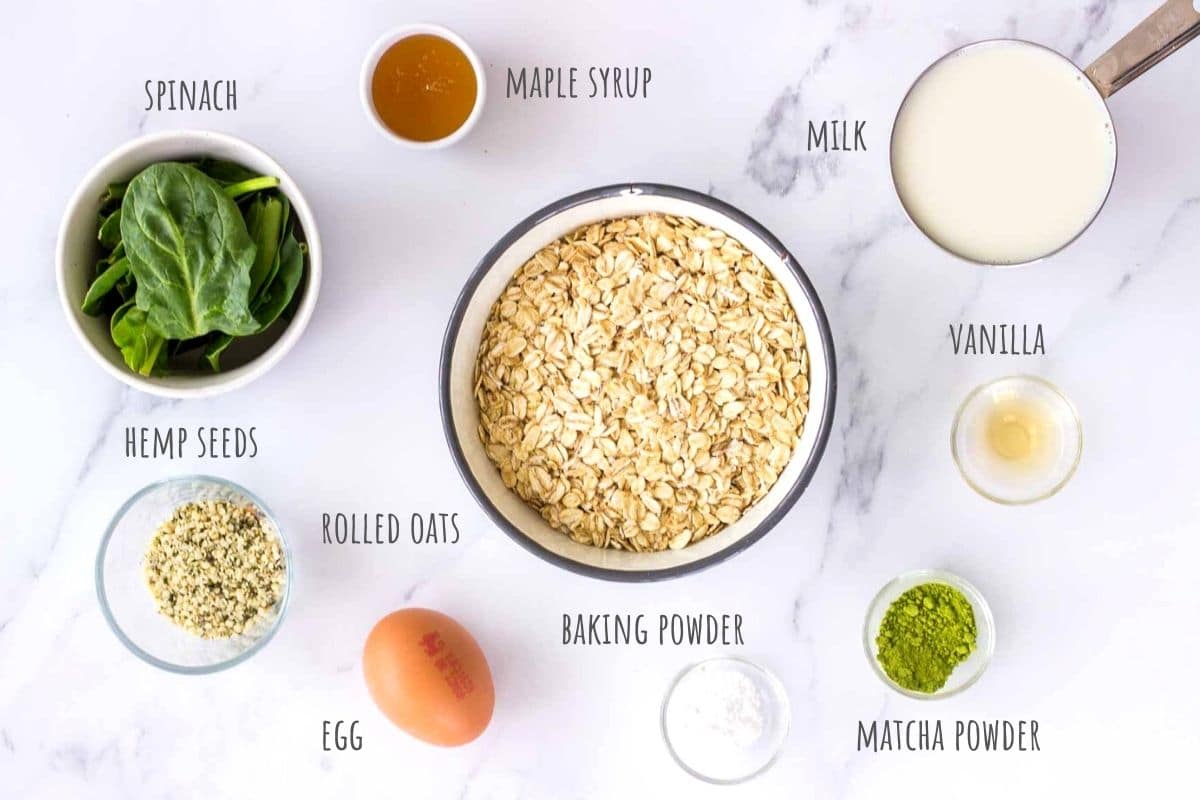
    Matcha Pancakes recipe ingredients.
    • Rolled oats. Hearty, healthy, and filling, oats are stapled food in my pantry. I love using them as a substitute for regular flour. They are an excellent source of fiber. I used rolled oats here, but you can use quick oats if you like.
    • Milk. I used oat milk, but you can use whatever milk you prefer or have. Note that coconut milk won't work well here.
    • Spinach. Spinach is now in season so why not throw a handful in the pancakes.
    • Sweetener. I used pure maple syrup, but you can easily use honey here if you like. Sirup gave subtle sweetness.
    • Matcha powder. It's a star ingredient in these pancakes. With its vibrant color and superfood superpowers, it's a great addition to your morning pancake breakfast. Matcha is packed with antioxidants, energizing, and just beautiful. (1)
    • Hemp seeds. They are an excellent source of healthy Omega-3s, but also a great source of proteins. A great addition to pancakes making them more filling and balanced.

    Other pantry ingredients you’ll need:

    • Egg - I used free-range, pasture-raised.  
    • Baking powder.
    • Vanilla extract.
    • Pinch of salt.
    • Extra virgin coconut oil/coconut oil cooking spray - for greasing the pancake pan. 
    Matcha green tea pancakes served on a plate topped with fruits.

    How to make Matcha Pancakes

    These matcha pancakes are the easiest pancakes ever. It only takes 15 minutes to make them, and you'll need only basic equipment.

    Equipment used

    • Measuring cups.
    • High-speed blender. 
    • Pancake pan - or any pan with a non-stick surface.
    • Flexible silicone spatula - for flipping the pancakes. 

    Step by step instructions

    • Start with preparing and measuring all the ingredients. I like to use measuring cups.
    • Take the blender and add all ingredients. Note: add wet ingredients first for easier blending.
    • Mix everything at high speed until you get a smooth texture.
    • Taste the pancake batter and add additional sweetener if you think the mixture is not sweet enough. Always add sweetener to your likings.
    • Let the batter rest for few minutes. Oats will soak some of the moisture, and pancake batter will become denser.
    • In the meantime, heat the pancake pan over medium heat and coat with coconut oil cooking spray or coconut oil using the brush. 
    • For each pancake, drop ¼ cup of batter into the pan. Cook for 1-2 minutes until pancake is lightly browned. 
    • Flip the pancake carefully with a flexible silicone spatula and cook for another minute. Transfer to a plate. 
    • Make sure to coat the pan before every pancake or batch of pancakes to prevent sticking.
    • Repeat the process with the remaining pancake batter.
    • Add toppings and serve. I used Vanilla yogurt and blueberries. You can be creative here and use any fruits, nuts, and toppings you like.
    • Makes 6 pancakes that serve 2-3 people. The serving size is 2-3 pancakes.
    Matcha green tea pancakes served on a plate topped with fruits.

    Tips for serving

    • Top matcha pancakes with yogurt and fresh fruits, like blueberries, strawberries, blackberries, or raspberries.
    • Drizzle them with maple syrup or honey.
    • Spread peanut butter or almond butter and put sliced banana on top.
    • Sprinkle them with bee pollen, chopped nuts, or hemp seeds.
    • You can be creative and choose any other toppings you like.

    Tips for storing

    • Keep covered in the refrigerator for up to 4 days. 
    • How to freeze? Take your cooked and cooled pancakes and place each pancake individually in wax paper bags or stack between wax paper. Store wrapped pancakes in a large freezer zip-lock bag. Keep in the freezer for up to 3 months. Thaw on room temperature.
    • Pancakes can be warmed in the microwave. Be careful not to overheat them.
    • Matcha Pancakes topped with yogurt and blueberries.

    Substitutions

    • You can substitute oat milk with any milk - organic soy milk, cashew milk, or almond milk. Cow’s milk works well too. Coconut milk won’t work well here. 
    • You can substitute coconut oil with avocado oil/avocado oil cooking spray. 
    • Substitute hemp seeds with flax seeds (for more Omega-3’s) or chia seeds (for more fibers).
    • You can substitute maple syrup and use honey. Make sure honey is in runny form. Date syrup or stevia is a great option too.
    • Make it vegan: Swap egg with flax or chia egg. Use non-dairy milk.
    • Make it gluten-free: Use certified gluten-free oats. 

    Recipe tips

    • When adding ingredients to a blender, always add the liquids first. Doing this will help your blender run easily and this will prevent making lumps.
    • Use a high-power blender to ensure everything blends well and the smoothie is silky smooth. 
    • Make sure you let the batter rest for few minutes. Oats will soak some of the moisture, and pancake batter will dense. This is very important because you don't want runny pancake batter.
    • If you let the batter sit overnight, it will become super dense so you may need to add a bit more liquid.
    • Always taste the butter. If you feel that pancakes are not sweet enough for your taste, add some sweetener.
    • Additional sweetener recommendation: I recommend using honey or maple syrup, stevia, date syrup or any low-carb sweetener. This is totally based on your preference.
    • Make sure to use organic virgin coconut oil rather than refined versions.
    Matcha Pancakes topped with yogurt and blueberries.

    Recipe

    Matcha green tea pancakes served on a plate topped with fruits.
    Print Recipe
    4.99 from 187 votes

    Matcha Pancakes

    These Matcha Pancakes are such a treat. Sweet, vanilla flavored, and super delicious. Easy to make with simple ingredients without refined sugars. 
    Prep Time5 minutes mins
    Cook Time10 minutes mins
    Total Time15 minutes mins
    Course: Breakfast, Brunch, Dessert
    Cuisine: American
    Keyword: healthy matcha pancakes, matcha green tea pancakes, matcha pancake, matcha pancakes, matcha pancakes recipe
    Servings: 6 pancakes
    Calories: 163kcal
    Author: Natalie

    Equipment

    • Measuring cups
    • Blender
    • Pancake pan
    • Flexible silicone spatula

    Ingredients

    • 1 cup milk I used oat milk
    • 1 egg
    • 1 ½ cup rolled oats
    • 2 teaspoons matcha powder
    • A handful of fresh spinach
    • 2 tablespoons hemp seeds
    • 1 teaspoon vanilla extract
    • 2 tablespoons maple syrup or honey
    • ½ teaspoon baking powder
    • Pinch of salt

    Instructions

    • Prepare and measure all the ingredients using measuring cups.
    • Take the blender and add all ingredients - wet ingredients first for easier blending.
    • Mix everything at high speed until you get a smooth texture.
    • Taste the pancake batter and add additional sweetener if you think the mixture is not sweet enough. Always add sweetener to your likings.
    • Let the batter rest for few minutes. Oats will soak some of the moisture, and pancake batter will become denser.
    • In the meantime, heat the pancake pan over medium heat and coat with coconut oil cooking spray or coconut oil using the brush.
    • For each pancake, drop ¼ cup of batter into the pan. Cook for 1-2 minutes until pancake is lightly browned.
    • Flip the pancake carefully with a flexible silicone spatula and cook for another minute. Transfer to a plate.
    • Make sure to coat the pan before every pancake or batch of pancakes to prevent sticking.
    • Repeat the process with the remaining pancake batter.
    • Add toppings and serve.

    Notes

    Makes 6 pancakes that serve 2-3 people. The serving size is 2-3 pancakes.
    Substitutions
    • You can use quick oats or rolled oats here. 
    • You can swap oat milk for almond milk or organic soy milk. Cow’s milk works fine here too. Coconut milk won’t work well here. 
    • You can substitute coconut oil with avocado oil.
    • Substitute hemp seeds with flax seeds or chia seeds.
    • Substitute maple syrup and use honey. Make sure honey is in runny form. Date syrup or stevia is a great option too.
    MAKE IT VEGAN: Swap egg with a flax or chia egg. Use non-dairy milk.
    MAKE IT GLUTEN-FREE: Use certified gluten-free oats.
    Tips for storing
    • Keep oatmeal pancakes in an air-tight food container refrigerated. They will last up to 4 days.
    • To freeze pancakes: Take the pancakes and place each pancake individually in a wax paper bag or stack between wax paper. Store wrapped pancakes in a large freezer zip-lock bag. Keep in the freezer for up to 3 months. Thaw on room temperature.
    • Pancakes can be warmed in the microwave. Don't overheat them.
    As a measure, I used a US cup (240ml).
    See "Recipe tips" for more info.

    Nutrition

    Serving: 1pancake | Calories: 163kcal | Carbohydrates: 23g | Protein: 7g | Fat: 5g | Saturated Fat: 1g | Trans Fat: 1g | Cholesterol: 27mg | Sodium: 35mg | Potassium: 147mg | Fiber: 3g | Sugar: 7g | Vitamin A: 683IU | Vitamin C: 1mg | Calcium: 91mg | Iron: 2mg

    This post is originally published in March 2021. It's updated with new information and republished in September 2021. The recipe stayed the same.

    More recipes to try

    • Carrot Cake Pancakes topped with Maple Cream Cheese drizzle
      Carrot Cake Pancakes
    • Chocolate Banana Pancakes featured image
      Chocolate Banana Pancakes
    • Apple Oatmeal Pancakes featured image
      Apple Oatmeal Pancakes
    • Peanut Butter Oatmeal Pancakes featured image
      Peanut Butter Oatmeal Pancakes

    Strawberry Oatmeal Smoothie

    August 3, 2021 by Natalie 117 Comments

    Strawberry Oatmeal Smoothie Featured Image

    This Strawberry Oatmeal Smoothie is a perfect morning treat. It's sweet, creamy, and filled with fruity freshness. Packed with essential nutrients and immune-boosting vitamin C, and made without added sugars, it's an ideal combination of delicious and healthy.

    [feast_advanced_jump_to]
    Strawberry Oatmeal Smoothie PIN image

    Summer is in full swing, and it's a peak season for sweet strawberries. You can find them in every store and on the markets. They will be in season until the end of August, and my plan is to enjoy them as much as I can.

    This Strawberry Oatmeal Smoothie is a perfect Summer smoothie. It's loaded with fruity flavors and sweetness. It's creamy, dreamy, and so delicious!

    I bet your whole family's gonna love this strawberry smoothie. Plus, it's made without added sugars, which makes this smoothie the ideal smoothie for weight loss.

    Strawberry Oatmeal Smoothie benefits

    • It's extra delicious. Thick, creamy, fruity. Extra smooth but so light.
    • It's packed with essential nutrients, especially fibers, and powerful antioxidants from strawberries and oats.
    • It's quite filling and nutritious, a great smoothie for weight loss.
    • It's loaded with immune-boosting Vitamin C and healthy Omega-3s.
    • It's made with wholesome ingredients and without added sugars.
    • It's vegan, dairy-free, and gluten-free.
    • It's super easy to whip up plus kids love it!

    Ingredients used

    You will need only a few simple pantry ingredients for this beautiful strawberry breakfast smoothie recipe.

    • Milk of choice. I used oat milk, but any non-dairy milk such as almond, cashew, or soy milk. Cow's milk is ok too, while coconut milk won't work well here. It doesn't pair well with other flavors.
    • Strawberries. Strawberries are delightful low-calorie fruit. they are loaded with vitamin C – a powerful immune-boosting antioxidant. Strawberries have many health benefits - I love them because they reduce inflammation and keep our gut and heart-healthy (1). For this smoothie, I used fresh strawberries, but frozen will work fine too.
    • Oats. It might seem odd to add oats to a smoothie, but oats are a great addition to smoothies. They make smoothies creamy and thick, but oats also add up many nutrients. Oats are an excellent source of fiber, especially beta-glucan, a type of soluble fiber responsible for keeping our heart healthy. It also supports the growth of good bacteria in our digestive tract, which is essential for our overall health. They are a great source of energy and fullness.  
    • Banana. The riper the better for natural sweetness. And for an extra creamy texture, you can use a frozen banana. See "Recipe tips" for more info.

    To make it more interesting, creamy, and super healthy, I also added:

    • Almond Butter. I added almond butter because I wanted to make the smoothie complete and more nutritious. Almond butter is packed with healthy monounsaturated fats, fibers, proteins, and many essential minerals and vitamins. 
    • Maca powder. Maca is a superfood with many health benefits. It boosts mood, energy, and stamina. It contains many vitamins, minerals, and amino acids and it's a great addition to smoothies.
    • Vanilla extract. For extra flavor punch.
    Strawberry Oatmeal Smoothie served in a glass with a straw

    How to make Strawberry Oatmeal Smoothie

    Making this oatmeal strawberry smoothie is quite easy. It will take you 5 minutes and all you need is a good blender.

    Step by step instructions

    • Start with measuring all the ingredients. I like to use measuring cups.
    • Wash the strawberries and remove strawberry stems.
    • Take the blender and add all ingredients. Note: add wet ingredients first for easier blending.
    • Turn on the blender and mix at high speed until you get a smooth texture.
    • If the smoothie is too thick, add a little more liquid – milk or water. Blend again until the smoothie is smooth.
    • Taste the smoothie and add additional sweetener if you like. (See the "Sweetener recommendation" section for suggestions)
    • Transfer the smoothie into a glass. 
    • Add toppings (optional): I used goji berries and bee pollen. Be creative here and add toppings you like. 
    • Serve and enjoy!

    This makes 1 serving that serves 1 person as a full meal or 2 servings as a light meal.

    Hand holding a glass full of Strawberry Oatmeal Smoothie

    Substitutions

    • You can use rolled oats or quick oats here.
    • You can use any plant-based milk here except coconut milk. Coconut milk won't work well here. Cow's milk is fine.
    • You can substitute almond butter with peanut butter or cashew butter. Tahini works well too.

    Smoothie variations

    Make it without banana: Substitute banana with ½ avocado. It will make the smoothie creamy. Note: in this case, you will need to add extra sweetener.

    Make it weight loss friendly: Use only ½ banana to cut down calories.

    Add protein powder: Add a scoop of vanilla protein powder. This will transfer smoothie into a great protein-packed, post-workout shake.

    Make it gluten-free: Use certified gluten-free oats.

    Strawberry Oatmeal Smoothie served in a glass topped with goji berries

    Tips for storing

    • Store in a smoothie cup with a lid and keep refrigerated for up to one day.
    • If you left the smoothie standing long it will set. Don't forget to shake or stir it before drinking!
    • Remember, all smoothies oxidate when left standing. That's not bad. But it's best to have the smoothie fresh.

    Recipe tips

    • When you're adding ingredients to a blender, always add the liquids first. Doing this will help your blender run easily and it will prevent lumps.
    • Use a high-power blender to ensure everything blends well and the smoothie is silky smooth. 
    • Frozen strawberries are the best for making this smoothie. They blend into a thick, refreshing drink that gives you a cold punch.
    • If you don't have frozen strawberries at hand, just pop the fresh ones in the freezer for at least 1 hour.
    • You can use a frozen banana. This will make the smoothie extra thick and even hard to mix. In that case, add a little more milk when blending and adjust thickness to your liking.
    • If you don't have a frozen banana at hand, just slice the banana and pop it in the freezer for at least 1 hour. Or just use ice cubes.
    Strawberry Oatmeal Smoothie served in a glass with a straw

    Sweetener recommendation

    This smoothie uses banana as a natural sweetener. I don't recommend adding any extra sugar. But if you find the smoothie not sweet enough, you can add some. Be mindful.

    • Add 1-2 dates, date syrup, liquid honey, or maple syrup.
    • If you are using dates, make sure you soak them in warm water for at least 10 minutes. Drain them before using them.
    • Use liquid stevia or any liquid low-carb sweetener for the low-carb option.
    • Coconut sugar or any other cristal sugar won't work well here. It will not dissolve well in a cold smoothie mixture.

    Faq

    Can you put raw oatmeal in a smoothie?

    Absolutely. Oats can be eaten raw and they are a great addition to smoothies. They're a great way to add fiber to your smoothie without adding a ton of calories. Plus, they make the smoothie extra thick and creamy!

    Which oats are best for smoothies?

    You can use any kind of oats you have on hand. I like to use rolled oats, but quick oats are fine too. Avoid instant oatmeal packets from stores. They are usually filled with added (unnecessary) sugars.

    Are oat smoothies good for you?

    Oats are rich in fiber, and fibers are important for digestive health. Plus oats make smoothies extra filling, that's why oat smoothies are great for weight loss.

    Is it OK to just have a smoothie for breakfast?

    Absolutely. Smoothies make excellent breakfast - if they are done right using healthy ingredients while keeping reasonable portions. When following these rules - using up to two fruits, adding fibers and proteins, and avoiding adding additional sugars, then it is okay to have a smoothie for breakfast every day.

    Strawberry Oatmeal Smoothie served in a glass with a straw

    You may also like:

    • Avocado Smoothie
    • Blueberry Chia Smoothie
    • Mixed Berry Smoothie
    • Cherry Banana Smoothie

    Recipe

    Strawberry Oatmeal Smoothie served in a glass topped with goji berries
    Print Recipe
    5 from 123 votes

    Strawberry Oatmeal Smoothie

    Sweet, creamy and packed with freshness, this Strawberry Oatmeal Smoothie is perfect breakfast smoothie. It's so delicious and healthy, made without any added sugars!
    Prep Time5 minutes mins
    Total Time5 minutes mins
    Course: Breakfast
    Cuisine: International
    Keyword: strawberry oatmeal smoothie, strawberry smoothie
    Servings: 1 serving
    Calories: 481kcal
    Author: Natalie

    Equipment

    • Blender

    Ingredients

    • 1 cup oat milk
    • 1 cup strawberries fresh or frozen
    • 1 banana fresh or frozen
    • ¼ cup oats rolled or quick
    • 1 tablespoon almond butter
    • 1 teaspoon vanilla extract
    • 1 teaspoon maca powder

    Instructions

    • Add all ingredients in the blender. Note: add wet ingredients first for easier blending.
    • Mix everything at high speed until you get a smooth silky texture.
    • If the smoothie is too thick, add a little more liquid – milk or water. Blend again until everything is well combined.
    • Taste the smoothie and add additional sweetener if the smoothie is not sweet enough to your taste. (See "Recipe tips" section for sweetener recommendation)
    • Transfer the smoothie into a smoothie glass.
    • ADD TOPPINGS: I used goji berries and bee pollen. Be creative here and add toppings you like.
    • Serve and enjoy!

    Notes

    Makes 1 serving that serves 1 person as a full meal, or 2 servings as a snack.
    As a measure, I used US cup (240ml). Nutrition values are calculated without added toppings.
    Substitutions
    • You can use rolled oats or quick oats here. Both are equally good.
    • Substitute almond butter with peanut butter, cashew batter, or tahini.
    • You can use any plant-based milk here except coconut milk. Cow's milk is ok too.
    MAKE IT GLUTEN-FREE: Make sure you use certified gluten-free oats. 
    Store in a glass jar with a lid or shaker and keep refrigerated for up to one day.

    Nutrition

    Serving: 1serving | Calories: 481kcal | Carbohydrates: 84g | Protein: 14g | Fat: 13g | Saturated Fat: 1g | Sodium: 118mg | Potassium: 1114mg | Fiber: 14g | Sugar: 43g | Vitamin A: 568IU | Vitamin C: 97mg | Calcium: 474mg | Iron: 5mg

    More recipes to try

    • Strawberry Kefir Smoothie topped with fresh strawberries and superfoods
      Strawberry Kefir Smoothie
    • Strawberry Peanut Butter Smoothie served in a glass topped with goji berries
      Strawberry Peanut Butter Smoothie
    • Strawberry Banana Smoothie featured image
      Strawberry Banana Smoothie
    • Strawberry Ginger Smoothie

    This post is originally published in August 2020. It's updated with new information and republished in August 2021. The recipe stayed the same.

    Mixed Berry Smoothie

    June 18, 2021 by Natalie 111 Comments

    Berry Smoothie topped with cream served in a glass with a straw

    This Mixed Berry Smoothie is cooling and refreshing. Creamy, thick, and absolutely delicious. Packed with fruity freshness and wonderful flavors. It's also very nutritious and has no added sugars. Great breakfast option or afternoon energizing drink.

    [feast_advanced_jump_to]
    Berry Smoothie topped with cream served in a glass with a straw

    When it comes to fresh fruits, I have two fussy eaters in the house. My husband, nor my kid are fans of eating fresh fruits especially berries. Feeding them healthy over the years transformed me into a very creative person.

    I've found many ways how to sneak the fresh fruits into the food they actually like eating - like smoothies. It's the perfect way to get them to have a huge boost from powerful berries in a form they love. And they both love my smoothies.

    This Mixed Berry Smoothie is very popular in my house, especially during the summer. It's thick and creamy, so refreshing and bursting with wonderful fruity flavors. It has an ice-cream-like texture and it's absolutely amazing because of that.

    It's also super simple to make, and loaded with all the important nutrients that the body needs. Without excess calories. Without added sugars. This berry smoothie is so high on our favorite smoothie list.

    Ingredients used

    For this berry smoothie recipe, you will need only a few simple pantry ingredients.

    • Berries. I used a mix of frozen raspberries, blackberries, blackcurrants, and redcurrants. It's a frozen fruit bag, sometimes called Summer berry mix. You can buy it in any store. You can use ANY type of berries here. See "Recipe tips" for more info.
    • Milk. Almond milk is the best option here. It has this lovely nutty flavor that pairs well with berries. But any milk will work, except coconut milk. It doesn't pair well with berries.
    • Almond butter. It makes the smoothie more nutritious. Almond butter is loaded with healthy fats that keep our heart healthy, fibers, proteins, and many important minerals and vitamins.
    • Flaxseeds. They are an excellent source of heart-healthy Omega-3 and fiber.  I used ground flaxseeds. 
    • Cinnamon. It's a highly delicious spice with many health benefits. (1) Cinnamon gave this frozen berry smoothie a wonderful flavor.
    • Sweetener (optional). See "Recipe tips" for recommendations.
    Berry Smoothie topped with cream served in a glass

    How to make Mixed Berry Smoothie

    Making this thick frozen berry smoothie is quite easy. It will take you 5 minutes and all you need is a good blender.

    • Start with preparing and measuring all the ingredients. I like to use measuring cups.
    • Take the blender and add all ingredients. Note: add wet ingredients first for easier blending. Also, add in ice cubes, if using.
    • Mix everything at high speed until you get a smooth silky texture.
    • If the smoothie is too thick, add a little more liquid – milk or water. Blend again until everything is well combined.
    • Taste the smoothie and add additional sweetener if the smoothie is not sweet enough to your taste. (See "Recipe tips" section for sweetener recommendation)
    • Transfer the smoothie into a smoothie glass. 
    • ADD TOPPINGS: I used whipped coconut cream and cacao nibs. Be creative here and add toppings you like. 
    • Serve and enjoy!
    • Makes 1 serving that serves 1 person as a full meal, or 2 servings as a snack.
    Mixed Berry Smoothie topped with cream served in a glass with a straw

    Substitutions

    • You can substitute the almond milk with any plant-based milk except coconut milk. Coconut milk won't work well here. Cow's milk is fine.
    • You can substitute ground flax seeds with hemp seeds or chia seeds. 
    • Substitute almond butter with any nut butter, or seed butter. Tahini is very delicious here, same as cashew butter. Peanut butter won't work here.

    Berry smoothie variations

    • Make it with a banana. If you're bulking up or making this berry smoothie for kids. You can substitute banana with ½ avocado.
    • Make it keto-friendly. Add ½ avocado or 1 teaspoon of MCD oil.
    • Make it protein-packed: Add a scoop of protein powder. This will transfer smoothie into a great fruity protein-packed, post-workout shake.
    • Berry Smoothie topped with cream served in a glass with a straw
    • Hand holding a glass full of frozen berry smoothie

    Tips for storing

    • Store in a glass jar with a lid or shaker and keep refrigerated for up to one day.
    • Don't forget to shake it or stir it before enjoying it.
    • Remember, all smoothies oxidate when left standing. That's not bad. But to reap all benefits from ingredients, it's best to have the smoothie freshly made.

    Recipe tips

    • When adding ingredients to a blender, always add the liquids first. Doing this will help your blender run easily and this will prevent making lumps.
    • Use a high-power blender to ensure everything blends well and the smoothie is silky smooth. 
    • Use the mix of any berries you like and have at home. Like blueberries, strawberries, raspberries, cherries, etc. Don't go overboard with different types of fruits. Use a max of 2-3 different berries.
    • Frozen berries are the best for making this smoothie. They blend into a thick very refreshing drink that gives you a cold punch. It feels like having ice cream and sometimes it's so thick you can eat it with the spoon. If you don't have frozen berries at hand, just pop the fresh ones in the freezer for at least 1 hour.
    • Additional sweetener recommendation:
      • I recommend using 1-2 dates, date syrup, raw honey or maple syrup, stevia, or any low-carb sweetener. This is totally based on your preference.
      • If you are using dates, make sure you soak them in warm water for at least 10 minutes. Drain them before using them.
    • Grinding flaxseeds is the best way to make the most of their health benefits. Don't use them whole.
    Close view of frozen berry smoothie topped with cream

    This berry smoothie is creamy, mildly sweet but above all refreshing and summery. It's so thick, like ice cream, and kids just love it.

    This smoothie is also very nutritious, packed with fibers, healthy Omega-3s, and powerful antioxidants from berries It's also made without added sugars and 100% healthy. Perfect drink that can be served as a nutritious breakfast or refreshing afternoon treat. Enjoy!

    Recipe

    Mixed Berry Smoothie topped with cream served in a glass with a straw
    Print Recipe
    4.99 from 215 votes

    Mixed Berry Smoothie

    This Mixed Berry Smoothie is cooling and refreshing. Creamy, thick, and absolutely delicious. Packed with fruity freshness and wonderful flavors. It's also very nutritious and has no added sugars. Great breakfast option or afternoon energizing drink.
    Prep Time5 minutes mins
    Total Time5 minutes mins
    Course: Breakfast
    Cuisine: American, International
    Keyword: blueberry smoothie, frozen berry smoothie, mixed berry smoothie, mixed berry smoothie recipe, strawberry smoothie recipe
    Servings: 1 serving
    Calories: 263kcal
    Author: Natalie

    Equipment

    • Blender

    Ingredients

    • 1 cup mixed frozen berries
    • 1 ¼ cup almond milk
    • 1 tablespoon almond butter
    • 1 tablespoon ground flaxseeds
    • 1 teaspoon Ceylon cinnamon
    • Sweetener (optional): honey, or maple syrup

    Instructions

    • Add all ingredients in the blender. Note: add wet ingredients first for easier blending. Also, add in ice cubes, if using.
    • Mix everything at high speed until you get a smooth silky texture.
    • If the smoothie is too thick, add a little more liquid – milk or water. Blend again until everything is well combined.
    • Taste the smoothie and add additional sweetener if the smoothie is not sweet enough to your taste. (See "Recipe tips" section for sweetener recommendation)
    • Transfer the smoothie into a smoothie glass.
    • ADD TOPPINGS: I used whipped coconut cream and cacao nibs. Be creative here and add toppings you like.
    • Serve and enjoy!

    Notes

    Makes 1 serving that serves 1 person as a full meal, or 2 servings as a snack.
    As a measure, I used US cup (240ml).
    Nutrition values are calculated without added toppings.
    Substitutions
    • Substitute the almond milk with any plant-based milk except coconut milk. Coconut milk won't work well here. Cow's milk is fine.
    • Substitute ground flax seeds with hemp seeds or chia seeds. 
    • Substitute almond butter with any nut butter, or seed butter. Tahini is very delicious here, same as cashew butter. Peanut butter won't work here.
    Store in a glass jar with a lid or shaker and keep refrigerated for up to one day. 

    Nutrition

    Calories: 263kcal | Carbohydrates: 27g | Protein: 7g | Fat: 17g | Saturated Fat: 1g | Sodium: 411mg | Potassium: 260mg | Fiber: 10g | Sugar: 14g | Vitamin A: 70IU | Vitamin C: 3.9mg | Calcium: 481mg | Iron: 1.2mg

    This post is originally published in June 2019. It's updated with new information and republished in June 2021. The recipe stayed the same.

    More recipes to try

    • Goji Berry Smoothie served in a tall glass topped with goji berries and bee pollen
      Goji Berry Smoothie
    • Strawberry Kefir Smoothie topped with fresh strawberries and superfoods
      Strawberry Kefir Smoothie
    • Blueberry Banana Smoothie with fresh fruits and oats
      Blueberry Banana Smoothie
    • Blueberry Acai Smoothie Bowl topped with fresh berries and superfoods
      Blueberry Acai Smoothie Bowl

    Coffee Smoothie

    June 14, 2021 by Natalie 144 Comments

    Coffee Smoothie served in a smoothie glass topped with cacao, oats and chocolate

    Thick and creamy, with a coffee kick, this Coffee Smoothie will surely energize you. It's packed with natural sweetness, hearty oats, and dark chocolate flavor. It's also easy to make with only 7 simple ingredients and has no added sugars. Filling, healthy and so delicious!

    [feast_advanced_jump_to]
    Coffee Smoothie served in a smoothie glass topped with cacao, oats and chocolate

    Let's all admit it. Caffeinated mornings are so much better. And coffee added in a smoothie makes morning even better.

    This coffee smoothie recipe is an oldie but goldie from my recipe book. I've been making it for many years and it surprises me with its taste every time.

    It's creamy, silky smooth, and lightly sweet. Full of coffee and dark chocolate flavor. It's so delicious and addictive. Cooling, refreshing, and energizing.

    BONUS: The smoothie is ready in 5 minutes and is super healthy. It's packed with heart-healthy oats and has no added sugars whatsoever. It's a nutritious meal - coffee and breakfast in one. Perfect for busy coffee lovers.

    Ingredients used

    For this coffee smoothie recipe you will need only 7 pantry ingredients:

    Coffee Smoothie ingredients
    • Milk of choice. I used oat milk, but you can use any milk.
    • Banana. The riper the better for natural sweetness. And for an extra creamy texture, it's best to use a frozen banana.
    • Coffee. I used cold-brewed but you can use whatever coffee you like and prefer. Just make sure it's chilled.
    • Oats. They are packed with fibers and make the smoothie more filling, balanced, extra thick, and creamy. I used rolled oats here, but quick oats are also good here.
    • Cacao powder. I always use unprocessed raw cacao powder that is bitter, deep-flavored, and so incredibly healthy. Cacao powder is packed with powerful antioxidants that have been linked to many health benefits.

    To give this coffee banana smoothie some extra flavor and more boost, I also tossed in:

    • Hemp seeds.  They are an excellent source of heart-healthy Omega-3 and proteins. A great addition to smoothies, making them more nutritious.
    • Vanilla. For extra flavor and deliciousness.
    Hand adding chocolate to coffee smoothie

    How to make Coffee Smoothie

    Making this thick chocolaty coffee smoothie is quite easy. It will take you 5 minutes and all you need is a good blender.

    • Start with preparing and measuring all the ingredients. I like to use measuring cups.
    • Take the blender and add all ingredients. Note: add wet ingredients first for easier blending. Also, add in ice cubes, if using.
    • Mix everything at high speed until you get a smooth silky texture.
    • If the smoothie is too thick, add a little more liquid – milk or coffee. Blend again until everything is well combined.
    • Taste the smoothie and add additional sweetener if the smoothie is not sweet enough to your taste. (See "Recipe tips" section for sweetener recommendation)
    • Transfer the smoothie into a smoothie glass. 
    • ADD TOPPINGS: I used chopped dark chocolate, oats, and cacao powder. Be creative here and add toppings you like. 
    • Serve and enjoy!
    • Makes 1 serving that serves 1 person as a full meal, or 2 servings as a snack.
    • Coffee Smoothie served in a smoothie glass with a straw
    • Hand holding Coffee Smoothie served in a smoothie glass with a straw

    Substitutions

    • Substitute oat milk with any plant-based milk except coconut milk. Coconut milk won't work well here. Cow's milk is fine.
    • Substitute hemp seeds with ground flax seeds or chia seeds. 
    • Use the whole banana if you're not on a restricted-calorie diet.

    Coffee smoothie variations

    • Make it without banana: Substitute banana with ½ avocado or coconut cream. They make smoothie creamy.
    • Make it keto-friendly: Use ½ avocado or ¼ cup coconut cream instead of banana. Add in 1 teaspoon of MCD oil or coconut oil if desired.
    • Make it weight loss friendly: Use only ½ banana to cut down calories.
    • Make it protein-packed: Add a scoop of protein powder. This will transfer smoothie into a great protein-packed, post-workout coffee shake.
    • Make it gluten-free. Use certified gluten-free oats. 
    Coffee Smoothie served in a smoothie glass with a straw

    Tips for storing

    • Store in a glass jar with a lid or shaker and keep refrigerated for up to one day.
    • Don't forget to shake it or stir it before enjoying.
    • Remember, all smoothies oxidate when left standing. That's not bad, but to reap all benefits from ingredients, it's best to have this protein shake freshly made.

    Recipe tips

    • To make this coffee breakfast smoothie more refreshing, use a frozen banana. Alternatively, you can use fresh banana and add ice cubes or use ice coffee cubes.
    • To make ice coffee cubes: Brew coffee. Place coffee in ice packs. Let it freeze.
    • When adding ingredients to a blender, always add the liquids first. Doing this will help your blender run easily and this will prevent making lumps.
    • Use a high-power blender to ensure everything blends well and the smoothie is silky smooth. 
    • Additional sweetener recommendation:
      • I recommend using 1-2 dates, date syrup, raw honey or maple syrup, stevia, or any low-carb sweetener. This is totally based on your preference.
      • If you are using dates, make sure you soak them in warm water for at least 10 minutes. Drain them before using them.
    • Make sure you use ripe bananas. They have more sweetness. 

    Faq

    How do you freeze bananas for smoothies?

    Peel bananas and cut them crosswise, creating thick slices. Lay the banana slices out in a single layer on a serving plate lined with wax paper. Freeze for about two hours, or until the slices are solid. Store banana slices in plastic resealable bags or airtight containers. Keep them in the freezer for up to six months.

    Coffee Smoothie served in a smoothie glass with a straw

    More smoothie recipes to try

    • Chocolate Peanut Butter Smoothie
    • Peanut Butter Protein Shake
    • Chocolate Avocado Smoothie
    • Strawberry Oatmeal Smoothie
    • Cherry Chocolate Smoothie

    Recipe

    Coffee Smoothie served in a smoothie glass topped with cacao, oats and chocolate
    Print Recipe
    4.59 from 178 votes

    Coffee Smoothie

    This Coffee Smoothie will surely energize you. It's packed with natural sweetness, hearty oats, and dark chocolate flavor. It's also easy to make with only 7 simple ingredients and has no added sugars. Filling, healthy and so delicious!
    Prep Time5 minutes mins
    Total Time5 minutes mins
    Course: Breakfast
    Cuisine: American
    Keyword: Coffee banana smoothie, coffee breakfast smoothie, coffee smoothie, coffee smoothie recipe
    Servings: 1 cup
    Calories: 314kcal
    Author: Natalie

    Equipment

    • Blender

    Ingredients

    • ¼ cup milk I used oat milk
    • ¾ cup coffee chilled
    • 1 banana frozen
    • ¼ cup rolled oats
    • 1 tablespoon cacao powder
    • 1 tablespoon hemp seeds
    • 1 teaspoon vanilla extract
    • Ice cubes optional

    Instructions

    • Add all ingredients into blender. Note: add wet ingredients first for easier blending. Also, add in ice cubes, if using.
    • Mix everything at high speed until you get a smooth silky texture.
    • If the smoothie is too thick, add a little more liquid – milk or coffee. Blend again until everything is well combined.
    • Taste the smoothie and add additional sweetener if the smoothie is not sweet enough. (See "Recipe tips" section for recommendation)
    • Transfer the smoothie into a smoothie glass.
    • ADD TOPPINGS: Be creative here and add toppings you like.
    • Serve and enjoy!

    Notes

    Makes 1 cup that serves 1 person (full meal) or 2 servings as a snack.
    As a measure, I used US cup (240ml). Nutrition values are calculated without added toppings.
    Substitutions
    • Substitute oat milk with any plant-based milk except coconut milk. Coconut milk won't work well here. Cow's milk is fine.
    • Substitute hemp seeds with ground flax seeds or chia seeds. 
    • Use half the banana if you're on a restricted-calorie diet.
    See "Smoothie variations" section for modifications.
    Store in a glass jar with a lid or shaker and keep refrigerated for up to one day.

    Nutrition

    Serving: 1cup | Calories: 314kcal | Carbohydrates: 51g | Protein: 12g | Fat: 10g | Saturated Fat: 1g | Sodium: 35mg | Potassium: 689mg | Fiber: 8g | Sugar: 19g | Vitamin A: 276IU | Vitamin C: 10mg | Calcium: 133mg | Iron: 4mg

    This post is originally published in March 2017. It's updated with new information, new photos and republished in June 2021. The recipe is changed slightly as I tested it more during the years.

    Lemon Poppy Seed Chia Pudding

    May 25, 2021 by Natalie 71 Comments

    Lemon Poppy Seed Chia Pudding served in a glass topped with fresh strawberries

    This Lemon Poppy Seed Chia Pudding is the perfect healthy breakfast. It's nutritious, creamy, and delicious, packed with incredible zesty flavor, sweet raisins, and poppy seeds. It's satisfying, easy to make in just 15 minutes, and has no refined sugars. Quite a treat!

    [feast_advanced_jump_to]
    Lemon Poppy Seed Chia Pudding served in a glass topped with fresh strawberries

    Last week I was on a real chia spree. I found a pack of unopened chia seeds in my kitchen cabinet, and the first thing that I made was, you can probably guess... a Strawberry Chia Pudding. I haven't had chia pudding in a while. It was a really nice change in my morning routine. I got quite bored with oats and pancakes for breakfast.

    My chia pudding frenzy continued the next day because strawberries are now in season and beautiful. So I made it again. And then I got inspired by these Lemon Poppy Seeds Pancakes and decided to make this bright lemony beauty.

    This Lemon Poppy Seed Chia Pudding is totally amazing. Creamy, sweet, and full of wonderful citrus flavors. Flacked with rising and discreetly scented with vanilla, packed with freshness and wonderful poppy seed flavor. It is delicious!

    It's also quite nutritious, very filling, it makes the perfect healthy breakfast or afternoon guilt-free treat. It's also super easy to make, and totally guilt-free, made without added refined sugars. 

    Ingredients used

    To make this lemon chia pudding, you will only need only a few pantry ingredients.

    Lemon Poppy Seed Chia Pudding ingredients
    Ingredients needed to make Lemon Poppy Seed Chia Pudding
    • Chia seeds. They are tiny, but they are powerful, loaded with fibers good for our digestion, and healthy Omega-3s for heart health. (1) Omega-3's also boost our brain and reduce inflammation. Chia seeds are also high in proteins. The unique combination of fats, proteins, and fibers makes them a great breakfast option. The benefits of chia seeds are really numerous, and chia pudding is one of the most popular ways to eat chia seeds. 
    • Milk. Non-dairy milk such as almond, oat, cashew, or soy milk is the best choice for making this lemon chia pudding. Cow's milk will work ok too. Coconut milk not so much.
    • Sweetener. To sweeten this chia pudding, I used pure maple syrup. Maple syrup is an unrefined sweetener. It gave a subtle sweetness yet he didn't overload this chia pudding with many sugary calories.
    • Lemon. Lemon is now in season and so beautiful. You will need lemon juice as well as some lemon zest, so make sure you use organic lemon here. The zest gives the majority of the citrus flavor, so don’t skip it!
    • Poppy Seeds. Tiny but mighty, poppy seeds pack a powerful punch. Like most seeds, poppy seeds are rich in fiber, healthy omega fats, and antioxidants polyphenols that reduce inflammation. (2) 
    • Raisins. I also tossed in some dried raisins. They go so well with lemon and poppy seed flavor.
    • Vanilla extract. I added a splash of vanilla too, just to make this beauty taste even more delicious.

    How to make Lemon Poppy Seeds Chia Pudding

    Assembling this Lemon Poppy Seeds Chia Pudding is quite easy. You will need only basic kitchen tools, some bowl, and a lemon grater. It's also done in a jiffy. That's why this is a great breakfast option.

    • Start with preparing and measuring all ingredients using measuring cups. Grate the lemon zest using the grater.
    • Place chia seeds in a bowl. (Picture 1) Add in milk. (Picture 2)
    • Mix chia seeds using the whisk or the spoon. (Picture 3)
    • Leave chia pudding to rest for 10-15 minutes. Seeds will start to absorb the liquid and expand forming the chia pudding. Mix the chia seeds halfway through. That way, chia seeds will absorb liquid equally, and there will be no lumps. Remember to stir! (Picture 4)
    • Add in the rest of the ingredients, the zest of a lemon, lemon juice, maple syrup, vanilla extract, poppy seeds, and raisins. (Picture 5)
    • Mix everything until it's all nicely combined. If chia pudding is too dense, add in more liquid (milk). Also, this is a good time to try the chia pudding and add more sweetener if desired. (Picture 6)
    • Transfer chia pudding into another bowl or glass jar, if you like. Top it with fresh strawberries or other fresh fruits, like blueberries, raspberries or blackberries.
    • Additional toppings: bee pollen, hemp seeds, chopped almonds. Be creative here and choose the toppings you like.
    • Makes 1 bowl that serves: 1 person (full meal size) or 2 people (dessert/snack meal size). 
    Lemon Poppy Seed Chia Pudding step by step instructions

    Substitutions

    • You can substitute oat milk with any milk - organic soy milk, cashew milk, or almond milk. Cow’s milk works well too. Coconut milk won’t work well here. 
    • You can substitute maple syrup and use honey. Make sure honey is in runny form. Date syrup, stevia, or any low-carb sweetener are great options too. 
    • You can substitute lemon juice with lemon extract.
    • You can substitute fresh lemon zest with dried lemon zest.
    • You can substitute raisins with other dried fruits, but I don't recommend it, flavor wise. Raisins pair perfectly with poppy seed and lemon. Other dried fruits, not so much.

    Tips for storing

    • Keep leftovers sealed for up to 2 days in the fridge.
    • PREP THE NIGHT BEFORE: Prep the chia pudding and put it into a jar with a lid. In the morning, just add toppings and enjoy!
    Lemon Poppy Seed Chia Pudding served in a glass topped with fresh strawberries

    Useful tips

    • The chia pudding ratio I used here is ¼ cup chia seeds per ⅔ cup of liquid (milk). This makes very dense, very firm chia pudding, but after adding lemon juice chia pudding will dissolve. Add more liquid after adding the lemon juice and make chia pudding creamy as you like.
    • If you let the chia pudding sit overnight, it will become super dense so you may need to add a bit more liquid. Lightly stir after adding the liquid, don't overmix.
    • Make sure you use organic, unwaxed lemon.

    Faq

    Is chia seed pudding healthy?

    Chia pudding it's SUPER healthy. It's high in protein, full of omega-3s, packed with fiber and helps keep you full and satisfied all day long. It's also meal-prep friendly which is great.

    Why is my chia pudding runny?

    If it's too runny, you probably added to much liquid. To fix this, just whisk in more chia seeds and let it sit again until thickened. On the other hand, if chia pudding is too thick, thin it with a touch of milk. 

    What is the ratio of chia seeds to liquid?

    The best chia pudding ratio is ¼ cup of chia seeds per 1 cup of liquid. That makes softer, creamy pudding.

    How long do chia seeds need to soak in milk?

    Chia pudding will start to absorb the liquid as soon as you mix them. In about 10 minutes chia pudding will already form and you can consume it. But for best result is best to leave chia seeds in liquid for 15-20 minutes.

    How to make overnight chia pudding?

    To make your chia pudding, combine the chia seeds and the liquid in a container, or a mason jar. Mix well or give your jar a vigorous shake to distribute the chia seeds evenly. Leave for 10-15 minutes, and then give it another shake or stir to loosen up any clumps of seeds. Then return it to the refrigerator and leave overnight.

    Lemon Poppy Seed Chia Pudding served in a glass topped with fresh strawberries

    This citrusy chia pudding got me completely hooked. It tastes just like sunshine in a bowl. Just like Summer! You can enjoy this easy chia pudding for breakfast, dessert, or as a snack. It’s a creamy, filling, and healthy, no matter how you serve it. Best chia pudding recipe!

    Here are some more chia pudding recipes:

    • Blueberry Chia Pudding
    • Blueberry Coconut Chia Pudding
    • Pineapple Coconut Chia Pudding
    • Chocolate Peanut Butter Chia Pudding

    Recipe

    Lemon Poppy Seed Chia Pudding served in a glass topped with fresh strawberries
    Print Recipe
    4.99 from 137 votes

    Lemon Poppy Seed Chia Pudding

    This Lemon Poppy Seed Chia Pudding is the perfect healthy breakfast. It's nutritious, creamy and delicious, packed with incredible zesty flavor, sweet raisins, and poppy seeds. It's also easy to make and has no refined sugars.
    Prep Time5 minutes mins
    Resting time15 minutes mins
    Total Time20 minutes mins
    Course: Breakfast
    Cuisine: American, International
    Keyword: lemon chia pudding, lemon poppy seed chia pudding
    Servings: 1 bowl
    Calories: 430kcal
    Author: Natalie

    Equipment

    • Measuring cups
    • Grater

    Ingredients

    • ¼ cup chia seeds
    • ⅔ cup oat milk
    • 1 teaspoon lemon zest
    • 2 tablespoons lemon juice
    • 1 tablespoon pure maple syrup
    • 1 tablespoon poppy seeds
    • 1 tablespoon raisins
    • ½ teaspoon vanilla extract

    Instructions

    • Place chia seeds in a bowl. Add in milk and mix using the whisk or the spoon.
    • Leave chia pudding to rest for 10-15 minutes. Mix the chia seeds halfway through to allow chia seeds to absorb the liquid and make sure lumps do not form.
    • Add in the rest of the ingredients, the zest of a lemon, lemon juice, maple syrup, vanilla extract, poppy seeds, and raisins.
    • Mix everything until combined. If chia pudding is too dense, add in more liquid (milk). Taste the chia pudding and add more sweetener if desired.
    • Transfer chia pudding into another bowl or glass jar, if you like.
    • Top it with fresh strawberries or other fresh fruits - strawberries, blueberries, raspberries or blackberries.
    • Additional toppings: bee pollen, hemp seeds, chopped almonds. Be creative here and choose the toppings you like.

    Notes

    Makes 1 bowl that serves: 1 person (full meal size) or 2 people (dessert/snack meal size).
    Substitutions
    • You can substitute oat milk with any milk - organic soy milk, cashew milk, or almond milk. Cow’s milk works well too. Coconut milk won’t work well here. 
    • You can substitute maple syrup and use honey. Make sure honey is in runny form. Date syrup, stevia, or any low-carb sweetener are great options too. 
    • You can substitute lemon juice with lemon extract.
    • You can substitute fresh lemon zest with dried lemon zest.
    Keep refrigerated in a sealed jar or container for up to 2 days. 
    PREP THE NIGHT BEFORE: Prep the chia pudding and put it into a jar with a lid. In the morning, just add toppings and enjoy!
    NOTE: The chia pudding ratio I used here is ¼ cup chia seeds per ⅔ cup of liquid (milk). This makes very dense, very firm chia pudding, but after adding lemon juice chia pudding will dissolve. Add more liquid after adding the lemon juice and make chia pudding creamy as you like.
    As a measure, I use a US cup (240ml).

    Nutrition

    Serving: 1bowl | Calories: 430kcal | Carbohydrates: 60g | Protein: 11g | Fat: 18g | Saturated Fat: 2g | Trans Fat: 1g | Sodium: 72mg | Potassium: 503mg | Fiber: 19g | Sugar: 23g | Vitamin A: 272IU | Vitamin C: 16mg | Calcium: 601mg | Iron: 5mg

    Lemon Poppy Seed Pancakes

    May 6, 2021 by Natalie 42 Comments

    Lemon Poppy Seed Pancakes served on a plate topped with yogurt and strawberries.

    These Lemon Poppy Seed Pancakes are so delicious. Thick and fluffy, sweet and tangy. Full of beautiful summery flavors. So easy to make too, using only a few simple ingredients. Loaded with oats and made without refined sugars, these lemon pancakes make a perfect healthy breakfast or brunch.

    Lemon Poppy Seed Pancakes served on a plate topped with yogurt and strawberries.
    [feast_advanced_jump_to]

    It's mid-Spring, and the weather is perfect for all things lemony. Lemons are now in season and just perfect for baking and making sweet treats. Bright, plump, refreshing, and beautiful. Honestly, how can you even resist them?!

    Lemon Smoothie is one of my favorite ways to indulge my lemon cravings lately. Followed with these Lemon Turmeric Balls. But these Lemon Poppy Seed Pancakes are even better. 

    There's something about the lemon and poppy seed combo. These two ingredients are just meant to be combined and enjoyed in the most delicious ways. And these lemon pancakes are proof that this combo is really sensational.

    They are sweet, fluffy, packed with poppy flavor with a citrus kick, and flecked with raisins. So refreshing, summery, delicate, and delicious. They are also made with wholesome ingredients, without refined flour or sugar. Just 185 calories each! That's what I call a delicious healthy breakfast.

    This delicious recipe will surely brighten up your day and delight the whole family. And now get ready to be totally amazed at how easy they are to prepare. 

    Ingredients used

    This lemon pancake recipe is super simple. You will need only a few pantry ingredients: 

    Lemon Poppy Seed Pancakes ingredients
    • Rolled oats. Oats are a great substitute for regular flour. They are an excellent source of soluble fiber, beta-glucan, that keeps our heart healthy. Fibers in oats also support healthy digestion and the growth of good bacteria in our bowels, which is essential for good immunity. I used rolled oats here, but you can use quick oats if you like.
    • Milk. I used oat milk, but you can use whatever milk you prefer or have. Note that coconut milk won't work well here.
    • Lemon. Lemon is now in season and so beautiful. You will need lemon juice as well as some lemon zest, so make sure you use organic lemon here. The zest gives the majority of the citrus flavor (not the lemon juice!), so don’t skip it!
    • Sweetener. I used pure maple syrup, but you can easily use honey here if you like. Sirup gave subtle sweetness yet didn't overload the pancakes with many sugary calories.
    • Poppy seeds. Tiny but mighty, poppy seeds pack a powerful punch. Like most seeds, poppy seeds are rich in fiber, healthy omega fats, and antioxidants polyphenols that reduce inflammation. (1) And yes, they are perfectly safe to consume when eaten in small amounts.
    • Hemp seeds. To give pancakes a little extra boost, I tossed in hemp seeds. They are an excellent source of healthy Omega-3s, but also a great source of proteins. A great addition to pancakes that makes them more filling.
    • Raisins. I also tossed in some dried raisins. They go so well with lemon and poppy seed flavor.

    Other pantry ingredients you’ll need:

    • Egg - I used free-range, pasture-raised.  
    • Baking powder.
    • Vanilla extract.
    • Extra virgin coconut oil/coconut oil cooking spray - for greasing the pancake pan. 
    Lemon poppyseed pancakes served on a plate topped with yogurt and strawberries.

    How to make Lemon Poppy Seed Pancakes

    These Lemon Poppy Seed Pancakes are the easiest pancakes ever. It only takes 15 minutes to make them, and you'll need only basic equipment.

    Equipment used

    • Measuring cups.
    • High-speed blender. 
    • Pancake pan - or any pan with a non-stick surface.
    • Flexible silicone spatula - for flipping the pancakes. 

    Step by step instructions

    • Start with preparing and measuring all the ingredients. I like to use measuring cups.
    • Take the blender and add all ingredients except raisins! Note: add wet ingredients first for easier blending.
    • Mix everything at high speed until you get a smooth texture.
    • Taste the pancake batter and add additional sweetener if you think the mixture is not sweet enough.
    • Add raisins to the batter and mix with a spoon or spatula.
    • Let the batter rest for few minutes. Oats will soak some of the moisture, and the batter will become denser. Don’t mix batter after resting.
    • In the meantime, heat the pancake pan over medium heat and coat with coconut oil cooking spray or coconut oil using the brush. 
    • For each pancake, drop ¼ cup of batter into the pan. Cook for 1-2 minutes until pancake is lightly browned. 
    • Flip the pancake carefully with a flexible silicone spatula and cook for another minute. Transfer to a plate. 
    • Make sure to coat the pan before every pancake or batch of pancakes to prevent sticking.
    • Repeat the process with the remaining pancake batter.
    • Add toppings and serve. I used vanilla yogurt and strawberries. You can be creative here and use any fruits, nuts, and toppings you like.
    • Makes 6 pancakes that serve 2-3 people. The serving size is 2-3 pancakes.
    Healthy lemon pancakes made with poppy seeds served on a plate with fresh strawberries.

    Substitutions

    • You can substitute oat milk with any milk - organic soy milk, cashew milk, or almond milk. Cow’s milk works well too. Coconut milk won’t work well here. 
    • You can substitute coconut oil with avocado oil/avocado oil cooking spray for greasing the pancake pan. Don't use butter.
    • You can substitute maple syrup and use honey. Make sure honey is in runny form. Date syrup, stevia, or any low-carb sweetener are great options too. 
    • You can substitute lemon juice with lemon extract.
    • You can substitute fresh lemon zest with dried lemon zest.
    • MAKE IT VEGAN: Swap egg with a flax or chia egg. Use non-dairy milk.
    • MAKE IT GLUTEN-FREE: Use certified gluten-free oats. 

    Useful tips

    • You can use old-fashioned rolled oats or quick oats here. Both are equally healthy and equally good.
    • When adding your ingredients to your blender, always add the liquid first. Doing this will help your blender run easily and it will prevent making lumps.
    • Use a high-power blender to ensure everything blends well and pancake batter is smooth. 
    • Make sure you let the batter rest for few minutes. Oats will soak some of the moisture, and pancake batter will become denser. This is very important because you don't want runny pancake batter.
    • Don’t mix batter after resting.
    • If you let the batter sit overnight, it will become super dense so you may need to add a bit more liquid. Lightly stir after adding the liquid, don't overmix.
    • Make sure to choose extra virgin coconut oil rather than refined versions.
    • Cook pancakes over low heat. This allows pancakes to cook through without burning or turning overly brown.
    • Pick lemons that are plum and have pure yellow skin without any spots.
    • Choose organic, non-waxed lemons.
    Lemon poppyseed pancakes served on a plate topped with yogurt and strawberries.

    Tips for serving

    • Top lemon pancakes with yogurt and fresh fruits, like blueberries, strawberries, blackberries, or raspberries.
    • Drizzle them with maple syrup or honey.
    • Sprinkle them with bee pollen, chopped nuts, or seeds.
    • You can be creative and choose any other toppings you like.

    Tips for storing

    • Keep covered in the refrigerator for up to 4 days. 
    • How to freeze? Take your cooked and cooled pancakes and place each pancake individually in wax paper bags or stack between wax paper. Store wrapped pancakes in a large freezer zip-lock bag. Keep in the freezer for up to 3 months. Thaw on room temperature.
    • Pancakes can be warmed in the microwave. Be careful not to overheat them.
    Lemon pancakes made with oats and poppy seeds served on a plate with fresh strawberries.

    More pancakes recipes to try

    • Matcha Pancakes
    • Carrot Cake Pancakes
    • Gingerbread Pancakes
    • Blueberry Cinnamon Pancake Casserole
    • Apple Oatmeal Pancakes
    • Chocolate Banana Pancakes 
    • Peanut Butter Oatmeal Pancakes

    Recipe

    Lemon Poppy Seed Pancakes served on a plate topped with yogurt and strawberries.
    Print Recipe
    5 from 59 votes

    Lemon Poppy Seed Pancakes

    These Lemon Poppy Seed Pancakes are so delicious. Thick and fluffy, sweet and tangy. Full of beautiful summery flavors. So easy to make too, using only a few simple ingredients.
    Prep Time5 minutes mins
    Cook Time10 minutes mins
    Total Time15 minutes mins
    Course: Breakfast, Brunch, Dessert
    Cuisine: American
    Keyword: Healthy lemon pancakes, Lemon pancakes, Lemon Poppy Seed Pancakes
    Servings: 6 pancakes
    Calories: 185kcal
    Author: Natalie

    Equipment

    • Measuring cups
    • Blender
    • Pancake pan
    • Flexible silicone spatula

    Ingredients

    • 1 cup milk I used oat milk
    • 1 egg
    • 1 ½ cup rolled oats
    • 2 tablespoons lemon juice
    • 1 teaspoon lemon zest
    • 1 tablespoon poppy seeds
    • 2 tablespoons hemp seeds
    • 1 teaspoon vanilla extract
    • 2 tablespoons maple syrup or honey
    • ½ teaspoon baking powder
    • ¼ cup raisins
    • Pinch of salt

    Instructions

    • Put all ingredients, except raisins, into the blender and mix at high speed until you get a smooth texture. Note: add wet ingredients first for easier blending.
    • Taste the pancake batter and add additional sweetener if you think the mixture is not sweet enough.
    • Add raisins to the batter and mix with a spoon or spatula.
    • Let the batter rest for few minutes. Oats will soak some of the moisture, and the batter will become denser. Don’t mix batter after resting.
    • Heat the pancake pan over medium heat and coat with coconut oil cooking spray or coconut oil using the brush.
    • For each pancake, drop ¼ cup of batter into the pan. Cook for 1-2 minutes until pancake is lightly browned.
    • Flip the pancake carefully with a flexible silicone spatula and cook for another minute. Transfer to a plate.
    • Make sure to coat the pan before every pancake or batch of pancakes to prevent sticking.
    • Repeat the process with the remaining pancake batter.
    • Add toppings and serve.

    Notes

    Makes 6 pancakes that serve 2-3 people. The serving size is 2-3 pancakes.
    Substitutions
    • You can substitute oat milk with any milk - organic soy milk, cashew milk, or almond milk. Cow’s milk works well too. Coconut milk won’t work well here.
    • You can substitute coconut oil with avocado oil/avocado oil cooking spray for greasing the pancake pan. Don't use butter.
    • You can substitute maple syrup and use honey. Make sure honey is in runny form. Date syrup, stevia, or any low-carb sweetener are great options too.
    • You can substitute lemon juice with lemon extract.
    • You can substitute fresh lemon zest with dried lemon zest.
    MAKE IT VEGAN: Swap egg with a flax or chia egg. Use non-dairy milk.
    MAKE IT GLUTEN-FREE: Use certified gluten-free oats.
    Tips for storing
    • Keep covered in the refrigerator for up to 4 days.
    • How to freeze? Take your cooked and cooled pancakes and place each pancake individually in wax paper bags or stack between wax paper. Store wrapped pancakes in a large freezer zip-lock bag. Keep in the freezer for up to 3 months. Thaw on room temperature.
    • Pancakes can be warmed in the microwave. Be careful not to overheat them.
    As a measure, I use a US cup (240ml).

    Nutrition

    Serving: 1pancake | Calories: 185kcal | Carbohydrates: 28g | Protein: 7g | Fat: 5g | Saturated Fat: 1g | Trans Fat: 1g | Cholesterol: 27mg | Sodium: 34mg | Potassium: 219mg | Fiber: 3g | Sugar: 8g | Vitamin A: 148IU | Vitamin C: 3mg | Calcium: 125mg | Iron: 2mg

    Chocolate Chip Banana Muffins

    March 3, 2021 by Natalie 56 Comments

    Banana chocolate chip muffins served on a wooden plate.

    These Chocolate Chip Banana Muffins are one delicious treat. Moist, fluffy, and super sweet, packed with incredible banana flavor and dark chocolate chips. So tasty and totally wholesome, made with healthy ingredients, without refined sugars. Great breakfast or afternoon snack.

    Chocolate Chip Banana Muffins in a muffin tin.
    [feast_advanced_jump_to]

    Schools are reopening from next week. And this means only one thing. From next week we moms will have one more thing to think about again - packed school lunches. But that doesn't have to be a daunting task. With this easy banana muffin recipe, you can just relax.

    Chocolate Chip Banana Muffins are super easy to make. Make them on Sunday evening and you'll have a whole week of healthy lunchbox treats for your kids. But practicality aside, these muffins are what kids really want for breakfast, lunch, or as a snack. Sweet, packed with banana flavor and dark chocolate chips. What's there not to love?

    Aside from incredible deliciousness, these banana chocolate chip muffins are:

    • Made with 100% whole grains thus more nutritious.
    • Naturally sweetened with bananas and maple syrup, meaning, no refined sugars are used!
    • Lower in calories and so much healthier than other treats. 
    • So easy to make, anyone can make them, even the kids.
    • One bowl and ready in 30 minutes!
    • They keep well and can be frozen. 

    These delicious muffins are the perfect family treat. Great grab-and-go breakfast, afternoon snack, or something you can pack for picnics or going out to the parks. They are freezable, packable, so practical. So simple to make. A classic we all love. But in the healthier edition.

    Ingredients used

    This banana muffin recipe is very simple. There are no fancy ingredients. Everything you need to make these muffins is probably already in your kitchen. You will need:

    Chocolate Chip Banana Muffins ingredients
    • Bananas. Banana is a star ingredient in this recipe. It's not just packed with incredible flavor and sweetness, but with many essential nutrients as well. (1) I like to use super ripe bananas when making these muffins. They are extra sweet and flavorful.
    • Whole grain flour. I use whole grain flour for all my baking. It's a healthier, more nutritious option than all-purpose wheat flour. It's packed with fibers and will keep you full longer. In this recipe, I used whole grain Spelt flour. but you can use any whole grain flour here. 
    • Milk. Use any milk you like and prefer. I used oat milk. It has less fat, and it packs nutrients, like fibers.
    • Sweetener. Maple syrup is great for muffins. It's very light on calories and mildly sweet.
    • Coconut oil. I like to use unrefined extra virgin coconut oil because it’s full of nutrients and very light. If you're worried about coconutty aftertaste, don't be. You will not taste coconut in these muffins. 
    • Chocolate chips. I used dark chocolate made with 85% cacao. Melting pieces of dark chocolate in a warm muffin it's unbelievably satisfying. Plus banana and chocolate go so well together.

    Other pantry ingredients you’ll need:

    • Egg - I used free-range, pasture-raised.
    • Baking powder.
    • Vanilla extract.
    • Salt - I used Himalayan salt.
    Chocolate Chip Banana Muffins in a muffin tin.

    How to make Chocolate Chip Banana Muffins

    Making these gorgeous banana chocolate chip muffins is quite easy. No brainer, really. You will need just one mixing bowl and a muffin tin.

    • Start with preparing and measuring all ingredients. I like to use these measuring cups. Melt coconut oil and let it cool for few minutes at room temperature.
    • Preheat oven to 350 F (178C). 
    • Place bananas in a mixing bowl and mash them with a fork. (Picture 1)
    • Add in wet ingredients: coconut oil, maple syrup, vanilla, and eggs. Mix everything using the whisk or fork until you get a nice dense texture. (Picture 2)
    • Add in the milk and mix everything together. (Picture 3)
    • Now is the time to add the dry ingredients. Add in flour, baking powder, and salt. You can use a spatula here or a whisk or fork. (Picture 4)
    • Mix the batter until it's nice, dense, and sticky. (Picture 5)
    • Toss in dark chocolate chips (Picture 6)
    • Fold everything together. (Picture 7)
    • Line the muffin tin with muffin liners. Or grease the muffin pan with nonstick cooking spray or melted coconut oil. (Picture 8)
    • Spoon the batter into liners, filling them ¾ full. (Picture 9)
    • Pop the muffins into the preheated oven, and bake for 20-25 minutes, depending on your oven. Make a toothpick test: insert a toothpick in the muffin center; if it comes out clean, muffins are done.  
    • Allow the muffins to cool for 5 minutes in the muffin pan, then transfer them to a wire rack to cool completely. (Picture 10)
    • Makes 12 muffins that serve 6-12 people. Recommended serving size is one muffin. 
    Chocolate Chip Banana Muffins process photos

    Substitutions

    • Flour. You can substitute Spelt flour with any whole grain flour. Oat flour works well here too. Or use plain/all-purpose flour if you prefer. Substitute at a 1:1 ratio.
    • Milk. You can substitute oat milk for almond milk, cashew, or organic soy milk. Cow’s milk works fine here too. Coconut milk won’t work well here.
    • Oil. In order to get all the health benefits from coconut oil, make sure to choose organic, virgin coconut oil rather than refined versions. You can substitute coconut oil with avocado oil. 
    • Sweetener. You can substitute maple syrup with honey or date syrup at a 1:1 ratio. Use honey in the runny form (not raw honey).
    • Chocolate chips. Substitute chocolate chips with chopped dark chocolate, or cacao nibs. You can swap chocolate for chopped nuts, like walnuts. 
    • Protein Powder. You can replace ¼ cup of flour with 1 scoop of protein powder.
    Chocolate Chip Banana Muffins served on a wooden plate.

    Tips for storing

    • Counter: Once muffins are completely cooled, store them in an airtight container and keep them on the counter for up to 3 – 4 days.
    • Refrigerator: Muffins will keep for up to a week in the refrigerator, in an airtight container.
    • How to freeze? Place the muffins in a zip-lock bag. Keep in the freezer for up to 3 months. Thaw on room temperature.
    • Muffins can be warmed in the microwave. Be careful not to overheat them.

    Useful tips

    • When folding the batter, use the spatula and don't over-mix it. Little lumps in the batter are ok - a lumpy batter makes a lighter muffin.
    • To check whether muffins are done, insert a skewer or toothpick into the center. If the toothpick comes out clean or with just a few crumbs on it, they are ready to come out of the oven.
    • Make sure you use eggs at room temperature. Pull them out of the fridge before baking so they can rest for a bit. Or run the eggs under warm water to speed this process or set them in a bowl of warm water.
    Upclose view of chocolate chip banana muffins.

    These Chocolate Chip Banana Muffins are packed with sweet flavors, fluffy, moist, and filled with dark chocolate chips. Such a yummy treat. Even grownups can resist munching on these beauties.

    Plus they are made with wholesome ingredients, without any added refined sugars which makes them super healthy and totally guilt-free. Nutritious, satisfying, and truly beyond delicious. You will absolutely love these healthy banana muffins.

    • Hand taking a banana chocolate chip muffin.
    • Hand holding a banana chocolate chip muffin.

    More muffin recipes to try

    • Apple Cinnamon Muffins
    • Double Chocolate Banana Muffins
    • Healthy Apple Carrot Muffins
    • French Toast Vanilla Muffins
    • Mini Peanut Butter Banana Muffins

    Recipe

    Banana chocolate chip muffins served on a wooden plate.
    Print Recipe
    5 from 65 votes

    Chocolate Chip Banana Muffins

    These Chocolate Chip Banana Muffins are delicious. Moist, fluffy, full of banana flavor and dark chocolate chips. Low-calorie and healthy!
    Prep Time5 minutes mins
    Cook Time25 minutes mins
    Total Time30 minutes mins
    Course: Breakfast, Dessert, Snack
    Cuisine: American, International
    Keyword: Chocolate Chip Banana Muffins, healthy banana bread muffins, healthy banana muffins, healthy chocolate chip muffins, peanut butter banana chocolate chip muffins
    Servings: 12 muffins
    Calories: 177kcal
    Author: Natalie

    Equipment

    • Measuring cups
    • Mixing bowls
    • 12-cup muffin pan

    Ingredients

    • 2 ripe bananas
    • 2 cups whole grain flour I used Spelt
    • 1 teaspoon baking powder
    • Pinch of salt
    • 2 eggs
    • ¼ cup coconut oil melted
    • ½ cup maple syrup
    • ½ cup milk
    • ½ cup chocolate chips

    Instructions

    • Preheat oven to 350 F (178C).
    • Place bananas in a mixing bowl and mash them with a fork.
    • Add in wet ingredients: coconut oil, maple syrup, vanilla, and eggs. Mix everything using the whisk or fork until you get a nice dense texture.
    • Add in the milk and mix everything together.
    • Add in flour, baking powder, and salt. Mix the batter until it's nice, dense, and sticky.
    • Toss in dark chocolate chips and fold everything together.
    • Line the muffin tin with muffin liners.
    • Spoon the batter into liners, filling them ¾ full.
    • Bake for 20-25 minutes, depending on your oven. Make a toothpick test: insert a toothpick in the muffin center; if it comes out clean, muffins are done.
    • Allow the muffins to cool for 5 minutes in the muffin pan, then transfer them to a wire rack to cool completely.

    Notes

    Makes 12 muffins that serve 6-12 people. Recommended serving size is one muffin.
    Substitutions
    • You can substitute Spelt flour with any whole grain flour. Oat flour works well here too. Or use plain/all-purpose flour if you prefer. Substitute at a 1:1 ratio.
    • You can substitute oat milk for almond milk, cashew, or organic soy milk. Cow’s milk works fine here too.
    • You can substitute coconut oil with avocado oil. You can substitute maple syrup with honey or date syrup at a 1:1 ratio. Use honey in the runny form (not raw honey).
    • Substitute chocolate chips with chopped dark chocolate, or cacao nibs. You can swap chocolate for chopped nuts, like walnuts.
    Tips for storing
    Counter: Once muffins are completely cooled, store them in an airtight container and keep them on the counter for up to 3 – 4 days.
    Refrigerator: Muffins will keep for up to a week in the refrigerator, in an airtight container.
    Freezer: Place the muffins in a zip-lock bag. Keep in the freezer for up to 3 months. Thaw on room temperature.

    Nutrition

    Serving: 1muffin | Calories: 177kcal | Carbohydrates: 29g | Protein: 4g | Fat: 6g | Saturated Fat: 4g | Trans Fat: 1g | Cholesterol: 27mg | Sodium: 17mg | Potassium: 188mg | Fiber: 3g | Sugar: 11g | Vitamin A: 74IU | Vitamin C: 2mg | Calcium: 41mg | Iron: 1mg

    Cookie Dough Protein Bars

    February 22, 2021 by Natalie 33 Comments

    Four Cookie Dough Protein Bars stacked on a wooden plate

    Sweet, packed with vanilla flavor and bits of dark chocolate, these Cookie Dough Protein Bars are one delicious treat. Made with just a few simple wholesome ingredients, no-bake, high-protein, and low-calorie, these protein bars are satisfying and totally yummy!

    Cookie Dough Protein Bars stacked on a wooden plate
    [feast_advanced_jump_to]

    Protein bars have always been one of my favorite grab-and-go snacks. They satisfy sweet tooth craving quite well without many sugary calories. Wholesome ingredients inside keep me full for a long time. Plus, they suppress any hunger very quickly. Total win if you ask me.

    And while you can buy protein bars in stores, making them at home is really easy and the main benefit is you're in control of the ingredients. You can make them low sugar, no sugar, high-protein, or high-fiber. Vanilla flavored, or packed with chocolate.

    You can be creative, and make them as you like them! Just like these Cookie Dough Protein Bars right here. They are specially tailored to satisfy a cookie dough craving in a super healthy way.

    These protein bars are:

    • Perfect low-sugar, high-protein snack.
    • They are easily made with just a few simple ingredients.
    • NO baking required.
    • Packed with vanilla flavor and bits of dark chocolate.

    Convinced? Yes, I thought so.

    Cookie Dough Protein Bars served on a wooden plate

    Ingredients used

    This cookie dough protein bar recipe calls for only a handful of pantry ingredients. All simple and you probably have them at home already. You will need:

    • Almond butter. I used all-natural creamy almond butter. Almond butter is packed with healthy monounsaturated fats that give energy and keep our heart healthy. Plus, it's loaded with fibers, proteins, and many important minerals and vitamins.
    • Protein powder. I used vanilla flavored whey isolate protein powder. You can use ANY protein powder you like or use.
    • Sweetener. I used maple syrup. It binds other ingredients together but also gives mild natural sweetness. 
    • Flax seeds. I used ground flax seeds here. Flax seeds are packed with Omega-3s. Consuming these essential fatty acids improves mood, boosts immunity, and fights inflammation. Also, flax seeds are packed with fibers that made these protein bars more filling and balanced.
    • Maca powder. To add some extra flavor I also added a maca powder. It's a known superfood that boosts mood, sex drive, energy, and stamina. If you don't have maca powder at hand, you can swap it for cinnamon.
    • Cacao nibs (or chocolate chips). I used Yukon-sweetened cacao nibs. Slightly sweetened these cacao nibs are less bitter than regular cacao nibs and a great alternative to dark chocolate chips which you totally can use here if you like.
    • Coconut flour.
    • Coconut oil. I used extra virgin coconut oil. 

    How to make cookie dough protein bars

    As I said, these chocolate chip cookie dough protein bars are NO-bake, meaning they don't require much work. If you have a food processor, great. Use it here - it will speed up the mixing.

    I tested the recipe without using any special equipment, just a mixing bowl, and spatula. Does the job equally good.

    • Start with preparing and measuring all the ingredients using the measuring cups. Line a 13x5” loaf pan with parchment paper. Set aside.
    • Add all ingredients except chocolate chips to a food processor. (Picture 1)
    • Mix on high speed until everything is fully incorporated. The mixture should resemble cookie dough texture. If it's too crumbly (dry) add a teaspoon of water until you got a nice sticky texture. (Picture 2)
    • Scrap down the sides of the bowl with a rubber spatula if needed.
    • Add in chocolate chips and give one last mix. Just pulse for few times. (Picture 3)
    • Scoop the mixture into the prepared pan. (Picture 4)
    • Press the mixture with a spatula until nice and flat. (Picture 5)
    • Put it in the freezer for 30 minutes to firm.
    • Take the pan out of the freezer. Gently lift the mixture out of the pan. Slice into 6 bars. (Picture 6)
    • Makes 6 bars. Recommended serving size is one bar. Altho, one bar can be split into two servings if you're following a restricted low-calorie diet.
    How to make Cookie Dough Protein Bars

    Substitutions

    • You can substitute almond butter with cashew butter at a 1:1 ratio.
    • You can substitute cacao nibs with mini dark chocolate chips, or dark chocolate chunks. Or chopped dark chocolate. Make sure you're using 80% or more dark chocolate without refined sugars.
    • You can substitute maple syrup with honey at a 1:1 ratio. Use honey in a runny form (not raw honey). Date syrup works well here too BUT it will discolor the bars.
    • Substitute ground flax seeds with chia seeds. Flax seeds and chia seeds are suggested options because of the high-fiber content that balances the nutrition profile of the bars. Hemp seeds are not a great substitution here because they are high in protein while lacking fibers.
    • You can substitute coconut flour with almond flour or oat flour.
    • You can substitute maca powder with cinnamon.
    • MAKE IT VEGAN: Use vegan protein powder.
    Close up of a Cookie Dough Protein Bars served on a wooden plate

    Useful tips

    • Use ground flax seeds here. Grinding flax seeds is the best way to make the most of their health benefits.
    • If almond butter is too firm, microwave it for a few seconds to soften. Use natural soft almond butter. Crunchy won’t work well here.
    • Make sure you melt coconut butter BUT cool it to room temperature before using it.
    • If you notice that the mixture is too dry and crumbly, add a teaspoon of warm water or milk.
    • Try adding different mix-ins like chopped almonds, and other nuts, white chocolate chips, etc. Be creative!
    • Make them more chocolaty. Melt the dark chocolate chips and dip these beauties in or just a drizzle.

    Tips for storing

    • Store in an airtight container and keep in the refrigerator for up to one week.
    • You can individually wrap the protein bars in sandwich bags for easy use.
    • How to freeze: Wrap each bar into parchment paper. Place the bars in a zip-lock plastic bag and stash them in the freezer for up to 3 months. Thaw the bars at room temperature for few minutes before eating.
    • Upper view of a Cookie Dough Protein Bars served on a wooden plate
    • Cookie Dough Protein Bars served on a wooden plate

    FAQ

    What kind of protein powder should you use?

    You can use any type of protein powder here. I like Whey Isolate vanilla flavored, which has 21 grams of protein per serving. Note that different protein powders give different textures. With some protein powders, you may need to add some water.

    Can I make these into cookie dough protein balls?

    Absolutely. Simply scoop 1-2 teaspoons of the dough and form it into a ball. And there you go, cookie dough protein balls!

    How many calories are in cookie dough protein bars?

    These protein bars pack 285 calories, with a whooping 14g of proteins, and 7 g fibers per serving.

    • Cookie Dough Protein Bars served on a wooden plate
    • Hand taking Cookie Dough Protein Bars

    These Cookie Dough Protein Bars are a great snack. Easy to make, delicious, and so healthy. They are great for meal prep since they store well in the fridge or freezer.

    They are no-bake, low on calories and packed with proteins and fibers. These protein bars will satisfy your sweet tooth, boost you with energy, especially before or after workouts. Prep them, packe them and have them ready.

    More healthy snacks recipes to try

    • Chocolate Peanut Butter Crunch Bars
    • Peanut Butter Banana Oatmeal Bars
    • Chocolate Peanut Butter Protein Balls
    • Almond Butter Energy Balls
    • Peanut Butter Coconut Balls
    • Peanut Butter Protein Balls

    Enjoy!

    Recipe

    Cookie Dough Protein Bars served on a wooden plate
    Print Recipe
    4.99 from 54 votes

    Cookie Dough Protein Bars

    The best cookie dough protein bar recipe that tastes just like a cookie! Made with coconut flour, almond butter, and vanilla protein powder with added dark chocolate chips. Healthy and delicious!
    Prep Time1 minute min
    Cooling time30 minutes mins
    Total Time35 minutes mins
    Course: Snack
    Cuisine: American, British, International
    Keyword: chocolate chip cookie dough protein bars, cookie dough protein bar recipe, cookie dough protein bars, low sugar protein bar recipe
    Servings: 6 bars
    Calories: 285kcal
    Author: Natalie

    Ingredients

    • ½ cup creamy almond butter
    • 1 tablespoon coconut oil melted
    • 1-2 tablespoon maple syrup
    • 2 scoops of protein powder vanilla flavored
    • ¼ cup coconut flour
    • ¼ cup ground flax seeds
    • 1 teaspoon maca powder
    • ¼ cup cacao nibs or chocolate chips

    Instructions

    • Line a 13x5” loaf pan with parchment paper. Set aside.
    • Add all ingredients except chocolate chips to a food processor.
    • Mix on high speed until everything is fully incorporated. The mixture should resemble cookie dough texture. If it's too crumbly add a teaspoon of water until you got a nice sticky texture.
    • Add in chocolate chips and give one last mix. Just pulse for few times.
    • Scoop the mixture into the prepared pan.
    • Press the mixture with a spatula until nice and flat.
    • Put it in the freezer for 30 minutes to firm.
    • Take the pan out of the freezer. Gently lift the mixture out of the pan. Slice into 6 bars.

    Notes

    Substitutions
    • You can substitute almond butter with cashew butter at a 1:1 ratio.
    • You can substitute cacao nibs with mini dark chocolate chips, or dark chocolate chunks. Or chopped dark chocolate.
    • You can substitute maple syrup with honey at a 1:1 ratio. Use honey in a runny form (not raw honey). 
    • Substitute ground flax seeds with chia seeds.
    • You can substitute coconut flour with almond flour or oat flour.
    • You can substitute maca powder with cinnamon.
    MAKE IT VEGAN: Use vegan protein powder.
    Tips for storing
    Store in an airtight container and keep in the refrigerator for up to one week.
    How to freeze: Wrap each bar into parchment paper. Place the bars in a zip-lock plastic bag and stash them in the freezer for up to 3 months. Thaw the bars at room temperature for few minutes before eating.

    Nutrition

    Serving: 1bar | Calories: 285kcal | Carbohydrates: 14g | Protein: 14g | Fat: 21g | Saturated Fat: 6g | Cholesterol: 1mg | Sodium: 15mg | Potassium: 232mg | Fiber: 7g | Sugar: 5g | Vitamin A: 1IU | Vitamin C: 1mg | Calcium: 97mg | Iron: 1mg

    Chocolate Waffles

    February 11, 2021 by Natalie 40 Comments

    Chocolate waffles served on a plate drizzled with melted chocolate

    Dense, deep dark chocolaty, and just beautiful, these Chocolate Waffles are one indulgent treat! They are made with simple, wholesome ingredients without refined sugars. Filled with superfood cacao and full of wonderful chocolate flavor. Perfect tasty, satisfying breakfast, so delicious that it can be served as a dessert too!

    Chocolate waffles served on a plate drizzled with melted chocolate

    Chocolate waffle recipe just in time for Valentine's Day. How great is that? 

    Last night I finally manage to sit down in quiet and make plans for our little lockdown Valentine's Day dinner. I've looked at my cookbook, tried to get some new ideas from the internet, but in the end, I decided to go very simple. We both love a good steak. And for dessert, our favorite, Fudgy Walnut Brownies. Winner combo. 

    This morning, as I started to present my menu plans to husband, he immediately stopped me with a quite serious face: But what about breakfast? And then it struck me. I totally forgot to include breakfast in my perfect Valentine's Day story. 

    I improvised and throw him a few ideas, like Chocolate Banana Waffles, but quickly realized they are more like everyday waffles. I had to enhance that recipe and make new chocolate waffles that are a bit more special. I quickly tested this idea and made these waffles. New and improved, Valentine's Day special edition.

    These Chocolate Waffles are beyond delicious. They are indulging, so satisfying. Deep dark, bitter-sweet. Filled with dark chocolate, and amazing flavors. Spiced with cinnamon and packed with aphrodisiac maca. They are the perfect treat, a delicious breakfast that is special enough to be served as a dessert too.

    Chocolate Waffles ingredients

    Ingredients used

    This chocolate waffle recipe is super simple. You will need only a few basic pantry ingredients:

    • Oat flour. I used oat flour here, but you can basically use any flour. I like oats because they are quite nutritious and healthy. They are always great to have for breakfast since they are a great source of fiber, especially beta-glucan known for its power to keep our heart healthy (1). Also, oats are high in essential vitamins, minerals, and surprisingly proteins!
    • Oat milk. I used oat milk because it's naturally sweet, plus, same as oats, has so many benefits to our health.
    • Cacao is actually a star in this recipe. I used raw cacao powder that is unprocessed, bitter, deep-flavored, and incredibly healthy. Cacao is one of the richest sources of antioxidants that have been linked to many health benefits. Cacao gave these waffles a gorgeous chocolaty flavor and made them irresistible. 
    • Ceylon cinnamon is an amazing addition to anything chocolate. I like to use Ceylon cinnamon, known as “true” cinnamon. It's highly flavorful and has many health benefits. (2)
    • Maca powder. To add some extra flavor (and some aphrodisiac punch!) I also added a maca powder. It's a known superfood that boosts mood, sex drive, energy, and stamina.

    Other pantry ingredients you'll need:

    • Egg - I used free-range, pasture-raised.
    • Maple syrup.
    • Coconut oil - I used extra virgin.
    • Baking soda.
    • Salt - I used Himalayan salt.
    Close up view of Chocolate waffles served on a plate drizzled with melted chocolate

    How to make Chocolate Waffles

    Making these gorgeous chocolate waffles is quite easy. No brainer, really. You will need some equipment: a blender and, of course, a waffle maker.

    • Start with preparing and measuring all ingredients. I like to use these measuring cups.
    • Place wet ingredients in the blender first: milk, coconut oil, and egg.
    • Add in oat flour, baking powder, a pinch of salt, cacao powder, cinnamon, and maca. Turn on the blender and mix at high speed until you get a smooth batter.
    • Heath up your waffle maker until it’s completely HOT (the green light must be on). Grease the waffle maker with coconut oil cooking spray or melted coconut oil using the brush. 
    • Pour the batter onto the hot waffle maker. Close the lid and allow waffles to cook before removing and repeating the process with the rest of the batter. Depending on how strong your waffle maker is, it will take 8-10 minutes for the waffle to be done. Don't open the waffle maker before waffles are completely cooked. 
    • Remove cooked waffles from the waffle maker and place them on a cooling rack. Let them cool to room temperature. Freshly cooked waffles will be soft when you take them out of the waffle maker but they will harden as they cool on the rack. 
    • Serve waffles with toppings. I used melted dark chocolate, goji berries, and chopped walnuts. You can choose any toppings you like.
    • Makes 4 waffles that serve 2 people.
    Upper view of a Chocolate waffles served on a plate drizzled with melted chocolate

    Substitutions

    • You can substitute oat flour with any whole grain flour at a 1:1 ratio.
    • You can substitute oat milk for almond milk, cashew, or organic soy milk. Cow’s milk works fine here too. Coconut milk won’t work well here because of the flavor.
    • In order to get all the health benefits from coconut oil, make sure to choose organic, virgin coconut oil rather than refined versions. You can substitute coconut oil with avocado oil. 
    • You can substitute maple syrup with honey or date syrup at a 1:1 ratio. Use honey in the runny form (not raw honey).
    • You can substitute maple syrup with liquid stevia. In that case, you may need to add more liquid into the batter - milk or water.
    • If you don't have maca powder at hand, you can leave it out.
    • MAKE IT GLUTEN-FREE: Use certified gluten-free oats/oat flour.
    • MAKE IT VEGAN: Swap egg with a flax or chia egg. Use non-dairy milk.

    Useful tips

    How to make oat flour at home? You can use quick oats or rolled oats. Put the oats in a food processor or high-speed blender. Blend until the oats become a fine powder. This will only take a few seconds in a high-speed blender, and a little bit longer in a food processor. 2 cups of oats will make approximately 1.5 cups of oat flour.  

    If you let the batter sit after the mixing (for example overnight), it will become dense so you may need to add a bit more liquid to make it runny again. Oats soak a lot of moisture.  

    Only pour in enough batter to cover the lower cooking grid. The batter needs room to expand, or you will get a waffle with a soggy middle.

    Upper view of Chocolate waffles served on a plate drizzled with melted chocolate

    Chocolate Waffles toppings

    • Top chocolate waffles with fresh fruits: banana slices, blueberries, strawberries, cherries, or any other high antioxidant berry fruit.
    • Add a spoonful of yogurt on top.
    • Drizzle with melted dark chocolate, peanut butter, or almond butter.
    • Sprinkle with: sliced almonds or walnuts, or any other nuts, goji berries, cacao nibs, or dark chocolate bits.
    • Be creative, make it fun. Choose toppings you like.

    Tips for storing Chocolate Waffles

    • Keep covered in the refrigerator for up to a week.
    • HOW TO FREEZE: Take your cooked and cooled waffles and store them in a large freezer zip-lock bag. Keep in the freezer for up to 3 months. Thaw on room temperature.
    • Waffles can be warmed in the microwave. Be careful not to overheat them.
    Chocolate waffles served on a plate drizzled with melted chocolate

    These chocolate waffles are real beauty. Mildly sweet, dense, deep dark, and full of chocolate flavor. They are so indulging and yet so guilt-free, low in calories, packed with nutrients. Truly delicious breakfast that looks stunning enough and can be served as a dessert to any occasion.

    Enjoy!

    Recipe

    Upper view of a Chocolate waffles served on a plate drizzled with melted chocolate
    Print Recipe
    5 from 44 votes

    Chocolate Waffles

    These Chocolate Waffles are one indulgent treat! They are made with simple, wholesome ingredients without refined sugars. Filled with superfood cacao and full of wonderful chocolate flavor. Perfect tasty, satisfying breakfast
    Prep Time5 minutes mins
    Cook Time15 minutes mins
    Total Time20 minutes mins
    Course: Breakfast
    Cuisine: American, British, International
    Keyword: chocolate oatmeal waffles, chocolate waffle recipe, chocolate waffles, healthy chocolate waffles
    Servings: 4 waffles
    Calories: 393kcal
    Author: Natalie

    Equipment

    • Measuring cups
    • Blender
    • Waffle maker

    Ingredients

    • 1 ⅓ cup oat flour
    • 1 cup oat milk
    • 1 egg
    • ¼ cup coconut oil melted and cooled to room temperature
    • ¼ cup maple syrup
    • 2 tablespoon cacao powder
    • 2 teaspoons Ceylon cinnamon
    • 2 teaspoon maca powder optional
    • 1 teaspoon baking powder
    • Pinch of salt

    Instructions

    • Place wet ingredients in the blender first: milk, coconut oil, and egg.
    • Add in oat flour, baking powder, a pinch of salt, cacao powder, cinnamon, and maca. Turn on the blender and mix at high speed until you get a smooth batter.
    • Heath up your waffle maker until it’s completely HOT (the green light must be on).
    • Grease the waffle maker with coconut oil cooking spray or melted coconut oil using the brush.
    • Pour the batter onto the hot waffle maker. Close the lid and allow waffles to cook. Depending on how strong your waffle maker is, it will take 8-10 minutes.
    • Open the lid, remove cooked waffles from the waffle maker and place them on a cooling rack. Let them cool to room temperature.
    • Repeat the process with the remaining batter.
    • Serve waffles with additional toppings.

    Notes

    Makes 4 waffles that serve 2 people. As a measure, I used UScup.
    Substitutions
    • You can substitute oat flour with any whole grain flour at a 1:1 ratio.
    • You can substitute oat milk with any milk. Coconut milk won’t work well here.
    • You can substitute coconut oil with avocado oil. 
    • You can substitute maple syrup with honey or date syrup at a 1:1 ratio. Use honey in the runny form (not raw honey).
    • You can substitute maple syrup with liquid stevia. In that case, you may need to add more liquid into the batter - milk or water.
    • If you don't have maca powder at hand, you can leave it out.
    • MAKE IT GLUTEN-FREE: Use certified gluten-free oats/oat flour.
    • MAKE IT VEGAN: Swap egg with a flax or chia egg. Use non-dairy milk.
    Tips for storing
    • Keep covered in the refrigerator for up to a week.
    • HOW TO FREEZE: Take your cooked and cooled waffles and store them in a large freezer zip-lock bag. Keep in the freezer for up to 3 months. Thaw on room temperature.
    • Waffles can be warmed in the microwave. Be careful not to overheat them.
    Nutrition values are calculated without toppings. 
    Nutritional Disclaimer

    Nutrition

    Serving: 1waffle | Calories: 393kcal | Carbohydrates: 49g | Protein: 9g | Fat: 19g | Saturated Fat: 13g | Trans Fat: 1g | Cholesterol: 41mg | Sodium: 54mg | Potassium: 317mg | Fiber: 5g | Sugar: 18g | Vitamin A: 185IU | Vitamin C: 1mg | Calcium: 162mg | Iron: 3mg

    More chocolate recipes to try

    • Chocolate Tahini Brownies
    • Chocolate Banana Pancakes
    • Chocolate Maca Balls
    • Brownie Bites

    If you’ve tried these Chocolate Waffles please take a minute to rate the recipe and leave a comment letting me know how you liked it. I love hearing from you!

    Chocolate Waffles recipe pin image

    No Bake Brownie Bites

    February 2, 2021 by Natalie 47 Comments

    Chocolate No Bake Brownie Bites rolled in cacao powder

    Dense, fudgy, and full of dark chocolate flavor, these No Bake Brownie Bites are one delicious treat and precisely what you need when craving a quick brownie fix. These little brownie balls are super simple to make and totally wholesome. Perfect snack or quick dessert!

    Chocolate No Bake Brownie Bites rolled in cacao powder

    [cmtoc_table_of_contents]

    I'm totally on the chocolate spree. After having Chocolate Avocado Smoothie for the last couple of days for breakfast and crazy-good Fudgy Walnut Brownies I made over the weekend, I'm completely hooked on the bitter-sweet dark chocolate taste. Can't imagine anything other than chocolate satisfy my needs right now.

    It seems like I'm craving chocolate even more after having these treats. And No Bake Brownie Bites turned out to be the perfect chocolate fix. 

    These beauties are insanely delicious! Fudgy, dense, full of bitter-sweet dark chocolate flavor. So freaking amazing. And knowing that they are completely guilt-free makes me like them even more.  

    They are made with only a few simple pantry ingredients, free of any added sugars. Also, low in calories and quite satisfying. Perfect everyday snack or quick dessert. 

    Chocolate No Bake Brownie Bites rolled in cacao powder

    Brownie Bites ingredients

    As I said, these brownie bites are super simple. You will need only a few pantry ingredients:

    • Walnuts are the base for these brownie balls. They are very nutritious, a good source of Omega-3, and an excellent source of powerful antioxidants that fights inflammation. 
    • Cacao powder. I always use unprocessed raw cacao powder that is bitter, deep-flavored, and so incredibly healthy. Cacao powder is packed with powerful antioxidants that have been linked to many health benefits. Cacao gave these brownie bits a gorgeous chocolaty flavor and made them absolutely irresistible.
    • Medjool dates have a rich, almost caramel-like taste and a soft, chewy texture. You can substitute them for any regular dates you find in any store. Dates bind ingredients together but also give a natural sweetness.
    • Cacao nibs (or chocolate chips). I used Yukon sweetened cacao nibs. Slightly sweetened these cacao nibs are less bitter than regular cacao nibs and a great alternative to dark chocolate chips which you totally can use here if you like.
    • Coconut flour.
    • Vanilla extract for flavor.
    Chocolate No Bake Brownie Bites rolled in cacao powder

    How to make No Bake Brownie Bites

    To make this Brownie Bites you will need some equipment, a good food processor or chopper. But other than that, this recipe is relatively straight forward.

    • Start with preparing and measuring all ingredients. I use measuring cups. All my measures are in US cups.
    • Soak pitted Medjool dates in hot water for a few minutes. Drain, but reserve the water.
    • I like to grind walnuts before mixing them with other ingredients. This gives a super soft texture. This step is totally optional.
    • Take a high-speed food processor and add all ingredients except cacao nibs (dark chocolate chips). Process everything at high speed for about two minutes until everything is nicely chopped.
    • Don't worry if the dough seems dry in the beginning. Just continue mixing. Dates will release juices and make it sticky. Scrap down the dough with a spatula if needed.
    • Stop the processing and check texture by pinching the dough between your fingers. It should be sticky and able to keep its shape. If not, add a teaspoon of the reserved water. Mix again and check the texture.
    • Mix in cacao nibs or chocolate chips if using.
    • Using a spoon, scoop out the dough and roll it between your palms. Form a little bite-size ball. Repeat with the remaining dough.
    • If you like you can dust Brownie Bites with cacao powder.
    • Place balls on a plate, serving tray, or in an airtight container and refrigerate to harden.
    • Makes 20-22 bite-sized balls. The recommended serving size is 2 balls.
    Chocolate No Bake Brownie Bites rolled in cacao powder

    Substitutions

    • You can substitute Medjool dates with regular dates, commonly called Deglet Noor. Regular dates are smaller than Medjool dates, so you might need to use more, around 14 dates.
    • I like to use raw unprocessed cacao powder but regular cocoa powder works fine too.
    • You can use cacao nibs, sweetened cacao nibs, or dark chocolate chips here. Even chopped dark chocolate. Use what you have in your cabinet.
    • You can substitute coconut flour with almond or oat flour. Note that it won't give such a nice fudgy texture. But it will be equally delicious and healthy.
    Chocolate No Bake Brownie Bites rolled in cacao powder

    Pro tips

    If you notice that the mixture is too dry and crumbly, add a bit of reserved water, just a teaspoon. Add water little by little and check the dough.

    Also, make sure you taste the dough. These Brownie Bites are lightly sweet, so if you feel like you need a bit more sweetness, feel free to add some maple syrup, raw honey, or date syrup. NOTE: If you're adding liquid sweetener, then there's no need to add reserved water. Sweetener will bind the dough and make the texture sticky.

    If you accidentally added too much water or dough turns out to be too mushy, just add a little more coconut flour.

    Tips for storing

    • Keep No Bake Brownie Bites covered in an air-tight food container in the refrigerator for up to 7 days.
    • HOW TO FREEZE: Place balls in a zip-lock bag. Keep in the freezer for up to 3 months. Thaw for 5 minutes at room temperature before consuming.
    Chocolate No Bake Brownie Bites rolled in cacao powder

    These little chocolate beauties are 100% vegan, gluten-free, low in calories. Not to mention fudgy, dense, melt-in-your-mouth, chocolaty. So enjoyable!

    Brownie Bites are great snack: post and pre-workout snack, after school kids snack, lunchbox snack.... you name it. They are also a great portable snack too, for trips and picnics.

    They are so pretty too. You can even serve these as a dessert. Or gift-wrap them for special occasions.

    Enjoy!

    Recipe

    Chocolate No Bake Brownie Bites rolled in cacao powder
    Print Recipe
    4.87 from 43 votes

    No Bake Brownie Bites

    Dense, fudgy, and full of dark chocolate flavor, these No Bake Brownie Bites are one delicious treat and precisely what you need when craving a quick brownie fix. These little brownie balls are super simple to make and totally wholesome. Perfect snack or quick dessert!
    Prep Time10 minutes mins
    Total Time10 minutes mins
    Course: Dessert, Snack
    Cuisine: American, International
    Keyword: brownie balls, chocolate brownie bites no bake, no bake brownie bites
    Servings: 22 balls
    Calories: 95kcal
    Author: Natalie

    Equipment

    • Food processor

    Ingredients

    • 12 Medjool dates
    • 1 cup walnuts
    • ¼ cup cacao powder
    • ¼ cup coconut flour
    • 1 teaspoon vanilla extract
    • ½ cup cacao nibs or dark chocolate chips
    • Cacao powder for dusting

    Instructions

    • Soak Medjool dates in hot water for a few minutes. Drain, and reserve the water.
    • Fine grind walnuts in coffee grinder or food processor (optional step).
    • Add walnuts, dates, cacao powder, coconut flour, and vanilla into a food processor and process on high for about minute until dough is formed.
    • Check texture by pinching the dough between your fingers. It should be sticky and able to keep its shape. If the mixture is too dry, add a bit of reserved water (just a teaspoon).
    • Add in cacao nibs or dark chocolate chips. Pulse few times just to incorporate.
    • Using a spoon, scoop out the dough and roll between your palms to form a small bite-size ball.
    • Dust in cacao powder, if desired.
    • Place balls on a plate, or in an airtight container and refrigerate to harden.

    Notes

    Makes 20-22 bite-sized balls. The recommended serving size is 2 balls.
    Substitution
    • Substitute Medjool dates with regular dates, commonly called Deglet Noor. Regular dates are smaller than Medjool dates, so you might need to use more, around 12-14 dates.
    • Substitute cacao powder with regular cocoa powder.
    • You can use cacao nibs, sweetened cacao nibs, dark chocolate chips here, or chopped dark chocolate. 
    • You can substitute coconut flour with almond or oat flour. Note that it won't give such a nice fudgy texture. But it will be equally delicious and healthy.
    Keep covered in an air-tight food container in the refrigerator for up to 7 days.
    HOW TO FREEZE: Place balls in a zip-lock bag. Keep in the freezer for up to 3 months. Thaw for 5 minutes at room temperature before consuming.
    Nutritional Disclaimer

    Nutrition

    Serving: 1ball | Calories: 95kcal | Carbohydrates: 12g | Protein: 2g | Fat: 5g | Saturated Fat: 1g | Sodium: 3mg | Potassium: 130mg | Fiber: 2g | Sugar: 9g | Vitamin A: 21IU | Vitamin C: 1mg | Calcium: 15mg | Iron: 1mg

    More healthy snacks to try

    • Chocolate Peanut Butter Protein Balls
    • Chocolate Cinnamon Balls
    • Chocolate Maca Balls
    • Turmeric Cacao Balls

    If you’ve tried this No Bake Brownie Bites recipe or any other recipe on Natalie’s Health, please take a minute to rate the recipe and leave a comment letting me know how you liked it. I love hearing from you!


    No Bake Brownie Bites PIN image

    This post is originally published in February 2019. It's updated with new information and republished in February 2021. The recipe reminded the same.

    Gingerbread Pancakes

    December 3, 2020 by Natalie 71 Comments

    Gingerbread Pancakes featured image

    Sweet, dense, and perfectly spiced, these Gingerbread Pancakes are a delicious seasonal treat. Made with oats and without processed sugars, they are equally delicious as healthy. Perfect Christmas breakfast or brunch.

    [feast_advanced_jump_to]
    Gingerbread Pancakes topped with pecans and drizzled with maple syrup served on a plate

    December is the jolliest month of them all and definitely my favorite. It's because of the twinkling colorful lights, cheerful music, bells ringing, and bright Christmas trees. It's because of the gingerbread scent spreading throughout my kitchen and sweet Holiday treats.

    I'm not the person who likes to rush time, but this year I couldn't wait for December to hit to finally put up our Christmas tree and decorate the house, and to start baking with Gingerbread Spice.

    This year, I've opened the Christmas season with these amazing Gingerbread Pancakes.

    Why should you try them?

    • These gingerbread pancakes are dense but fluffy, full of wonderful seasonal flavors. So sweet and tasting devine!
    • They are packed with hearty OATS and fibers.
    • They are filling and nutritious. Perfect quick and healthy breakfast, brunch, or afternoon dessert.
    • They are made with just a few simple pantry ingredients, without unhealthy processed sugar. Delicious yet 100% guilt-free! 
    • They are filled with beautiful molasses and warm Christmas spices.
    • So good and unbelievably delicious.
    • Also easy to make in just 15 minutes!

    Ingredients used

    This gingerbread pancakes recipe is very simple. You will need only a few pantry ingredients:

    Gingerbread Pancakes ingredients
    • Oats. Hearty, healthy, and filling, oats are the most used ingredients in my cooking. I use them as a substitute for regular flour. Oats are an excellent source of fiber, especially beta-glucan, a type of soluble fiber that keeps our hearts healthy. They also support healthy digestion and strong immunity. I used rolled oats in this recipe, but you can use quick oats if you like.
    • Milk of choice. I used oat milk, but you can use whatever milk you prefer. Note that coconut milk won't work well here.
    • Blackstrap molasses. It's a byproduct of the sugar cane sugar-making process. It is a dark, somewhat bitter tasting with a subtle sweetness. It contains many essential vitamins and minerals – like iron, vitamin B6, and selenium (1). That makes blackstrap molasses a great addition to a healthy diet. And because of its distinctive taste, a great addition to holiday sweet treats.
    • Sweetener. I used maple syrup, but you can easily use honey. Syrup gave subtle sweetness yet didn't overload the pancakes with sugary calories.

    To give the pancakes extra flavor and boost, I tossed in some superfoods as well:

    • Gingerbread spice. I love my homemade Gingerbread spice blend. It features super spices like ginger and Ceylon cinnamon known for their anti-inflammatory properties. (2).
    • Hemp seeds. They are an excellent source of healthy Omega-3s, but also a great source of proteins.

    Other pantry ingredients you’ll need:

    • Egg - I used free-range, pasture-raised. 
    • Baking powder.
    • Pinch of salt.
    • Extra virgin coconut oil/coconut oil cooking spray - for greasing the pancake pan.

    Look at the "Substitutions" section below if you are missing some of the ingredients.

    Healthy Gingerbread Pancakes topped with pecans and drizzled with maple syrup served on a plate

    How to make Gingerbread Pancakes

    These pancakes are really easy to make. It will take you 15 minutes TOPS! - and you need only basic equipment.

    Equipment used

    • Measuring cups.
    • High speed blender. 
    • Pancake pan - or any pan with non-stick surface.
    • Flexible silicone spatula - for flipping the pancakes. 

    Step by step instructions

    • Step 1: Prepare the ingredients.
      • Start with preparing and measuring all the ingredients. Use measuring cups.
    • Step 2: Mix the ingredients.
      • Place all the ingredients in a blender. Note: add wet ingredients first for easier blending.
      • Mix everything at high speed until you get a smooth texture.
      • This is a good time to taste the pancake batter and add additional sweetener if you think the mixture is not sweet enough.
      • Let the batter rest for a minute. Oats will soak some of the moisture, and pancake batter will thicken.
      • If pancake batter turns out too dense, add a bit more liquid - milk or water. Mix again. Pancake batter should be dense but runny.
    • Step 3: Bake the pancakes.
      • In the meantime, heat the pancake pan over medium heat and coat it with coconut oil cooking spray or coconut oil using the brush. 
      • For each pancake, drop ¼ cup of batter into the pan.
      • Top the pancake with chopped cranberries. Push the cranberry pieces into the batter.
      • Cook for 1-2 minutes until pancake is lightly browned. 
      • Flip the pancake carefully with a flexible silicone spatula and cook for another minute. Transfer to a plate. 
      • Make sure to coat the pan before every pancake or batch of pancakes to prevent sticking.
      • Repeat the process with the remaining pancake batter.
    • Step 4: Add toppings and serve.
      • Top the pancakes with different toppings. You can be creative here and use ingredients you like.
      • Serve and enjoy!
    Gingerbread Pancakes served on a plate

    Tips for serving

    • Top whipping cream and dash them with Gingerbread Spice or cinnamon.
    • Make them festive: Use festive sprinkles.
    • Top gingerbread pancakes with fresh fruits: fresh cranberies, banana slices, pears, plums, or any stone fruit.
    • Drizzle them with molasses, maple syrup or honey.
    • Top them with nut butter: almond butter, peanut butter.
    • Sprinkle them with chopped nuts: walnuts, pecans, peanuts, hazelnuts, and dried fruits: cranberries, raising, sultanas, goji berries, apricots, chopped dates.

    Tips for storing

    • Keep pancakes in an air-tight food container refrigerated. They will last up to 4 days.
    • To freeze pancakes: Take the pancakes and place each pancake individually in a wax paper bag or stack between wax paper. Store wrapped pancakes in a large freezer zip-lock bag. Keep in the freezer for up to 3 months. Thaw on room temperature.
    • You can warm pancakes in the microwave. But don't overheat them. They will become soggy.

    Substitutions

    • You can use rolled oats or quick oats.
    • You can swap oat milk for almond milk, cashew milk, or organic soy milk. Cow’s milk works fine here too. Coconut milk won’t work well here. 
    • Substitute hemp seeds with ground flax seeds or chia seeds.
    • You can substitute maple syrup and use honey. Date syrup is a great option too.
    • You can substitute coconut oil with avocado oil.
    • Make it vegan: Swap egg with a flax or chia egg. Use non-dairy milk.
    • Make it gluten-free: Use certified gluten-free oats.
    • Make it protein-packed: Add a scoop of protein powder in the mixture. I recommend vanilla protein powder.
    Gingerbread Pancakes served on a plate

    Recipe tips

    • When adding ingredients to a blender, always add the liquids first. Doing this will help your blender run easily and this will prevent making lumps.
    • Use a high-power blender to ensure everything blends well and the batter is smooth. 
    • Make sure you let the batter rest for a minute. Oats will soak some of the moisture, and pancake batter will thicken. This is very important because you don't want runny pancake batter.
    • If you let the batter sit overnight, it will become dense so you may need to add a bit more liquid - milk or water.
    • Always taste the butter. If you feel that pancakes are not sweet enough for your taste, add more sweetener.
    • Sweetener recommendations:
      • I recommend using honey or maple syrup. Make sure you use honey in runny form.
      • Date syrup is a great options too.
      • Adding sweetener is totally based on your preference.
    • Make sure to use organic virgin coconut oil rather than refined versions.
    • Since the batter is full of molasses, to prevent pancakes from burning, cook them slowly on low to medium heat. Watch them and don't flip them more than twice. 
    • If you're adding protein powder to the mixture, omit adding sweetener. Protein powder will give oats enough sweetness.
    Gingerbread Pancakes sliced

    More Gingerbread recipes:

    • Gingerbread Latte
    • Gingerbread Oatmeal
    • Gingerbread Balls
    • Gingerbread Matcha Latte
    • Gingerbread Hot Chocolate

    Recipe

    Gingerbread Pancakes topped with pecans and drizzled with maple syrup served on a plate
    Print Recipe
    4.99 from 78 votes

    Gingerbread Pancakes

    Sweet, dense, and perfectly spiced, these Gingerbread Pancakes are a delicious seasonal treat. Made with oats and without processed sugars, they are equally delicious as healthy. Perfect Christmas breakfast or brunch.
    Prep Time2 minutes mins
    Cook Time12 minutes mins
    Resting time1 minute min
    Total Time15 minutes mins
    Course: Breakfast
    Cuisine: American, International
    Keyword: easy gingerbread pancakes, gingerbread pancake recipe, gingerbread pancakes, gingerbread pancakes recipe, healthy gingerbread pancakes
    Servings: 6 pancakes
    Calories: 182kcal
    Author: Natalie

    Equipment

    • Measuring cups
    • Blender
    • Pancake pan
    • Flexible silicone spatula

    Ingredients

    • 1 ¾ cup rolled oats
    • 1 medium egg
    • 1 cup oat milk
    • 1 teaspoon Gingerbread Spice
    • 2 tablespoons blackstrap molasses
    • 1-2 tablespoons maple syrup or honey
    • ½ teaspoon baking powder
    • 2 tablespoons hemp seeds
    • Pinch of salt

    Instructions

    • Place all the ingredients in a blender. Note: add wet ingredients first for easier blending.
    • Mix everything at high speed until you get a smooth texture.
    • Taste the pancake batter and add additional sweetener if you think the mixture is not sweet enough.
    • Let the batter rest for a minute. Oats will soak some of the moisture, and pancake batter will thicken.
    • Pancake batter should be dense but runny. If pancake batter turns is too dense, add a bit more liquid - milk or water. Mix again.
    • Heat the pancake pan over medium heat and coat it with cooking spray or coconut oil using the brush.
    • For each pancake, drop ¼ cup of batter into the pan.
    • Top the pancake with chopped cranberries. Push the cranberry pieces into the batter.
    • Cook for 1-2 minutes until pancake is lightly browned.
    • Flip the pancake carefully with a flexible silicone spatula and cook for another minute. Transfer to a plate.
    • Make sure to coat the pan before every pancake or batch of pancakes to prevent sticking.
    • Repeat the process with the remaining pancake batter.
    • Top the pancakes with different toppings.
    • Serve and enjoy!

    Notes

    Makes 6 pancakes that serve 3 people.
    Substitution
    • You can use rolled oats or quick oats.
    • You can swap oat milk for almond milk, cashew milk, or organic soy milk. Cow’s milk works fine here too. Coconut milk won’t work well here. 
    • Substitute hemp seeds with ground flax seeds or chia seeds.
    • You can substitute maple syrup and use honey. Date syrup is a great option too.
    • You can substitute coconut oil with avocado oil.
    • Make it vegan: Swap egg with a flax or chia egg. Use non-dairy milk.
    • Make it gluten-free: Use certified gluten-free oats.
    • Make it protein-packed: Add a scoop of protein powder in the mixture. I recommend vanilla protein powder.
    Tips for storing
    • Keep pancakes in an air-tight food container refrigerated. They will last up to 4 days.
    • To freeze pancakes: Take the pancakes and place each pancake individually in a wax paper bag or stack between wax paper. Store wrapped pancakes in a large freezer zip-lock bag. Keep in the freezer for up to 3 months. Thaw on room temperature.
    • You can warm pancakes in the microwave. But don't overheat them. They will become soggy.
    As a measure, I used a US cup (240ml). See "Recipe tips" for more info.

    Nutrition

    Serving: 1pancake | Calories: 182kcal | Carbohydrates: 28g | Protein: 7g | Fat: 5g | Saturated Fat: 1g | Cholesterol: 27mg | Sodium: 34mg | Potassium: 254mg | Fiber: 3g | Sugar: 10g | Vitamin A: 148IU | Vitamin C: 1mg | Calcium: 118mg | Iron: 3mg

    This post is originally published in December 2020. It's updated with new information and republished in December 2021. The recipe stayed the same.

    More recipes to try

    • Apple Oatmeal Pancakes featured image
      Apple Oatmeal Pancakes
    • Matcha Pancakes featured image
      Matcha Pancakes
    • Peanut Butter Oatmeal Pancakes featured image
      Peanut Butter Oatmeal Pancakes
    • Carrot Cake Pancakes topped with Maple Cream Cheese drizzle
      Carrot Cake Pancakes

    Halloween Brownie Bites

    October 27, 2020 by Natalie 42 Comments

    Halloween Brownie Bites made with dark chocolate rolled in Halloween sugar sprinkles served in a bowl

    Sweet, chocolaty, and absolutely delicious, these Halloween Brownie Bites are the perfect treat for your Halloween party. These little no-bake chocolate balls are super simple to make with only a few pantry ingredients. They are also made with only WHOLESOME ingredients, without added sugars. Fudgy and perfectly spiced, packed with flavor. Spooky, yummy, and so fun!

    Halloween Brownie Bites made with dark chocolate rolled in Halloween sugar sprinkles served in a bowl

    I noticed that as our son getting older, our Halloween is becoming more fun. We kinda enjoy Halloween more than previous years when he was younger. We used to have just one night dedicated to celebrate Halloween and have fun. But this year, everything is different.

    Boys are much more involved in organizing the Halloween party. Our home is already fully decorated, a whole week ahead, which is super fun. Plus, our son is on a half-term break, and I decided to take some time off work. So everything is much, MUCH, more relaxed this year. 

    Also, we already have a scary movie list ready, Halloween menu is set (I just need to assemble everything). Plus, I've got all my Halloween sweet treats ready: I have our favorite Halloween Dark Chocolate Cookies baked and I have something new this year - these Halloween Brownie Bites that are incredibly delicious. And so fun!

    These Brownie Bites are the perfect Halloween treat. Sweet, full of dark chocolate flavor, soft and fudgy. So enjoyable and completely addictive. Plus, they are totally guilt-free - made with WHOLESOME ingredients, without any added sugars. Plus they are packed with my favorite SUPERFOODS. Absolutely fantastic! Oh, and did I mention they are filled with chunks of dark chocolate? Yes, that too! It's a treat you don't want to miss this Halloween. Trust me. 

    Halloween Brownie Bites ingredients

    Ingredients used

    To make these Brownie Bites, you will need ONLY a few super simple ingredients that are very common in everyone's pantry. I also offer plenty of substitutions, so there's no excuse not to make them this Halloween. You will need:

    • WALNUTS - Walnuts are great for making no-bake treats. They give firm structure, texture, and wonderful taste, not to mention they enhance treats with many essential nutrients. Walnuts are known as a good source of Omega-3's, an essential fatty acid important for keeping our heart healthy. Also, they are an excellent source of powerful antioxidants that fights inflammation and protecting us from illnesses. I absolutely love using them to make energy balls. 
    • CACAO POWDER - I always use unprocessed raw cacao powder that is bitter, deep-flavored, and so incredibly healthy. Cacao powder is one of the richest sources of polyphenols – a powerful antioxidant that has been linked to many health benefits. Cacao gave these Brownie Bites a gorgeous chocolaty flavor and made them absolutely irresistible.
    • DATES - Dates are a great addition to snacks like these. They bind ingredients together but also give sweetness that is completely natural. Dates also have an excellent nutrition profile. They are packed with many vitamins and minerals, as well as antioxidants. I used Medjool dates here. Medjool dates have a rich, almost caramel-like taste and a soft, chewy texture. You can substitute them for any regular dates you find in the store. 

    To give these sweet chocolaty delights even more power, I added my favorite superfoods. I used: 

    • CINNAMON: I'm using Ceylon cinnamon, also known as "true" cinnamon. It's a highly delicious spice with many health benefits. Cinnamon gave these Brownie Bites very seasonal flavor.
    • HEMP SEEDS: They are an excellent source of healthy Omega-3s, but also a great source of proteins. A great addition to pancakes. You can substitute hemp seeds with chia seeds or flax seeds.
    • DRIED CRANBERRIES: I added them to balance the sweetness from dates. Dried cranberries are a tart and amazing addition to treats like this. 

    I wanted to make Halloween Brownie Bites extra special, so I added DARK CHOCOLATE bits as well. I always use 80% or more dark chocolate made without refined sugars. You can find it in a health store, or any store nowadays. 

    I also added a pinch of ground cloves. This spice has amazing flavor. You can skip cloves if you dislike the strong taste, but I highly recommend not to. Cloves pairs so well with dark chocolate.

    If you're missing some ingredients, just look at the substitution section below. I offer some alternatives. 

    Halloween Brownie Bites made with dark chocolate rolled in Halloween sugar sprinkles served on a wooden plate
    Halloween Brownie Bites made with dark chocolate rolled in Halloween sugar sprinkles served on a wooden plate

    How to make Halloween Brownie Bites

    To make spooky Brownie Bites, you will need a food processor or chopper. Other than that, this recipe is fairly EASY to make. Here are step by step instructions, how I make them:

    • Prepare and measure all ingredients using measuring cups.
    • Soak pitted Medjool dates in hot water for a few minutes. Drain them, and reserve the water.
    • Take a high-speed food processor and chop the walnuts until finely ground.
    • Add in soaked drained dates, cacao powder, hemp seeds, Ceylon cinnamon, and ground cloves (if using). Process everything on high speed for about two minutes until the dough is formed.
    • Don't worry if the dough seems dry in the beginning. Just continue mixing. Dates will release juices and make it sticky. Scrap down the dough with a spatula if needed.
    • Stop processing and check texture by pinching the dough between your fingers. Now it should be sticky and able to keep its shape.
    • If the mixture is too dry, add a bit of reserved date water (just a teaspoon). Mix again and check the texture. 
    • Finally, add in chopped dark chocolate bits and dried cranberries. Puls for few times just to mix everything together.
    • Using a teaspoon, scoop out the dough and roll between your palms to form a little bite-size ball. Repeat with remaining dough.
    • Roll the balls in colorful Halloween sugar sprinkles. Place them on a plate, serving tray, or in an airtight container and refrigerate to harden.
    • From this amount of ingredients, you can make 20-22 bite-sized balls. The recommended serving size is 2-4 balls.

    Pro tips 

    • Taste the dough after mixing all ingredients. These Brownie Bites are mildly sweet, so if you feel like you need a bit more sweetness, feel free to add a teaspoon of maple syrup, raw honey, or date syrup. 
    • Note: If you're adding liquid sweetener, then there's no need to add water. Sweetener will bind the dough and make the texture sticky.
    • Make sure you chop the dark chocolate into tiny pieces so you can form a nice tiny ball without having big chunks spreading out.

    Halloween Brownie Bites made with dark chocolate rolled in Halloween sugar sprinkles served in a bowl

    Substitutions

    • You can substitute hemp seeds with ground flax seeds or chia seeds. 
    • You can substitute Medjool date with regular dates, commonly called Deglet Noor. Regular dates are smaller than Medjool dates, so you might need to use more, 12-14 dates.
    • You can substitute the chopped dark chocolate with dark chocolate chips. 
    • You can substitute dried cranberries with raisins, sultanas, or currants. 

    How to store Halloween Brownie Bites

    • Store in a glass cookie jar or closed airtight container at room temperature for up to 5 days. 
    • Refrigerated they will last longer, up to 10 days.
    • HOW TO FREEZE: Place them in a zip-lock bag. Keep in the freezer for up to 3 months. Thaw for 10 minutes at room temperature before consuming.

    Halloween Brownie Bites calories

    These Halloween Brownie Bites are perfectly healthy and low-calorie snacks. From ingredients, you will get around 20-22 bite-sized balls. The recommended serving size is 2-4 balls. One ball has around 100 calories. They are FREE from added and refined sugars, packed only with good-for-you nutrients and calories, so you don't need to overthink too much here. Enjoy freely.

    Halloween Brownie Bites made with dark chocolate rolled in Halloween sugar sprinkles

    Everything about these Halloween Brownie Bites is absolutely amazing. They are:

    • Easy to make with only a few simple pantry ingredients.
    • They are full of good-for-you nutrients that promote optimal health.
    • They are rich in healthy Omega-3s that promote heart health.
    • They are FREE of added and refined sugars. 
    • They are gluten-free and vegan. 
    • Low in calories, kid-friendly, and very satisfying.
    • Soft, fudgy, loaded with dark chocolate flavor + sweet, and absolutely delicious!
    • Perfect party treat but also an everyday healthy snack.

    Have a fun Halloween. Enjoy!

    Halloween Brownie Bites made with dark chocolate rolled in Halloween sugar sprinkles served in a bowl
    Halloween Brownie Bites made with dark chocolate rolled in Halloween sugar sprinkles served in a bowl

    Recipe

    Halloween Brownie Bites made with dark chocolate rolled in Halloween sugar sprinkles served in a bowl
    Print Recipe
    5 from 54 votes

    Halloween Brownie Bites

    Sweet, chocolaty, and absolutely delicious, these Halloween Brownie Bites are the perfect treat for your Halloween party. These little no-bake chocolate balls are super simple to make with only a few pantry ingredients. They are also made with only WHOLESOME ingredients, without added sugars.
    Prep Time10 minutes mins
    Total Time10 minutes mins
    Course: Snack
    Cuisine: American, International
    Keyword: best brownie bites, brownie balls, brownie energy balls, halloween brownie bites
    Servings: 22 balls
    Calories: 109kcal
    Author: Natalie

    Equipment

    • Measuring cups
    • Food processor
    • Spatula

    Ingredients

    • 12 Medjool dates
    • 1 ½ cup walnuts
    • ¼ cup cacao powder
    • 1 tablespoon hemp seeds
    • 1 tablespoon dried cranberries
    • ¼ cup chopped dark chocolate
    • 1 teaspoon Ceylon cinnamon
    • Pinch of ground cloves optional
    • Colorful sprinkles for rolling

    Instructions

    • Soak pitted Medjool dates in hot water for a few minutes. Drain them, and reserve the water.
    • In a high-speed food processor, chop the walnuts until finely ground.
    • Add in soaked and drained dates, cacao powder, hemp seeds, Ceylon cinnamon, and a pinch of ground cloves. Process everything on high speed for about two minutes until the dough is formed. Scrap down the dough with a spatula if needed.
    • Stop processing and check texture by pinching the dough between your fingers. It should be sticky and able to keep its shape.
    • If the mixture is too dry, add a 1-2 teaspoon of reserved date water. Mix again and check the texture.
    • Add in chopped dark chocolate bits and dried cranberries. Puls for few times just to mix everything together.
    • Using a teaspoon, scoop out the dough and roll between your palms to form a little bite-size ball. Repeat with remaining dough.
    • Roll the balls in colorful sugar sprinkles. Place them on a plate, serving tray, or in an airtight container and refrigerate to harden.

    Notes

    Makes 20-22 bite-sized balls. The recommended serving size is 2-4 balls.
    PRO TIPS
    Taste the dough after mixing all ingredients. Add a teaspoon of maple syrup, raw honey, or date syrup if you feel the mixture is not sweet enough to your taste. Note: If you're adding liquid sweetener, then there's no need to add extra water. Sweetener will bind the dough and make the texture sticky.
    Chop the dark chocolate into tiny pieces so you can form a nice tiny ball.
    SUBSTITUTIONS
    Substitute hemp seeds with ground flax seeds or chia seeds.
    Substitute Medjool date with regular dates, commonly called Deglet Noor. Regular dates are smaller than Medjool dates, so you might need to use more, 12-14 dates.
    Substitute the chopped dark chocolate with dark chocolate chips.
    Substitute dried cranberries with raisins, sultanas, or currants.
    STORING
    Store in a glass cookie jar or closed airtight container. It will last up to 5 days at room temperature, or up to 10 days if refrigerated.
    TO FREEZE: Place the balls in a zip-lock bag. Keep in the freezer for up to 3 months. Thaw for 10 minutes at room temperature before consuming.
    Given nutritional values don't include sprinkles.
    Nutritional Disclaimer

    Nutrition

    Serving: 1ball | Calories: 109kcal | Carbohydrates: 13g | Protein: 2g | Fat: 7g | Saturated Fat: 1g | Cholesterol: 1mg | Sodium: 1mg | Potassium: 155mg | Fiber: 2g | Sugar: 10g | Vitamin A: 23IU | Vitamin C: 1mg | Calcium: 21mg | Iron: 1mg


    More energy balls recipes

    • No-Bake Peanut Butter Balls
    • Hazelnut Chocolate Balls
    • Chocolate Cinnamon Balls
    • Peanut Butter Coconut Balls
    • Peanut Butter Protein Balls
    • Chocolate Maca Balls

    If you’ve tried this Halloween Brownie Bites recipe or any other recipe on Natalie’s Health, please take a minute to rate the recipe and leave a comment letting me know how you liked it. I love hearing from you!

    Halloween Brownie Bites

    Apple Pie Smoothie

    October 15, 2020 by Natalie 80 Comments

    Apple Pie Smoothie featured image

    This Apple Pie Smoothie tastes just like apple pie. It's sweet and extra delicious, filled with apple freshness and seasonal spices. It's also very nutritious, made without unhealthy refined sugar, and packed with hearty oats. Ultimate healthy drink perfect for breakfast!

    [feast_advanced_jump_to]
    Apple Pie Smoothie topped with walnuts cinnamon and hemp seeds served in a glass with a straw

    Apples are so good while in season. I just can't stop myself. They are my favorite fruit at the moment and part of my daily meals. Apple Cinnamon Cookies and Apple Baked Oatmeal are just some of the treats I'm enjoying right now.

    I actually planned to close the apple season with Apple Cinnamon Pancakes. But then I made this creamy apple smoothie the other day, and I realized that just won't be possible. I had to share one more apple recipe. Cause this smoothie is just sooo good!

    This Apple Pie Smoothie is the fastest way to enjoy favorite apple pie flavors straight in the morning. Which is kinda neat.

    Why should you try it?

    • It's extra delicious. Thick, creamy, filled with apple freshness and beautiful seasonal spices.
    • It's extra smooth, very satisfying, but so light.
    • It's packed with essential nutrients, especially fibers, and powerful heart-healthy oats.
    • It's quite filling and nutritious, great smoothie for weight loss.
    • It's loaded with healthy Omega-3s.
    • It's made with wholesome ingredients, and without added sugar.
    • It's vegan, dariy-free and gluten-free.
    • It's super easy to whip up plus kids love it!
    • The ultimate fall-inspired healthy drink - perfect breakfast.

    Ingredients used

    For this beautiful apple smoothie recipe, you will need only a few simple pantry ingredients.

    Apple Pie Smoothie ingredients
    • Sweet apple. It's a star ingredient in this smoothie. Fresh, sweet, and packed with nutrients, apples are now in season. I used crunchy and super sweet Fuji apple. But any type is just as good.
    • Milk of choice. I used oat milk, but any non-dairy milk such as almond, cashew, or soy milk. Cow's milk is ok too.
    • Oats. It might seem odd to add oats in a smoothie, but oats are a great addition to smoothies. They make smoothie creamy and thick, but oats also add up many nutrients. Oats are an excellent source of fiber, especially beta-glucan, a type of soluble fiber responsible for keeping our heart healthy. They are a great source of energy and fullness.
    • Blackstrap molasses. It's a byproduct of the sugar cane making process. Unlike refined sugars with zero nutritional value, molasses offers many essential vitamins and minerals – like iron, calcium, magnesium, vitamin B6, and selenium (1). It is a dark, gooey substance with a distinctive bitter-sweet taste—a great option to use as a sweetener for smoothies.

    To give apple smoothie extra flavor and boost, I tossed in some superfoods as well:

    • Ceylon cinnamon. Also known as "true" cinnamon. It's a highly delicious spice with many health benefits. Cinnamon gave the smoothie a wonderful flavor.
    • Hemp seeds. They are an excellent source of healthy Omega-3s, but also a great source of proteins - a great addition to a smoothie. 
    • Walnuts. Walnuts are not only flavorful but very nutritious. They are a good source of the Omega-3 and an excellent source of powerful antioxidants that fights inflammation. 
    • Nutmeg. For extra flavor punch. 

    If you are missing some of the ingredients, just look at the "Substitutions" section below. I offer plenty of replacements.

    Apple Pie Smoothie topped with walnuts cinnamon and hemp seeds served in a glass with a straw

    How to make Apple Pie Smoothie

    Making this apple pie smoothie is quite easy. It will take you 5 minutes and all you need is a good blender.

    Step by step instructions

    • Start with preparing and measuring all the ingredients. I like to use measuring cups.
    • Take the blender and add all ingredients. Note: add wet ingredients first for easier blending.
    • Mix everything at high speed until you get a smooth silky texture.
    • If the smoothie is too thick, add a little more liquid – milk or water. Blend again until everything is well combined.
    • Taste the smoothie and add additional sweetener if the smoothie is not sweet enough to your taste. (See "Recipe tips" section for sweetener recommendation)
    • Transfer the smoothie into a smoothie glass. 
    • ADD TOPPINGS: I used chopped walnuts, a dash of cinnamon, and hemp seeds. Be creative here and add toppings you like. 
    • Serve and enjoy!
    • Makes 1 serving that serves 1 person as a full meal, or 2 servings as a snack.
    Healthy Apple Pie Smoothie topped with walnuts cinnamon and hemp seeds served in a glass with a straw

    Substitutions

    • You can use rolled oats or quick oats here.
    • You can use any plant-based milk here except coconut milk. Coconut milk won't work well here. Cow's milk is fine.
    • Substitute blackstrap molasses with 1-2 dates, date syrup, maple syrup, or honey.  
    • Substitute hemp seeds with ground flax seeds or chia seeds (it will add more fibers and omega-3's). 
    • Substitute walnuts with pecans.
    • Instead of nutmeg, you can use fresh or ground ginger. Add just a pinch, don't go crazy because too much will overtake other beautiful flavors inside the smoothie.

    Smoothie variations

    • Make it protein-packed: Add a scoop of protein powder. This will transfer smoothie into a great protein-packed, post-workout shake. I reccomend unflavord protein powder or vanilla flavored.  
    • Make it more energizing and nutritious: Add in a tablespoon of nut butter, like peanut butter or almond butter.
    • Make it gluten-free: Use certified gluten-free oats.
    Healthy Apple Pie Smoothie topped with walnuts cinnamon and hemp seeds served in a glass with a straw

    Tips for storing

    • Store in a glass jar with a lid or shaker and keep refrigerated for up to one day.
    • If you left smoothie standing too long oats will soak up the moisture. This will make smoothie extra thick. In that case just add a bit of liquid - milk or water and stir or shake it.
    • Remember, all smoothies oxidate when left standing. That's not bad. But to reap all benefits from ingredients, it's best to have the smoothie freshly made.

    Recipe tips

    • When adding ingredients to a blender, always add the liquids first. Doing this will help your blender run easily and this will prevent making lumps.
    • Use a high-power blender to ensure everything blends well and the smoothie is silky smooth. 
    • You can add in some ice cubes, for extra cool kick.
    • The best apple for apple pie smoothie: I like to use sweet apples, like Gala or Fuji but you're welcome to use sour apples, like Granny Smith. In that case, you may need to add some extra sweetener. 
    • Additional sweetener recommendation:
      • I recommend using 1-2 dates, date syrup, raw honey or maple syrup.
      • Stevia, or any low-carb sweetener are good option too.
      • If you are using dates, make sure you soak them in warm water for at least 10 minutes. Drain them before using them.
    Apple Pie Smoothie topped with walnuts cinnamon and hemp seeds served in a glass with a straw

    Recipe

    Apple Pie Smoothie featured image
    Print Recipe
    5 from 106 votes

    Apple Pie Smoothie

    This Apple Pie Smoothie tastes just like apple pie. It's sweet and extra delicious, filled with apple freshness and seasonal spices. It's also very nutritious, made without unhealthy refined sugar, and packed with hearty oats. Ultimate healthy drink perfect for breakfast!
    Prep Time5 minutes mins
    Total Time5 minutes mins
    Course: Breakfast, Smoothie
    Cuisine: American, International
    Keyword: apple pie smoothie, apple pie smoothie with oats, healthy apple smoothie, kale pineapple smoothie, simple apple smoothie, vegan apple pie smoothie
    Servings: 1 serving
    Calories: 510kcal
    Author: Natalie

    Equipment

    • Measuring cups
    • Blender

    Ingredients

    • 1 sweet apple
    • ¼ cup rolled oats
    • 1 cup oat milk
    • 1 tablespoon blackstrap molasses
    • 1 teaspoon Ceylon cinnamon
    • ⅛ teaspoon ground nutmeg
    • 1 tablepoon walnuts
    • 1 tablespoon hemp seeds
    • Ice cubes optional

    Instructions

    • Take the blender and add all ingredients. Add in ice cubes, if using.
    • Mix everything on high speed until you get an even smoothie texture.
    • If the smoothie is too thick, add a little more liquid – milk or water. Blend again until everything is well combined.
    • Taste the smoothie and add additional sweetener if you like. I recommend using date syrup, raw honey or maple syrup, or stevia. This is totally based on your preference.
    • Transfer the smoothie into a tall glass.
    • ADD TOPPINGS (optional): I used chopped walnuts, a dash of cinnamon, and hemp seeds. Be creative here and add toppings you like.
    • Serve and enjoy!

    Notes

    Makes 1 serving that serves 1 person as a full meal, or 2 servings as a snack/light meal.
    As a measure, I used a US cup (240ml). Nutrition values are calculated without toppings.
    Substitutions
    • You can use rolled oats or quick oats.
    • You can use any plant-based milk here except coconut milk. Coconut milk won't work well here. Cow's milk is fine.
    • Substitute blackstrap molasses with 1-2 dates, date syrup, maple syrup, or honey.  
    • Substitute hemp seeds with ground flax seeds or chia seeds.
    • Substitute walnuts with pecans.
    Store in a glass jar with a lid or shaker and keep refrigerated for up to one day. Add more liquid - milk or water, and shake or stir the smoothie before drinking.
    MAKE IT GLUTEN-FREE: Make sure you use certified gluten-free oats.

    Nutrition

    Serving: 1serving | Calories: 510kcal | Carbohydrates: 80g | Protein: 14g | Fat: 17g | Saturated Fat: 1g | Polyunsaturated Fat: 11g | Monounsaturated Fat: 2g | Sodium: 124mg | Potassium: 723mg | Fiber: 9g | Sugar: 53g | Vitamin A: 670IU | Vitamin C: 9mg | Calcium: 438mg | Iron: 6mg

    This post is originally published in October 2020. It's updated with new information and republished in October 2021. The recipe stayed the same.

    More recipes to try

    • Apple Peanut Butter Smoothie served with a straw in a glass jar topped with creamy peanut butter and crushed peanuts
      Apple Peanut Butter Smoothie
    • Carrot cake smoothie recipe with walnuts and probiotic yogurt
      Carrot Cake Smoothie
    • Coffee Smoothie served in a smoothie glass topped with cacao, oats and chocolate
      Coffee Smoothie
    • Pumpkin Oatmeal Smoothie
      Pumpkin Oatmeal Smoothie

    Goji Berry Smoothie

    September 17, 2020 by Natalie 120 Comments

    Goji Berry Smoothie served in a tall glass topped with goji berries and bee pollen

    This Goji Berry Smoothie is just amazing. Thick, creamy, delicious. Loaded with beautiful flavors and powerful superfoods. Also, packed with immune-boosting vitamin C and made without any added sugars. Perfect energy-filled breakfast.

    [feast_advanced_jump_to]

    Goji Berry Smoothie served in a tall glass topped with goji berries and bee pollen

    And so here we go... It's now only a week since our kid returned to school, and already he's having a runny nose and sore throat. This is pretty normal for this time of year when cold and flu season starts. Returning to the collective after months being locked inside the house with little contact with other people, it's one of the reasons he's been more sensitive too. It was entirely expected. And I was prepared.

    To boost our immunity and protect us from a simple cold to advance into a more severe illness, I started making us immune-boosting smoothies and filled our menu with warming SUPERFOOD soups weeks before. In my son's case, that prevented a complete disaster from happening with sore throat turning into hight temperature. Also, it protected my husband and me from getting ill.

    Goji Berry Smoothie served in a tall glass topped with goji berries and bee pollen

    When you're looking to avoid winter colds and flu and boost your immunity, the obvious choice is Vitamin C packed fruits. I wanted to add a little more diversity into our diet; that's why I decided to use Goji Berries. Goji berries are an excellent source of vitamins and minerals, including vitamin C and vitamin A, and some powerful antioxidants. They are powerful little fruit, entirely overlooked by many.

    This Goji Smoothie is just one of the many ways to use these little berries. 

    It's packed with so many beautiful anti-inflammatory ingredients that promote a good healthy immune system as well. It's also very nutritious, filled with all the nutrients our body needs. It's thick, creamy, bursting with so much flavor. Super sweet, but has no added sugars. Equally healthy and delicious. 

    Goji Berry Smoothie ingredients

    Ingredients used

    Smoothies are usually super easy to make. And this beauty is no exception. You'll need only a few simple ingredients. Here's what you'll need:

    • GOJI BERRIES: Goji berries pack healthy energy into small servings. They are an excellent source of vitamin C and vitamin A, and other powerful antioxidants that help boost the immune system and protect the body from high levels of oxidative stress and inflammation. 
    • BANANA: I used frozen ripe banana. It gave the smoothie a creamy texture and natural sweetness, so there was no need to add added sugars. Also, banana added many nutrients as well - fiber, antioxidants, and many vitamins and minerals, especially potassium and magnesium — two nutrients that are essential for heart health. Also, fibers in bananas are beneficial to our digestion, and happy digestion means better immunity. 
    • MILK: I used oat milk, but you can use any non-dairy milk such as almond or soy milk. 

    I also tossed in some more superfoods to boost this smoothie to the next level. I added:

    • ALMOND BUTTER: I used creamy natural almond butter. Almond butter is packed with healthy monounsaturated fats, fibers, proteins, and many essential minerals and vitamins. 
    • FLAXSEEDS: Flaxseeds are a good source of many nutrients, especially fibers and antioxidants. They are one of the richest plant sources of the Omega-3s. I used freshly ground flax seeds.
    • GINGER: I used fresh ginger root. Ginger is known for its anti-inflammatory and anti-viral properties. 
    • CEYLON CINNAMON: Ceylon cinnamon is loaded with powerful antioxidants with anti-inflammatory properties. It gave smoothie wonderful flavor. 

    Goji Berry Smoothie served in a tall glass topped with goji berries and bee pollen

    How to make Goji Berry Smoothie

    Making this gorgeous smoothie is quite easy. It will take you 5 minutes (tops!). Here's how to make it:

    • Prepare and measure all ingredients using measuring cups.
    • Soak Goji berries in warm water for 10 minutes. Drain them.
    • Peel and slice fresh ginger.
    • Take the blender and add goji berries, frozen banana, milk, almond butter, flax seeds, fresh ginger and cinnamon. Mix everything on high speed until you get even texture.
    • If the smoothie is too thick, add a little more liquid – milk or water. Blend again until everything is well combined.
    • Taste the smoothie and add additional sweetener if the smoothie is not sweet enough. I recommend using date syrup, raw honey or maple syrup, or stevia. This is totally based on your preference.
    • Transfer the smoothie into a tall glass. 
    • ADD TOPPINGS: I used goji berries and bee pollen. Be creative here and add toppings you like.  
    • Serve and enjoy!
    • Makes 1 glass that serves 1 person. 

    Substitutions

    • You can substitute almond butter with cashew butter. Tahini works well too. Peanut butter won't work well here because of the taste. 
    • Substitute flaxseeds with hemp seeds or chia seeds (it will add more omega-3's). 
    • You can use any plant-based milk here except coconut milk and cow's milk. It won't work well.
    • MAKE IT VEGAN: Use plant-based milk. Omit bee pollen as a topping. Use stevia, or maple syrup as a sweetener.

    Recipe tips

    • Frozen banana helps create a thick and creamy consistency and makes your smoothie extra refreshing. If you don't want to use banana, bear in mind that the smoothie's texture will change, as well as sweetness.
    • You can substitute banana by adding OATS. In that case, you might need to add extra sweetener. Use raw honey, date syrup, maple syrup, or soaked dates. 
    • Be sure to buy your organic goji berries from a reliable source, even though they may be expensive. Cheaper brands have been known to contain sulfites. Sulfites can cause an allergic reaction in some people.
    • ¼ cup of goji berries also fulfils 170 percent of your intake for vitamin A. You may want to limit how much you eat to reduce the risk of vitamin A toxicity.

    Goji Berry Smoothie served in a tall glass topped with goji berries and bee pollen

    Goji Berry Smoothie benefits

    This sweet, vibrant beauty is: 

    • Loaded with nutrients that promote good health.
    • Made with ALL NATURAL healthy ingredients.
    • Powered with SUPERFOODS – goji berries, flaxseeds, GINGER.
    • Completely ADDED SUGAR-FREE.
    • Full of wonderful sweet berry flavor.
    • Packed with plant-based proteins, heart-healthy fats, and fibers.
    • Rich in powerful antioxidants, vitamin C good for immunity, and iron.
    • Vegan, gluten free and dairy free.
    • Very filling and will keep you full for long time. 
    • + it’s deliciously creamy, rich and amazing!

    This gorgeous Goji Berry Smoothie is creamy, dreamy, and absolutely delicious. It’s very thick, vibrant, and full of flavor. Beautiful to look at and tastes amazing. Kids love it!

    It's so healthy too. Packed with immune-boosting Vitamin C and Vitamin A, fibers good for digestion and anti-inflammatory Omega-3s. It has all the important nutrients that boost our immunity and promote optimal health. This smoothie is a well-balanced meal and thus perfect for morning served as breakfast.

    I know you have goji berries stashed somewhere in your kitchen cabinet. Now, this is the perfect opportunity to use them. Enjoy!

    Recipe

    Goji Berry Smoothie served in a tall glass topped with goji berries and bee pollen
    Print Recipe
    4.99 from 193 votes

    Goji Berry Smoothie

    Thick, creamy, and perfectly sweet, this Goji Berry Smoothie is just amazing. Loaded with beautiful flavors and powerful SUPERFOODS, this smoothie is equally delicious and HEALTHY. Packed with nutrients and immune-boosting VITAMIN C and made without any added sugars, it's a perfect energy-filled breakfast.
    Prep Time5 minutes mins
    Total Time5 minutes mins
    Course: Breakfast
    Cuisine: International
    Keyword: goji berry smoothie
    Servings: 1 cup
    Calories: 432kcal
    Author: Natalie

    Equipment

    • Measuring cups
    • Blender

    Ingredients

    • 1 cup oat milk
    • ½ banana frozen
    • ¼ cup goji berries soaked
    • 1 tablespoon almond butter
    • 1 tablespoon ground flaxseeds
    • ½ teaspoon cinnamon
    • 1 teaspoon fresh ginger

    Instructions

    • Prepare and measure ingredients. Soak Goji berries in warm water for 10 minutes. Drain them. Peel and slice fresh ginger.
    • Take the blender and add goji berries, frozen banana, milk, almond butter, flax seeds, fresh ginger and cinnamon. Mix everything on high speed until you get even texture.
    • If the smoothie is too thick, add a little more liquid – milk or water. Blend again until everything is well combined.
    • Taste the smoothie and add additional sweetener if the smoothie is not sweet enough. I recommend using date syrup, raw honey or maple syrup, or stevia. This is totally based on your preference.
    • Transfer the smoothie into a tall glass.
    • ADD TOPPINGS: I like goji berries and bee pollen. Be creative here and add toppings you like.
    • Serve and enjoy!

    Notes

    Makes 1 glass that serves 1 person. Store in a glass jar with a lid and keep refrigerated up to one day. As a measure, I used US cup (240ml). 
    Substitutions
    You can substitute almond butter with cashew butter. Tahini works well too.
    Substitute flaxseeds with hemp seeds or chia seeds.
    You can use any plant-based milk here except coconut milk. Cow's milk won't work well.
    MAKE IT VEGAN: Use plant-based milk. Omit bee pollen as a topping. Use stevia, or maple syrup as a sweetener.
    Nutritional Disclaimer

    Nutrition

    Serving: 1cup | Calories: 432kcal | Carbohydrates: 62g | Protein: 13g | Fat: 16g | Saturated Fat: 1g | Sodium: 202mg | Potassium: 506mg | Fiber: 10g | Sugar: 42g | Vitamin A: 8992IU | Vitamin C: 17mg | Calcium: 478mg | Iron: 5mg

    More healthy smoothie recipes to try

    • Mixed Berry Smoothie
    • Strawberry Kefir Smoothie
    • Blueberry Banana Chia Smoothie
    • Strawberry Ginger Smoothie 

    If you’ve tried this Goji Berry Smoothie recipe or any other recipe on Natalie’s Health, please take a minute to rate the recipe and leave a comment letting me know how you liked it. I love hearing from you!

    Goji Berry Smoothie PIN

    Goji Berry Smoothie PIN


    Strawberry Chia Pudding

    July 9, 2020 by Natalie 83 Comments

    Strawberry Chia Pudding featured image

    This Strawberry Chia Pudding is the perfect healthy breakfast. It's creamy, loaded with fresh fruity flavors, lightly sweet, and totally delicious. It's a satisfying meal made without unhealthy sugars, packed with superfoods.

    [feast_advanced_jump_to]
    Strawberry Chia Pudding PIN

    Strawberries are now in season and I can't stop myself. Lightly sweet, juicy, and extra tasty... how can you even resist them? Having a handful of fresh strawberries straight in the morning can make your day instantly better.

    There are so many ways to enjoy fresh strawberries for breakfast. From Strawberry Banana Smoothie to Strawberry Oatmeal Cookies, and super healthy chia pudding.

    The benefits of chia seeds are countless and the most popular way to enjoy them is by making chia pudding. Chia pudding ticks all my boxes. It packs everything - looks, flavor, and nutrients. Plus, it's the easiest breakfast ever.

    This Strawberry Chia Pudding is my latest creation. Bright red and bursting with flavor. The perfect way to super-charge your day. Plus, this healthy breakfast definitely has the power to brighten your day. 

    Why do you need to try this?

    • It's incredibly creamy and extra delicious.
    • It's packed with fibers, proteins, and superfoods.
    • It's very filling - it will keep you full for hours.
    • It's made with simple ingredients without unhealthy processed sugars.
    • It's easy, made in 15 minutes.
    • It's a great breakfast option or light afternoon dessert!

    Ingredients used

    This strawberry chia pudding recipe is very simple. You will only need a few simple ingredients.

    Strawberry Chia Pudding ingredients

    Chia seeds. Chia seeds are among the healthiest foods on the planet and they are stapled in my pantry. They are packed with nutrients - fibers, proteins, and healthy Omega-3s. (Source)

    Milk of choice. I used oat milk. But you can use any dairy or non-dairy milk. Note: coconut milk won't work well here. It will interfere with other flavors. 

    Strawberries. Fresh, sweet, and delicious, they are the real star. Also, strawberries are a great source of fiber, vitamin C, and powerful antioxidants. They help keep our hearts healthy and reduce inflammation. Not to mention they are low-calorie fruit great for weight-loss. (Source)

    Peanut Butter. I used creamy peanut butter. It gave a creamy texture but also it pairs so nicely with strawberries. Plus, peanut butter added more nutrients, making this chia pudding more nutritious.

    Sweetener. I used pure maple syrup. You can use other sweeteners. Please check the "Sweetener recommendation" section below.

    Vanilla extract. Just a splash is enough to make this beauty taste even more delicious.

    Ceylon cinnamon. Paired nicely with fresh strawberries and gave an unbelievable scent.

    Maca powder. It's a superfood with many health benefits. It has a deep earthy, root-like, flavor that goes so well with strawberry freshness. Also, maca is a known energy and mood booster. A great addition to your morning meals or drinks.

    Strawberry Chia Pudding served in a glass jar topped with fresh strawberries

    How to make Strawberry Chia Pudding

    This chia pudding recipe is easy to make. You will need basic kitchen tools and 15 minutes of your time.

    Equipment used

    • Measuring cups.
    • Mixing bowl.
    • Fork and whisk.

    Step by step instructions

    • Step 1: Prepare the ingredients
      • Start with measuring all the ingredients. I use measuring cups.
      • Wash and pat the strawberries dry with a clean towel. Remove stems.
      • Place strawberries in a bowl and mash them with the fork.
    • Step 2: Mix chia seeds.
      • Place chia seeds in another bowl.
      • Add in milk, sweetener, and vanilla extract. Mix chia seeds using a whisk or a spoon.
      • Next, add peanut butter, cinnamon, and maca powder (if used). Mix chia seeds until smooth and not clumped.
      • Leave chia seeds to rest for 15 minutes. Seeds will start to absorb the liquid and expand forming the chia pudding. 
      • Mix the chia seeds halfway through. That way, chia seeds will absorb liquid equally, and there will be no lumps. 
    • Step 3: Serve.
      • The final step is to mix in mashed strawberries.
      • If chia pudding is too dense, add in more liquid (milk). Also, this is a good time to try the chia pudding and add more sweetener if desired.
      • Add toppings (optional): I used fresh strawberries and bee pollen. Be creative and add toppings you like.
      • Serve and enjoy!

    This makes 2 bowls (servings) that serve 2 people as a full meal.

    Strawberry Chia Pudding served in a glass jar topped with fresh strawberries

    Substitutions

    • You can substitute oat milk with dairy or any other non-dairy milk - organic soy milk, cashew milk, hemp seed milk, or almond milk. Note: coconut milk won't work well here because of the flavor.
    • You can substitute maple syrup and use honey. Make sure honey is in liquid form. See "Sweetener recommendation" below for more options.
    • You can substitute peanut butter with any nut butter.
    • You can omit maca powder if you don't have it at hand. It's an optional addon.

    Recipe variations

    This recipe is vegan and gluten-free.

    Make it keto. Use unsweetened almond milk and low-carb sweetener. Add in 1 teaspoon of MCD oil.

    Make it weight-loss friendly. Omit peanut butter and use low-carb sweetener to cut down calories.

    Make it with protein powder. Add a scoop of vanilla protein powder to a chia mixture. This will transform chia pudding into a great protein-packed meal. Note: you may need to add more milk as protein powder absorbs liquids. Also, no need to add sweetener or extra vanilla extract.

    Strawberry Chia Pudding served in a glass jar topped with fresh strawberries

    Tips for storing

    Keep leftovers chia pudding sealed in a bowl or jar for up to 2 days in the fridge.

    This recipe is suitable for meal-prepping. Make chia pudding and put it into a jar with a lid. Save in the fridge. In the morning, just add toppings and enjoy!

    Recipe tips

    Fresh strawberries are the best for this recipe, but you can use frozen ones too. Make sure you thaw strawberries so you can mash them. Also, drain excess water after you mash them.

    If you let the chia pudding sit overnight, it will become very thick so you may need to add a bit more liquid. Lightly stir after adding the liquid, don't overmix.

    Strawberry Chia Pudding served in a glass jar topped with fresh strawberries

    What is the best chia pudding ratio?

    The chia pudding ratio I used here is ⅓ cup of chia seeds per cup of liquid. This ratio gives a denser texture. Alternatively, you can use ¼ cup of chia seeds per cup of liquid. This ratio gives a lighter texture.

    Sweetener recommendation

    I used pure maple syrup in this recipe. Maple syrup is unprocessed sugar, it gives mild sweetness and has fewer sugary calories. You can use other sweeteners.

    • You can use date syrup or liquid honey.
    • Use liquid stevia or any liquid low-carb sweetener for the keto / low-carb option.
    • Coconut sugar or any other cristal sugar won't work well here. It will not dissolve well in the chia mixture.
    Strawberry Chia Pudding served in a glass jar topped with fresh strawberries

    This healthy strawberry chia seed pudding is the perfect breakfast that is tasty enough to be a dessert too.

    Lightly sweet, bursting with fresh strawberry flavor, and heavenly creamy, this chia seed pudding is a really special treat. Satisfying, nutritious, and very filling, it will keep you full and very happy for hours.

    Try these chia recipes too:

    • Peach Ginger Chia Seed Pudding
    • Pineapple Coconut Chia Pudding
    • Chocolate Peanut Butter Chia Seed Pudding
    • Blueberry Chia Pudding
    • 30 Chia Seeds Recipes
    • Blackberry Chia Seed Jam
    • Strawberry Chia Seed Jam

    Recipe

    Strawberry Chia Pudding served in a glass jar topped with fresh strawberries
    Print Recipe
    4.84 from 118 votes

    Strawberry Chia Pudding

    This Strawberry Chia Pudding is the perfect healthy breakfast. It's creamy, loaded with fresh fruity flavors, lightly sweet, and totally delicious.
    Prep Time5 minutes mins
    Resting time15 minutes mins
    Total Time20 minutes mins
    Course: Breakfast
    Cuisine: American, International
    Keyword: healthy strawberry chia pudding, strawberry chia pudding, strawberry chia seed pudding
    Servings: 2 servings
    Calories: 302kcal
    Author: Natalie

    Equipment

    • Measuring cups
    • Mixing bowls
    • Whisk

    Ingredients

    • ½ cup strawberries
    • ⅓ cup chia seeds
    • 1 cup oat milk
    • 1 tablespoon peanut butter
    • 1 tablespoons maple syrup
    • 1 teaspoon vanilla extract
    • ½ teaspoon Ceylon cinnamon
    • 1 teaspoon maca powder (optional)
    • For topping: fresh strawberries

    Instructions

    • Wash and pat the strawberries dry with a clean towel. Remove stems. Place strawberries in a bowl and mash them with the fork.
    • Place chia seeds in another bowl.
    • Add in milk, sweetener, and vanilla extract. Mix chia seeds using a whisk or a spoon.
    • Add peanut butter, cinnamon, and maca powder (if used). Mix chia seeds until smooth and not clumped.
    • Leave chia seeds to rest for 15 minutes.
    • Mix the chia seeds halfway through. That way, chia seeds will absorb liquid equally, and there will be no lumps.
    • Mix in mashed strawberries.
    • If chia pudding is too dense, add in more liquid (milk). Also, this is a good time to try the chia pudding and add more sweetener if desired.
    • Add toppings (optional).

    Notes

    This makes 2 bowls (servings) that serve 2 people as a full meal.
    Substitutions
    • You can substitute oat milk with dairy or any other non-dairy milk - organic soy milk, cashew milk, hemp seed milk, or almond milk. Note: coconut milk won't work well here because of the flavor.
    • You can substitute maple syrup and use honey. Make sure honey is in liquid form. See "Sweetener recommendation" below for more options.
    • You can substitute peanut butter with any nut butter.
    • You can omit maca powder if you don't have it at hand. It's an optional addon.
    This recipe is vegan and gluten-free.
    Make it keto. Use unsweetened almond milk and low-carb sweetener. Add in 1 teaspoon of MCD oil.
    Make it weight-loss friendly. Omit peanut butter and use low-carb sweetener to cut down calories.
    Make it with protein powder. Add a scoop of vanilla protein powder to a chia mixture. Note: you may need to add more milk as protein powder absorbs liquids. Also, no need to add sweetener or extra vanilla extract.
    Keep leftovers chia pudding sealed in a bowl or jar for up to 2 days in the fridge.
    This recipe is suitable for meal-prepping. Make chia pudding and put it into a jar with a lid. Save in the fridge. In the morning, just add toppings and enjoy!
    As a measure, I used a US cup (240ml).

    Nutrition

    Serving: 1serving | Calories: 302kcal | Carbohydrates: 39g | Protein: 10g | Fat: 13g | Saturated Fat: 1g | Polyunsaturated Fat: 8g | Monounsaturated Fat: 2g | Trans Fat: 1g | Sodium: 111mg | Potassium: 357mg | Fiber: 13g | Sugar: 19g | Vitamin A: 267IU | Vitamin C: 22mg | Calcium: 386mg | Iron: 4mg

    This post is originally published in July 2020. It's updated with new information and republished in March 2022. The recipe has been changed slightly as I tested it more during that time.

    More recipes to try

    • Blueberry Coconut Chia Pudding made with coconut cream topped with blueberry sauce, fresh blueberries, and coconut chips served in a glass bowl.
      Blueberry Coconut Chia Pudding
    • Raspberry Chia Pudding with almond butter and raspberry jam topped with banana raspberry ice cream and chocolate
      Raspberry Chia Pudding
    • Lemon Poppy Seed Chia Pudding served in a glass topped with fresh strawberries
      Lemon Poppy Seed Chia Pudding
    • Matcha Chia Pudding featured image
      Matcha Chia Pudding

    Blueberry Coconut Chia Pudding

    May 27, 2020 by Natalie 86 Comments

    Blueberry Coconut Chia Pudding made with coconut cream topped with blueberry sauce, fresh blueberries, and coconut chips served in a glass bowl.

    Creamy, coconutty, and insanely delicious, this Blueberry Coconut Chia Pudding is perfect superfood breakfast. It's thick and rich in flavor, packed with BLUEBERRIES and many nutrients - omega-3s, and powerful antioxidants. Energizing, immune-boosting, and oh-so good! + Super EASY to make in just 15 minutes!

    Blueberry Coconut Chia Pudding made with coconut cream topped with blueberry sauce, fresh blueberries, and coconut chips served in a glass bowl.

    [cmtoc_table_of_contents]

    I don't usually wake up thinking about food. Ok, ok. I do sometimes... when I wake up SUPER hungry. Like the other day. I woke up craving sweet breakfast that is extra creamy and delicious, and includes BLUEBERRIES. They are now in season and constantly on my mind. Plus, my fridge is loaded with these blue antioxidant-rich beauties. 

    I haven't had chia seeds for breakfast in AGES!!! I was so into smoothies lately that I totally forgot about this powerful little seeds and how good they are. So Blueberry Chia Pudding instantly popped into my mind. But this time I wanted to make that chia pudding even creamier. I had coconut cream waiting to be used, so that was the obvious choice to add for extra creaminess. And so Blueberry Coconut Chia Pudding was created.

    This chia pudding is insanely delicious. It's thick, sweet, coconutty with a hint of vanilla and with added fruity freshness from blueberries. So yummy. SO good. And so HEALTHY - it has NO refined sugars, and it's filled with health-healthy ingredients. It's a quick and easy breakfast done in less than 15 minutes. Perfect for mornings when you're looking for a satisfying meal that is tasty and looks pretty awesome.

    Blueberry Coconut Chia Pudding made with coconut cream topped with blueberry sauce, fresh blueberries, and coconut chips served in a glass bowl.

    Main ingredients

    To make this chia pudding, you will only need a few pantry ingredients. The main ingredients are:

    • Chia seeds: They are tiny, but they are powerful. I love them because they are loaded with fibers good for our digestion and omega-3 fatty acid good for heart-health. (1) Omega-3's also boost our brain and reduce inflammation. Also, chia seeds are high in proteins. The unique combination of fats, proteins, and fibers makes them great breakfast option - they are digested slowly, providing a long, slow release of energy while keeping our blood-sugar levels stable (2). Benefits of chia seeds are really numerous, and chia pudding is one of the most popular ways to eat miraculous chia seeds. 
    • Milk: Non-dairy milk such as coconut, almond, oat, or soy milk is the best choice for making this fruity chia pudding. Cow's milk will work ok too, but it might interfere with other flavors. 
    • Sweetener: To sweeten this Blueberry Chia Coconut Pudding, I used raw honey. Raw honey is an unrefined sweetener with many health benefits. It gives subtle sweetness to chia pudding yet will not overload it with many sugary calories. For the vegan version, you can use maple or date syrup.
    • Coconut cream: Thick, creamy, and extra coconutty, coconut cream is the perfect addition to this blueberry chia pudding. Besides flavor, coconut cream added some extra nutrients - mostly fats. Altho, 89% of the coconut fat is saturated fat (3) - that has a bad reputation of being unhealthy - most of these fats are medium-chain triglycerides (MCTs). MCTs are absorbed differently in our small intestine and used by our bodies to produce energy (4). So, to resolve controversy - coconut fat is good. Eat your coconut! 
    • Blueberries: They are definitely my favorite part of this chia story. Blueberries are now in season and bursting with freshness, nutrients, and flavor. Blueberries are loaded with powerful antioxidants, vitamins, and essential minerals and a great addition to this and any other morning meal. Fresh blueberries are the best here, but frozen will work fine too.

    To spice things up a bit, I added a splash of vanilla too, just to make this beauty taste even more irresistible.

    Blueberry Coconut Chia Pudding made with coconut cream topped with blueberry sauce, fresh blueberries, and coconut chips served in a glass bowl.

    How to make Blueberry Chia Coconut Pudding

    To assemble this blueberry chia pudding, you will only need basic kitchen tools, and 15 minutes of your time. 

    • Start with preparing and measuring all ingredients using measuring cups.
    • In a small bowl, mix chia seeds with milk and coconut cream. Add vanilla, honey or maple syrup, whichever you are using. Mix everything using the whisk or the spoon. 
    • Leave chia pudding to rest for 15 minutes until seeds puff and form chia pudding. 
    • To achieve the best results, mix the chia seeds half way trough. That way, chia seeds will absorb liquid equally, and there will be no lumps. 
    • In the meantime, place fresh blueberries in a small saucepan. Add a teaspoon of water and bring blueberries to a low boil, stirring frequently. Reduce heat to low and simmer until the berries fully soften, about 1-2 minutes. Mash blueberries with a potato masher or fork. Cook for another 1-2 minutes stirring until nice blueberry sauce forms. 
    • Put chia pudding into in a bowl. Top it with blueberry sauce and fresh blueberries.  
    • Additional toppings: coconut chips, bee pollen, hemp seeds, chopped almonds. You can choose the toppings you like.
    • Makes 1 bowl that serves: 1 person (meal sized chia pudding) or 2 people (dessert/snack sized chia pudding). 
    • Alternatively, you can skip making blueberry sauce and use some sugar-free blueberry jam. 

    Blueberry Coconut Chia Pudding made with coconut cream topped with blueberry sauce, fresh blueberries, and coconut chips served in a glass bowl.
    Blueberry Coconut Chia Pudding made with coconut cream topped with blueberry sauce, fresh blueberries, and coconut chips served in a glass bowl.

    Tips for storing

    • Keep leftovers sealed for up to 2 days in the fridge.
    • PREP THE NIGHT BEFORE: Prep the chia pudding and put it into a jar with a lid. Make the blueberry sauce and put it into a jar with a lid. Place both in the fridge overnight. In the morning, assemble Blueberry Coconut Chia Pudding and enjoy!

    Chia pudding ratio

    The chia pudding ratio I use is ¼ cup (around 3.5 tablespoons) chia seeds per cup of liquid. If you prefer dense texture you can use ⅓ cup seeds per cup of liquid. This makes one bowl of chia pudding that is can be served as one full meal.  

    Blueberry Coconut Chia Pudding made with coconut cream topped with blueberry sauce, fresh blueberries, and coconut chips served in a glass bowl.
    Blueberry Coconut Chia Pudding made with coconut cream topped with blueberry sauce, fresh blueberries, and coconut chips served in a glass bowl.

    This Blueberry Coconut Chia Pudding is easy to make, super healthy meal, packed with fibers, proteins, omega-3s and powerful antioxidants. Satisfying, nutritious, and very filling, it will keep you full and very happy for hours.

    It's a quick yummy way to get all the essential nutrients your body needs. Perfect breakfast option but decadent enough to be served as a light afternoon dessert too

    If you’re a fan of CHIA PUDDING, check these recipes too:

    • Raspberry Chia Pudding
    • Pineapple Coconut Chia Pudding
    • Chocolate Peanut Butter Chia Seed Pudding
    • Peach Ginger Chia Seed Pudding

    Enjoy!

    Recipe

    Blueberry Coconut Chia Pudding made with coconut cream topped with blueberry sauce, fresh blueberries, and coconut chips served in a glass bowl.
    Print Recipe
    4.93 from 52 votes

    Blueberry Coconut Chia Pudding recipe

    Thick, creamy, and loaded with coconut flavor, this Blueberry Coconut Chia Pudding is a perfect healthy breakfast. Easy to make and insanely delicious! Refined sugar-free, dairy-free, gluten-free, vegan.
    Prep Time15 minutes mins
    Total Time15 minutes mins
    Course: Breakfast, Dessert, Snack
    Cuisine: American, British, International
    Keyword: blueberry chia pudding, blueberry coconut chia pudding, chia pudding, chia pudding recipe
    Servings: 1 bowl
    Calories: 582kcal
    Author: Natalie

    Equipment

    • Measuring cups
    • Mixing bowls
    • Whisk

    Ingredients

    • ½ cup blueberries + more for topping fresh or frozen
    • ¾ cup milk oat or almond
    • ¼ cup full-fat coconut cream
    • 1 teaspoon vanilla extract
    • 1 tablespoon honey or pure maple syrup
    • ¼ cup chia seeds
    • Topping: blueberries coconut chips, bee pollen

    Instructions

    • In a small bowl, mix ¼ cup chia seeds with ¾ cup milk and ¼ cup coconut cream. Add 1 tablespoon honey or maple syrup and 1 teaspoon vanilla. Mix everything using the whisk or the spoon.
    • Leave chia pudding to rest for 15 minutes. To achieve the best results, mix the chia seeds half way trough.
    • In the meantime, place ½ cup fresh or frozen blueberries in a small saucepan. Add a teaspoon of water and bring blueberries to a low boil, stirring frequently. Reduce heat to low and simmer until the berries fully soften, about 1-2 minutes.
    • Mash blueberries with a potato masher or fork. Cook for another 1-2 minutes stirring until nice blueberry sauce forms.
    • Put chia pudding into in a bowl. Top it with blueberry sauce and fresh blueberries.
    • Serve and enjoy!

    Notes

    Makes 1 bowl that serves: 1 person (meal sized chia pudding) or 2 people (dessert/snack sized chia pudding). 
    Keep leftovers sealed for up to 2 days in the fridge.
    For VEGAN: Use maple syrup instead of honey. Omit bee pollen.
    Nutritional Disclaimer

    Nutrition

    Serving: 1bowl | Calories: 582kcal | Carbohydrates: 54g | Protein: 15g | Fat: 37g | Saturated Fat: 20g | Sodium: 79mg | Potassium: 644mg | Fiber: 19g | Sugar: 26g | Vitamin A: 377IU | Vitamin C: 9mg | Calcium: 494mg | Iron: 6mg

    More chia seeds recipes 

    If you’ve been struggling to find ways to use chia seeds, here are some awesome chia seed recipes that you can make over and over again.

    • Sour Cherry Chia Jam Cornbread
    • Easy Strawberry Chia Seed Jam
    • Blackberry Chia Seed Jam
    • Blueberry Banana Chia Smoothie
    • 30 Chia Seeds Recipes

    Blueberry Coconut Chia Pudding

    Foods You Need To Stop Buying At The Grocery Store

    May 12, 2020 by Natalie 30 Comments

    Foods You Need To Stop Buying At The Grocery Store

    Our immune system needs proper nutrition, now more than ever. There are some temptations on store shelves that will wreak havoc on your immunity. Here are the foods you need to stop buying at the grocery store right now to keep your immunity strong and healthy.

    Foods You Need To Stop Buying At The Grocery Store

    Global pandemic definitely changed the way we shop for groceries. Nothing is quite the same as it was before. Shopping is clearly more stressful right now for all of us. We need to plan more, make an extra effort in organizing everything from stocking our pantry to actually going to the grocery store.

    And then there are all sorts of other worries and questions: If I'm going to the store, will I find items I need on stock? Do I need to wear a mask and gloves when I go shopping? Or if I'm ordering groceries online, will I find the delivery spot? 

    Honestly, it's brain exhausting and easy to lose sight of yet another important question. And that is: What are the proper foods I should be buying right now? And what foods definitely shouldn't be in my shopping cart?

    In these challenging times, it's easy to lose focus on our health. We tend to look for comfort foods to help us get through. And that is precisely what we shouldn't be doing. In fact, proper nutrition is what our immune system needs right now.

    To help you navigate through store aisles and encourage you to make the right food choices, here is the list of foods you need to stop buying at the grocery store during the pandemic. 

    1. Items you don't need

    This may seem like an obvious thing, but honestly, how many times did you find yourself buying foods you don't really need, or you don't know how to prepare. Maybe you felt the need to stock up on some food items just because you were scared. That kind of behavior is completely normal during uncertain times. 

    When you shop for food, think only about the food you really need. Skip the foods you are unfamiliar with, or you don't have a clear vision of how to prepare it. Keep your shopping list simple, and cook foods you know to avoid unnecessary stress. 

    Also, keep reminding yourself that everything will be ok and try to calm down. You don't need to worry about the food supply, so don't stock up on things you don't really need right now. If something isn't available in the stores now, it will become available soon. Breath out the negative thoughts and suppress the panic mode.

    TIPS:

      • Make a meal plan and prepare a shopping list in advance.
      • Buy only things on your shopping list and just 1 to 2 weeks worth of groceries at a time. Remember: buying more than you need may lead to food waste. Not to mention you'll waste your money too.
      • Foods are best used FRESH.
      • If you need to calm your mind, you can stock on some food items. But don't go overboard. Avoid panic buying. 

    You may want to read this:

    • How to Start Meal Planning in 3 Simple Steps

    2. Comfort foods

    We don't always eat just to satisfy physical hunger. We sometimes turn to food for comfort and stress relief. And when we do, we usually reach for junk food, sweets, and other comforting but unhealthy foods. This is a normal reaction. It's called emotional eating. It's when we use food to make ourselves feel better - we fill emotional needs, rather than our stomach.

    And while comfort foods may sound tempting, these foods are precisely what we DON'T NEED right now. Comfort food is usually high in sodium, packed with refined carbs and added sugars, processed oils, and refined grains. These foods harm our physical health. But it may hurt our mental health too. After overeating, our emotional problems will remain, and in addition, we will feel enormous guilt.

    So, the worst thing you can do right now is stock up with frozen pizza, white bread, and pasta, sugary breakfast cereals, processed meats (like sausages, hot dogs, and deli meats), microwave meals or ready meals. Not to mention sweet treats like candies, cakes, biscuits, and cookies.

    All these foods shouldn't be a part of your healthy diet anyway. But in a normal situation, I would say: eat everything in moderation. One or two store-bought cookies occasionally won't wreck your health. But with being locked in the house, with gyms closed, and with restrictions on being outdoors, the calories can quickly add up. And our mental health is already at high risk as it is.

    TIPS:

      • Stick to the FRESH PRODUCE, fresh fruits, and veggies that are now in season.
      • Make homemade pizza using whole grain flour.
      • Bake wholegrain bread.
      • Make cookies at home using healthy ingredients, and enjoy them in moderation. 

    You may find this interesting:

    • Seasonal Produce Guide: Eat healthy throughout all season

    Healthy comfort foods to try:

    • Lemon Oatmeal Muffins
    • Matcha Chocolate Chip Cookies
    • Lemon Blueberry Pound Cake
    • Peanut Butter Oatmeal Cookies
    • Strawberry Oatmeal Cookies

    3. Sugary foods

    Sugar is the worst enemy of our immunity. And without a healthy immune system, we are more prone to illness and disease. Refined sugars, like table sugar and high-fructose corn syrup, are the worst. They cause high blood sugar, which produces molecules that interfere with the body's natural ability to fight infections. (1) 

    Additionally, viruses and "bad" bacteria love to thrive on sugar. Cutting out sugar helps create an environment in the body in which disease cannot exist. Furthermore, too much sugar can lead to obesity, insulin resistance, and inflammation. Inflammation does havoc to our immunity too. 

    So, the worst thing you can do right now is to eat foods high in sugar (like store-bought cakes, cookies, biscuits) and drink sugary drinks (soda drinks, and fruit juices made from concentrate). Even those foods labeled as zero sugar and low sugar.

    We need our immunity strong and healthy, now more than ever. So if you want to straighten your immunity, limit your daily sugar intake. That doesn't mean you need to avoid all sugars. Natural sugars like those found in fruits are processed in our bodies completely different from added refined sugars found in store-bought foods. Plus, fruits are loaded with antioxidants and vitamins. And that is precisely what you need to consume now to boost immunity. 

    TIPS: 

      • Replace sugary drinks with plain water, sparkling water, or herbal teas. Adding a slice of lemon to glass will provide a burst of flavor. Adding a teaspoon of honey to your drinks is perfectly ok.
      • Skip store-bought sweets and treats. Make homemade desserts and treats using healthier sugar options like maple syrup, honey, dates, stevia, monk fruit. 
      • Make your own homemade granola for perfect healthy breakfast. 
      • Swap your morning cereal for a bowl of porridge or overnight oats.
      • Skip store-bough fruit flavored yogurts. Stick to plain probiotic ones.
      • Skip ketchup, salad dressings, and pasta sauces. These foods are usually high in sugars.
      • Make your own sweet snacks, like energy balls and candied nuts.
      • Replace candy with a homemade trail mix of fruit, nuts and a few dark chocolate chips

    You may be interested to read this:

    • How To Reduce Inflammation In The Body
    • How To Stop Sugar Cravings And Lose Weight
    • 20 Immune Boosting Smoothies

    Try these healthy snacks:

    • Lemon Coconut Energy Balls
    • No Bake Peanut Butter Balls
    • No Bake Brownie Bites
    • Spicy Cinnamon Roasted Almonds
    • Hazelnut Chocolate Balls
    • Peanut Butter Energy Balls

    ---

    We all should strive for better health, especially now – meaning we should prioritize healthy foods every day. Our immunity is counting on us to make the right food choices. And even if we find grocery shopping a bit stressful right now, we can't let that overwhelm us. Keep your head calm and shop the perimeter of the grocery store, focusing on fresh, whole ingredients. 

    Do you find grocery shopping challenging these days? How do you cope with emotional eating and cravings for comfort foods? What are your favorite immune-boosting foods? Let me know in the comments below. 

    Xoxo, Natalie

    Let’s connect! Find me on – Facebook | Instagram | Pinterest | Twitter

    Chocolate Banana Waffles

    April 29, 2020 by Natalie 123 Comments

    Chocolate Banana Waffles topped with chocolate syrup and fresh fruits

    These healthy Chocolate Banana Waffles are fluffy and full of chocolate flavor. Perfect delicious breakfast for the whole family. Made with wholesome ingredients and without added sugars, these healthy waffles are super simple and taste amazing.

    [feast_advanced_jump_to]

    Chocolate Banana Waffles topped with chocolate syrup and fresh fruits

    A waffle maker is definitely the best thing I invested my money in lately. Since I bought it, it's been constantly in use, which is a complete opposite of what I expected to happen. When I bought it, I thought we would use it a few times and then get bored. And waffle maker would be pushed in some dark corner in my pantry and gone in oblivion.

    But that didn't happen at all. My boys love Oatmeal Waffles since the first day I made them. And I've been making these beauties over and over again for quite some time now. 

    To change things up a bit (and to use some ripen bananas I had in my fridge), I decided to make a chocolate version. Deep dark, full of chocolate flavor, smelling so divine and looking so indulgent, Chocolate Banana Waffles turned up to be a complete success. We all loved it. 

    But how not to love them. These dark beauties are made with WHOLESOME ingredients. They are fluffy and full of beautiful bitter-sweet dark chocolate flavor. They are also super easy to make - you'll only need a few pantry ingredients. 

    Chocolate Banana Waffles are beyond simple sweet treat - they are rich and nutritious - full of fibers good for our digestion and proteins. They are also packed with antioxidants from cacao powder. If you're looking for a quick and HEALTHY breakfast, this recipe is it! Delicious and satisfying, 100% guilt-free, made without added sugars.  

    Chocolate Waffles made with oats and sweetened with bananas
    Chocolate Waffles made with oats and sweetened with bananas

    Ingredients used

    All ingredients in this recipe contribute to our health in some way, so this treat is far from sweet empty calories. To make these chocolate beauties, you'll need:

    OATS: Hearty, healthy, and filling, oats are stapled food in my pantry. It’s one of my favorite grain. They are a great choice for breakfast since they are an excellent source of fiber, especially beta-glucan that is known for its power to lower cholesterol and therefore keep your heart healthy (1). Also, oats are high in vitamins, minerals, and some powerful antioxidants. + Proteins. YES, proteins!! They are nutritious and so versatile. 

    MILK: I used oat milk in this recipe because oat milk is naturally creamy and sweet, plus it has so many benefits too. Oat milk is a popular dairy-free milk substitute. Naturally, oat milk isn’t as nutritious as whole oats, that’s why it’s often enriched with nutrients — including calcium, potassium, iron, and vitamins A and D. But oat milk is unique because it’s free of many of the allergens found in other types of milk. Plus, same as whole oats, it contains beta-glucans — a soluble fiber that may offer heart health benefits (2). 

    COCONUT OIL: Coconut oil is called a superfood. For a reason. The unique combination of fatty acids in coconut oil is showed to have positive effects on our health, including fat loss, improving heart health, and boosting up our brain functions. While most fats are categorized as long-chain triglycerides (LCTs), coconut oil contains medium-chain triglycerides (MCTs), which are shorter fatty acid chains (3). When you eat MCTs, they go straight to the liver where the body uses them as a quick source of energy. Also, coconut oil contains natural saturated fats that increase HDL (good) cholesterol in the body turning turn LDL (bad) cholesterol into a less harmful form thus keeping our heart healthy. 

    BANANA: Banana is a great fruit. Sweet and packed with nutrients. Bananas are high in fiber and many essential micronutrients, including potassium, vitamin B6, vitamin C, and magnesium. (4) They are also packed with antioxidants. (5) I used a ripe banana here in this recipe. It gave waffles sweetness, so there’s no need to add extra sugars. Meaning you’ll eat less unnecessary sugars and calories. But if you feel like waffles are not sweet enough for your taste, you can add some pure maple syrup or honey.

    Chocolate Waffles topped with chocolate syrup and fresh fruits

    The STAR of these waffles is definitely superfood CACAO POWDER. I used raw cacao powder that is unprocessed, bitter, deep-flavored and incredibly healthy. Cacao is one of the richest sources of polyphenols – an antioxidant that has been linked to many health benefits, including reduced inflammation, better blood flow, lower blood pressure, and improved cholesterol and blood sugar levels. (6) Cacao gave a gorgeous chocolaty flavor and made these waffles absolutely irresistible. 

    To enhance the flavor and add some more SUPERFOOD powers, I also added CEYLON CINNAMON. Ceylon cinnamon is loaded with powerful antioxidants with anti-inflammatory properties. (7, 8) Plus, it pairs so nice with deep dark, bitter chocolate flavor.

    Other pantry ingredients you’ll need:

    • Eggs - I used free-range, pasture-raised.
    • Salt - I like to use Himalayan salt.
    • Baking powder.

    Chocolate Banana Waffles made with oats topped with chocolate syrup and fresh fruits

    How to make Chocolate Banana Waffles

    Making this gorgeous chocolate waffles is quite easy. No brainer, really. 20 minutes + pantry ingredients + good blender and waffle maker, you’ll have it ready. 

    • Start with preparing and measuring all ingredients using measuring cups.
    • Place milk, banana and coconut oil in a blender. Blend on high for few seconds until ingredients fully combine. Add in eggs and pulse for few seconds. Don't overmix. 
    • Add in oat flour, baking powder, salt, cacao powder and cinnamon. Blend everything until you get a smooth mixture.
    • Heath up your waffle maker until it’s completely HOT (the green light must be on). If needed, grease the waffle maker with coconut oil cooking spray or using the brush. 
    • Pour the batter onto the hot waffle maker, close the lid and allow it to cook before removing and repeating the process for the rest of the batter. Depending on how strong your waffle maker is, it will take 8-10 minutes for waffle to be done. DON'T open waffle maker before waffles are completely cooked. 
    • Remove cooked waffles from the waffle maker and place it on a cooling rack. Let them cook to room temperature. Freshly cooked waffles will be soft when you take them out of the waffle maker but they will harden as they cool on the rack. 
    • ADD TOPPINGS: melted dark chocolate, bananas, and fresh blueberries. You can choose toppings you like.
    • Makes 4 waffles that serves 2 people.

    Healthy Chocolate Banana Waffles topped with chocolate syrup and fresh fruits

    Substitutions

    • TO MAKE OAT FLOUR: You can use quick oats or rolled oats. Put the oats in a food processor or high speed blender. Blend until the oats become a fine powder. This will only take a few seconds in a high speed blender, and a little bit longer in a food processor.   
    • You can swap oat milk for almond milk or organic soy milk. Cow’s milk works fine here too. Coconut milk won’t work well here. 
    • In order to get all the health benefits from coconut oil, make sure to choose organic, virgin coconut oil rather than refined versions. You can substitute coconut oil with avocado oil. 
    • For added sweetener use maple syrup, raw honey or you can add few soaked dates, or date syrup. 
    • MAKE IT VEGAN: Swap eggs with flax or chia egg. Use non-dairy milk.
    • MAKE IT GLUTEN-FREE: Use certified gluten-free oats. 

    Tips for serving

    • Top chocolate waffles with FRESH FRUITS: banana slices, blueberries, strawberries, or any other high antioxidant berry fruit, melted dark chocolate or sugar-free chocolate syrup.
    • Sprinkle with: sliced almonds or any other nut, cacao nibs or dark chocolate bits. You can be creative here and choose toppings you like.

    Tips for storing

    • Keep covered in the refrigerator for up to 4 days.
    • HOW TO FREEZE: Take your cooked and cooled waffles and place each waffle individually in wax paper bags. Store wrapped waffles in a large freezer zip-lock bag. Keep in the freezer for up to 3 months. Thaw on room temperature.
    • Waffles can be warmed in the microwave. Be careful not to overheat them.

    Chocolate Banana Waffles topped with chocolate syrup and fresh fruits

    These chocolate waffles are real beauty. Mildly sweet, fluffy, full of dark chocolate flavor. So easy to make and so guilt-free, altho they don't look like that at all. So next time when you got unused bananas, give these chocolate beauties a try. Pull out that waffle maker out of the counter and start baking. 

    Recipe

    Chocolate Banana Waffles topped with chocolate syrup and fresh fruits
    Print Recipe
    4.99 from 196 votes

    Chocolate Banana Waffles recipe

    Fluffy and full of chocolate flavor, these healthy Chocolate Banana Waffles are perfect indulgent yet guilt-free breakfast! They are made with WHOLESOME ingredients, filled with SUPERFOOD cacao powder, and made without ADDED SUGARS. Super simple and taste amazing.
    Prep Time5 minutes mins
    Cook Time15 minutes mins
    Total Time17 minutes mins
    Course: Breakfast, Brunch
    Cuisine: American, British, International
    Keyword: chocolate banana waffles, chocolate waffles, healthy oatmeal waffles, oatmeal waffles
    Servings: 4 waffles
    Calories: 368kcal
    Author: Natalie

    Ingredients

    • 1 ⅓ cup oat flour
    • 1 cup milk I used oat milk
    • 1 banana ripen
    • 4 tablespoons coconut oil melted and cooled
    • 2 eggs
    • 2 tablespoons cacao powder
    • 2 teaspoon Ceylon cinnamon
    • 1 teaspoon baking powder
    • Pinch of salt

    Instructions

    • Prepare and measure all ingredients using measuring cups.
    • Place 1 cup of milk, 1 ripen banana and 4 tablespoons of coconut oil in a blender. Blend on high for few seconds until ingredients fully combine. Add in 2 eggs and pulse for few seconds. Don't overmix.
    • Add in 1+⅓ cup oat flour, 1 teaspoon baking powder, pinch of salt, 2 tablespoons of cacao powder and 2 teaspoons of Ceylon cinnamon. Blend everything until you get a smooth mixture.
    • Heath up your waffle maker until it’s completely HOT (the green light must be on). If needed, grease the waffle maker with coconut oil cooking spray or using the brush.
    • Pour ⅓ cup of batter onto the hot waffle maker, close the lid and allow it to cook for before removing and repeating the process for the rest of the batter. Depending on how strong your waffle maker is, it will take 8-10 minutes for waffle to be done. DON'T open waffle maker before waffles are completely cooked.
    • Remove cooked waffles from the waffle maker and place it on a cooling rack. Let them cook to room temperature. Freshly cooked waffles will be soft when you take them out of the waffle maker but they will harden as they cool on the rack.
    • Serve and add toppings.

    Notes

    Makes 4 waffles that serves 2 people.
    TO MAKE OAT FLOUR: You can use quick oats or rolled oats. Put the oats in a food processor or high speed blender. Blend until the oats become a fine powder. This will only take a few seconds in a high speed blender, and a little bit longer in a food processor.  
    Substitutions
    You can swap oat milk for almond milk or organic soy milk. Cow’s milk works fine here too.
    For added sweetener use maple syrup, raw honey or you can add few soaked dates, or date syrup.
    MAKE IT VEGAN: Swap eggs with flax or chia egg. Use non-dairy milk.
    MAKE IT GLUTEN-FREE: Use certified gluten-free oats. 
    Keep covered in the refrigerator for up to 4 days.

    Nutrition

    Serving: 1waffle | Calories: 368kcal | Carbohydrates: 36g | Protein: 11g | Fat: 21g | Saturated Fat: 14g | Cholesterol: 82mg | Sodium: 62mg | Potassium: 395mg | Fiber: 5g | Sugar: 4g | Vitamin A: 263IU | Vitamin C: 3mg | Calcium: 123mg | Iron: 3mg

    More recipes to try

    • Chocolate Banana Pancakes
    • Chocolate Peanut Butter Banana Roll-Ups
    • Chocolate Peanut Butter Banana Oatmeal Bars
    • Double Chocolate Banana Muffins

    Carrot Cake Pancakes

    April 7, 2020 by Natalie 105 Comments

    Carrot Cake Pancakes topped with Maple Cream Cheese drizzle

    Sweet, fluffy, and loaded with aromatic spices, these Carrot Cake Pancakes are perfect breakfast treat. Packed with heart-healthy, immune-boosting CARROTS and OATS, these pancakes are HEALTHY and nutritious. Also, they are refined sugar-free and made with simple pantry ingredients - easy and incredibly delicious!

    Carrot Cake Pancakes topped with Maple Cream Cheese drizzle

    [cmtoc_table_of_contents]

    Easter is just a few days away. It's time to get all carroty and cakey. Although this Easter will definitely be somewhat different, we are not planning on canceling ANY celebration. No way! I've been looking forward to that ham and Carrot Cake all year long. We only gonna miss our friends and family visiting us, but hey! We are all in the same boat, right!? I'm comforting myself that this eventually will pass.

    This weekend hubby helped me design and plan our Easter menu. As usual, besides all-glorious ham, I'll be making some family favorite desserts and treats. Like Carrot Cake Balls. Also, he mentioned Carrot Cake Muffins for Easter brunch, but I suggested these carroty pancakes instead.

    If you're looking for an easy breakfast/brunch treat that will satisfy your sweet cravings than this Carrot Cake Pancakes ARE the answer. These pancakes are sweet, fluffy, filled with wonderful aromatic spices - ginger, cinnamon, and nutmeg. Utterly delicious, NUTRITIOUS and without empty calories.

    One of the things I love most about these pancakes is the fact that they can be made in just 15 minutes with only a few pantry ingredients, blender, and pancake pan. How easy is THAT!? And just look at them. How DELICIOUS they look? I tell you, these beauties will surely delight you. And the Maple Cream Cheese glaze (which is totally optional BUT highly recommended) makes these Carrot Cake Pancakes complete. Indulging, irresistible, and just excellent addition to your Easter table.

    Carrot Cake Pancakes ingredients

    Carrot Cake Pancakes ingredients

    All ingredients in this recipe contribute to our health in some way, so this carroty treat is far from empty sweet calories. To make these delicious Carrot Cake Pancakes you’ll need:

    • OAT FLOUR: Healthy and filling, oats are stapled food in my pantry. It’s one of my favorite grain. They are a great choice for breakfast since they are an excellent source of fiber, especially beta-glucan that is known for its power to lower cholesterol and keep your heart healthy (1). Also, oats are high in vitamins, minerals, and some powerful antioxidants. + Proteins. YES, proteins!! They are nutritious and so versatile. To make oat flour simple grind oats in a blender or food processor. You can use rolled or quick oats to make oat flour.
    • MILK: I used oat milk in this recipe because oat milk is naturally creamy and sweet, plus it has so many benefits too. Oat milk is a popular dairy-free milk substitute. Naturally, oat milk isn’t as nutritious as whole oats, that’s why it’s often enriched with nutrients — including calcium, potassium, iron, and vitamins A and D. But oat milk is unique because it’s free of many of the allergens found in other types of milk. Plus, the same as whole oats, it contains beta-glucans — a soluble fiber that may offer heart health benefits (2).
    • SWEETENER: I suggest using raw honey. Raw honey is unrefined sweetener with many health benefits. It will give pancakes subtle sweetness yet won’t overload them with much sugary calories. Marple syrup is another great choice. It is also considered non-refined sugar, meaning much healthier option. 

    The star of these breakfast pancakes are CARROTS, sweet, delicious and loaded with nutrients and benefits. Carrots are a high in carotenoids (beta-carotene) - powerful antioxidants that protects or cells from damage, and excellent source of soluble fiber pectin that is great for weight loss (3). Carrots are also good source of several essential vitamins and minerals, like vitamin C and vitamins A (from beta carotene) both important for strong immunity and fighting inflammation (colds and flu), biotin, potassium, and B6 (4). 

    To enhance these pancakes with flavor and some more NUTRIENTS, I also added:

    • CEYLON CINNAMON: Ceylon cinnamon, also known as “true” cinnamon, is a highly delicious spice with many health benefits. Cinnamon is loaded with powerful antioxidants with anti-inflammatory properties. (5, 6) Cinnamon gave these banana pancakes a truly wonderful flavor. 
    • GINGER + NUTMEG: Together with cinnamon, this is one powerful flavor combo. I used fresh grated ginger here. Fresh ginger will give much more flavor and add some benefits too. But powdered version will work well too.
    • HEMP SEEDS: Hemp seeds are loaded with healthy fats. They are exceptionally rich in two essential fatty acids, omega-6 and omega-3 but also a great source of high-quality proteins. (7) Hemps seeds enriched these pancakes with nutrients and made it more filling and super healthy.

    Other pantry ingredients you’ll need:

    • Egg
    • Coconut oil
    • Vanilla extract
    • Salt
    • Baking powder
    • Baking soda

    Carrot Cake Pancakes with Maple Cream Cheese Frosting

    How to make Carrot Cake Pancakes

    • Prepare and measure all ingredients using measuring cups. Peel and grate carrots and squeeze out excess juice. Peel and grate ginger root. 
    • Place 1 medium egg, ¾ cup oat milk, 2 tablespoon coconut oil, 1 tablespoon honey or maple syrup and 1 teaspoon vanilla extract in a blender. Blend for a few seconds just until ingredients combine.
    • Add in 1 ⅓ cup oat flour, 1 ½ teaspoon cinnamon, 1 teaspoon grated fresh ginger, ¼ teaspoon nutmeg, 1 teaspoon baking powder, ½ teaspoon baking soda, and pinch of salt. Blend on high until the batter is smooth (about 1-2 minutes). 
    • Mix in ½ cup shredded carrot and ¼ cup hemp seeds using spatula. 
    • Heat a skillet or pancake pan over medium heat and coat with coconut oil cooking spray or melted coconut oil using the brush. 
    • For each pancake, drop ¼ cup of batter into the pan. Cook 2-3 minutes, until pancake is lightly browned. 
    • Flip the pancake carefully with flexible silicone spatula and cook another 2-3 minutes. Transfer to a plate. 
    • Make sure to coat the pan before every pancake or batch of pancakes to prevent sticking.
    • Repeat the process with the remaining batter.
    • Serve pancakes immediately, topped with Maple Cream Cheese drizzle, maple syrup, goji berries, shredded carrots, cacao nibs or dark chocolate chips.
    • Makes 6 pancakes that serves 2-3 people.

    Substitutions

    • TO MAKE OAT FLOUR: You can use quick oats or rolled oats. Put the oats in a food processor or high speed blender. Blend until the oats become a fine powder. This will only take a few seconds in a high speed blender, and a little bit longer in a food processor. 
    • You can swap oat milk for almond milk or organic soy milk. Cow’s milk works fine here too.
    • Coconut milk won’t work well here. 
    • Make sure to choose organic virgin coconut oil rather than refined versions.
    • You can substitute coconut oil with avocado oil. 
    • Substitute hemp seeds with flax seeds (for more Omega-3’s) or chia seeds (for more fibers).
    • You can use raw honey or maple syrup. 
    • MAKE IT VEGAN: Swap egg with flax or chia egg. Use non-dairy milk.
    • MAKE IT GLUTEN-FREE: Use certified gluten-free oats. 

    Carrot Cake Pancakes with Maple Cream Cheese Frosting

    Tips for serving

    • Top Carrot Cake Pancakes with NUTS: chopped walnuts, almonds, pecans. 
    • Top with Maple Cream Cheese drizzle.
    • Sprinkle with: goji berries, bee pollen, cacao nibs or dark chocolate chips.
    • You can be creative here and choose any other toppings you like.

    Tips for storing

    • Keep covered in the refrigerator for up to 4 days. 
    • HOW TO FREEZE: : Take your cooked and cooled pancakes and place each pancake individually in wax paper bags or stack between wax paper. Store wrapped pancakes in a large freezer zip-lock bag. Keep in the freezer for up to 3 months. Thaw on room temperature.
    • Pancakes can be warmed in the microwave. Be careful not to overheat them.

    Carrot Cake Pancakes with Maple Cream Cheese Frosting
    Carrot Cake Pancakes with Maple Cream Cheese Frosting

    I love these carroty pancakes because they taste just like Easter morning. Just like the SPRING! Plus, they are so incredibly healthy, altho they look pretty indulging. These beauties are:

    • Made with all natural, WHOLESOME ingredients.
    • Fluffy and full of beautiful aromatic spices.
    • Easy to make in just 15 minutes.
    • Needs a few pantry ingredients.
    • Refined sugar-free.
    • Low-calorie and rich in nutrients – quality fibers, plant-based proteins.
    • Packed with heart-healthy fats, fibers and antioxidants.
    • Perfect quick & HEALTHY breakfast, kids school snack, brunch or afternoon dessert.
    • Great for weight loss.
    • Delicious and satisfying, 100% guilt-free! 

    Seriously I can’t wait until Easter to make them again. Do yourself a favor and make these soon. 

    Enjoy!

    Recipe

    Carrot Cake Pancakes topped with Maple Cream Cheese drizzle
    Print Recipe
    4.99 from 83 votes

    Carrot Cake Pancakes recipe

    Sweet, fluffy, and loaded with aromatic spices, these Carrot Cake Pancakes are perfect breakfast treat. They are refined sugar-free and made with simple pantry ingredients - easy and incredibly delicious!
    Prep Time5 minutes mins
    Cook Time15 minutes mins
    Total Time20 minutes mins
    Course: Breakfast, Brunch
    Cuisine: American, British, International
    Keyword: breakfast pancakes, carrot cake pancakes, pancakes with cream cheese frosting
    Servings: 6 pancakes
    Calories: 242kcal
    Author: Natalie

    Ingredients

    • 1 ⅓ cup oat flour
    • 1 medium egg
    • ¾ cup oat milk
    • 2 tablespoon coconut oil melted and cooled
    • 1 tablespoon honey or maple syrup
    • ½ cup shredded carrot
    • ¼ cup hemp seeds
    • 1 teaspoon vanilla extract
    • 1 ½ teaspoon Ceylon cinnamon
    • 1 teaspoon ginger freshly grated
    • ¼ teaspoon nutmeg
    • 1 teaspoon baking powder
    • ½ teaspoon baking soda
    • Pinch of salt

    For Maple Cream Cheese drizzle

    • 2 tablespoon cream cheese
    • 2 tablespoon yogurt
    • 1 tablespoon honey or maple syrup
    • ½ teaspoon vanilla extract

    Instructions

    • Peel and grate carrots and squeeze out excess juice.
    • Peel and grate ginger root.
    • Place 1 medium egg, ¾ cup oat milk, 2 tablespoon coconut oil, 1 tablespoon honey or maple syrup and 1 teaspoon vanilla extract in a blender. Blend for a few seconds just until ingredients combine.
    • Add in 1 ⅓ cup oat flour, 1 ½ teaspoon cinnamon, 1 teaspoon grated fresh ginger, ¼ teaspoon nutmeg, 1 teaspoon baking powder, ½ teaspoon baking soda, and pinch of salt. Blend on high until the batter is smooth (about 1-2 minutes).
    • Mix in ½ cup shredded carrot and ¼ cup hemp seeds using spatula.
    • Heat a skillet or pancake pan over medium heat and coat with coconut oil cooking spray or melted coconut oil using the brush.
    • For each pancake, drop ¼ cup of batter into the pan. Cook 2-3 minutes, until pancake is lightly browned.
    • Flip the pancake carefully with flexible silicone spatula and cook another 2-3 minutes. Transfer to a plate.
    • Make sure to coat the pan before every pancake or batch of pancakes to prevent sticking.
    • Repeat the process with the remaining batter.
    • Serve pancakes immediately, topped with Maple Cream Cheese drizzle, goji berries and shredded carrots.

    For Maple Cream Cheese drizzle

    • In a small bowl mix all ingredients until well combined.

    Notes

    Makes 6 pancakes that serves 2-3 people.
    Substitutions
    You can use quick oats or rolled oats to make oat flour: Put the oats in a food processor or high speed blender. Blend until the oats become a fine powder. This will only take a few seconds in a high speed blender, and a little bit longer in a food processor.
    You can swap oat milk for almond milk or organic soy milk. Cow’s milk works fine here too.
    Coconut milk won’t work well here.
    You can substitute coconut oil with avocado oil.
    Substitute hemp seeds with flax seeds (for more Omega-3’s) or chia seeds (for more fibers).
    You can use raw honey or maple syrup.
    MAKE IT VEGAN: Swap egg with flax or chia egg. Use non-dairy milk.
    MAKE IT GLUTEN-FREE: Use certified gluten-free oats. 
    Tips for storing
    Keep covered in the refrigerator for up to 4 days. 
    As a measure, I used US cup (240ml).
    The nutritional values are calculated and given without Maple Cream Cheese Drizzle.
    Disclaimer: The nutritional information provided is approximate and is calculated using online tools. Information can vary depending on various factors, but I have endeavored to be as accurate as possible.

    Nutrition

    Serving: 1pancake | Calories: 242kcal | Carbohydrates: 26g | Protein: 9g | Fat: 12g | Saturated Fat: 5g | Cholesterol: 27mg | Sodium: 37mg | Potassium: 158mg | Fiber: 3g | Sugar: 6g | Vitamin A: 1926IU | Vitamin C: 1mg | Calcium: 84mg | Iron: 3mg

    More pancake recipes

    • Chocolate Banana Pancakes
    • Peanut Butter Oatmeal Pancakes
    • Blueberry Banana Pancakes
    • Lemon Cardamom Pancakes
    • Blueberry Pancake Casserole

    If you’ve tried this Carrot Cake Pancakes recipe or any other recipe on Natalie’s Health, please take a minute to rate the recipe and leave a comment letting me know how you liked it. I love hearing from you!

    Carrot Cake Pancakes with Maple Cream Cheese Frosting

    Blueberry Acai Smoothie Bowl

    March 3, 2020 by Natalie 49 Comments

    Blueberry Acai Smoothie Bowl topped with fresh berries and superfoods

    Thick and creamy, this SUPERFOOD Blueberry Acai Smoothie Bowl makes perfect breakfast. It's packed with nutrients and powerful antioxidants, completely ADDED SUGAR-FREE, and so easy to make. Nourishing, loaded with refreshing fruity flavors - extremely delicious!

    Blueberry Acai Smoothie Bowl topped with fresh berries and superfoods

    [cmtoc_table_of_contents]

    With ongoing colds and flues and viruses outbreaks (yikes!) my breakfasts lately are super-charged with SUPERFOODS - fresh blueberries, strawberries, and other immune-boosting, antioxidant-rich goodness. So, a few days ago, I shared one of these superfood breakfast creations on my IG story. It received immediate attention. Well, no wonder.

    Not only that smoothie breakfast bowl looked impressive, colorful, creamy, and super delicious, but the ingredients I used were impressive too. I didn't have time to respond to all the messages asking for the recipe, so I decided to share the whole recipe here on my blog. 

    As you all know, I'm a huge smoothie fan, especially fruity flavored. But smoothie bowls are really my weakness. Especially one made with fresh fruits - like this Blueberry Avocado Smoothie Bowl. I guess that's because of its thick texture, creaminess, and freshness. Plus, the fact that you can add all sorts of additional toppings, making it look more irresistible. And you can eat them with a spoon. Sooo good! 

    Well, this Blueberry Acai Smoothie Bowl is equally delicious. Thick and creamy, loaded with refreshing fruity flavors, perfectly flavored. But what's inside counts more. This purple beauty is PACKED with superfoods - fresh blueberries, seeds, super spices.... and powered up with some more superfoods - acai powder.  

    Blueberry Smoothie Bowl with acai powder

    What is Acai?

    Acai (ah-sigh-EE) berries are a grape-like fruit grown in Central and South America, Brazil and Peru. Acai powder is made from freeze-dried acai berries and it tastes very fruity. Acai berries are packed with very potent antioxidants - called anthocyanins, amino acids, fibre, omega fatty acids (omega 3, 6, and 9) which are essential for human health, vitamins and minerals making it a near perfect energizing fruit - a real SUPERFOOD! (1)

    What is acai powder good for?

    • The fibre found in acai helps with digestion, keep us full longer, and keep our cardiovascular system healthy by lowering "bad" LDL cholesterol.
    • Acai is naturally high in essential fatty acids (omega fatty acids) having a fatty acid profile similar to olive oil. These essential fatty acids keep our heart healthy and boost our brain function. 
    • Acai berries contain amino acids which help muscle performance, energy production, endurance and strength.
    • Acai berries contain as much Vitamin C as blueberries and is also a source of Vitamins A, B1, B2, B3 and E. It is also a source of calcium, magnesium, zinc and copper.

    How eat acai powder?

    It's safe to take 1 -2 teaspoons of acai powder daily with food or drinks. Simply blend acai powder with your favorite fruits and milk and make refreshing smoothie. Mix acai powder into a yogurt or sprinkle it on top of your morning oatmeal. It’s also delicious with desserts like frozen yogurt and makes a wonderful addition to chia seed pudding. This Blueberry Acai Smoothie Bowl is just one delicious way to enjoy this powerful berry powder. 

    Blueberry Smoothie Bowl with acai powder

    Blueberry Acai Bowl ingredients

    To make these delicious smoothie bowl you will need few basic ingredients:

    • BLUEBERRIES: Blueberries are delicious and bursting with flavor! They are low-calorie super-fruit that is incredibly healthy. Blueberries are high in fiber, vitamin C and vitamin K but also loaded with powerful antioxidants that protect our body from many diseases. (2) Actually, blueberries are believed to have one of the highest antioxidant levels of all common fruits and vegetables. (3) I like to use frozen blueberries when making smoothie bowls like this one simply because of the creamier texture and cooling effect. But both fresh or frozen will work fine here. 
    • MILK: I used oat milk because it is creamy and packed with nutrients too. It pairs so well with fruity flavors in this smoothie bowl. You can swap oat milk for almond, organic soy milk or cashew milk. Coconut milk won’t work well here. 
    • ACAI POWDER 
    • DATES: I used dates here as a natural sweetener and because I wanted to skip adding extra sugar. Dates are sweet but also packed with other nutrients too. Dates can be easily substituted with raw honey, pure maple syrup or other sweetener you prefer and like. 

    To enhance this blueberry smoothie bowl with flavor and some more NUTRIENTS, I also added:

    • CHIA SEEDS: Despite their small size, chia seeds are full of important nutrients. They are an excellent source of omega-3s, rich in antioxidants, fiber, magnesium, and calcium. They provide many benefits to health as well. Read about benefits of chia seeds and try some of my 30 chia seeds recipes.
    • CEYLON CINNAMON: Ceylon cinnamon, also known as “true” cinnamon, is a highly delicious spice with many health benefits. Cinnamon is loaded with powerful antioxidants with anti-inflammatory properties. (4, 5) Cinnamon gave this smoothie bowl a truly wonderful flavor. 

    Acai Smoothie Bowl with fresh blueberries

    How to make Blueberry Acai Smoothie Bowl

    • Prepare and measure all ingredients using measuring cups.
    • Take a blender and add 1 cup frozen blueberries, 1 cup oat milk, 1 teaspoon acai powder, 1 teaspoon Ceylon cinnamon, ½ teaspoon vanilla extract and 2-3 pitted Medjool dates. Mix on high speed until you get even creamy texture.
    • Add in ¼ cup chia seeds. Pulse few times just to combine.
    • Taste the smoothie and add more dates or additional sweetener if smoothie is not sweet enough. I recommend using raw honey or maple syrup, stevia or date syrup. This is totally based on your preference.
    • If the smoothie is too thick, add a little more liquid – milk, ice cubes or water. Blend again until everything is well combined.
    • Transfer smoothie mixture into a bowl. 
    • ADD TOPPINGS: I used probiotic yogurt, fresh blueberries, strawberries, bee pollen. You can be creative here and choose toppings you like.
    • Serve immediately or keep covered in the refrigerator for up to one day.
    • Makes 1 big bowl that serves 1-2 people. 

    Substitutions

    • You can swap oat milk for almond milk or organic soy milk. Cow’s milk works fine here too. Coconut milk won’t work well here. 
    • Substitute CHIA SEEDS with flax seeds (to add more fibers) or hemp seeds (to add more protein). 
    • Substitute DATES with adding date syrup, pure maple syrup or raw honey. 

    Blueberry Acai Bowl topped with fresh blueberries and strawberries

    This creamy purple goodness is: 

    • Loaded with nutrients that promote good health.
    • Made with ALL NATURAL healthy ingredients.
    • Powered with SUPERFOODS – acai powder, chia seeds, blueberries.
    • Completely ADDED SUGAR-FREE.
    • Full of wonderful fresh fruity flavor.
    • Packed with plant-based proteins, heart-healthy fats, and fibers.
    • Rich in powerful antioxidants, vitamin C, calcium and iron.
    • Vegan, gluten free, and extremely delicious!

    Enjoy!

    Recipe

    Blueberry Acai Smoothie Bowl topped with fresh berries and superfoods
    Print Recipe
    4.97 from 59 votes

    Blueberry Acai Smoothie Bowl recipe

    Thick and creamy, this SUPERFOOD Blueberry Acai Smoothie Bowl makes perfect breakfast. It's packed with nutrients and powerful antioxidants, completely ADDED SUGAR-FREE, and so easy to make. Nourishing, loaded with refreshing fruity flavors - extremely delicious! (V,GF)
    Prep Time5 minutes mins
    Total Time5 minutes mins
    Course: Breakfast
    Cuisine: American, International
    Keyword: acai smoothie bowl, blueberry acai smoothie bowl, blueberry smoothie bowl
    Servings: 1 bowl
    Calories: 577kcal
    Author: Natalie

    Equipment

    • Blender

    Ingredients

    • 1 cup blueberries fresh or frozen
    • 1 cup oat milk
    • 1 teaspoon acai powder
    • 1 teaspoon Ceylon cinnamon
    • ½ teaspoon vanilla extract
    • 2-3 pitted Medjool dates
    • ¼ cup chia seeds

    Instructions

    • Prepare and measure all ingredients using measuring cups.
    • Take a blender and add 1 cup blueberries, 1 cup oat milk, 1 teaspoon acai powder, 1 teaspoon Ceylon cinnamon, ½ teaspoon vanilla extract and 2-3 pitted Medjool dates. Mix on high speed until you get even creamy texture.
    • Add in ¼ cup chia seeds. Pulse few times just to combine.
    • Taste the smoothie and add more dates or additional sweetener if smoothie is not sweet enough. I recommend using raw honey or maple syrup, stevia or date syrup. This is totally based on your preference.
    • If the smoothie is too thick, add a little more liquid – milk, ice cubes or water. Blend again until everything is well combined.
    • Transfer smoothie mixture into a bowl.
    • ADD TOPPINGS: I used probiotic yogurt, fresh blueberries, strawberries, bee pollen. You can be creative here and choose toppings you like.
    • Serve immediately or keep covered in the refrigerator for up to one day.

    Notes

    Makes 1 bowl that serves 1-2 people. 
    Substitutions
    You can swap oat milk for almond milk or organic soy milk. Cow’s milk works fine here too. Coconut milk won’t work well here. 
    Substitute CHIA SEEDS with flax seeds (to add more fibers) or hemp seeds (to add more protein). 
    Substitute DATES with adding date syrup, pure maple syrup or raw honey. 
    Make it vegan: Use plant-based milk. Skip bee pollen.
    As a measure, I used US cup (240ml).
    Disclaimer: The nutritional information provided is approximate and is calculated using online tools. Information can vary depending on various factors, but I have endeavored to be as accurate as possible.

    Nutrition

    Serving: 1bowl | Calories: 577kcal | Carbohydrates: 101g | Protein: 13g | Fat: 18g | Saturated Fat: 1g | Sodium: 122mg | Potassium: 739mg | Fiber: 25g | Sugar: 65g | Vitamin A: 644IU | Vitamin C: 14mg | Calcium: 644mg | Iron: 6mg

    More healthy smoothie recipes

    • Mixed Berry Smoothie
    • Strawberry Kefir Smoothie
    • Strawberry Banana Smoothie
    • Strawberry Peanut Butter Smoothie

    If you’ve tried this blueberry smoothie bowl recipe or any other recipe on Natalie’s Health, please take a minute to rate the recipe and leave a comment letting me know how you liked it. I love hearing from you!

    This thick and creamy Blueberry Acai Smoothie Bowl is perfect healthy breakfast. It's packed with nutrients, incredibly delicious, and without added sugars! (V,GF)

    Chocolate Maca Balls

    February 12, 2020 by Natalie 64 Comments

    Chocolate Maca Balls with goji berries and walnuts

    Chocolate Maca Balls are a perfect HEALTHY treat - sweet, chewy, and delicious, loaded with amazing flavors and aphrodisiac benefits of maca. They are an easy-to-make nutrient-packed snack that will satisfy your sweet tooth and uplift your mood. Perfect treat for Valentine's Day!

    Chocolate Maca Balls with goji berries and walnuts

    [cmtoc_table_of_contents]

    Me and my hubs, we are not much into Valentine's Day celebration. Well, not in that excessive sense  - we don't shower each other with luxury gifts and go out for fine dining. We are more a simple types. We like to open a bottle of wine and dine at home. Nothing fancy. Nothing glamorous. Just relaxing date night at home. After the dinner, we like to get ourselves cozy on the couch and enjoy some romantic movie. With munchies, sweet treats, and smooching included.

    While hubs is in charge of preparing Valentine's dinner, desserts and treats are my thing. Chocolate Tahini Brownies or Chocolate Cherry Brownies, either are WIN with him! Well, we both love brownies. Served with a scoop of vanilla ice cream, it's a real treat. But this year I decided to make him something extra (beside brownies). We will both enjoy this Chocolate Maca Balls as an additional treat.

    These little delights are utterly delicious. Sweet and soft inside, loaded with amazing flavor and aphrodisiac powers from MACA. + Cinnamon-y and packed with dark chocolate bits. Perfect! But these maca chocolate balls are more than just tasty little things. They are packed with many nutrients and SUPERFOODS, filling and so HEALTHY - ideal on-to-go snack for any-day, not just celebrations and special occasions.

    The best part is, these maca chocolate balls don't require baking. They are easily done in 15 minutes, with just a few simple ingredients. Great last minute Valentine's Day dessert! 

    Maca Chocolate Balls with goji berries and walnuts

    Chocolate Maca Balls ingredients

    All ingredients in this recipe contribute to our health in some way, so this treat is not just the empty sweet calories. To make these delightful little balls, you will need few simple ingredients: 

    • WALNUTS: Walnuts are a good source of the plant-based omega-3 fat, an essential fatty acid, and an excellent source of antioxidants that fights inflammation. (1) Walnuts enhanced these energy balls with many nutrients but also wonderful nutty taste and texture. + They are known as aphrodisiac food. You can swap walnuts with almonds here. 
    • CACAO POWDER: I used raw cacao powder that is unprocessed, bitter, deep-flavored and incredibly healthy. Cacao is one of the richest sources of polyphenols – an antioxidant that has been linked to many health benefits, including reduced inflammation, better blood flow, lower blood pressure, and improved cholesterol and blood sugar levels. (2) Cacao gave a gorgeous chocolaty flavor and made these energy balls absolutely irresistible.
    • MACA POWDER: Maca is in one word – amazing! Some dislike it’s earthy nutty taste but I love it. It’s a SUPERFOOD known to boost mood, sex drive, energy and stamina. Maca Powder contains nutritious vitamins, minerals, amino acids and plant sterols, including vitamins B1, B2, B, C, D, E, iron, potassium, copper, magnesium, selenium, phosphorous and calcium. Maca powder is also a source of plant protein, fatty acids, and it contains four unique alkaloids. Also, maca is loaded with powerful antioxidants that prevent some health conditions, including heart disease and cancer. (3, 4)
    • CEYLON CINNAMON: Cinnamon enhanced these maca choclate balls with a truly wonderful flavor. Also, cinnamon is loaded with powerful antioxidants with anti-inflammatory properties. (5, 6) 
    • DATES: Dates are great addition when making energy balls. They bind other ingredients together but also give natural sweetness. But dates also have an excellent nutrition profile. They are packed with many vitamins and minerals, as well as with antioxidants. (7)

    I also tossed in some more SUPERFOODS (these are optional, but highly recommended):

    • CACAO NIBS: Cacao nibs are basically a small pieces of crushed cacao beans that have a rich bitter chocolate flavor. They are great and healthier option when you want to add a bit of extra chocolate in your treats. Cacao nibs are not only flavorful, but loaded with nutrients – fiber, protein, and healthy fats, as well as with powerful antioxidants – flavonoids, that have many health benefits. (8, 9) I used Yacon sweetened cacao nibs here. They have the bitterness of raw cacao but with subtle added sweetness. I like to use cacao nibs as a replacement for dark chocolate chips wherever I can especially when making no-bake treats like no bake balls. They give a little crunch which I love in soft no bake protein balls. You can substitute cacao nibs with dark chocolate chips.
    • GOJI BERRIES: Goji berries are very nutritious. They are high in fiber, protein and a range of vitamins and minerals including iron, copper, selenium, and vitamins A and C. Also they are packed full of powerful antioxidants that fight inflammation and boost immunity. 

    Maca Chocolate Balls with goji berries and walnuts

    How to make Chocolate Maca Balls

    1. Prepare and measure all ingredients using measuring cups.
    2. Soak 10 pitted Medjool dates in hot water for a few minutes. Drain, and reserve water.
    3. Take a high-speed food processor and add 10 dates, ½ cup walnuts, 2 tablespoon cacao powder, 2 tablespoon maca powder, 1 teaspoon Ceylon cinnamon and pinch of salt. Process everything on high speed for about two minutes until the dough is formed.
    4. Don’t worry if the dough seems dry in the beginning. Just continue mixing. Dates will release juices and make it sticky. Scrap down the dough with spatula if needed.
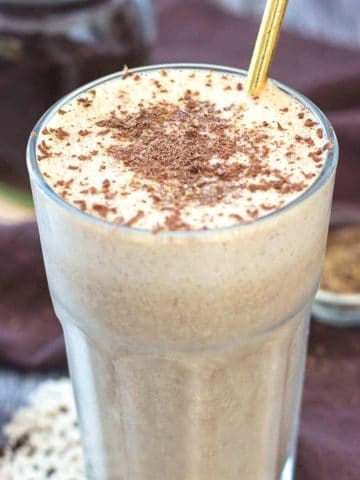
    5. After two minutes, stop the processing and check texture by pinching the dough between your fingers. Now it should be sticky and able to keep its shape.
    6. If the mixture is too dry, add a bit of hot water from soaking dates (just a teaspoon). Mix again and check the texture. 
    7. Make sure you taste the dough. These chocolate energy balls are mildly sweet so if you feel like you need a bit more sweetness, feel free to add a teaspoon of maple syrup, raw honey or date syrup. Molasses is good here too. 
    8. If you’re adding liquid sweetener, as suggested then there’s no need to add hot water. Sweetener will bind the dough and make texture sticky.
    9. In the end, add the ¼ cup Goji berries and ¼ cup Yacon sweetened cacao nibs.  Pulse everything for half more minute.
    10. Using a spoon, scoop out dough and roll between your palms to form your balls. Repeat with remaining ingredients.
    11. Roll the balls in crushed Goji berries or Goji berries powder (for gorgeous red color), or cacao powder, or ground walnuts.
    12. Place energy balls on a plate, serving tray or in an airtight container and refrigerate to harden.

    Chocolate Maca Energy Balls with goji berries
    Maca bliss balls recipe with cacao, goji berries, and walnuts

    Substitutions

    • Substitute WALNUTS with almonds in same amount.
    • Substitute DATES with dried figs or dried prunes. 
    • Substitute Yacon sweetened cacao nibs  with dark chocolate chips or regular cacao nibs. Be aware that regular cacao nibs are bitter in taste and hard to chew.
    • Substitute GOJI BERRIES with any dried fruit, or just omit in the recipe.

    Tips for storing

    • Store in an airtight container in the fridge until serving for up to 4 weeks.
    • Place in a zip-lock bag and freeze for up to 3 months. You don’t need to thaw the balls to eat them.

    Maca bliss balls recipe with cacao, goji berries, and walnuts

    Chocolate Maca Balls are packed with nutrients, immune boosting vitamins and minerals as well with some powerful antioxidants. They are beautifully flavored and so delicious – chewy, sweet and so addictive. Perfect treat for ANY occasion and celebration, but great as a simple everyday snack too.

    Chocolate Maca Balls will satisfy your sweet tooth, power your afternoon and definitely boost your mood. + They are totally guilt-free as they don't have any added-sugars! Win!

    Enjoy!

    Recipe

    Chocolate Maca Balls with goji berries and walnuts
    Print Recipe
    5 from 40 votes

    Chocolate Maca Balls recipe

    These Chocolate Maca Balls are delicious. Sweet, chewy, and loaded with flavor. A perfect nutrient-packed snack that will satisfy your sweet tooth and power your afternoon. Vegan, gluten-free, no-bake!
    Prep Time15 minutes mins
    Total Time15 minutes mins
    Course: Dessert
    Cuisine: American, International
    Keyword: chocolate maca balls, maca bliss balls recipe, maca chocolate balls, maca power balls
    Servings: 20 balls
    Calories: 65kcal
    Author: Natalie

    Ingredients

    • 10 Medjool dates
    • ½ cup walnuts
    • 2 tablespoon cacao powder
    • 2 tablespoon maca powder
    • 1 teaspoon Ceylon cinnamon
    • Pinch of salt
    • ¼ cup Goji berries
    • ¼ cup cacao nibs or dark chocolate chips
    • For dusting: Goji berries or Goji berries powder cacao powder, or ground walnuts

    Instructions

    • Prepare and measure all ingredients using measuring cups.
    • Soak 10 pitted Medjool dates in hot water for a few minutes. Drain, and reserve water.
    • Take a high-speed food processor and add 10 dates, ½ cup walnuts, 2 tablespoon cacao powder, 2 tablespoon maca powder, 1 teaspoon Ceylon cinnamon and pinch of salt. Process everything on high speed for about two minutes until the dough is formed.
    • Don’t worry if the dough seems dry in the beginning. Just continue mixing. Dates will release juices and make it sticky. Scrap down the dough with spatula if needed.
    • After two minutes, stop the processing and check texture by pinching the dough between your fingers. Now it should be sticky and able to keep its shape.
    • If the mixture is too dry, add a bit of hot water from soaking dates (just a teaspoon). Mix again and check the texture.
    • Make sure you taste the dough. These chocolate energy balls are mildly sweet so if you feel like you need a bit more sweetness, feel free to add a teaspoon of maple syrup, raw honey or date syrup. Molasses is good here too.
    • If you’re adding liquid sweetener, as suggested then there’s no need to add hot water. Sweetener will bind the dough and make texture sticky.
    • In the end, add the ¼ cup Goji berries and ¼ cup Yacon sweetened cacao nibs.  Pulse everything for half more minute.
    • Using a spoon, scoop out dough and roll between your palms to form your balls. Repeat with remaining ingredients.
    • Roll the balls in crushed Goji berries or Goji berries powder (for gorgeous red color), or cacao powder, or ground walnuts.
    • Place energy balls on a plate, serving tray or in an airtight container and refrigerate to harden.

    Notes

    Substitutions
    Substitute WALNUTS with almonds in same amount.
    Substitute DATES with dried figs or dried prunes.
    Substitute Yacon sweetened cacao nibs  with dark chocolate chips or regular cacao nibs. Be aware that regular cacao nibs are bitter in taste and hard to chew.
    Substitute GOJI BERRIES with any dried fruit, or just omit in the recipe.
    Tips for storing
    Store in an airtight container in the fridge until serving for up to 4 weeks.
    Place in a zip-lock bag and freeze for up to 3 months. You don’t need to thaw the balls to eat them.
    As a measure, I used US cup (240ml).
    Disclaimer: The nutritional information provided is approximate and is calculated using online tools. Information can vary depending on various factors, but I have endeavored to be as accurate as possible.

    Nutrition

    Serving: 1ball | Calories: 65kcal | Carbohydrates: 11g | Protein: 1g | Fat: 3g | Saturated Fat: 1g | Sodium: 1mg | Potassium: 120mg | Fiber: 2g | Sugar: 8g | Vitamin A: 18IU | Vitamin C: 1mg | Calcium: 16mg | Iron: 1mg

    More energy balls recipes

    If you’re looking for more delicious ENERGY BALLS RECIPES, check these out:

    • No Bake Peanut Butter Balls
    • Hazelnut Chocolate Balls
    • Peanut Butter Energy Balls
    • Chocolate Cinnamon Balls

    If you’ve tried this Chocolate Maca Balls recipe or any other recipe on Natalie’s Health, please take a minute to rate the recipe and leave a comment letting me know how you liked it. I love hearing from you!

    These Chocolate Maca Balls are delicious. Sweet, fudgy, and loaded with flavor. A perfect nutrient-packed snack that will satisfy your sweet tooth and power your afternoon.

    20 Healthy Super Bowl Desserts

    January 29, 2020 by Natalie 20 Comments

    Healthy Super Bowl Desserts

    If you are hosting Super Bowl party, you'll need some sweet treats for the big game! These 20 Healthy Super Bowl Desserts are super delicious, easy to make and most importantly GUILT-FREE. Perfect for your next game day party.

    Healthy Super Bowl Desserts

    Watching Super Bowl, or any other game always involves some food. Actually, a lots of it! Game day party buffet is usually packed with chicken wings, cheesy dips, and cheese balls. All these yumminess keep us in a good mood while cheering for our favorite team. But game day party foods shouldn't be just savory snacks, chips, and salsa. You need something sweet to balance things up. Right?!

    I'm a HUGE lover of sweet treats while watching the game. And I bet there are many of you out there who share my love for candied bites. So today I'm sharing a collection of super delicious, easy to make and most importantly GUILT-FREE Super Bowl Desserts for your next Super Bowl game day party.

    All these recipes are made with HEALTHY, all natural ingredients, without refined sugars. In one word YUMMY! + Party friendly!

    Enjoy!

    [cmtoc_table_of_contents]


    #1 Peanut Butter Energy Balls

    Nutty and sweet, these Peanut Butter Energy Balls are super simple snack that is both satisfying and good for your health. These little bites are loaded with wonderful peanut flavor, and made without added sugars. Great for nibbling and party!


    #2 Chocolate Cinnamon Balls

    Decadent, soft and fragrant, Chocolate Cinnamon Balls are perfect guilt-free treat. These little delights are loaded with bittersweet dark chocolate flavor, so delicious and yet so HEALTHY. They are easy to make and look good on a party platter!

    Whole grain healthy Irish Soda Bread Muffins with raisins and caraway seeds

    #3 Irish Soda Bread Muffins 

    Beautiful rustic and light textured, these Irish Soda Bread Muffins are perfect party treat! Flecked with raisins and caraway seeds, they are perfect with a glass of beer.

    Healthy chocolate covered Cinnamon Vanilla Donuts

    #4 Cinnamon Vanilla Donuts

    Cinnamon Vanilla Donuts are perfect quick treat your guest will love. These delicious donuts are covered with chocolate, perfectly flavored but 100% guilt-free. Yummy and easy to make.


    #5 Peanut Butter Oatmeal Cookies

    Chewy Peanut Butter Oatmeal Cookies are perfect sweet treat to enjoy. These cookies are loaded with peanuts and dark chocolate chunks. Easy to make, refined sugar-free and delicious, these cookies make a perfect game day yummy bite.

    #6 Chocolate Chunk Oatmeal Cookies

    Chewy and loaded with dark chocolate chunks these Chocolate Oatmeal Cookies are the perfect HEALTHY delight for your party guests to enjoy. These tasteful cookies are made with just few simple ingredients and in no time.

    #7 Chocolate Peanut Butter Crunch Bars

    Rich, chocolaty and delicious, these Raw Chocolate Peanut Butter Crunch Bars are one amazing snack. Every bite is loaded with rich chocolate flavor as well with superfoods.

    #8 Apple Pie Energy Bites

    Soft and flavorful, these Apple Pie Energy Bites are perfect HEALTHY snack packed with sweetness. These tasty little balls are ADDED-SUGAR-FREE and loaded with fragrant spices.

    Chocolate No Bake Brownie Bites rolled in cacao powder

    #9 No Bake Brownie Bites

    Fudgy and rich with intense chocolaty flavor, these No Bake Brownie Bites are a decadent treat and exactly what you need when you craving a quick chocolate fix to calm your nerves. These chocolate balls are true melts in your mouth dessert that will surely delight your party guest.

    Hazelnut Chocolate Balls Ferrero Rocher

    #10 Hazelnut Chocolate Balls

    Hazelnut Chocolate Balls are delightful little treats. These soft and sweet bliss balls are delicious hazelnut goodness that are loaded with only natural healthy stuff and waistline friendly. A sweet treat special enough for the holidays or parties.

    #12 Chocolate Chip Cookie Dough Truffles

    Just six ingredients, no baking required and ready in less than 20 minutes. The perfect healthier party treat!

    #13 Easy Chocolate Fat Bombs

    You only need five ingredients and 10 minutes prep to make the most delicious chocolate treat ever. These easy fat bombs taste incredible and are perfect for your game day party.

    #14 Brownie Batter Hummus

    Delicious, buttery and loaded with chocolate flavor, this Brownie Batter Hummus is perfect sweet dip.

    #15 Hostess Cupcakes

    Chocolate cream-filled Hostess Cupcakes are not only delicious but super cute. These would look really impressive on your party buffet table. These are MUST make if you ask me!

    Healthy Double Chocolate Almond Butter Brownies made with cacao powder

    #16 Double Chocolate Brownies

    Rich and incredibly delicious, these Double Chocolate Almond Butter Brownies are the perfect dessert. Made with all healthy ingredients and loaded with bits of dark chocolate, these yummy brownies are a pure guilt-free chocolate treat perfect for parties.

    #17 No-Bake Coconut Cookies

    These no bake coconut cookies are the perfect thing when you need a healthy treat in a flash. They come together super quick and are loaded with healthy ingredients.

    #18 Football Fruit Tray

    This is not only fun themed fruit tray but the best snack ever. A football fruit tray makes perfect sense and will make your guest cheerful and healthy.

    Oven baked Double Chocolate Banana Donuts whole grain refined SUGAR-FREE

    #19 Double Chocolate Banana Donuts

    Soft, sweet and absolutely irresistible, Double Chocolate Banana Donuts are one delicious guilt-free treat. These donuts are super easy to make and great party treat that guest just can't stop eating. 

    #20 Lemon Coconut Balls 

    These refreshing Lemon Coconut Balls will surely delight you. Packed with flavor and super sweet, these lemony balls will definitely brighten up your party. 

    Xoxo, Natalie

    Let’s connect! Find me on – Facebook | Instagram | Pinterest | Twitter

    Halloween Dark Chocolate Cookies

    October 29, 2019 by Natalie 44 Comments

    Halloween Dark Chocolate Cookies

    Dark Chocolate Cookies are the perfect Halloween party treat. Soft, loaded with bitter-sweet chocolate flavor and candy surprise, these cookies are not only fun and festive but also wholesome, made with all healthy ingredients and WITHOUT REFINED SUGARS.

    Halloween Dark Chocolate Cookies

    [cmtoc_table_of_contents]

    The end of October marks the beginning of the cheeriest time of the year. It begins with Halloween, followed by Thanksgiving, and right after that, there's Christmas. Two months of celebration and fun, with lots of foods and sweet treats to feast upon. Who is not looking forward to THAT?!

    As every year, we will celebrate Halloween with loads of snacks and sweet treats, and of course, scary movies. We used to make Halloween decorations, carve pumpkins, and costume ourselves. But now that my kiddo is older, he doesn't fancy doing all that. He rather stays at home and just watches scary movies with us. It's a new way of Halloween fun that involves much more munchies.

    I opened the celebration with our favorite Halloween Ghost Vanilla Donuts. It's no Halloween without those donuts. But as it is a Halloween, there must be MORE sweet treats. This year I decided to go with something super easy to make, which is equally fun and festive as healthy and delicious.

    These Dark Chocolate Cookies are the perfect Halloween treat. Dark, scary-looking, and bite-sized. But these delights are also filled with candied surprise, which makes them super festive and extra yummy. To make sure cookies are guilt-free, I used all healthy ingredients, and I skipped using refined sugars. Packed with flavor but lacking in calories, these Dark Chocolate Cookies will surely become your favorite Halloween treat too.

    Halloween Dark Chocolate Cookies

    Dark Chocolate Cookies ingredients

    Making these chocolate cookies is super easy. All you need is a few simple ingredients and 15 minutes of your time:

    • WHOLE GRAIN FLOUR: I used whole grain Spelt flour here. It is one of the staples in my pantry. I use it often in my baking as a substitute for all-purpose wheat flour. Spelt flour is an ancient grain with a nutty and mildly sweet taste. It’s packed with nutrients – especially fibers. 
    • CACAO POWDER: I used raw cacao powder that is unprocessed, bitter, deep-flavored, and incredibly healthy. Cacao is one of the richest sources of polyphenols – an antioxidant that has been linked to many health benefits, including reduced inflammation, better blood flow, lower blood pressure, and improved cholesterol and blood sugar levels. (1) Cacao gave the cookies a gorgeous chocolaty flavor and made them healthy and absolutely irresistible.
    • COCONUT OIL: I like to use unrefined extra virgin coconut oil because it’s full of nutrients and adds a really nice light flavor to the cookies. You can substitute coconut oil with grass-fed butter here if you like. 
    • SWEETENER: To make cookies sweet, I used coconut sugar. It gave subtle sweetness yet didn’t overload the cookies with just empty sugary calories. Also, coconut sugar has this delicious and strong caramel taste, which added so much extra flavor to these dark chocolate cookies. While coconut sugar is still sugar and should be avoided or used in moderation, it still has some advantages over refined white table sugar. Coconut sugar is derived from the coconut palm tree and less processed, meaning it contains small amounts of minerals, antioxidants, and a fiber called inulin, which slows glucose absorption. That’s why coconut sugar has a lower glycemic index than regular table sugar. (2)  

    Other pantry ingredients you’ll need:

    • Egg
    • Vanilla extract
    • Salt
    • Baking powder
    • Baking soda

    To make these Dark Chocolate Cookies festive and fun, I also tossed in some M&M's. You can substitute those with any candies you like. These cookies are great to use Halloween candy leftovers too. 

    Healthy Halloween Dark Chocolate Cookies

    How to make Halloween Dark Chocolate Cookies

    • Position an oven rack in the middle of the oven and heat to 325F (160C).
    • Line the bottom of a 13 x 9-inch cookie sheet with parchment paper. Set aside.
    • Prepare and measure all ingredients using measuring cups.
    • In a big glass or stainless steel mixing bowl, add measured 1 cup whole grain flour, ½ cup cacao powder, ½ cup coconut sugar, ½ teaspoon baking soda, ¼ teaspoon baking powder, ¼ teaspoon salt. Use a silicone spatula to mix the dry ingredients. 
    • In a small mixing bowl, combine 1 egg with ½ cup melted and cooled to room temperature coconut oil. Add 2 teaspoons vanilla. Use the whisk and mix it until you get even mixture.  
    • Add the wet mixture in the dry ingredients. Using the spatula mix everything until fully combined. 
    • Add ⅓ cup candies and mix them in.
    • Use ice cream scoop or tablespoon to scoop cookie dough and roll it into a ball. Arrange the balls 2-inches apart on the cookie sheet. Don't press them down.  
    • Gently press extra candies onto the cookies before baking so that bright orange candy shows.
    • Bake 10 minutes. 
    • Get the cookies out of the oven. They will be soft when you get them out. Leave them to cool for a few minutes. They will harden after they cool down. Transfer the cookies to a wire rack to finish cooling.

    Healthy Dark Chocolate Cookies
    Healthy Dark Chocolate Cookies

    Substitutions

    • I used whole grain Spelt flour but you can use whole grain wheat flour. 
    • You can substitute coconut oil with grass-fed butter.
    • To make these cookies vegan, substitute egg with flax or chia egg. 

    Tips for storing

    • Keep cookies in a cookie jar or air-tight food container. They will last up to 5 days.
    • You can keep them in fridge. That way they will last longer.
    • Place the cookies in a zip-lock bag and freeze up to 3 months. Thaw them on room temperature before serving. 

    Healthy Dark Chocolate Cookies

    Soft and chewy, loaded with dark chocolate flavor and hidden pieces of candy inside, these Dark Chocolate Cookies are a real treat not only for celebrations like Halloween but year-round. I love the fact that these chocolate delights are so easy to make and totally guilt-free, filled with HEALTHY stuff like raw cacao and anti-inflammatory coconut oil, which makes them favorite in my book. I hope you'll like them too!

    Enjoy!

    Recipe

    Halloween Dark Chocolate Cookies
    Print Recipe
    5 from 60 votes

    Halloween Dark Chocolate Cookies recipe

    Dark Chocolate Cookies are the perfect Halloween party treat. Soft, loaded with bitter-sweet chocolate flavor and candy surprise, these cookies are not only fun and festive but also wholesome, made with all healthy ingredients and WITHOUT REFINED SUGARS.
    Prep Time5 minutes mins
    Cook Time10 minutes mins
    Total Time15 minutes mins
    Course: Dessert
    Cuisine: American, British, International
    Keyword: dark chocolate cookies, dark chocolate halloween cookies, healthy dark chocolate cookies
    Servings: 12 cookies
    Calories: 179kcal
    Author: Natalie

    Ingredients

    • 1 cup whole grain flour I used Spelt
    • ½ cup cacao powder
    • ½ cup coconut sugar
    • ½ teaspoon baking soda
    • ½ teaspoon baking powder
    • ⅛ teaspoon Himalayan salt
    • 1 medium egg
    • ½ cup extra virgin coconut oil melted and cooled
    • 2 teaspoon vanilla extract
    • ⅓ cup candies I used M&M's

    Instructions

    • Position an oven rack in the middle of the oven and heat to 325F (160C).
    • Line the bottom of a 13 x 9-inch cookie sheet with parchment paper. Set aside.
    • Prepare and measure all ingredients using measuring cups.
    • In a big glass or stainless steel mixing bowl, add measured 1 cup whole grain flour, ½ cup cacao powder, ½ cup coconut sugar, ½ teaspoon baking soda, ½ teaspoon baking powder, ⅛ teaspoon salt. Use a silicone spatula to mix the dry ingredients.
    • In a small mixing bowl, combine 1 medium egg with ½ cup melted and cooled to room temperature coconut oil. Add 2 teaspoons vanilla. Use the whisk and mix it until you get even mixture.
    • Add the wet mixture in the dry ingredients. Using the spatula mix everything until fully combined.
    • Add ⅓ cup candies and mix them in.
    • Use ice cream scoop or tablespoon to scoop cookie dough and roll it into a ball. Arrange the balls 2-inches apart on the cookie sheet. Don't press them down.
    • Gently press extra candies onto the cookies before baking so that bright orange candy shows.
    • Bake 10 minutes.
    • Get the cookies out of the oven. They will be soft when you get them out. Leave them to cool for a few minutes. They will harden after they cool down. Transfer the cookies to a wire rack to finish cooling.

    Notes

    SUBSTITUTIONS:
    You can substitute whole grain Spelt flour with wheat whole grain flour.
    You can substitute coconut oil with grass-fed butter.
    STORING:
    Keep cookies in a cookie jar or air-tight food container. They will last up to 5 days.
    You can keep them in the fridge. That way they will last longer.
    Place the cookies in a zip-lock bag and freeze up to 3 months. Thaw them on room temperature before serving.
    MAKE IT VEGAN: Use flax or chia egg.
    As a measure, I used US cup (240ml).
    Disclaimer: The nutritional information provided is approximate and is calculated using online tools. Information can vary depending on various factors, but I have endeavored to be as accurate as possible.

    Nutrition

    Serving: 1cookie | Calories: 179kcal | Carbohydrates: 19g | Protein: 3g | Fat: 12g | Saturated Fat: 9g | Cholesterol: 15mg | Sodium: 93mg | Potassium: 113mg | Fiber: 2g | Sugar: 8g | Vitamin A: 33IU | Calcium: 24mg | Iron: 1mg

    More Halloween recipes

    If you’re looking for more fun and healthy Halloween snacks and treats, check these out:

    • Halloween Ghost Vanilla Donuts
    • Cinnamon Vanilla Donuts
    • Raw Chocolate Peanut Butter Crunch Bars
    • Chocolate Cinnamon Balls

    If you’ve tried this Halloween Dark Chocolate Cookies or any other recipe on Natalie’s Health, please take a minute to rate the recipe and leave a comment letting me know how you liked it. I love hearing from you!

    You can also FOLLOW ME on Facebook | Instagram | Pinterest

    Halloween Dark Chocolate Cookies

    30 Cinnamon Recipes

    October 23, 2019 by Natalie 41 Comments

    easy and delicious cinnamon recipes healthy

    Golden-yellow and fragrant, cinnamon gives a distinctive flavor to sweet treats and a unique twist in savory meals. If you're a fan of this incredible spice with many health benefits, check out these 30 sweet and savory Cinnamon Recipes that prove cinnamon may just be the most versatile spice in your cabinet.

    easy and delicious cinnamon recipes healthy

    A few things make me feel warm and fuzzy, like the smell of cinnamon drifting through the kitchen does. The aroma is intoxicating. And it comes with some pretty sweet health benefits too. And while cinnamon is usually associated with colder months and holiday time when we bake desserts using this warming spice, nothing really stops us from using cinnamon all year round.

    Cinnamon has a warm, slightly spicy taste that lends well to a variety of dishes, sweet and savory. Here are 30 Cinnamon Recipes that prove cinnamon may be the most versatile spice in your cabinet.

    [cmtoc_table_of_contents]

    Cinnamon Roll Oatmeal Bake recipe
    Cinnamon French Toast topped with almond butter and fruits
    Healthy Apple Cinnamon Overnight Oats with FRESH apples and banana
    Apple Cinnamon Baked Oatmeal

    Breakfast recipes

    • Cinnamon Roll Oatmeal Bake
    • Cinnamon Orange Granola
    • Cinnamon French Toast
    • Apple Cinnamon Overnight Oats
    • Apple Cinnamon Baked Oatmeal
    • Carrot Cake Baked Oatmeal
    • Blueberry Oatmeal Porridge

    Smoothie recipes

    • Cherry Banana Smoothie
    • Mixed Berry Smoothie
    • Carrot Cake Smoothie
    • Chocolate Avocado Smoothie
    • Apple Peanut Butter Smoothie

    Cinnamon Oatmeal Cookies on a wooden plate
    Healthy Apple Cinnamon Muffins
    Delicious Honey Cinnamon Cookies with whole grain flour and refined sugar-free.
    Easy Apple Pear Crisp with oats

    Desserts

    • Cinnamon Oatmeal Cookies
    • Apple Cinnamon Muffins
    • Honey Cinnamon Cookies
    • Apple Cinnamon Oatmeal Cookies
    • Cinnamon Vanilla Donuts
    • Easy Apple Pear Crisp

    Drinks

    • Gingerbread Hot Chocolate
    • Pumpkin Spice Latte
    • Cacao Turmeric Maca Hot Chocolate

    Healthy Coconut Chips recipe with cinnamon
    Spicy Cinnamon Roasted Almonds
    Chocolate Cinnamon Balls

    Snack recipes

    • Toasted Cinnamon Coconut Chips
    • Spicy Cinnamon Roasted Almonds
    • Chocolate Cinnamon Balls
    • Chocolate Prune Energy Balls
    • Apple Pie Energy Bites

    Savory recipes

    • Spicy Broccoli Soup
    • Quick Pan Seared Pork Chops by Gluten Free Homestead
    • Butternut Squash Soup by This Healthy Kitchen
    • Spiced Chicken and Rice with Apples and Raisins by Bowl of Delicious


    If you’ve tried any of these recipes or other recipes on Natalie’s Health, please take a minute to rate the recipe and leave a comment letting me know how you liked it. I love hearing from you!

    You can also FOLLOW ME on Facebook | Instagram | Pinterest

    Blueberry Avocado Smoothie Bowl

    October 11, 2019 by Natalie 45 Comments

    Blueberry Avocado Smoothie in a bowl

    Creamy, mildly sweet, and loaded with SUPERFOODS, this Blueberry Avocado Smoothie Bowl makes a perfect start of the day. It's packed with nutrients and bursting with fresh flavors, ADDED SUGAR-FREE, and super easy to make. It's nourishing and delicious!

    Blueberry Avocado Smoothie in a bowl

    [cmtoc_table_of_contents]

    Busy mornings call for a quick breakfast. Lately, my life is in super speed mode, so there are mornings when I forget to eat. YES! Imagine that! I forget to put food in my mouth till lunch. I practiced this nasty habit for few times last week, and my body started to suffer. So this week I said to my self, no more.

    When I'm looking to make something nutritious and filling, but healthy FAST, smoothies are my way to go. I can make Mixed Berry Smoothie or Spirulina Smoothie super quick and have it sipping on my way to drop kiddo to school. But sometimes I like to make a smoothie, sit on my laptop and enjoy eating it with a spoon. And that's where smoothie bowls come to shine. Sweet, creamy, and with colorful toppings, it's a real sight for hungry eyes. And real treat for the hungry belly.

    This incredible Blueberry Avocado Smoothie Bowl was on my menu for few times last week. It was so tasty and so delightful, I just had to put him online to shine! It's thick, cooling and creamy, bursting with fresh flavors. + It's packed with SUPERFOODS and nutrients. And it hides some greens inside, which is always a plus.

    Blueberry Avocado Smoothie in a bowl

    Blueberry Avocado Smoothie Bowl ingredients

    This delicious breakfast bowl is packed full of healthy stuff, and to make it you'll need only few simple ingredients:

    • BLUEBERRIES 
    • AVOCADO: Avocado is my favorite fatty friend. I use it almost daily in my salads, I make spreads. I have it sliced with my backed eggs in the morning. But avocado is great in smoothies too. Avocado adds extra creaminess to smoothie drink. However, what’s more important, it adds essential nutrients – HEALTHY FATS – monounsaturated fatty acids aka omega-3’s that are heart-healthy and anti-inflammatory. Avocado is rich in magnesium, potassium, and fiber, as well in many essential vitamins – like those “B Group vitamins”. A real superfood with many health benefits!
    • FLAX SEEDS
    • CEYLON CINNAMON: Ceylon cinnamon, also known as “true” cinnamon, is a highly delicious spice with many health benefits. Cinnamon is loaded with powerful antioxidants with anti-inflammatory properties. (2, 3) Cinnamon gave this baked oatmeal a truly wonderful flavor.
    • DATES

    I also tossed in a handful of fresh BABY SPINACH. Which makes this smoothie bowl secretly "green". Blueberries hide the leafy green taste of spinach making this smoothie acceptable even by my veggie-hater hubby. It's a nice trick to get some more veggies into your family's diet. 

    Other pantry ingredients you’ll need:

      • Milk (plant-based or cow's)
      • Vanilla extract

    Blueberry Avocado Smoothie served in a bowl topped with blueberries almonds and chocolate
    Blueberry Avocado Smoothie served in a bowl topped with blueberries almonds and chocolate

    How to make Blueberry Avocado Smoothie Bowl

    • Prepare and measure all ingredients using measuring cups.
    • Take a blender or food processor and add 1 cup frozen blueberries, ½ avocado, 1 cup almond milk, 1 tablespoon ground flax seeds, 1 teaspoon Ceylon cinnamon, a handful of baby spinach (or kale), ½ teaspoon vanilla extract and 2-3 pitted Medjool dates. Mix on high speed until you get even creamy texture.
    • Mix on high speed until you get even creamy texture.
    • Taste the smoothie and add sweetener if smoothie is not sweet enough. I recommend using raw honey or maple syrup, stevia or few more dates. This is totally based on your preference.
    • If the smoothie is too thick, add a little more liquid - milk, ice cubes or water. Blend again until everything is well combined.
    • Transfer smoothie mixture into a bowl. 
    • Sprinkle with toppings: fresh or frozen berries, sliced almonds or walnuts, cacao nibs or dark chocolate bits. You can be creative here and choose toppings you like.
    • Serve immediately or keep covered in the refrigerator for up to one day.

    Substitutions

    • Substitute ground FLAX SEEDS with hemp seeds or chia seeds.
    • Substitute dates with date syrup, maple syrup or honey.
    • You can substitute baby spinach with fresh kale. 
    • You can use any plant based or cow's milk here. I like to use almond unsweetened because it has mild nutty flavor.

    Healthy Blueberry Avocado Smoothie in a bowl

    This creamy goodness is:

    • Loaded with nutrients that promote good health.
    • Made with ALL NATURAL healthy ingredients.
    • Powered with SUPERFOODS – avocado, flax seeds, blueberries.
    • Completely ADDED SUGAR-FREE.
    • Full of wonderful fresh fruit flavor.
    • Packed with plant-based proteins, heart-healthy fats, and dietary fibers.
    • Rich in powerful antioxidants, vitamin C, calcium and iron.
    • Vegan, gluten free, and beyond delicious!

    Definitely something you need to incorporate in your breakfast routine.

    Enjoy!

    Recipe

    Blueberry Avocado Smoothie served in a bowl topped with blueberries almonds and chocolate
    Print Recipe
    5 from 46 votes

    Blueberry Avocado Smoothie Bowl Recipe

    Creamy, mildly sweet, and loaded with SUPERFOODS, this Blueberry Avocado Smoothie Bowl makes a perfect start of the day. It's packed with nutrients and amazing flavor, ADDED SUGAR-FREE, and super easy to make. It's nourishing and delicious!
    Prep Time5 minutes mins
    Total Time5 minutes mins
    Course: Breakfast
    Cuisine: American, International
    Keyword: blueberry avocado smoothie, blueberry avocado smoothie bowl, blueberry smoothie, blueberry smoothie bowl
    Servings: 1 bowl
    Calories: 461kcal
    Author: Natalie

    Ingredients

    • 1 cup frozen blueberries
    • ½ avocado
    • 1 cup almond milk I used unsweetened
    • 1 tablespoon ground flax seeds
    • 1 teaspoon Ceylon cinnamon
    • A handfull of baby spinach or kale
    • ½ teaspoon vanilla extract
    • 2-3 Medjool dates pitted
    • 2-3 ice cubes

    Toppings:

    • Frozen or fresh blueberries
    • Chopped dark chocolate or cacao nibs
    • Sliced almonds
    • Bee pollen

    Instructions

    • Prepare and measure all ingredients using measuring cups.
    • Take a blender or food processor and add 1 cup frozen blueberries, ½ avocado, 1 cup almond milk, 1 tablespoon ground flax seeds, 1 teaspoon Ceylon cinnamon, a handful of baby spinach (or kale), ½ teaspoon vanilla extract and 2-3 pitted Medjool dates. Mix on high speed until you get even creamy texture.
    • Taste the smoothie and add sweetener if the smoothie is not sweet enough. I recommend using raw honey or maple syrup, stevia, or a few more dates. This is based on your preference.
    • If the smoothie is too thick, add a little more liquid - milk, ice cubes or water. Blend again until everything is well combined.
    • Transfer smoothie mixture into a bowl.
    • Sprinkle with toppings:
    • Serve immediately or keep covered in the refrigerator for up to one day.

    Notes

    SUBSTITUTIONS:
    Substitute FLAX SEEDS with hemp seeds or chia seeds.
    Substitute dates with date syrup, maple syrup or honey.
    You can substitute baby spinach with fresh kale.
    You can use any plant-based or cow's milk here.
    Make it vegan: Use plant-based milk. Skip bee pollen.
    As a measure, I used US cup (240ml).
    Disclaimer: The nutritional information provided is approximate and is calculated using online tools. Information can vary depending on various factors, but I have endeavored to be as accurate as possible.

    Nutrition

    Serving: 1bowl | Calories: 461kcal | Carbohydrates: 71g | Protein: 7g | Fat: 21g | Saturated Fat: 2g | Sodium: 339mg | Potassium: 992mg | Fiber: 17g | Sugar: 48g | Vitamin A: 298IU | Vitamin C: 24mg | Calcium: 381mg | Iron: 2mg

    More smoothie recipes

    If you’re looking for more delicious SMOOTHIE RECIPES, check these out:

    • Chocolate Avocado Smoothie
    • Matcha Smoothie
    • Chocolate Peanut Butter Smoothie
    • Orange Mango Turmeric Smoothie Bowl
    • Pineapple Peach Smoothie Bowl

    If you’ve tried this Blueberry Avocado Smoothie Bowl recipe or any other recipe on Natalie’s Health, please take a minute to rate the recipe and leave a comment letting me know how you liked it. I love hearing from you!

    You can also FOLLOW ME on Facebook | Instagram | Pinterest

    Cinnamon Oatmeal Cookies

    September 26, 2019 by Natalie 70 Comments

    Cinnamon Oatmeal Cookies on a wooden plate

    Soft, chewy, and completely addictive, these Cinnamon Oatmeal Cookies are just beyond delicious. Loaded with nutrients and incredible cinnamon flavor, yet low in calories and made without refined sugars, these cinnamon cookies are both tasty and guilt-free.

    [feast_advanced_jump_to]

    Cinnamon Oatmeal Cookies on a wooden plate

    With such beautiful warm weather we have here in England, no one can guess is Fall already. But gloomy clouds with first drops of rain and yellow trees remind us that season is about to change soon.

    This beginning of Fall always inspires me to use cinnamon more in my baking. So for the past week, I'm making and baking everything cinnamon. From Apple Cinnamon Cookies to Apple Cinnamon Muffins and family favorite breakfast, Apple Cinnamon Baked Oatmeal. Cinnamon has definitely become a star in my kitchen and my house is overwhelmed with its incredible scent. But honestly, who can resist cinnamon? Aromatic and fragrant, this spice is not only loaded with magnificent flavor but has many health benefits too.

    Since my family loves cinnamon and to nibble cookies during weekdays, I've decided to make a bunch of these delicious cinnamon-flavored oatmeal cookies. They turned out fantastic! Soft, chewy, with such an wonderful scent and aroma. All thanks to cinnamon spice.

    But these cookies are more than just sweet afternoon treat. They are loaded with nutrients - heart-healthy fibers and proteins, and at the same time deprived of unnecessary empty calories. These beauties are 100% guilt-free made with all HEALTHY ingredients and without refined sugars. Plus they are easy to make. Winning combo all the way!

    Cinnamon Oatmeal Cookies on a wooden plate

    Ingredients used

    As I said, these cinnamon cookies are super easy to make. Like SUPEr easy... and you'll only need a few simple ingredients:

    • OATS: I use oats a lot in my baking and cooking. Oats are a great source of fiber, especially beta-glucan that is known for its power to lower cholesterol and therefore keep your heart healthy (1). Also, oats are high in vitamins, minerals, and some powerful antioxidants. AND proteins. YES, proteins!! I usually use quick oats to make oatmeal cookies but you can substitute them with rolled oats. 
    • WHOLE GRAIN FLOUR: Whole grain Spelt flour is one of the staples in my pantry. I use it in my baking as a substitute for all-purpose wheat flour. Spelt flour is an ancient grain with a nutty and mildly sweet taste. It’s packed with nutrients – especially fibers. 
    • CEYLON CINNAMON: Ceylon cinnamon, also known as “true” cinnamon, is a highly delicious spice with many health benefits. Cinnamon is loaded with powerful antioxidants with anti-inflammatory properties. (2, 3) Cinnamon gave this cookies a truly wonderful flavor.
    • SWEETENER: I used pure maple syrup but you can easily use honey here if you like. Sirup gave subtle sweetness yet didn't overloaded cookies with much sugar calories.

    I also tossed in some superfood HEMP SEEDS. Hemp seeds are loaded with healthy fats. They are exceptionally rich in two essential fatty acids, omega-6 and omega-3 but also a great source of high-quality proteins. (4) Hemps seeds enriched these cinnamon cookies with nutrients and made them filling and super super chewy.

    Other pantry ingredients you'll need:

    • Baking powder
    • Salt
    • Egg
    • Coconut oil

    Cinnamon cookies made with oats

    How to make Cinnamon Oatmeal Cookies

    • Position an oven rack in the lower third of the oven and heat to 356F (180C).
    • Line the bottom of an baking sheet with parchment paper. Set aside.
    • Prepare and measure all ingredients using measuring cups.
    • In a small glass or stainless steel mixing bowl add measured 1 cup oats, ¾ cup whole grain flour, 1 teaspoon baking powder, 2 teaspoons Ceylon cinnamon and ¼ teaspoon salt. Use silicone spatula to mix the dry ingredients.
    • In a large mixing bowl combine 2 tablespoons coconut oil melted and cooled to room temperature and ½ cup maple syrup. Add 1 teaspoon vanilla extract. Use the whisk and mix it until you get the sticky texture.
    • Add in 1 egg, and stir vigorously using the whisk.
    • When the batter looks thick and well blended, add in the dry ingredients. Using the spatula mix everything until fully combined.
    • Gently fold in ¼ cup hemp seeds. Use spatula.
    • Let the mixture sit for 10 minutes.
    • Use ice cream scoop or tablespoon to scoop cookie mixture and place it on a baking sheet. Arrange the cookies 2-inches apart. Slightly flatten the dough and shape cookies with the spoon.
    • Bake cookies 12 to 15 minutes. Watch for cookies and don’t over-bake them.
    • When you get them out of the oven, cookies will be soft. Leave them to cool for few minutes on the baking sheet then transfer them to a cookie rack to cool completely. They will harden after they cool down.
    Cinnamon cookies made with oats
    Easy oatmeal cookies made with oats and cinnamon

    Substitutions

    • I like to use quick oats when making oatmeal cookies, but you can substitute quick oats with rolled oats. Rolled oats will give denser cookies.
    • I used whole grain Spelt flour but you can use whole grain wheat flour.
    • You can substitute maple syrup with honey. Make sure honey is not raw but in liquid, runny form.

    Tips for storing

    • Keep cookies in a cookie jar or air-tight food container. They will last up to 5 days.
    • You can keep them in fridge. That way they will last longer.
    • Place the cookies in a zip-lock bag and freeze up to 3 months. Thaw them on room temperature before serving.

    Easy oatmeal cookies made with oats and cinnamon

    These cinnamon cookies are perfect for busy families and for those who want to snack something healthy on-to-go during weekdays. Cinnamon oatmeal cookies are not only delicious, sweet tasting with incredible flavor, but also loaded with many nutrients and so filling. One cookie will satisfy your hunger quickly.

    Since they are so nutritious, you can have these oatmeal cookies as quick on-to-go breakfast. Or as a healthy snack between meals. And they are perfect to pack into kids school lunch box.

    Believe me, this easy oatmeal cookie recipe will soon become your favorite one.

    Enjoy!

    Recipe

    Cinnamon Oatmeal Cookies on a wooden plate
    Print Recipe
    4.94 from 130 votes

    Cinnamon Oatmeal Cookies

    Soft, chewy, and completely addictive, these Cinnamon Oatmeal Cookies will become family favorite in no time. Loaded with incredible cinnamon flavor, nutritious yet made without refined sugars, these cinnamon cookies are both delicious and guilt-free. Dessert perfect for lunchbox or served as afternoon treat.
    Prep Time5 minutes mins
    Cook Time15 minutes mins
    Resting time10 minutes mins
    Total Time30 minutes mins
    Course: Dessert
    Cuisine: American, International
    Keyword: cinnamon cookies, Cinnamon Oatmeal Cookies, Easy oatmeal cookie recipe, Oatmeal cookies recipe
    Servings: 12 cookies
    Calories: 121kcal
    Author: Natalie

    Ingredients

    • 1 cup rolled oats
    • ¾ cup whole grain flour I used Spelt flour
    • 2 teaspoon Ceylon cinnamon
    • 1 teaspoon baking powder
    • ¼ teaspoon Himalayan salt
    • 2 tablespoon extra virgin coconut oil melted and cooled
    • ½ cup pure maple syrup
    • 1 teaspoon vanilla extract
    • 1 egg
    • ¼ cup hemp seeds

    Instructions

    • Position an oven rack in the lower third of the oven and heat to 356F (180C).
    • Line the bottom of an baking sheet with parchment paper. Set aside.
    • Prepare and measure all ingredients using measuring cups.
    • In a small glass or stainless steel mixing bowl add measured 1 cup oats, ¾ cup whole grain flour, 1 teaspoon baking powder, 2 teaspoons Ceylon cinnamon and ¼ teaspoon salt. Use silicone spatula to mix the dry ingredients.
    • In a large mixing bowl combine 2 tablespoons coconut oil melted and cooled to room temperature and ½ cup maple syrup. Add 1 teaspoon vanilla extract. Use the whisk and mix it until you get the sticky texture.
    • Add in 1 egg, and stir vigorously using the whisk.
    • When the batter looks thick and well blended, add in the dry ingredients. Using the spatula mix everything until fully combined.
    • Gently fold in ¼ cup hemp seeds. Use spatula.
    • Let the mixture sit for 10 minutes.
    • Use ice cream scoop or tablespoon to scoop cookie mixture and place it on a baking sheet. Arrange the cookies 2-inches apart. Slightly flatten the dough and shape cookies with the spoon.
    • Bake cookies 12 to 15 minutes. Watch for cookies and don’t over-bake them.
    • When you get them out of the oven, cookies will be soft. Leave them to cool for few minutes on the baking sheet then transfer them to a cookie rack to cool completely. They will harden after they cool down.

    Notes

    STORING: Keep cookies in a cookie jar or air-tight food container. They will last up to 5 days. You can keep them in the fridge. That way they will last longer.
    Place the cookies in a zip-lock bag and freeze up to 3 months. Thaw them on room temperature before serving.
    As a measure, I used US cup (240ml).
    Disclaimer: The nutritional information provided is approximate and is calculated using online tools. Information can vary depending on various factors, but I have endeavored to be as accurate as possible.

    Nutrition

    Calories: 121kcal | Carbohydrates: 15g | Protein: 4g | Fat: 5g | Saturated Fat: 2g | Cholesterol: 14mg | Sodium: 55mg | Potassium: 105mg | Fiber: 2g | Sugar: 4g | Vitamin A: 41IU | Calcium: 39mg | Iron: 1mg

    More recipes to try

    If you’re looking for more delicious OATMEAL COOKIES RECIPE, check these out:

    • Tahini Oatmeal Cookies
    • Peanut Butter Oatmeal Cookies
    • Strawberry Oatmeal Cookies
    • Orange Carrot Oatmeal Cookies
    • Chocolate Oatmeal Cookies

    Tahini Oatmeal Cookies

    August 30, 2019 by Natalie 42 Comments

    Healthy Tahini Oatmeal Cookies with chocolate chips and sunflower seeds

    Crunchy, nutty and loaded with chocolate chips, these Tahini Oatmeal Cookies are perfect guilt-free treat. Packed with essential nutrients including hearty oats, but made entirely without refined sugars, these little sweet bites will surely delight you. Plus, they are easy to make and loved by the whole family.

    Healthy Tahini Oatmeal Cookies with chocolate chips and sunflower seeds

    [cmtoc_table_of_contents]

    Holidays are over. The school is about to begin next week, and my kitchen started to smell like a bakery already. I'm back in my usual making and baking, planning and preparing routine. I made a bunch of Apple Cinnamon Oatmeal Cookies, and this weekend I'm planning on baking Blueberry ones. If you're thinking that I'm prepping us for some world catastrophe, no I'm not! I'm just stuffing my freezer with healthy treats that will serve as school snacks for my kiddo in upcoming weeks/months.

    Kiddo ordered a bunch of oatmeal cookies for his lunch box, mostly fruity ones - he loves fruity flavored cookies, but lately, something else intrigued his tastebuds. A few weeks back I made these Tahini Oatmeal Cookies with the purpose to store them in the freezer as a snack, for my self and upcoming busy weeks. But these delicious oatmeal cookies disappeared before I manage to freeze any of them. Hubs and kiddo devoured them. Literally.

    I don't really blame them. These cookies are easy to like and fell in love with. They are sweet, crunchy and loaded with dark chocolate bits. Straight from the oven while they are still hot, they are irresistible. Melting bitter-sweet dark chocolate makes you go mad. And later when they cool down, the nuttiness comes to its peak. They harden and become unbelievably crunchy, making you obsessive to have more and more.

    Tahini Oatmeal Cookies clearly passed family deliciousness test. But they are more than just delicious. They are highly nutritious, super healthy treat as well. These oatmeal cookies are loaded with essential nutrients and hearty oats made entirely without refined sugars. Which makes them guilt-free. Plus they are easy to make. Win!

    Healthy Tahini Oatmeal Cookies with chocolate chips and sunflower seeds

    Tahini Oatmeal Cookies Ingredients

    To make these Tahini Oatmeal Cookies, you'll need:

    • OATS: I use oats a lot in my baking and cooking. Oats are a great source of fiber, especially beta-glucan that is known for its power to lower cholesterol and therefore keep your heart healthy (1). Also, oats are high in vitamins, minerals, and some powerful antioxidants. AND proteins. YES, proteins!! I usually use quick oats to make oatmeal cookies but you can substitute them with rolled oats. 
    • WHOLE GRAIN FLOUR: Whole grain Spelt flour is one of the staples in my pantry. I use it in my baking as a substitute for all-purpose wheat flour. Spelt flour is an ancient grain with a nutty and mildly sweet taste. It’s packed with nutrients – especially fibers. 
    • TAHINI: For those who are unfamiliar, tahini is a paste made from toasted, ground sesame seeds. It's like sesame butter. It has a light, nutty flavor but most importantly it's loaded with nutrients and many health benefits. Tahini is full of healthy anti-inflammatory monounsaturated fats, vitamins, and minerals, especially phosphorus and manganese, both of which play vital roles in bone health. (2)  It’s also high in thiamine (vitamin B1) and vitamin B6, which are important for energy production. (3) Also, tahini contains powerful antioxidants, which help prevent free radical damage in your body and reduce the risk of developing disease. (4) Many known tahini as an ingredient in hummus but I love using it form baking too. Just check out this amazing Chocolate Tahini Brownies! 
    • SUNFLOWER SEEDS: Sunflower seeds are packed with nutrients, especially healthy anti-inflammatory fats and proteins. These tiny seeds are especially high in vitamin E and selenium, both function as antioxidants to protect our body’s cells against free radical damage responsible for developing several chronic diseases. (5, 6) They might be tiny but they surely pack many health benefits. 

    I also tossed in some dark chocolate chips. They deepened overall chocolate flavor but also gave that special double chocolate punch. Melting pieces of dark chocolate in a warm cookies are unbelievably good and satisfying. I’ve used dark chocolate made with 75% or more raw cacao that is made without refined sugars. You can find those in healthy food stores.

    To sweeten these Tahini Oatmeal Cookies I used pure maple syrup. Maple syrup is mildly sweet and paired nicely with tahini nutty taste. You can substitute maple syrup with honey here. 

    Tahini Oatmeal Cookies with chocolate chips and sunflower seeds

    How to make Tahini Oatmeal Cookies

    • Position an oven rack in the lower third of the oven and heat to 356F (180C).
    • Line the bottom of an baking sheet with parchment paper. Set aside.
    • Prepare and measure all ingredients using measuring cups.
    • In a small glass or stainless steel mixing bowl add measured 1 cup oats, ¾ cup whole grain flour, 1 teaspoon baking powder and ¼ teaspoon salt. Use silicone spatula to mix the dry ingredients.
    • In a large mixing bowl combine ¼ cup creamy tahini and ¼ cup maple syrup. Add 2 teaspoon vanilla extract and 2 tablespoon milk. Use the whisk and mix it until you get the sticky texture.
    • Add in 1 egg, and stir vigorously using the whisk. 
    • When the batter looks thick and well blended, add in the dry ingredients. Using the spatula mix everything until fully combined.
    • Gently fold in ¼ cup sunflower seeds and ½ cup chocolate chips. Use spatula. Let the mixture sit for 10 minutes.
    • Use ice cream scoop or tablespoon to scoop cookie mixture and place it on a baking sheet. Arrange the cookies 2-inches apart. Slightly flatten the dough and shape cookies with the spoon.
    • Bake cookies 12 to 15 minutes. Watch for cookies and don’t over-bake them. When cookies begin to brown on the edges, they are done. 
    • When you get them out of the oven, cookies will be soft. Leave them to cool for few minutes on the baking sheet then transfer them to a cookie rack to cool completely. 

    Tahini Oatmeal Cookies with chocolate chips and sunflower seeds
    Chocolate Chip Tahini Oatmeal Cookies

    Substitutions

    • I like to use quick oats when making oatmeal cookies, but you can substitute quick oats with rolled oats. Rolled oats will give denser cookies.
    • I used whole grain Spelt flour but you can use whole grain wheat flour. 
    • You can substitute chocolate chips with Yacon sweetened cacao nibs or regular cacao nibs. Be aware that regular cacao nibs are bitter in taste and hard to chew thus maybe not suitable for kids.
    • You can substitute maple syrup with honey. Make sure honey is not raw but in liquid, runny form. 

    Tips for storing oatmeal cookies

    • Keep cookies in a cookie jar or air-tight food container. They will last up to 5 days.
    • You can keep them in fridge. That way they will last longer.
    • Place the cookies in a zip-lock bag and freeze up to 3 months. Thaw them on room temperature before serving. 

    Chocolate Chip Tahini Oatmeal Cookies

    These healthy Tahini Oatmeal Cookies are beautifully flavored, loaded with SUPERFOODS and so delicious – crunchy, mildly sweet and so addictive. + There’s a tiny bits of bittersweet chocolate in every single bite which is so yummy!

    These oatmeal cookies are perfect quick breakfast, snack, lunchbox sweet treat, or afternoon dessert. They go so well with a cup of coffee or tea but the best are dipped in milk.

    Enjoy!

    Recipe

    Healthy Tahini Oatmeal Cookies with chocolate chips and sunflower seeds
    Print Recipe
    4.59 from 41 votes

    Tahini Oatmeal Cookies

    Healthy Tahini Oatmeal Cookies with chocolate chips and sunflower seeds. Packed with essential nutrients including hearty oats, but made entirely without refined sugars, these little sweet bites will surely delight you. Super easy to make too.
    Prep Time5 minutes mins
    Cook Time15 minutes mins
    Total Time20 minutes mins
    Course: Breakfast, Dessert, Snack
    Cuisine: American, International
    Keyword: chocolate chips oatmeal cookies, oatmeal cookies, tahini oatmeal cookies
    Servings: 16 cookies
    Calories: 123kcal
    Author: Natalie

    Ingredients

    • 1 cup rolled oats
    • ¾ cup whole grain flour I used Spelt flour
    • 1 teaspoon baking powder
    • ¼ teaspoon Himalayan salt
    • 1 egg
    • ¼ cup natural creamy tahini
    • ¼ cup pure maple syrup
    • 2 teaspoon vanilla extract
    • 2 tablespoon milk any plant-based
    • ¼ cup sunflower seeds
    • ½ cup dark chocolate chips

    Instructions

    • Position an oven rack in the lower third of the oven and heat to 356F (180C).
    • Line the bottom of an baking sheet with parchment paper. Set aside.
    • Prepare and measure all ingredients using measuring cups.
    • In a small glass or stainless steel mixing bowl add measured 1 cup oats, ¾ cup whole grain flour, 1 teaspoon baking powder and ¼ teaspoon salt. Use silicone spatula to mix the dry ingredients.
    • In a large mixing bowl combine ¼ cup creamy tahini and ¼ cup maple syrup. Add 2 teaspoon vanilla extract and 2 tablespoon milk. Use the whisk and mix it until you get the sticky texture.
    • Add in 1 egg, and stir vigorously using the whisk.
    • When the batter looks thick and well blended, add in the dry ingredients. Using the spatula mix everything until fully combined.
    • Gently fold in ¼ cup sunflower seeds and ½ cup chocolate chips. Use spatula. Let the mixture sit for 10 minutes.
    • Use ice cream scoop or tablespoon to scoop cookie mixture and place it on a baking sheet. Arrange the cookies 2-inches apart. Slightly flatten the dough and shape cookies with the spoon.
    • Bake cookies 12 to 15 minutes. Watch for cookies and don’t over-bake them. When cookies begin to brown on the edges, they are done.
    • When you get them out of the oven, cookies will be soft. Leave them to cool for few minutes on the baking sheet then transfer them to a cookie rack to cool completely.

    Notes

    STORING: Keep cookies in a cookie jar or air-tight food container. They will last up to 5 days. You can keep them in the fridge. That way they will last longer.
    Place the cookies in a zip-lock bag and freeze up to 3 months. Thaw them on room temperature before serving.
    As a measure, I used US cup (240ml).
    Disclaimer: The nutritional information provided is approximate and is calculated using online tools. Information can vary depending on various factors, but I have endeavored to be as accurate as possible.

    Nutrition

    Serving: 1cookie | Calories: 123kcal | Carbohydrates: 15g | Protein: 3g | Fat: 6g | Saturated Fat: 2g | Cholesterol: 10mg | Sodium: 50mg | Potassium: 148mg | Fiber: 2g | Sugar: 5g | Vitamin A: 19IU | Vitamin C: 1mg | Calcium: 49mg | Iron: 1mg

    More Oatmeal Cookie Recipes

    If you’re looking for more delicious OATMEAL COOKIE RECIPES, check these out:

    • Peanut Butter Oatmeal Cookies
    • Strawberry Oatmeal Cookies
    • Orange Carrot Oatmeal Cookies
    • Chocolate Oatmeal Cookies

    If you’ve tried this Tahini Oatmeal Cookies recipe or any other recipe on Natalie’s Health, please take a minute to rate the recipe and leave a comment letting me know how you liked it. I love hearing from you!

    You can also FOLLOW ME on Facebook | Instagram | Pinterest

    Healthy Tahini Oatmeal Cookies with chocolate chips and sunflower seeds


    Cinnamon Coconut Chips

    July 16, 2019 by Natalie 70 Comments

    Cinnamon Coconut Chips in a glass bowl

    This Cinnamon Coconut Chips is such a delicious and healthy snack. It's a crispy, sweet, and salty. Made with only 3 ingredients and in 15 minutes, this coconut chips recipe is a great nutritious nibble your whole family will love.

    [feast_advanced_jump_to]

    Cinnamon Toasted Coconut Chips in a glass bowl

    My hubs is a huge fan of snacking. When he works, a bowl of snacks is always on his desk. I'm more movie snacker myself. I love to have some nibbles when I'm relaxing. But for him nibbling while working is a sort of stress relief. Which is totally fine as long as he nibbles some healthier stuff. That's why I always make sure to have some healthy snacks in the house ready for him and his long working hours.

    When I'm super lazy I just make simple trail mix with dried fruits, nuts and seeds. Or I put him Cinnamon Orange Granola in a bowl. That's a great, simple and super healthy snack! And when I'm in my super-mood, I love to toast some nuts and make him his favorite spiced Cinnamon Roasted Almonds.

    Since he's into spices and different flavor combos, I decided to whip him up something with my favorite snack option - coconut chips. Crispy, salty and subtly sweet, these toasted Cinnamon Coconut Chips are just amazing.

    This coconut chips recipe is super easy to make with only 3-ingredients! In less than 15 minutes!!! And here's why coconut chips are a great nibble option and how to make this super healthy Coconut Chips snack.

    Healthy Toasted Coconut Chips recipe with cinnamon

    What is coconut chips?

    Coconut chips are basically the coconut meat sliced into long strips. For those who are not familiar with coconut... Coconut meat is that white flesh inside of a coconut. It's that simple. If you're adventures enough and have time, you can make your own coconut chips from the whole coconut. But again if you ever tried opening and slicing the whole coconut then you'll know that isn't an easy job. That's why I find store-bought coconut chips more convenient.

    There are two types of coconut chips in stores: sweetened and unsweetened, toasted and untoasted. I always buy unsweetened raw (untoasted) coconut chips. It's much cheaper and since it's not flavored and sweetened, it can be used for many sweet and savory recipes. + Many toasted and prepackaged coconut products are heavily sweetened, which is like not healthy at all.

    Why coconut is so good for you?

    I'm a HUGE fan of coconut but not just because of its amazing tropical taste. Coconut is loaded with nutrients and provide many benefits for our health.

    Coconut meat is basically just fat and fiber. Around 89% of the coconut fat is saturated fat (1) and while saturated fat has bad reputation of being unhealthy if consumed in high amounts, most of the coconut fats are medium-chain triglycerides (MCTs), which are absorbed intact in your small intestine and used by your body to produce energy (2). Also, most of the fibers in coconut meat are insoluble, meaning that it doesn’t get digested. Instead, it helps to keep our digestive system healthy and aids bowel health.

    Rich in fiber and MCTs, coconut offers a number of benefits, including weight loss, it keeps our heart healthy, helps digestion and supports brain health, keep our blood sugar levels, and aids immunity. (3)

    Cinnamon Coconut Chips recipe ingredients
    Cinnamon Coconut Chips recipe process

    Ingredients used

    To make this crunchy super tasty snack, you'll need only q few simple ingredients:

    • COCONUT CHIPS: I used unsweetened organic coconut chips. Raw, unflavored and super healthy, it's perfect for making this treat.
    • SWEETENER: I used organic coconut sugar. It gave subtle sweetness, perfect caramel flavor, and a beautiful color.
    • CEYLON CINNAMON: Ceylon cinnamon, also known as “true” cinnamon, is a highly delicious spice with many health benefits. Cinnamon is loaded with powerful antioxidants with anti-inflammatory properties. (4, 5) Cinnamon gave this incredible snack a truly wonderful flavor.

    Healthy Toasted Coconut Chips recipe with cinnamon

    How to make Cinnamon Coconut Chips

    1. Preheat the oven to 325F. Line big baking sheet with parchment paper.
    2. Prepare and measure all ingredients using measuring cups.
    3. Put 3 cups of coconut chips in a large mixing bowl. Sprinkle coconut chips with 1 tablespoon of water. Toss everything with hands.
    4. In a small bowl, add ½ teaspoon of Ceylon cinnamon, 1 teaspoon of coconut sugar and ½ teaspoon of salt. Mix everything with a spoon or spatula.
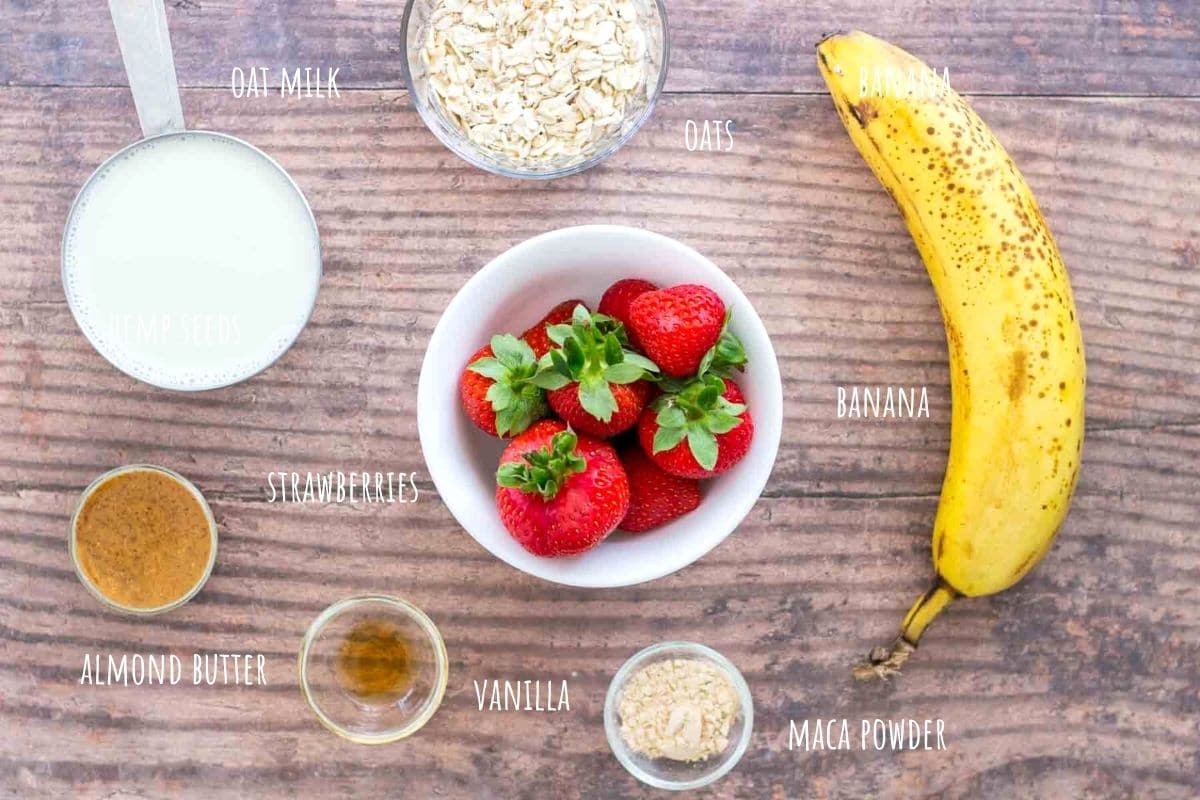
    5. Pour dry ingredients over coconut chips and mix with a spatula until coconut chips are coated in the dry mixture.
    6. Spread coconut chips onto the prepared baking sheet and flatten into one layer.
    7. Baking is probably the most challenging part. The goal is to NOT OVER-TOAST the coconut chips. That's why you basically need to sit and watch over the chips while it bakes.
    8. My formula is: bake for 5 minutes and then stir coconut chips to make sure everything bakes evenly. Bake for another 2 minutes then again toss, and then bake for another 2 minutes and toss. Keep your eyes on coconut chips. You want perfect crisp, crunchy, golden brown lovelies.
    9. Remove from the oven and allow to cool completely.
    10. Once cool, transfer to a container or bowl for serving. These are best served at room temperature!
    11. Store in an air-tight glass container for up to two months.

    3 ingredient Coconut Chips recipe with cinnamon

    Why you need to make this?

    • It’s a nutritious snack, made with all-natural and wholesome ingredients!
    • It’s crispy and mildly sweet, beautifully flavored.
    • It’s made without refined sugars.
    • It’s rich in nutrients – healthy fats for energy and fibers for digestion.
    • It’s enriched with SUPER-SPICE - Ceylon cinnamon.
    • It’s great for aiding digestion and weight loss.
    • It’s vegan and gluten-free.
    • It’s very filling and perfect for nibbling.
    • Kids love it!!!

    3 ingredient Coconut Chips recipe with cinnamon

    The flavors in these toasted Cinnamon Coconut Chips are so perfectly blended. Sweet and salty, toasted coconut coated with beautiful cinnamon flavor. Crispy and just addictive! And jet so simple and easy to make. + So healthy and totally guilt-free! I promise this will become your favorite snack option as soon as you try it.

    You can serve these tasty coconut chips on special occasions like birthday parties, game nights or take it for picnics, even road trips. Or just grab a pinch when you feel sudden hunger strike or drop of energy.

    Enjoy!

    Recipe

    Healthy Coconut Chips recipe with cinnamon
    Print Recipe
    4.96 from 104 votes

    Cinnamon Coconut Chips

    Crispy, sweet and salty, these toasted Cinnamon Coconut Chips are a great healthy snack idea. These tasty nibbles will satisfy any craving! + They are SO easy to make at home. You only need 3 simple ingredients and less than 15 minutes! Vegan. Gluten-free. Refined sugar-free. Kid-friendly!
    Prep Time5 minutes mins
    Cook Time9 minutes mins
    Total Time14 minutes mins
    Course: Snack
    Cuisine: American, International
    Keyword: coconut chips recipe, how to make toasted coconut chips, toasted cinnamon coocnut chips, toasted coconut chips
    Servings: 10 servings
    Calories: 170kcal
    Author: Natalie

    Ingredients

    • 3 cups coconut chips unsweetened and untoasted
    • 1 tablespoon water
    • ½ teaspoon Ceylon cinnamon
    • 1 teaspoon coconut sugar
    • ½ teaspoon Himalayan salt

    Instructions

    • Preheat the oven to 325F. Line big baking sheet with parchment paper.
    • Prepare and measure all ingredients using measuring cups.
    • Put 3 cups of coconut chips in a large mixing bowl. Sprinkle coconut chips with 1 tablespoon of water. Toss everything with hands.
    • In a small bowl, add ½ teaspoon of Ceylon cinnamon, 1 teaspoon of coconut sugar and ½ teaspoon of salt. Mix everything with a spoon or spatula.
    • Pour dry ingredients over coconut chips and mix with a spatula until coconut chips are coated in the dry mixture.
    • Spread coconut chips onto the prepared baking sheet and flatten into one layer.
    • Bake for 5 minutes and then stir coconut chips to make sure everything bakes evenly.
    • Bake for another 2 minutes then again toss, and then bake for another 2 minutes. Keep your eyes on coconut chips not to over-toast them.
    • Remove form the oven and allow to cool completely.
    • Once cool, transfer to a container or bowl for serving.

    Notes

    STORING: Store in an airtight container for up to two months.
    As a measure, I used US cup (240ml).
    Disclaimer: The nutritional information provided is approximate and is calculated using online tools. Information can vary depending on various factors, but I have endeavored to be as accurate as possible.

    Nutrition

    Calories: 170kcal | Carbohydrates: 6g | Protein: 2g | Fat: 16g | Saturated Fat: 15g | Sodium: 127mg | Potassium: 138mg | Fiber: 4g | Sugar: 2g | Vitamin C: 0.4mg | Calcium: 7mg | Iron: 0.8mg

    More healthy snacks recipes

    • Lemon Coconut Energy Balls
    • Healthy Coconut Bites
    • Chocolate Prune Energy Balls
    • No Bake Peanut Butter Balls
    Crispy, sweet and salty, these toasted Cinnamon Coconut Chips are a great healthy snack idea. These tasty nibbles will satisfy any craving!

    Chocolate Prune Energy Balls

    June 21, 2019 by Natalie 58 Comments

    Chocolate Prune Energy Balls served on a wooden plate

    These delightful no-bake Chocolate Prune Energy Balls are a perfect healthy snack! Made with only 6 nutritious ingredients, loaded with superfoods and dark chocolate flavor, they are a fantastic source of energy and fiber. + They are naturally sweet, simple and easy to make, and will boost your mood and energy, but also the metabolism.

    Chocolate Prune Energy Balls served on a wooden plate

    [cmtoc_table_of_contents]

    Prunes, or dried plums, are in one word amazing! Prunes are not only sweet, beautifully soft and delicious, but they hold such amazing health benefits too. They are either loved or hated by people. In my case LOVED... very much. I have prunes stapled in my pantry since I remember. I always consider prunes great source of quick energy... and as a natural remedy for digestive problems that worked like a charm every time. 

    These delightful little energy bomblets are pure deliciousness. Chocolate Prune Energy Balls are what I call quick fix for many problems. They will boost your mood - because of chocolate, boost your energy and digestion - because of wonderful prunes and walnuts, and boost your immunity - because of all the amazing and powerful superfoods that are mixed in this energy balls recipe.  

    Chocolate Prune Energy Balls are approved and loved by my two picky eaters - hubs and the kiddo. I'm sure these beauties will be equally loved by you too. Here’s what you’ll need and tips on how to make these little power balls at home.

    Vegan energy balls recipe with prune walnuts and chocolate

    Chocolate Prune Energy Balls ingredients

    This energy balls recipe calls for only six very basic ingredients.

    • PRUNES: Prunes are a good source of energy in the form of simple sugars, but they don't cause a rapid blood sugar spike as other dried fruits do. They are also very high in fiber great for our digestion. Fibers keep us full longer and keep our gut healthy. Also, prunes are a great source of vitamin A, potassium - an important mineral that keeps our heart healthy, manganese, iron and powerful antioxidants. (1) But I guess prunes are most know as a natural remedy for constipation. I absolutely love them for THAT! Besides keeping you regular, prunes help prevent colon cancer and cardiovascular diseases, help control obesity and diabetes. (2, 3) Even if you're not a fan of prunes, don't swap prunes for dates here. Give these delicious little dried fruits a chance. 
    • WALNUTS: Walnuts are a good source of the plant-based omega-3 fat, an essential fatty acid, and an excellent source of antioxidants that fights inflammation. (4) Same as prunes, walnuts are great for gut health and weight loss. Walnuts enhanced these energy balls with many nutrients but also wonderful nutty taste and texture. You can swap walnuts with almonds here. 
    • CACAO POWDER: I used raw cacao powder that is unprocessed, bitter, deep-flavored and incredibly healthy. Cacoa is one of the richest sources of polyphenols – an antioxidant that has been linked to many health benefits, including reduced inflammation, better blood flow, lower blood pressure, and improved cholesterol and blood sugar levels. (5) Cacao gave a gorgeous chocolaty flavor and made these energy balls absolutely irresistible.

    For this recipe, I used Noberasco Organic Prunes. They are soft and perfectly sweet, pitted and ready to use. + They are ORGANIC which is great! These prunes are part of the Ciao Gusto Italian Deli collection you can get at Ocado. So if you’re looking to discover new and exciting Italian products then you need to check Ocado store out! 

    To give these sweet chocolaty delights even more power, I added some more superfoods. I used: 

    • FLAX SEEDS: Flax seeds are a true superfood. A functional food ingredient with many health benefits. They are a good source of many nutrients, especially fiber, antioxidant lignan and one of the richest plant sources of the Omega-3 fatty acids. (6, 7) I used ground flaxseed here to boost Omega-3. You can swap flax seeds for hemp seeds - if you're looking for more protein boost, or chia seeds - if you're looking for more fiber boost.
    • CEYLON CINNAMON: Ceylon cinnamon, also known as "true" cinnamon, is a highly delicious spice with many health benefits too. Cinnamon is loaded with powerful antioxidants with anti-inflammatory properties. (8, 9) Cinnamon gave these raw prune balls a wonderful flavor.
    • GOJI BERRIES: Goji berries are very nutritious. They are high in fiber, protein and a range of vitamins and minerals including iron, copper, selenium, and vitamins A and C. Also they are packed full of powerful antioxidants that fight inflammation and boost immunity. 

    Ingredients for Energy Balls recipe with prunes walnuts and cacao
    Process of making Energy Balls recipe with prunes walnuts and goji berries

    How to make Chocolate Prune Energy Balls

    1. Measure and prepare all the ingredients. 
    2. Take a high-speed food processor and add 1 ½ cup of pitted organic prunes, 1 cup walnuts, ¼ cup flax seeds (or hemp seeds or chia seeds), ¼ cup cacao powder. Add 2 teaspoon of Ceylon cinnamon and process everything on high for about two minutes until the dough is formed.
    3. Don't worry if the dough seems dry in the beginning. Just continue mixing. Prunes will release juices and make it sticky. Scrap down the dough with spatula if needed.
    4. After two minutes, stop the processing and check texture by pinching the dough between your fingers. Now it should be sticky and able to keep its shape.
    5. If the mixture is too dry, add a bit of hot water (just a teaspoon). Mix again and check the texture. 
    6. Make sure you taste the dough. These chocolate energy balls are mildly sweet so if you feel like you need a bit more sweetness, feel free to add a teaspoon of maple syrup, raw honey or date syrup. Molasses is good here too. 
    7. If you're adding liquid sweetener, as suggested then there's no need to add hot water. Sweetener will bind the dough and make texture sticky.
    8. In the end, add the ¼ cup Goji berries.  Pulse everything for half more minute.
    9. Using a tablespoon, scoop out dough and roll between your palms to form your balls. Repeat with remaining ingredients.
    10. Place energy balls on a plate, serving tray or in an airtight container and refrigerate to harden.
    11. Store in an airtight container in the fridge until serving for up to 4 weeks.
    12. Place in a zip-lock bag and freeze for up to 3 months. You don't need to thaw the balls to eat them.

    Process of making Energy Balls recipe with prunes
    Chocolate Prune Energy Balls

    Chocolate Prune Energy Balls served on a wooden plate

    Chocolate Prune Energy Balls calories

    These chocolate energy balls are a nutrient dense, low-calorie snack. One ball has only 104 calories. Balls are packed with fibers, healthy brain boosting omega-3s fats, and proteins. It has a good amount of essential minerals and it’s loaded with iron, vitamin A and potassium.

    Chocolate Prune Energy Balls benefits

    • They are no-bake and made with only 6 ingredients.
    • They are full of dietary fibers that promote good digestion, weight loss, and a healthy digestive system.
    • They are rich in plant-based proteins.
    • They are rich in healthy omega-3 fatty acids and powerful antioxidants.
    • They are ADDED AND REFINED SUGAR-FREE.
    • They are loaded with superfoods – like flax seeds, cacao powder and goji berries. 
    • They are flavored with super spice - Ceylon cinnamon. 
    • They are gluten-free and vegan.
    • + Low in calories, kid-friendly and very nutritious.
    • These energy balls are an excellent post-workout snack.

    Healthy Chocolate Prune Energy Balls recipe
    Healthy Chocolate Prune Energy Balls recipe

    FAQ

    Are Chocolate Prune Energy Balls good for constipation

    Prunes are great options for relieving constipation and helping you stay regular. (10) Researches also shows that using prunes can be more effective than other constipation-relieving methods. Prunes contain significant amounts of sorbitol, sugar alcohol, which has laxative effects in a body. (11) Sorbitol passes through the body undigested. It draws water into the gut to bulk up the stool and stimulate a bowel movement. So, YES! These chocolate prune delights are definitely good for constipation.  

    Can I freeze Chocolate Prune Energy Balls

    Absolutely YES! Just pop these beauties in a zip-lock bag and put them in freezer. They will hold there for up to 3 months... but you will devour them sooner then that, believe me. When you crave a sweet bite or some energy boost just take one or two from the bag and enjoy instantly. No need to thaw these to eat. 

    Vegan energy balls recipe with prune walnuts and chocolate

    The great thing about this Chocolate Prune Energy Balls recipe is that it’s super easy to make. You only need like 10 minutes and one bowl. Yup, this recipe is NO-BAKE. All you need is a food processor. 

    These amazing little energy bomblets are a truly delicious healthy treat. You definitely should have them stocked in your freezer for when the sweet-tooth craving strikes, or when you feel like you need quick energy pick-me-up snack. I'm sure you gonna love these raw prune balls. 

    Enjoy!

    Recipe

    Chocolate Prune Energy Balls served on a wooden plate
    Print Recipe
    4.61 from 53 votes

    Chocolate Prune Energy Balls

    Chocolate Prune Energy Balls are a perfect healthy snack! These 6-ingredient energy balls are delicious way to boost your energy and metabolism. They are naturally sweet, simple and easy to make. Vegan. Gluten-free. Kids-friendly.
    Prep Time10 minutes mins
    Total Time10 minutes mins
    Course: Snack
    Cuisine: American, International
    Keyword: Chocolate Prune Energy Balls, energy balls recipe, prune energy balls, prune recipes
    Servings: 16 balls
    Calories: 104kcal
    Author: Natalie

    Ingredients

    • 1 ½ cup organic prunes
    • 1 cup walnuts
    • ¼ cup cacao powder
    • ¼ cup flax seeds ground
    • 2 teaspoon Ceylon cinnamon
    • ¼ cup Goji berries
    • Sweetener: Maple syrup, honey, date syrup or molasses, optional and to taste

    Instructions

    • Put prunes, walnuts, flax seeds, cacao powder, and cinnamon in the high-speed food processor and mix for about two minutes until the dough is formed. Don't worry if the dough seems dry in the beginning. Just continue mixing. Prunes will release juices and make it sticky. Scrap down the dough with a spatula if needed.
    • Stop the processing and check texture by pinching the dough between your fingers. If the mixture is too dry, add a bit of hot water (just a teaspoon). Mix again and check the texture.
    • Taste the dough. Add a teaspoon of maple syrup, raw honey, date syrup or molasses. If you're adding liquid sweetener then there's no need to add hot water. Sweetener will bind the dough and make texture sticky.
    • In the end, add the Goji berries. Pulse everything for half more minute.
    • Using a tablespoon, scoop out dough and roll between your palms to form your balls. Repeat with remaining ingredients.
    • Place energy balls on a plate, serving tray or in an airtight container and refrigerate to harden.
    • Store in an airtight container in the fridge until serving for up to 4 weeks.
    • Place in a zip-lock bag and freeze for up to 3 months. You don't need to thaw the balls to eat them.

    Notes

    As a measure, I used US cup (240ml).
    SUBSTITUTIONS:
    You can substitute flax seeds with hemp seeds or chia seeds. 
    You can substitute walnuts with almonds.
    Disclaimer: The nutritional information provided is approximate and is calculated using online tools. Information can vary depending on various factors, but I have endeavored to be as accurate as possible.

    Nutrition

    Serving: 1ball | Calories: 104kcal | Carbohydrates: 13g | Protein: 2g | Fat: 6g | Saturated Fat: 1g | Sodium: 2mg | Potassium: 192mg | Fiber: 3g | Sugar: 6g | Vitamin A: 125IU | Vitamin C: 0.2mg | Calcium: 25mg | Iron: 0.7mg

    More energy balls recipes

    If you’re looking for more easy energy balls recipes, give these a try:

    • Peanut Butter Energy Balls
    • Gingerbread Energy Balls
    • Turmeric Cacao Energy Balls
    • Pumpkin Seeds Energy Balls
    • No Bake Peanut Butter Balls

    If you’ve tried this Chocolate Prune Energy Balls recipe or any other recipe on Natalie’s Health, please take a minute to rate the recipe and leave a comment letting me know how you liked it. I love hearing from you!

    You can also FOLLOW ME on Facebook | Instagram | Pinterest

    ** This post is sponsored by Ocado. All words, thoughts, and opinions are my own. I always support only products that I truly love and/or use.

    Chocolate Prune Energy Balls are a perfect healthy snack! These 6-ingredient energy balls are delicious way to boost your energy and metabolism.

    30 Chia Seeds Recipes

    June 14, 2019 by Natalie 25 Comments

    30 easy and delicious chia seeds recipe

    Ready to take your chia game to the next level? Try these delicious, healthy and easy chia seeds recipes, including puddings, snacks, smoothies and more.

    30 easy and delicious chia seeds recipe

    Chia seeds are stapled in my pantry and part of my daily healthy diet. Neutral in flavor, chia seeds can be added to virtually any recipe for a nutritional boost. These tiny, nutrient-dense seeds, are packed with fiber, protein, omega-3s, and antioxidants. They have some pretty amazing health benefits and I absolutely love them.

    They are awesome for making chia pudding but they can be used in so much more ways.. in smoothies, in snacks, jams. If you’re looking to get more chia in your life, here are 30 Chia Seeds Recipes that will inspire you to eat more chia seeds. These chia seed recipes are creative and healthy ways to add the most super of superfoods to your diet quickly.

    [cmtoc_table_of_contents]

    Breakfast recipes

    Strawberry Chia Pudding topped with fresh strawberries
    Raspberry aChia Pudding with almond butter and raspberry jam topped with banana raspberry ice cream and chocolate
    Healthy Chocolate Peanut Butter Chia Seed Pudding with maca powder and raw cacao powder
    Blueberry Chia Pudding with fresh blueberries and almonds

    Chia pudding recipes

    • Blueberry Chia Pudding
    • Strawberry Chia Pudding
    • Raspberry Chia Pudding
    • Chocolate Peanut Butter Chia Pudding
    • Peach Ginger Chia Seed Pudding
    • Pineapple Coconut Chia Pudding

    Chia jam Recipes

    • Strawberry Chia Seed Jam
    • Blackberry Chia Seed Jam

    Other breakfast recipes

    • Strawberry Coconut Overnight Oats from Leanne Ray
    • Overnight Oats with Mango & Blueberries from The Belly Rules The Mind
    • Healthy Oil-Free Vegan Pancakes from A Virtual Vegan

    Smoothie Recipes

    Blueberry Banana Chia Smoothie is the ultimate morning breakfast smoothie! It’s HEALTHY, deliciously creamy and SO satisfying + refined sugar-free and packed with nutrients and powerful antioxidants. #smoothie #summer #fit #workout #sugarfree #healthy #kidsfriendly #whole30 #weightloss #skinny #lowcalorie | natalieshealth.com
    Cantaloupe Peach Smoothie
    Immune-boosting Grapefruit Ginger Smoothie great for weight loss and detox.

    • Blueberry Banana Chia Smoothie
    • Grapefruit Ginger Smoothie
    • Cantaloupe Peach Smoothie
    • Raspberry Chia Post-Workout Smoothie from Umami Girl

    Snack Recipes

    Gingerbread Energy Balls
    Lemon Turmeric Energy Balls served in a bowl
    Raw no-bake Carrot Cake Energy Balls made with all HEALTHY ingredients. These yummy bites are refined sugar-free, gluten-free and vegan. Perfect snack, a post-workout snack or simple dessert. | natalieshealth.com | #vegan #glutenfree #sugarfree #Easter #healthy #easy #whole30
    Pumpkin Pie Energy Balls are the perfect grab-and-go snack. These HEALTHY no-bake bites are nutritious, refined sugar-free, vegan, gluten-free.

    • Lemon Turmeric Energy Balls
    • Gingerbread Energy Balls
    • Pumpkin Pie Energy Balls
    • Carrot Cake Energy Balls
    • Apple Pie Energy Bites 
    • Healthy Chewy No Bake Granola Bars from Happy Kitchen Rocks
    • Sunbutter Chocolate Granola Bars from Wanderlust & Wellness

    Desserts Recipes

    • Sour Cherry Chia Jam Cornbread
    • Pomegranate Chia Popsicles from The Fit Cookie
    • Oatmeal Cookies with Chocolate Chips from Veggie Fun Kitchen 
    • Tropical coconut chia pops from Choosing Chia
    • Blueberry Banana Chia Bread from Bucket List Tummy

    Drinks

    • Blueberry Lime Chia Fresca
    • Cherry Chia Fresca Lemonade from Vegetarian Gastronomy
    • Simple Chia Fresca from Hey Nutrition Lady
    • Iced Raspberry Leaf Chia Tea from Raia's recipes

    If you’ve tried any of these or other recipes on Natalie’s Health, please take a minute to rate the recipe and leave a comment letting me know how you liked it. I love hearing from you!

    You can also FOLLOW ME on Facebook | Instagram | Pinterest

    Benefits Of Chia Seeds

    June 10, 2019 by Natalie 9 Comments

    Health Benefits Of Chia Seeds

    Despite their small size, chia seeds are full of important nutrients. They provide many benefits to health as well. Here's all you need to know about the health benefits of chia seeds and why chia seeds are high on my favorite foods list.

    [feast_advanced_jump_to]
    Health Benefits Of Chia Seeds

    I'm a huge advocate of eating chia seeds. Chia seeds are stapled in my kitchen and are high on my favorite foods list. Every time I publish a chia seed recipe I always get tons of questions about what are benefits, how to eat chia seeds, what is chia to liquid ratio, how much chia should I eat daily... and I realize I didn't share all that info anywhere on my page. And chia seeds are so powerful that they definitely deserve a whole post.

    By now you've probably heard of chia seeds and that they are good for our health, especially weight loss, but maybe you're still puzzled with some questions. Here is all you need to know about the health benefits of chia seeds and why this food is so important in a healthy diet.

    Health Benefits Of Chia Seeds

    What are chia seeds?

    Chia seeds are the tiny edible seeds that come from the desert plant Salvia Hispanica L., a member of the mint family, which is grown in Mexico. Chia seed was a staple in the lives of ancient Aztecs and Mayans thousands of years ago. In fact, the word chia is actually derived from the Mayan language and means “strength.” Aztec warriors even looked to chia to give them stamina and energy.

    Chia seeds are packed with nutrients, and therefore the perfect addition to a balanced healthy diet. Chia can be used in everything from baked goods to smoothies. Miraculously, it can even be used as an egg replacer!  

    Chia seeds nutrition

    A one-ounce (28 grams) serving of chia seeds contains (1):

    • Fiber: 11 grams.
    • Protein: 4 grams.
    • Fat: 9 grams (5 of which are omega-3s).
    • Calcium: 18% of the RDI.
    • Manganese: 30% of the RDI.
    • Magnesium: 30% of the RDI.
    • Phosphorus: 27% of the RDI.
    • They also contain a decent amount of zinc, vitamin B3 (niacin), potassium, vitamin B1 (thiamine) and vitamin B2.

    Health benefits of chia seeds

    Chia seeds are among the healthiest foods on the planet. Despite their tiny size, chia seeds are full of essential nutrients and when eaten as part of a balanced healthy diet, may prevent the development of many chronic diseases.

    They’re a good source of:

    • Omega 3 fatty acids: Chia seeds are high in Omega-3 alpha-linolenic acid. 60% of the oil in chia seeds is from this essential omega-3 fatty acids that can't be synthesized and is essential for the human body for good health. Omega-3s have shown a beneficial effect on cardiovascular health - lowering cholesterol, regulating heart rhythms and blood pressure, preventing blood clots, decreasing inflammation. (2) 
    • Fiber: The fiber in chia seeds is mainly soluble fiber. These fibers help lovering "bad" LDL cholesterol and slow down digestion, which can prevent blood sugar spikes after eating a meal and promote a feeling of fullness (3). Because of their rich fiber content, chia seeds are great for digestive health. The fiber acts as a prebiotic and provides fuel for the good bacteria in the gut (4). Plus, the fiber in chia seeds absorbs water and expands in the stomach, which keep us full longer.
    • Plant-based proteins: Chia seeds are high in proteins. We all know protein is an essential macronutrient needed for many functions in the body, including muscle building. The combination of fat, protein, and fiber means the seeds are digested slowly, providing a long, slow release of energy while keeping blood-sugar levels stable (5).
    • Magnesium and Potassium: These two minerals are essential minerals needed for good health.
    • Antioxidants: Chia seeds are also a source of powerful antioxidants that fight the production of free radicals, which can damage cell molecules and contribute to aging and developing diseases like cancer (6, 7).
    Health Benefits Of Chia Seeds

    What do chia seeds taste like?

    Chia seeds have a mild, nutty flavor that works well to in both sweet and savory dishes. In raw form, the texture of the chia seed is crunchy and dense but when soaked in water they absorb liquid and become soft.

    How to eat chia seeds?

    Whole

    You can eat chia seeds whole. Unlike flax seeds, you don’t have to grind chia seeds to pull nutrients out.

    Add chia seeds in yoghurt, oatmeal or cereal, sprinkle the salads. If you do choose to eat chia seeds whole, just make sure you drink plenty of water afterward to keep your body hydrated. Chia seeds absorbs water from your body during digestion.

    Soaked

    It's not necessary to soak chia seeds before eating, but if you do you'll get the most nutrients out of your food and maximize the potential benefits of chia seeds. Soaking chia seeds in liquid make them much easier to digest too. 

    Make chia gel: Chia seeds absorb water quickly (up to 10 times their weight in liquid). Place ¼ cup seeds in 1 cup liquid, stir well, and cover. Allow to sit for about 15-20 minutes until the texture changes to soft gelatin. Store in the refrigerator for up to one week. Add to smoothies and soups to boost nutrient value and create a thicker, more satisfying consistency.

    Make chia pudding: To make a dessert variation, mix ¼ cup of seeds with one cup of liquid such as milk (almond, soy, or dairy all work) or 100% fruit juice. Allow to sit for at least 15 minutes refrigerated. Add nuts, chopped fresh fruit, or cinnamon if desired.

    Make vegan egg: Chia can replace whole eggs in baking. For 1 whole egg, mix 1 tablespoon of whole chia seeds or 2 teaspoons ground chia seeds with 3 tablespoons water. Allow to sit for at least 5 minutes or until the mixture thickens.

    Ground

    Another option is to grind chia seeds in a coffee grinder or blender. When finely ground, chia flour with its high fiber content may be substituted to create gluten-free pancakes, bread, cookies, and more. It’s a great alternative to processed grains.

    FAQ about chia seeds

    How much chia should I eat daily?

    There are no precise guidelines on how many chia seeds you should eat daily. But there are some recommendations which suggest eating 20 g (or a bit under 2 tbsp) of chia twice per day. Naturally, this depends on factors like your age, sex, and weight. Because they’re so dense in fiber, just remember to increase the amount you eat gradually and drink plenty of water.

    Are chia seeds safe for all people?

    Some people may experience an allergic reaction after eating chia seeds, though this is uncommon. If you have food allergies (especially to sesame or mustard seeds) or are on high blood pressure medications or blood thinners, ask your health care provider before adding chia to your diet (8).
    Because they quickly swell after absorbing liquid, it is advised to eat chia seeds that have already been soaked in liquid or are served with a moist food, such as oatmeal or yogurt.
    Chia seeds are a good source of fiber. Fiber is essential for our health, promoting regularity and supporting the beneficial bacteria in your gut, among other important roles. However, too much fiber can cause issues for some people like abdominal pain, constipation, diarrhea, bloating and gas (9). Negative symptoms from high fiber intake can be prevented by increasing fiber intake slowly and drinking plenty of water.

    Can eating chia seeds make me lose weight?

    The soluble fiber in chia seeds absorbs large amounts of water and expands in the stomach. That makes us feel full meaning we will eat less food. This can lead to weight loss. Also, the protein in chia seeds helps reduce appetite and food intake. But there's no such thing as magic food. The entire diet and lifestyle behavior like sleep and exercise counts.
    Chia seeds as a part of balanced healthy diet aid the weight loss but adding chia seeds to your meals won't cause you to lose weight on its own. 

    Where can I buy chia seeds?

    You can buy chia seeds at many local grocery stores, health food stores, and online. Chia seed have long shelf life due to their high antioxidant profile and can last about four to five years in your pantry. Make sure you store chia seeds a container with a tight-fitting lid in a cool, dry place. Ground chia seeds are best stored in a glass container in the refrigerator.

    Do you have to grind chia seeds?

    Unlike flaxseeds that must be ground or at the very least chopped to attain the maximum nutritional benefits flax has to offer, chia seeds can be eaten raw whole or ground.

    Is there more than one kind of chia seed?

    Yes! Chia seeds can come in black or white form, though their nutritional profile is the same regardless of which color you go with.

    More facts about chia

    • Chia seeds are a whole-grain food, usually grown organically.
    • Chia seeds are non-GMO and naturally gluten-free (10).
    • Chia seeds are suitable for those who follow paleo, vegan, vegetarian, keto, Whole30, low-carb or raw diets.
    • Don’t buy chia products or foods with chia in them and think you’re automatically getting something healthful. You still need to read labels and make sure the product isn’t full of sugar and additives.

    Chia seeds recipes

    Since chia seeds are so versatile, there are endless ways you can include them in your diet, from trying a popular chia seed pudding to sprinkling them on salads or over cereal. Here are a few recipes you can start with:

    • Strawberry Chia Pudding
    • Chocolate Peanut Butter Chia Pudding
    • Blueberry Chia Pudding
    • Raspberry Chia Pudding
    • Easy Strawberry Chia Seed Jam
    • Blueberry Banana Chia Smoothie
    • Peach Ginger Chia Seed Pudding
    • Blackberry Chia Seed Jam
    • Pineapple Coconut Chia Pudding
    • Sour Cherry Chia Jam Cornbread

    Have you tried chia seeds? What are your favorite ways to eat chia?

    Healthy Strawberry Recipes

    May 8, 2019 by Natalie 31 Comments

    Healthy Strawberry Recipes

    Strawberries are low-calorie fruit that is not only delicious but super healthy, packed with vitamins, fibers, powerful antioxidants. Here's why strawberries should be part of your healthy diet, including tips on how to buy, store and freeze strawberries. + I give you most delicious Healthy Strawberry Recipes to use up this amazing fruit.

    Healthy Strawberry Recipes

    Strawberries are called as "Queen of Fruits" for a good reason. These sweet little delights are not only delicious but nutritious with many health benefits. This heart-shaped fruit is loaded with immune-boosting vitamin C, powerful antioxidants that fights free radicals and protects against inflammation, cancer and heart diseases. Also, strawberries are low-calorie fruit and thus perfect for weight loss. Strawberries are in one word AMAZING and they are part of my healthy diet.

    Since strawberries are now in season, I decided to group up some of my favorite Healthy Strawberry Recipes in one post. All these recipes are super easy to make, packed with fresh strawberries and beyond words delicious.

    But also I want to share with you why I love strawberries so much, by giving you some info about the health benefits of eating strawberries including tips on how to buy, store and freeze strawberries. Read and fell in love with strawberries too. 

    Strawberry nutrition facts

    Strawberries are amazing! They are low-calorie fruit that consist mainly of water (91%) and some carbohydrates (7.7%). Most of these carbs are simple sugars - such as glucose, fructose, and sucrose - but they also contain a decent amount of fiber that are important to feed the friendly bacteria in your gut and improve digestive health. 

    One cup of sliced, fresh strawberries (166 grams), contain (1):

    • Calories: 53 kcal
    • Protein: 1.11 g
    • Carbohydrates: 12.75 g
    • Dietary fiber: 3.3 g
    • Sugars 8.12 g
    • Fat 0.50 g

    Also, strawberries have a glycemic index (GI) score of 40, which is relatively low (2). This means that strawberries don't lead to big blood sugar spikes and they are considered safe for people with diabetes. 

    The most prevalent vitamins and minerals in strawberries are:

      • Vitamin C. Strawberries are an excellent source of vitamin C, a powerful antioxidant that promotes healthy immunity and skin health (3, 4).
      • Folate (vitamin B9). Folate is important for normal tissue growth and cell function. It's fundamental vitamin for pregnant women and older adults (5, 6, 7).
      • Potassium. This is essential mineral responsible for regulating blood pressure (8, 9).

    Strawberries are also a good source of iron, copper, magnesium, phosphorus, and vitamins B6, K, and E.

    Health benefits of strawberries

    In addition to being sweet, juicy and absolutely delicious, strawberries offer many health benefits. The antioxidant-rich strawberries prevent many diseases - those caused by inflammation and oxidative stress. They help with obesity and keep our hear healthy by increasing HDL (good) cholesterol levels, and lower the blood pressure. Also, they are good protection against various types of cancer. (10)

    Health benefits of strawberries are many. Here are just a few that will convince you to include this fruit in your diet. 

    #1 Heart health
    Strawberries have high levels of heart-healthy antioxidants - flavonoids with strong anti-inflammatory properties that reduces the risk of a heart attack and improve our heart health. Additionally, the high fiber content, vitamin C, and folate in strawberries help keeping the heart healthy by reducing bad cholesterol. (11, 12, 13)

    #2 Reduce blood pressure
    Strawberries are rich in potassium and magnesium and low in sodium. Potassium and magnesium help reduce hypertension and the rigidity of arteries and blood vessels. This eases the flow of blood to various parts of the body and keeps them functioning at their full potential. (14)

    #3 Stroke prevention
    The anti-inflammatory power of the antioxidants in strawberries helps reduce the formation of blood clots that are linked with stroke. (15)

    #4 Cancer prevention
    Vitamin C, folate, and flavonoids in strawberries act as excellent antioxidants and form strong line of defense to fight cancer and tumor growth. (16) 

    #5 Boost immunity
    Vitamin C, present in strawberries and many other types of fruits help boosts the immune system and helps in curing common cough and cold. A single serving has approximately 150% of your daily requirement of vitamin C!

    #6 Weight Loss
    Strawberries boost the production of the adiponectin and leptin, both of which are fat-burning hormones. (17) They help reduce appetite, decrease blood sugar, and reduce body weight and fat, all of which promote weight loss. 

    #7 Reduce the risk of diabetes
    Strawberries are a low glycemic index food that are high in fiber, which helps to regulate blood sugar and keep it stable by avoiding extreme highs and lows. Eating strawberries may lower the risk of developing type 2 diabetes. (18)

    When are strawberries in season?

    Strawberries are available basically year-round in grocery stores. You can find fresh strawberries, same as frozen ones pretty much in any store. But the best strawberries are those that are fresh and in season. And that’s between April and June.

    How to choose the best strawberries?

    Nothing beats fresh strawberries plucked from the bush and eaten raw! But many of us are not that lucky to have strawberries planted in our gardens. So when visiting stores or farmers market, we have to choose. And here’s how to choose the best ones:

    • Select organic, locally grown strawberries whenever possible, as they are safe to eat and have the sweetest flavor.
    • Choose berries that are firm, plump, undamaged and free of mold.
    • Look for those that have a shiny, deep red color and bright green caps attached. 
    • Take a whiff before you buy. Strawberries should smell like strawberries meaning they have to be fragrant.
    • Strawberries that are available all year round are from those countries with a warmer climate. They are safe to eat but I always choose organic.

    Note: Strawberries have the highest level of pesticides (19), so when it comes to strawberries I always look to buy organic and locally-grown. But that's not always the case and I know for many organic strawberries are outside of the budget. There is no need to worry. The nutritional benefit of eating conventionally grown strawberries far outweighs the risk of not eating strawberries at all. 

    How to store strawberries?

    Strawberries are very delicate and highly perishable fruit and should be eaten in a couple of days once harvested. Proper storage can keep strawberries fresh longer. Here's how:

    • Don’t wash strawberries and don’t remove their stems until meant to eat. That way they will last longer.
    • Store strawberries in a sealed container and keep them refrigerated in the coldest part of the fridge.
    • If properly stored, they will last for a week.
    • To wash strawberries, place them in a large colander and rinse gently with cool water. Lay strawberries in a single layer on a clean kitchen towel or layer of paper towels and pat dry. 

    How to freeze Strawberries?

    Nothing is more disappointing than to find your beautiful fresh strawberries started to rot and you have to toss them out. You can avoid wasting these little treasures simply by freezing them. Freezing strawberries don't underly the nutritional value of the fruit. Actually, strawberries will keep 98% of all their values but also original shape, color, and taste. 

    Here are some tips on how to freeze strawberries:

    • Hull the strawberries and wash them thoroughly. Pat them dry with paper towels.
    • Lay them in a single layer on a baking sheet with baking paper on the bottom, and freeze them until they're solid (overnight usually does it).
    • Transfer frozen strawberries to a resealable plastic zip-lock bag and keep them frozen until ready to use.
    • Frozen strawberries will keep up to six months.

    Did you know...

    Strawberries are not berries from a botanical standpoint, but pseudocarps (also known as a false fruit or accessory fruit). The strawberry plant, genus Fragaria, is a member of the rose family. Yes, ROSE! The true fruits of the strawberry plant are actually the small seeds found on the outer surface.

    Also, the red color of strawberries is due to high amounts of anthocyanins (pigment), but the presence of anthocyanins is not always assimilated with the red color. The anthocyanins also give color to blueberries, but the difference in pH makes them...blue.

    Recipes to use up strawberries

    Perfectly ripe, sweet and delicious strawberries are best eaten raw, right out of hand. But if you're willing to put in just a bit more effort, there are many other ways to enjoy this fruit. Here is the selection of delicious healthy strawberry recipes that are easy to make, super delicious and totally guilt-free. 

    Enjoy!

    Strawberry Kefir Smoothie topped with fresh strawberries and superfoods

    #1 Strawberry Overnight Oats

    Creamy and delicious, this Strawberry Overnight Oats recipe will be your new favorite breakfast, I promise! These oats are loaded with fibers, proteins, and SUPERFOODS. Made with yogurt for extra creaminess and packed with fresh strawberries, they are wholesome meal that will make you wake up early in the morning just to have breakfast.

    #2 Strawberry Kefir Smoothie

    Refreshing and loaded with flavor, this Strawberry Kefir Smoothie is a delicious and super healthy way to start the day. This fruity kefir drink is loaded with probiotics and SUPERFOODS, naturally sweet and made without added sugars. It’s an easy breakfast that will satisfy all your morning needs.

    Healthy Strawberry Spirulina Smoothie with spinach and superfoods
    Healthy Strawberry Chia Seed Pudding with fresh strawberries

    #3 Strawberry Spirulina Smoothie

    Strawberry Spirulina Smoothie is jet another perfect morning drink. This tasty breakfast smoothie is delicious, super simple to throw together, and a wonderful way to get your daily dose of greens. It’s made without added sugars, loaded with nutrients, antioxidants and SUPERFOODS.

    #4 Strawberry Chia Pudding

    This simple, yet so delicious Strawberry Chia Pudding is nutritious breakfast that is decadent enough to be a dessert too. It’s loaded with fresh strawberry flavor, lightly sweet and totally addictive. A satisfying guilt-free treat that’s refined sugar-free, healthy and packed with superfoods.

    Strawberry Peanut Butter Smoothie with banana and flaxseeds topped with superfoods
    Strawberry Oatmeal Cookies with fresh strawberries and walnuts

    #5 Strawberry Peanut Butter Smoothie

    Sweet and deliciously creamy, Strawberry Peanut Butter Smoothie is perfect on-to-go breakfast for busy weekday mornings! It’s loaded with nutrients and fresh strawberry flavor. Refined sugar-free, all natural and very filling – super healthy and so tasty.

    #6 Strawberry Oatmeal Cookies

    Chewy Strawberry Oatmeal Cookies are one delicious treat filled with fresh strawberries and beautiful flavors. These tasteful cookies are made with all healthy ingredients and packed with nutrients. Without refined sugars, whole grain, and super low-calorie these cookies are perfect breakfast, kids school snack or afternoon dessert.

    Strawberry Chia Seed Jam with Lime and Cinnamon
    Creamy and sweet with a kick of spicy ginger, this immune boosting Strawberry Ginger Smoothie Bowl is a fresh and HEALTHY breakfast done in just minutes! Packed with nutrients, low calorie and WITHOUT added sugars. Vegan, gluten free and dairy free. DELICIOUS! #vegan #glutenfree #dairyfree #sugarfree #healthy #smoothie #recipe #breakfast #kids

    #7 Strawberry Chia Seed Jam

    Strawberry Chia Seed Jam is the perfect healthy alternative to conventional store-bought jams. It’s made with healthy ingredients, loaded with delightful fruity flavor and many nutrients. Enriched with lime and cinnamon and without refined sugars, this jam is a delicious way to enjoy healthy breakfast every day.

    #8 Strawberry Ginger Smoothie Bowl

    Sweet with a kick of spicy ginger, this immune boosting Strawberry Ginger Smoothie Bowl is a fresh and healthy breakfast done in just minutes! Packed with nutrients, low calorie and made without any added sugars it's irresistible and yummy!

    Healthy Strawberry Banana Muffins
    Sweet and flavorful, this Strawberry Chocolate French Toast Bake is the ultimate crowd-pleaser. It's filled with cottage cheese and super HEALTHY. A delectable, make-ahead morning treat or brunch. #breakfast #healthy #brunch #overnight #casserole

    #9 Strawberry Chocolate French Toast Bake

    Sweet and flavorful, this Strawberry Chocolate French Toast Bake is the ultimate crowd-pleaser. It’s filled with cottage cheese and so delicious. Easy make-ahead morning treat or brunch.

    #10 Strawberry Banana Muffins

    Strawberry Banana Muffins makes perfect afternoon treat. Packed full of fresh flavors and all the healthy stuff these banana muffins will surprise you with it's taste. Made without refined sugars, low calorie and super easy to make… just amazing! 

    ----

    If you’ve tried any of these healthy strawberry recipes or any other recipe on Natalie’s Health, please take a minute to rate the recipe and leave a comment letting me know how you liked it. I love hearing from you!

    You can also FOLLOW ME on Facebook | Instagram | Pinterest

    • « Previous Page
    • 1
    • 2
    • 3
    • Next Page »

    I’m Natalie, the creator of Natalie’s Health — a foodie passionate about healthy living. I craft recipes with wholesome ingredients that nourish the body and inspire vibrant health. My journey began with my own health challenges. My recipes have been featured in Shape, Greatist, ELLE, and more.

    Seasonal Recipes

    • 20 Healthy Apple Recipes
      20 Healthy Apple Recipes
    • Healthy Pancakes Recipes
      10 Easy Healthy Pancakes Recipes
    • Immune Boosting Smoothies
      20 Immune Boosting Smoothies
    • easy and delicious cinnamon recipes healthy
      30 Cinnamon Recipes
    • Healthy Peanut Butter Recipes
      15 Healthy Peanut Butter Recipes
    • 30 easy and delicious chia seeds recipe
      30 Chia Seeds Recipes

    Featured In

    Natalie's Health Featured In

    Footer

    ↑ back to top

    • Contact
    • About me
    • Privacy Policy
    • Disclaimer
    • Terms & Conditions
    • Accessibility Policy

    As an Amazon Associate, I earn from qualifying purchases at no additional cost to you.

    Copyright © 2026 Natalie's Health · All Rights Reserved